

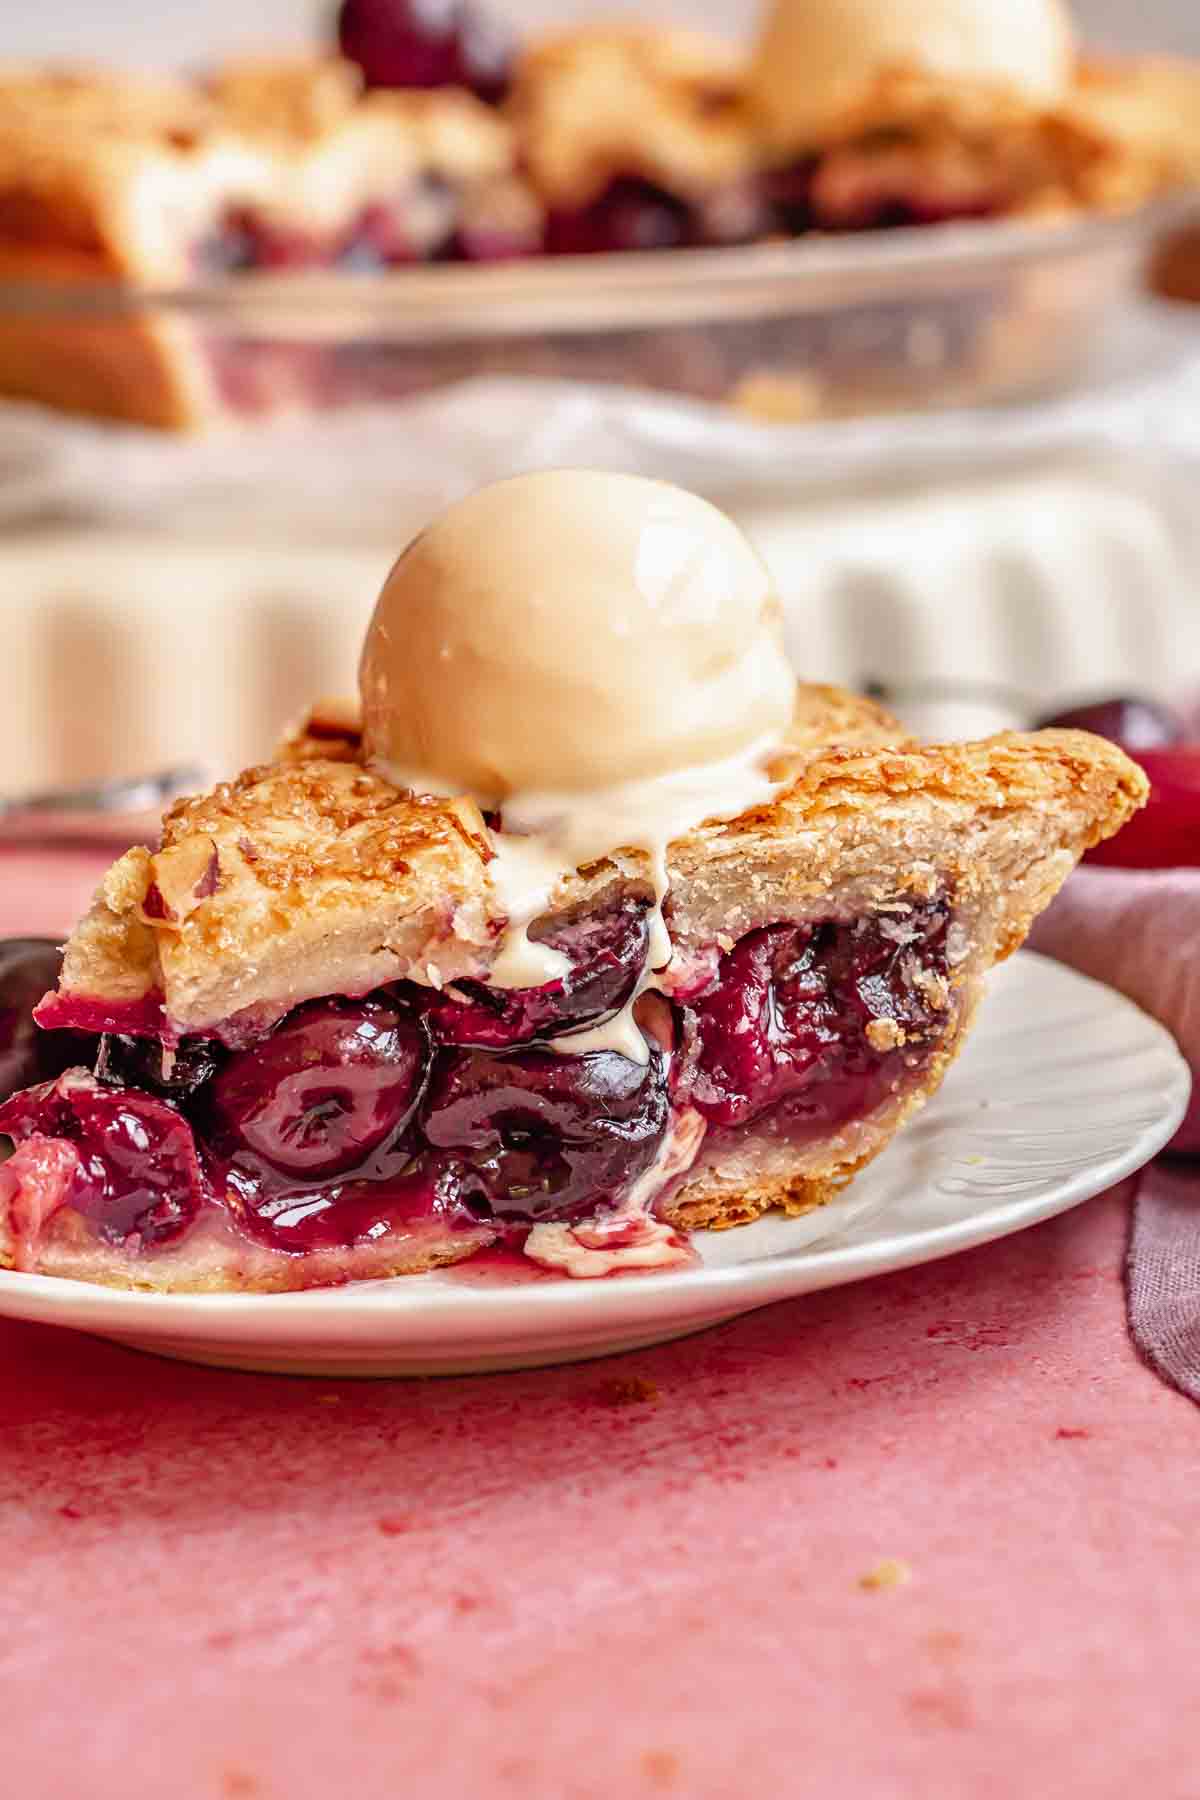
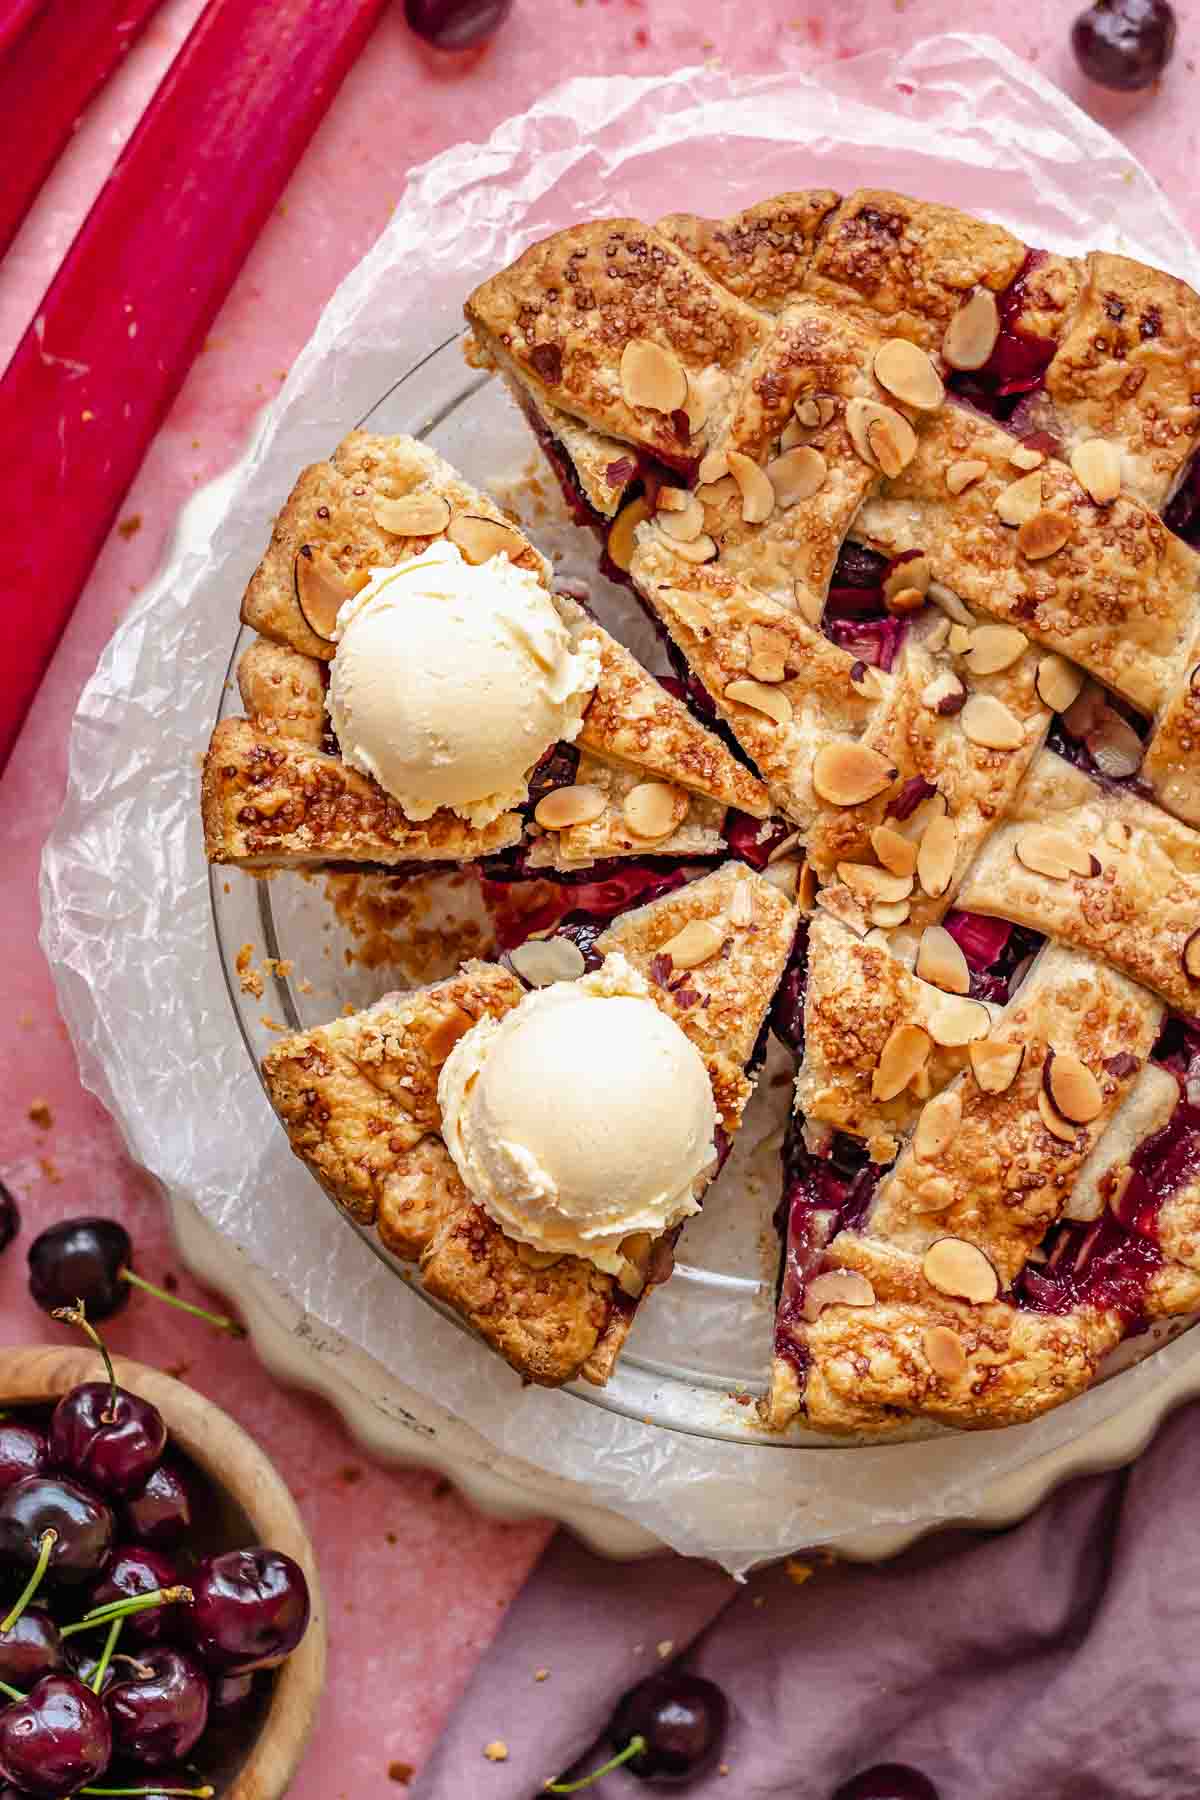
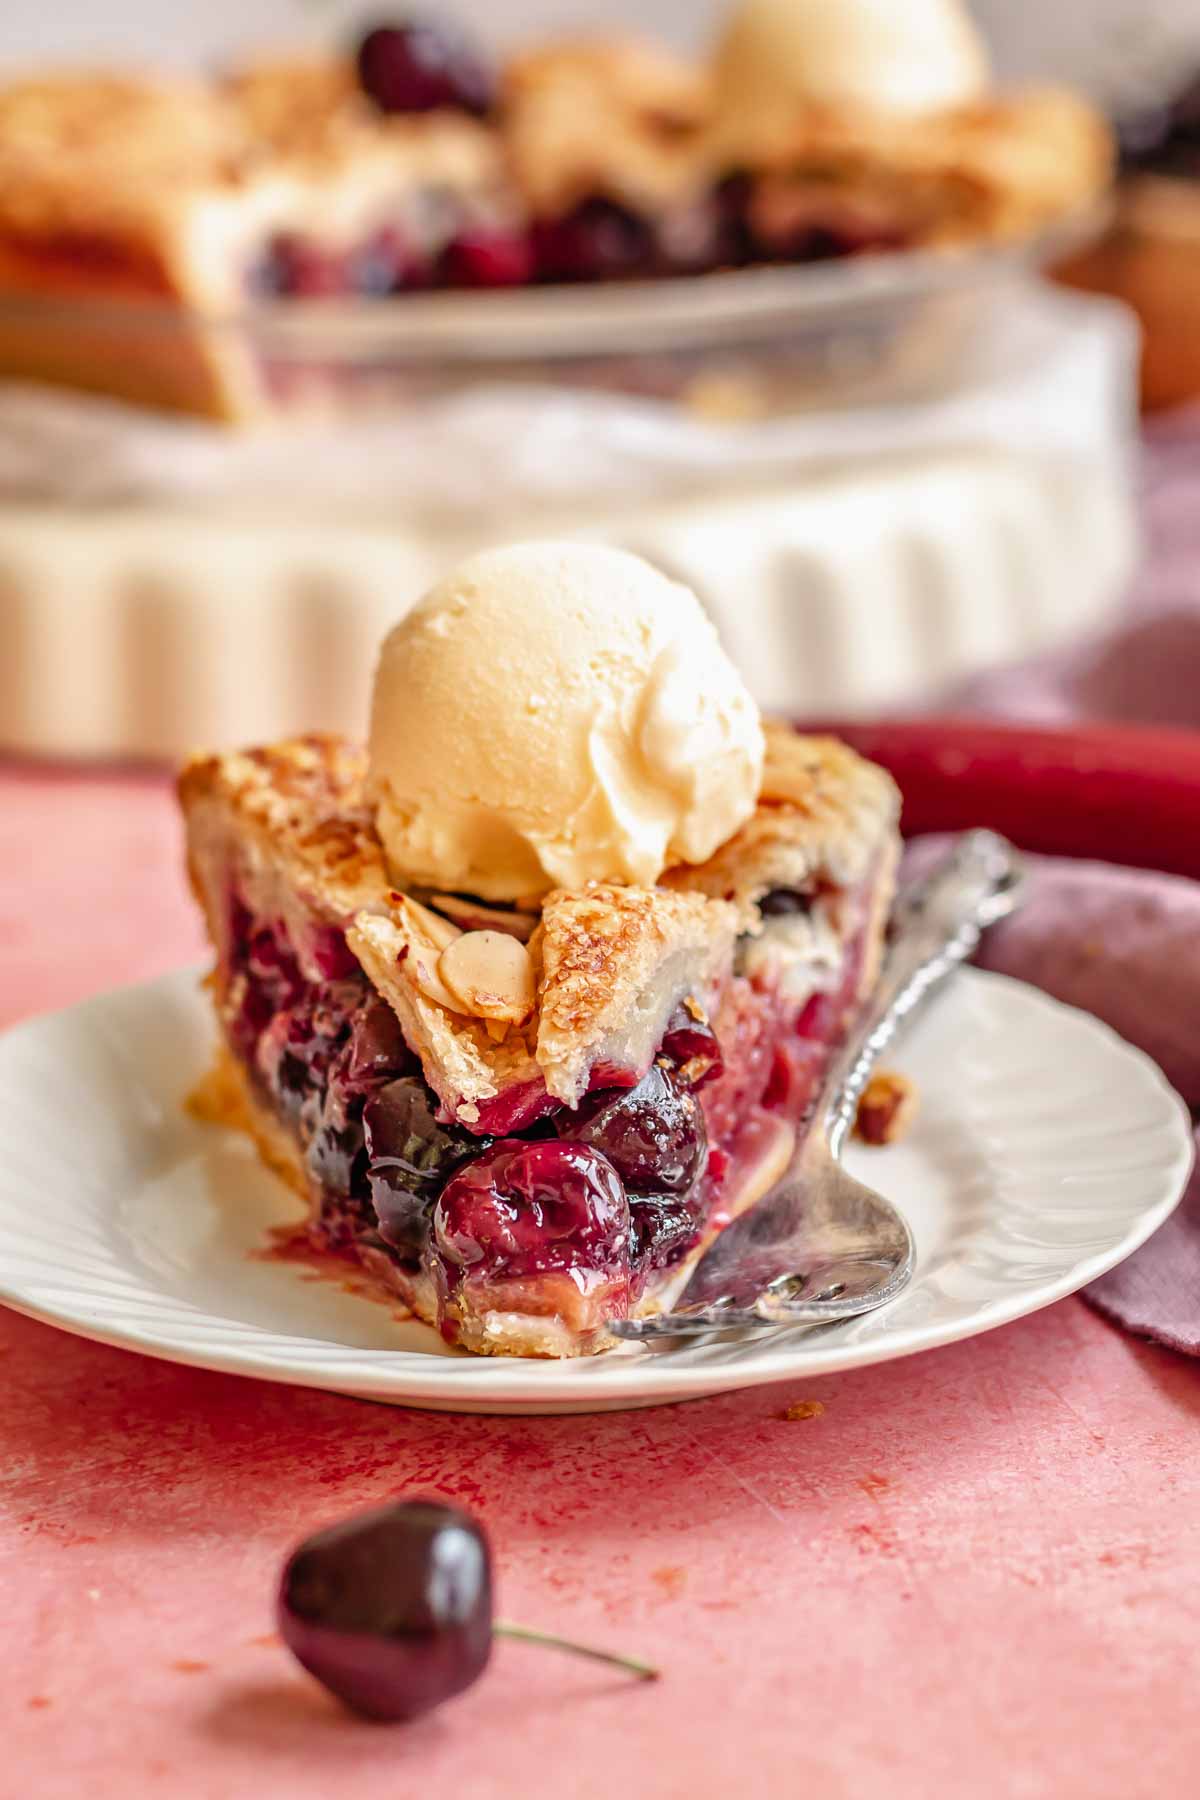
Cherry Rhubarb Pie combines a sweet and tart jammy filling in a flaky, homemade crust. Cherries and rhubarb are an iconic summer fruit combination, and this pie, with a beautiful lattice crust, is like summer on a plate.
This pie is like a cherry rhubarb crumble or crisp in pie form. Fresh or frozen sweet dark cherries work great paired with tart rhubarb. The fruit gets mixed with cornstarch and sugar for a perfectly set fruit pie filling.
Cherries and rhubarb are classic late spring and summer fruits with relatively short (yet delicious) seasons. For more recipes using this wonderful produce, try:
Jump to:
Why You'll Love This Recipe
Sweet and tart. Fruit pies are always delicious, but especially so when there is a combination of tangy and sugary fruit. This rhubarb and cherry pie has that perfect balance making you keep wanting to go back for another bite.
Flaky crust. This recipe uses my go-to flaky all-butter pie crust. You’ll learn how to make an easy pie crust at home with only a few ingredients! Store-bought crust can be used if you are short on time, though the butter flavor in homemade makes a huge difference!
Americana. Is there anything more classically American than a cherry pie? Make this for the 4th of July or a summer barbecue, and it’s sure to be a hit.
Ingredients
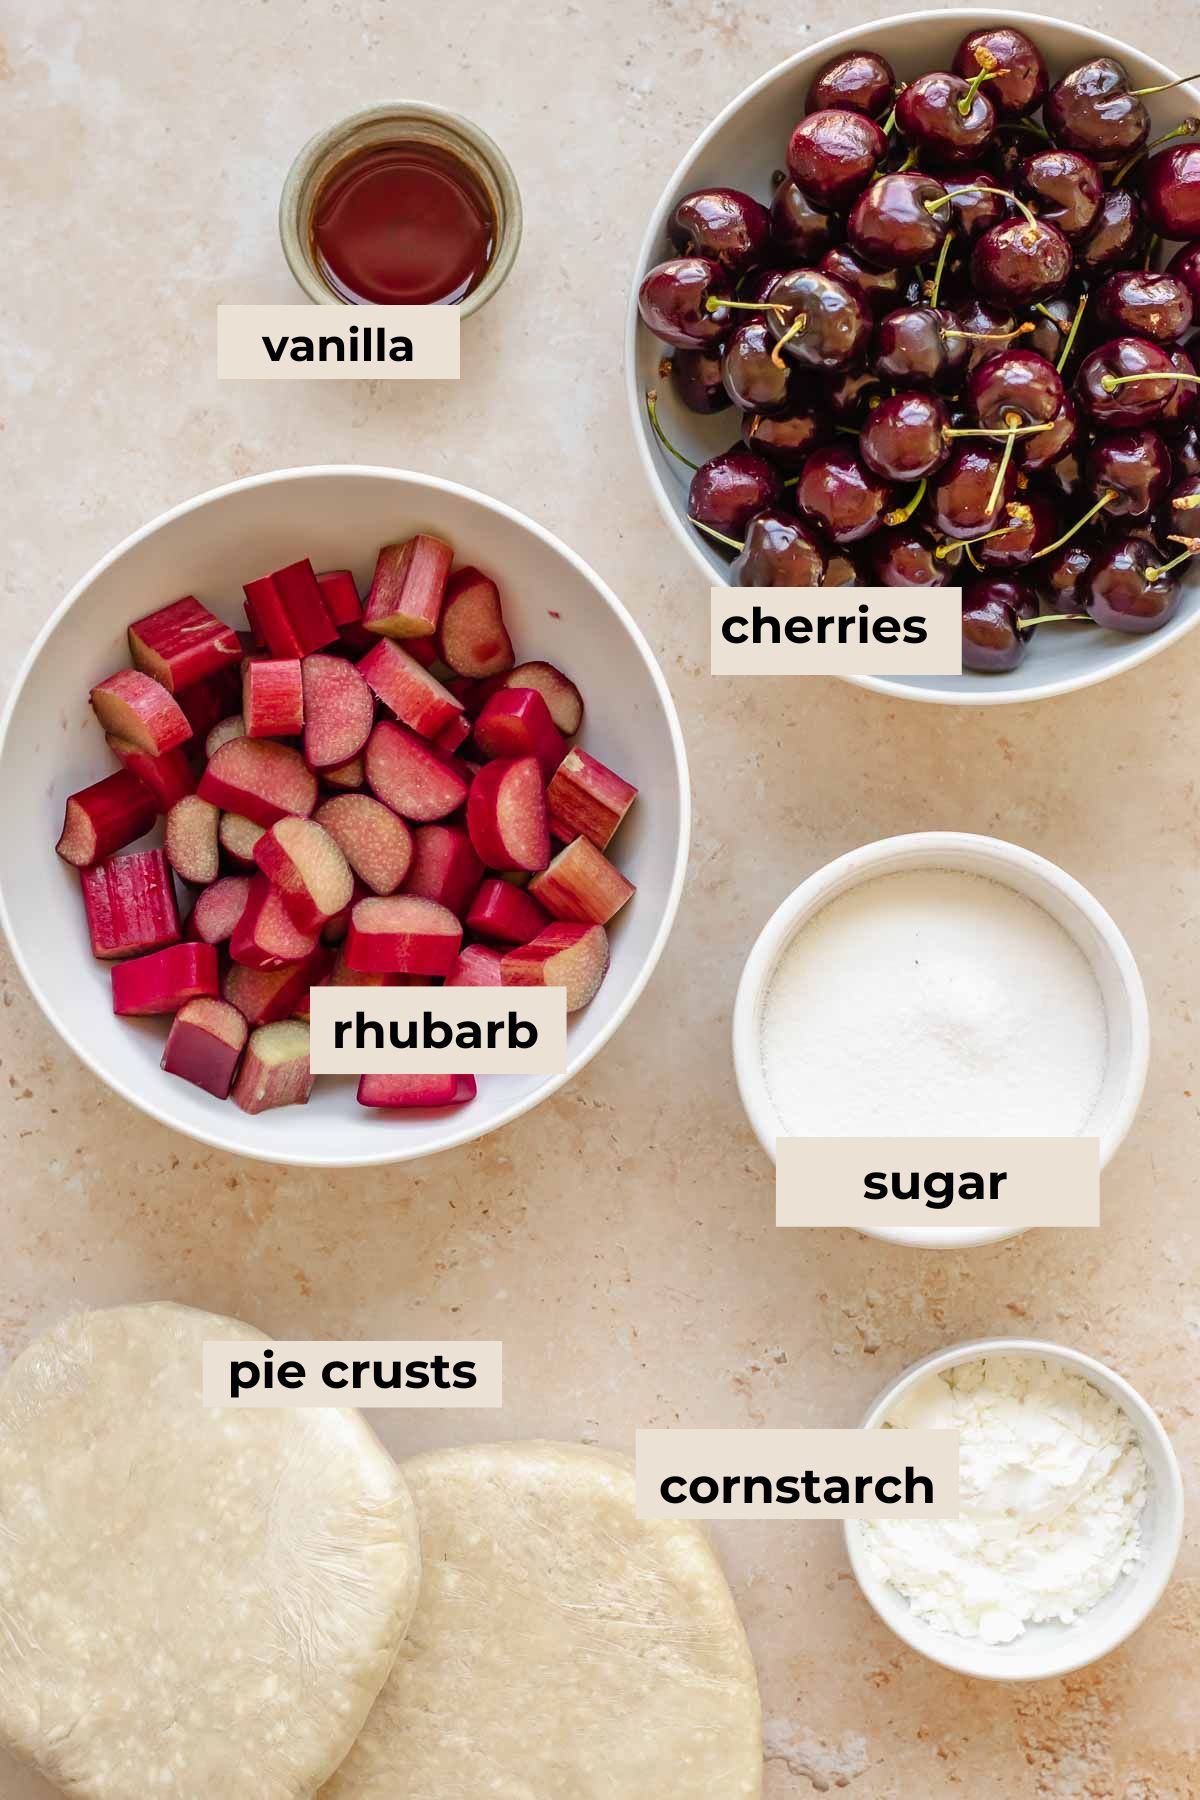
This cherry rhubarb pie has very minimal ingredients, making it the perfect, fruit-forward summer recipe.
- Cherries. Dark, sweet cherries are used rather than tart cherries because the rhubarb is incredibly tart. Fresh or frozen pitted cherries can be used.
- Rhubarb. Look for bright red or pink colored rhubarb to help make the pie a beautiful color.
- Sugar. Standard, granulated sugar is used to sweeten this pie.
- Cornstarch. The thickening agent is used to set the fruit juices during baking. Tapioca starch can also be used.
- Pie Crust. This recipe used two discs of my foolproof All-Butter Pie Crust. Store-bought crust can be used, but it will brown much more quickly, as the pie needs quite a long bake time.
See recipe card for full ingredients list and quantities.
Substitutions and Variations
- If you don’t want to a lattice top, add a full top crust and slice two large slits in the top to allow steam to escape during baking.
- Substitute a crumb topping for the lattice crust like in my Dutch Caramel Apple Pie.
- Add some sliced strawberries to bulk up the volume of the fruit filling.
- Do not use canned cherry pie filling in this recipe.
- To add some flavor variations, add some warm spices to the filling. Cinnamon, ginger, clove, or cardamom would be great.
How to Make This Recipe
Before beginning the recipe, the pie crust must be made and let to rest in the fridge for at least two hours before rolling out. Be sure to account for this time, if making the All-Butter Pie Crust!

One: Pit the cherries, slice some in half, and cut the rhubarb into ½" pieces. Combine in a bowl.
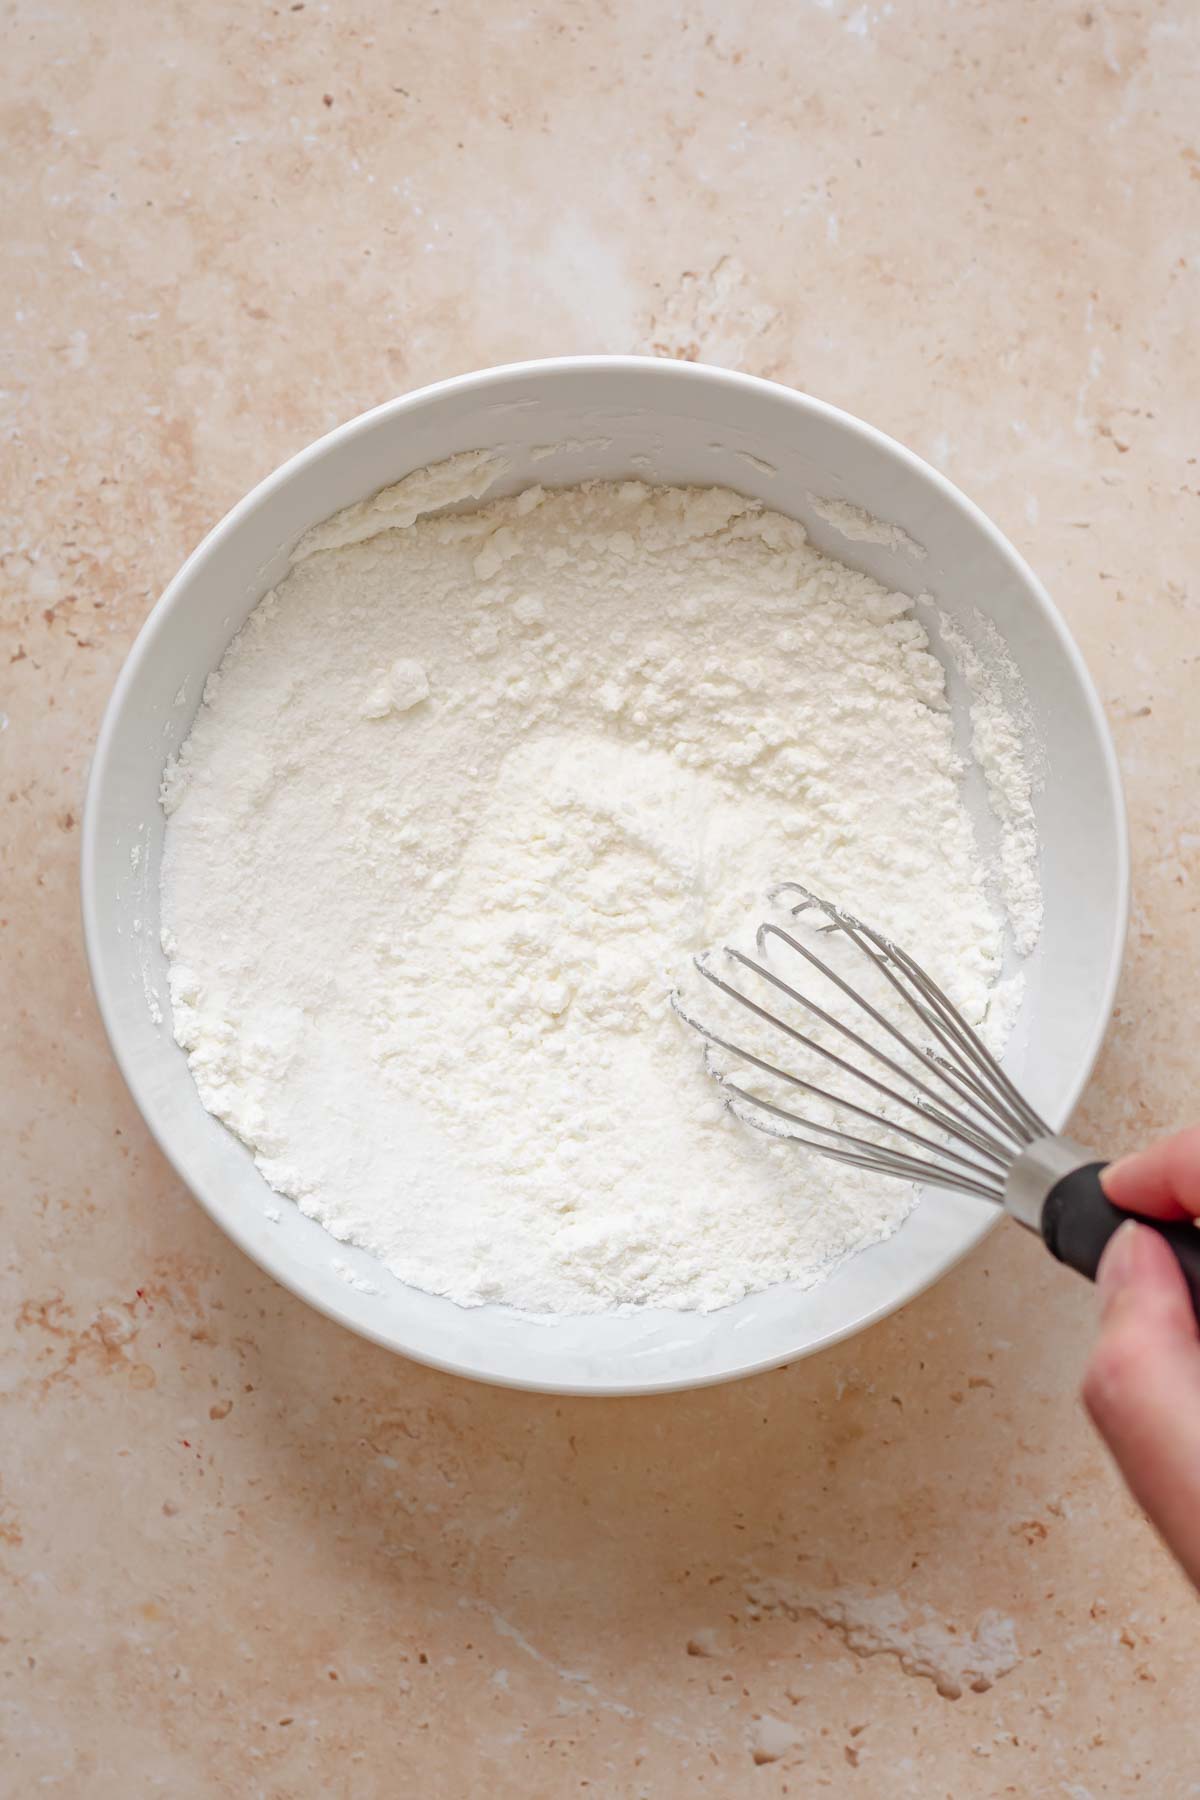
Two: Whisk together the sugar and cornstarch. This will prevent any cornstarch lumps in the filling.
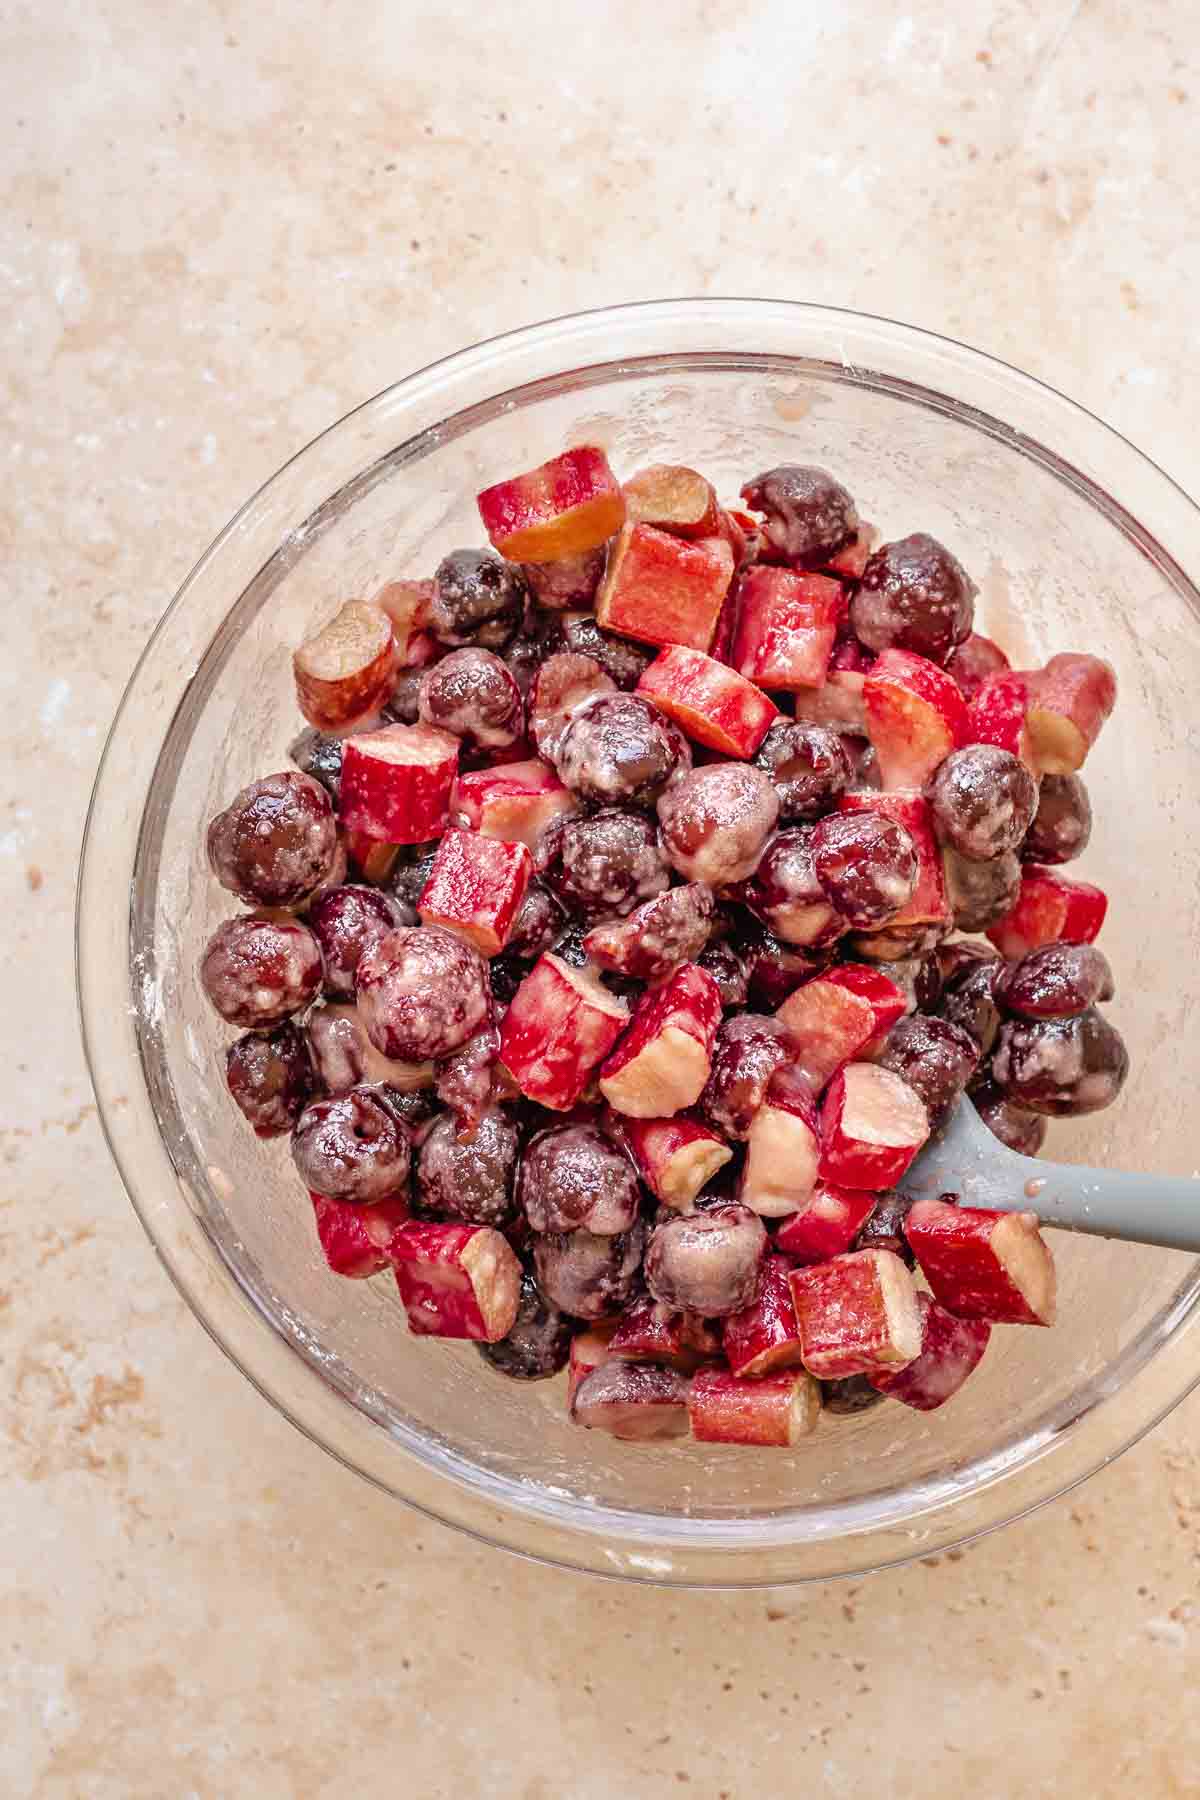
Three: Add the sugar and cornstarch mixture, and vanilla and mix to coat completely. Set aside.
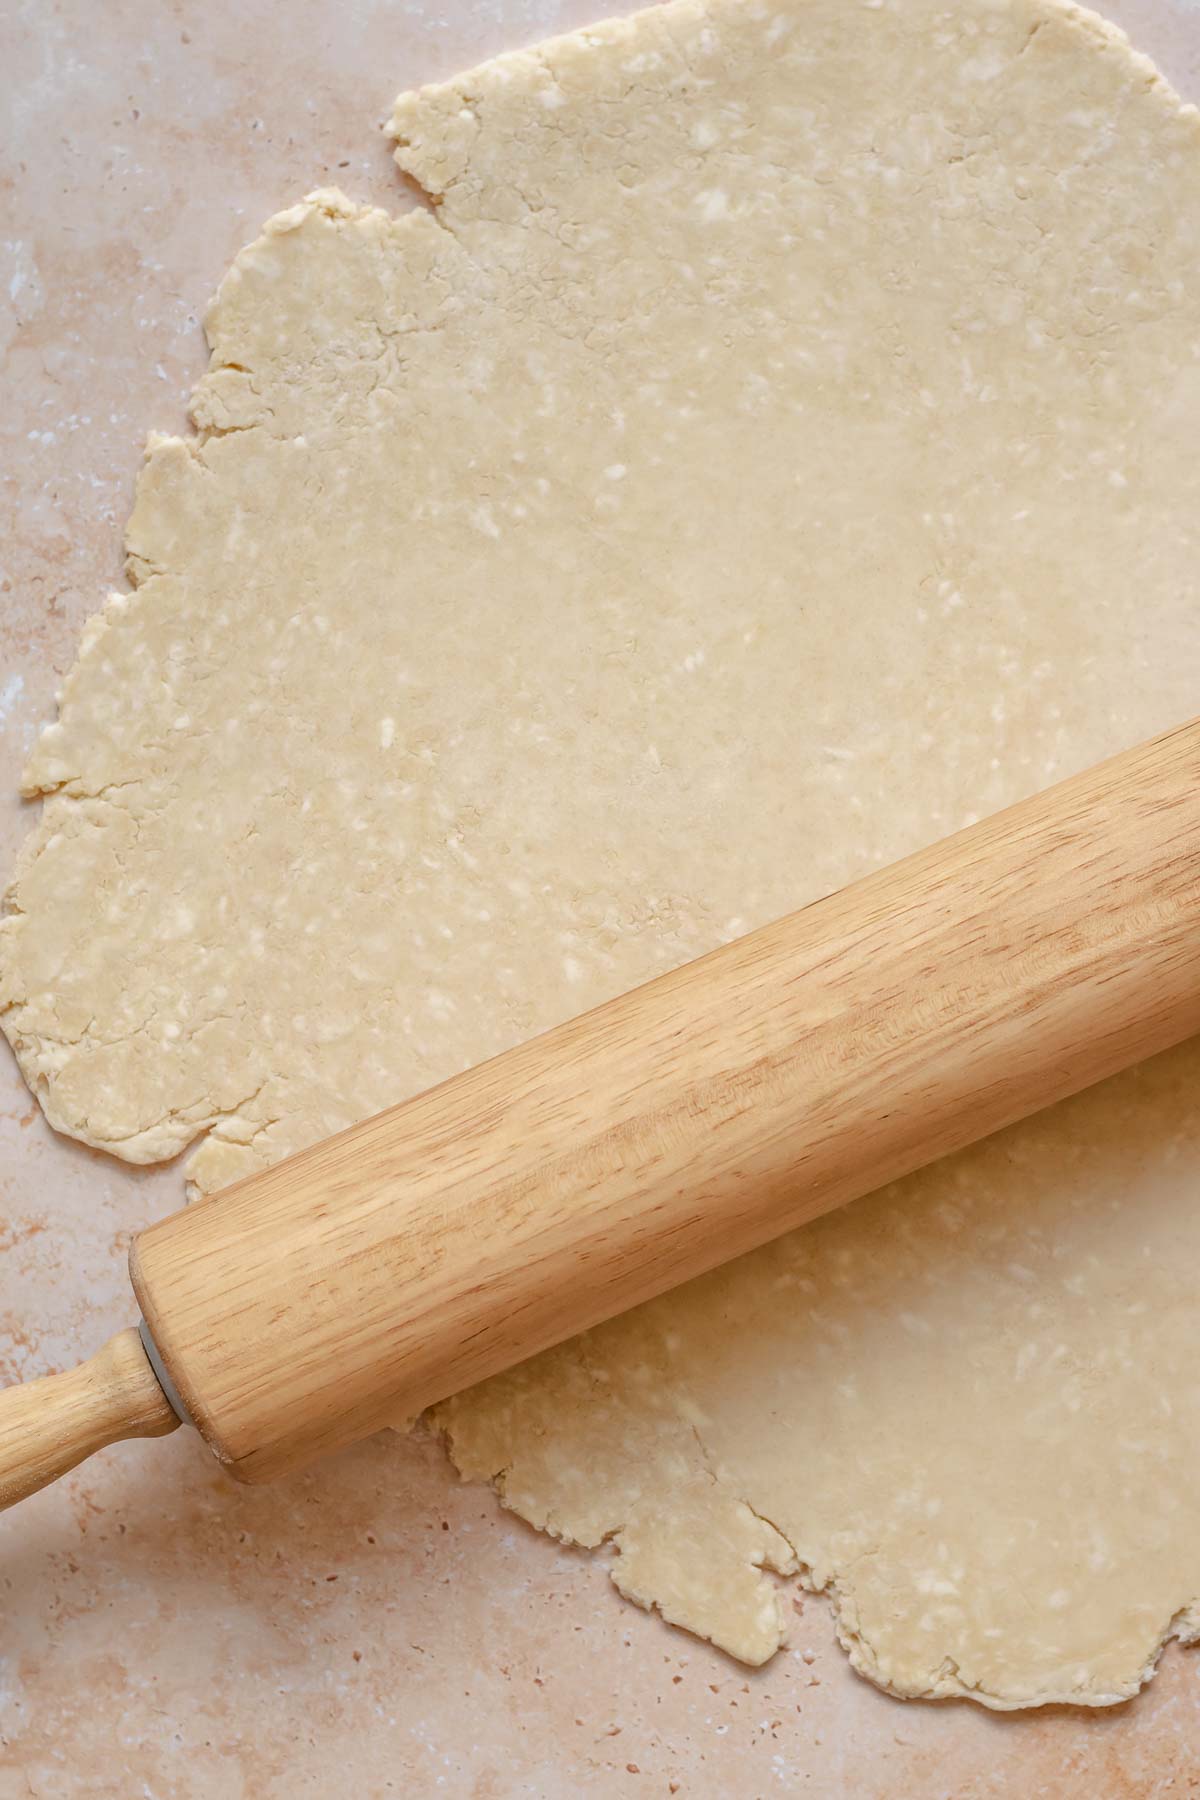
Four: Roll out one disc of pie dough between ⅛-1/4" thick, and so it's at least 2 inches wider than the pie dish.
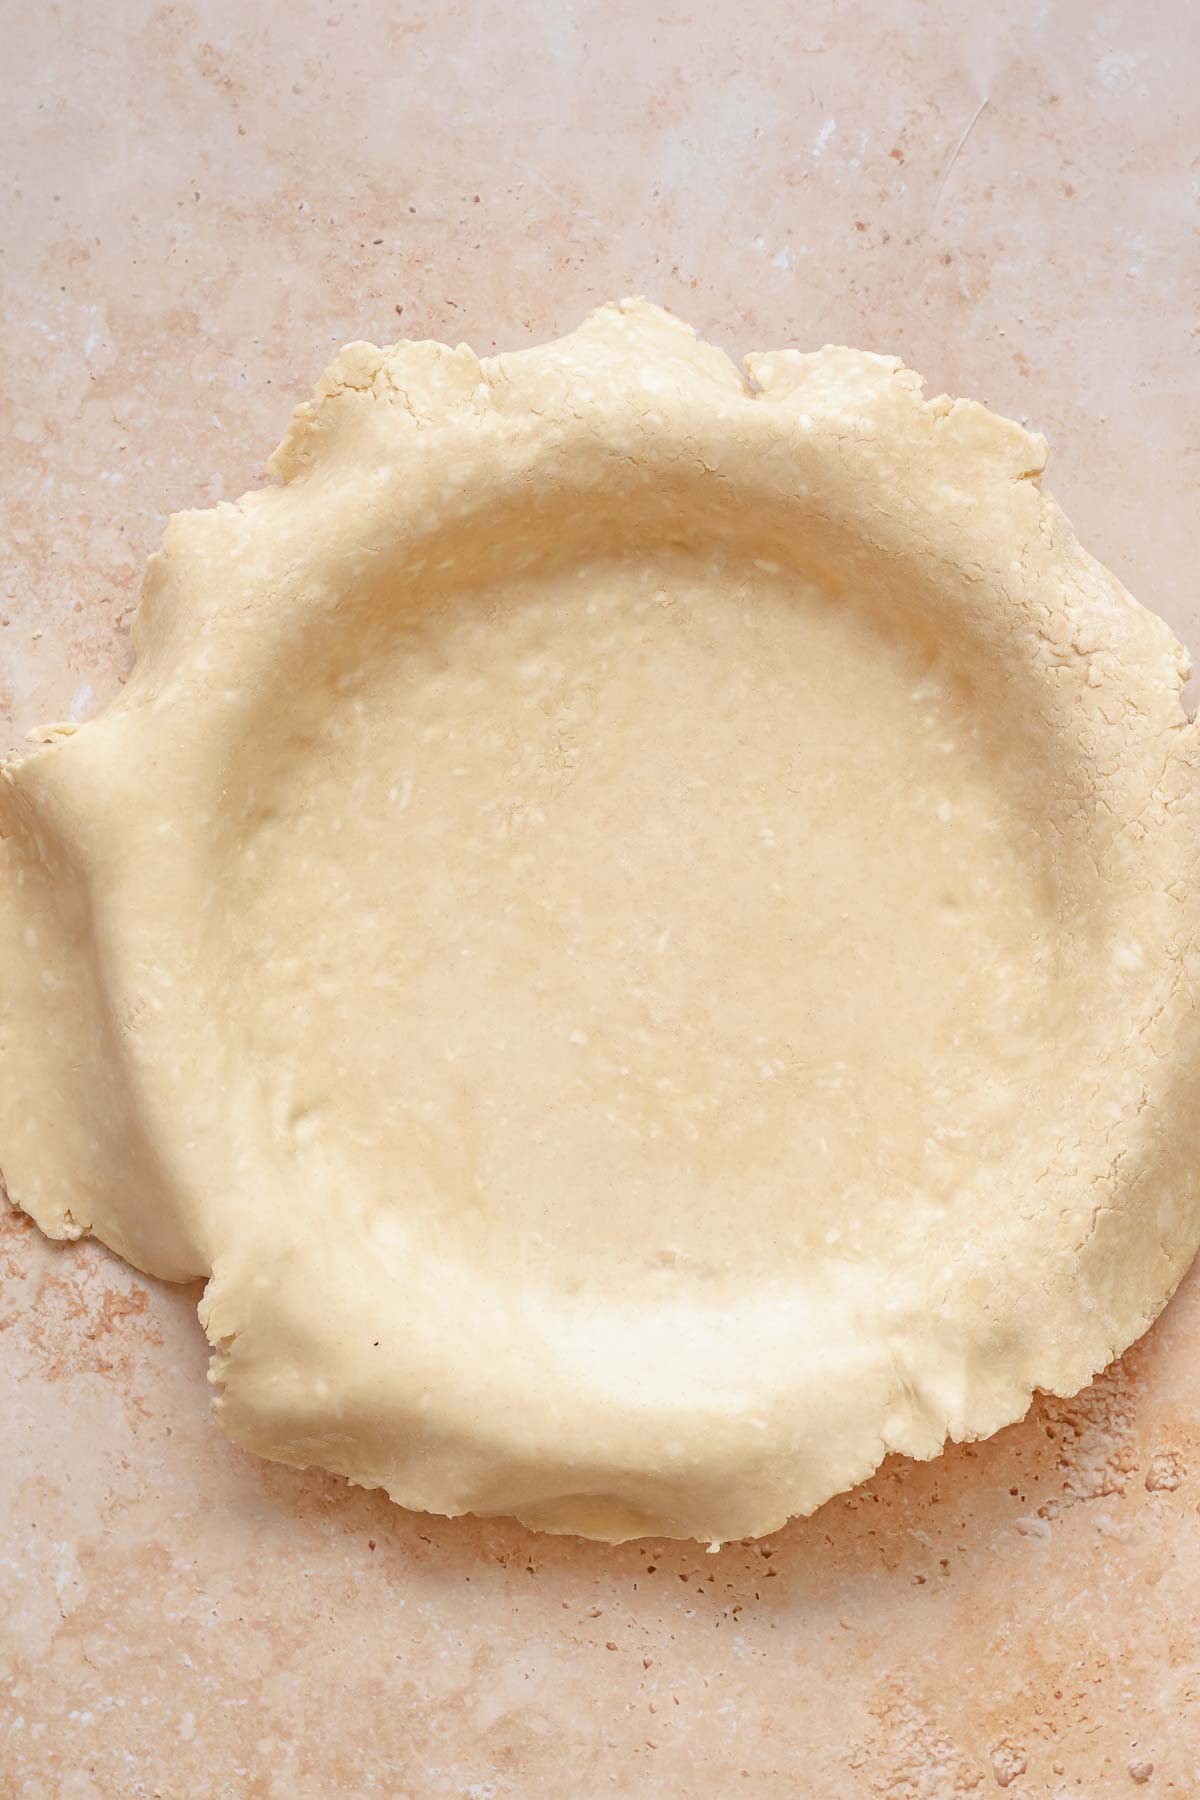
Five: Add the crust to the pie dish and press gently into the bottom and sides, leaving an overhang.

Six: Roll out the second crust to ⅛" thick, then cut into lattice strips (these were 1").
💌 Save This Recipe
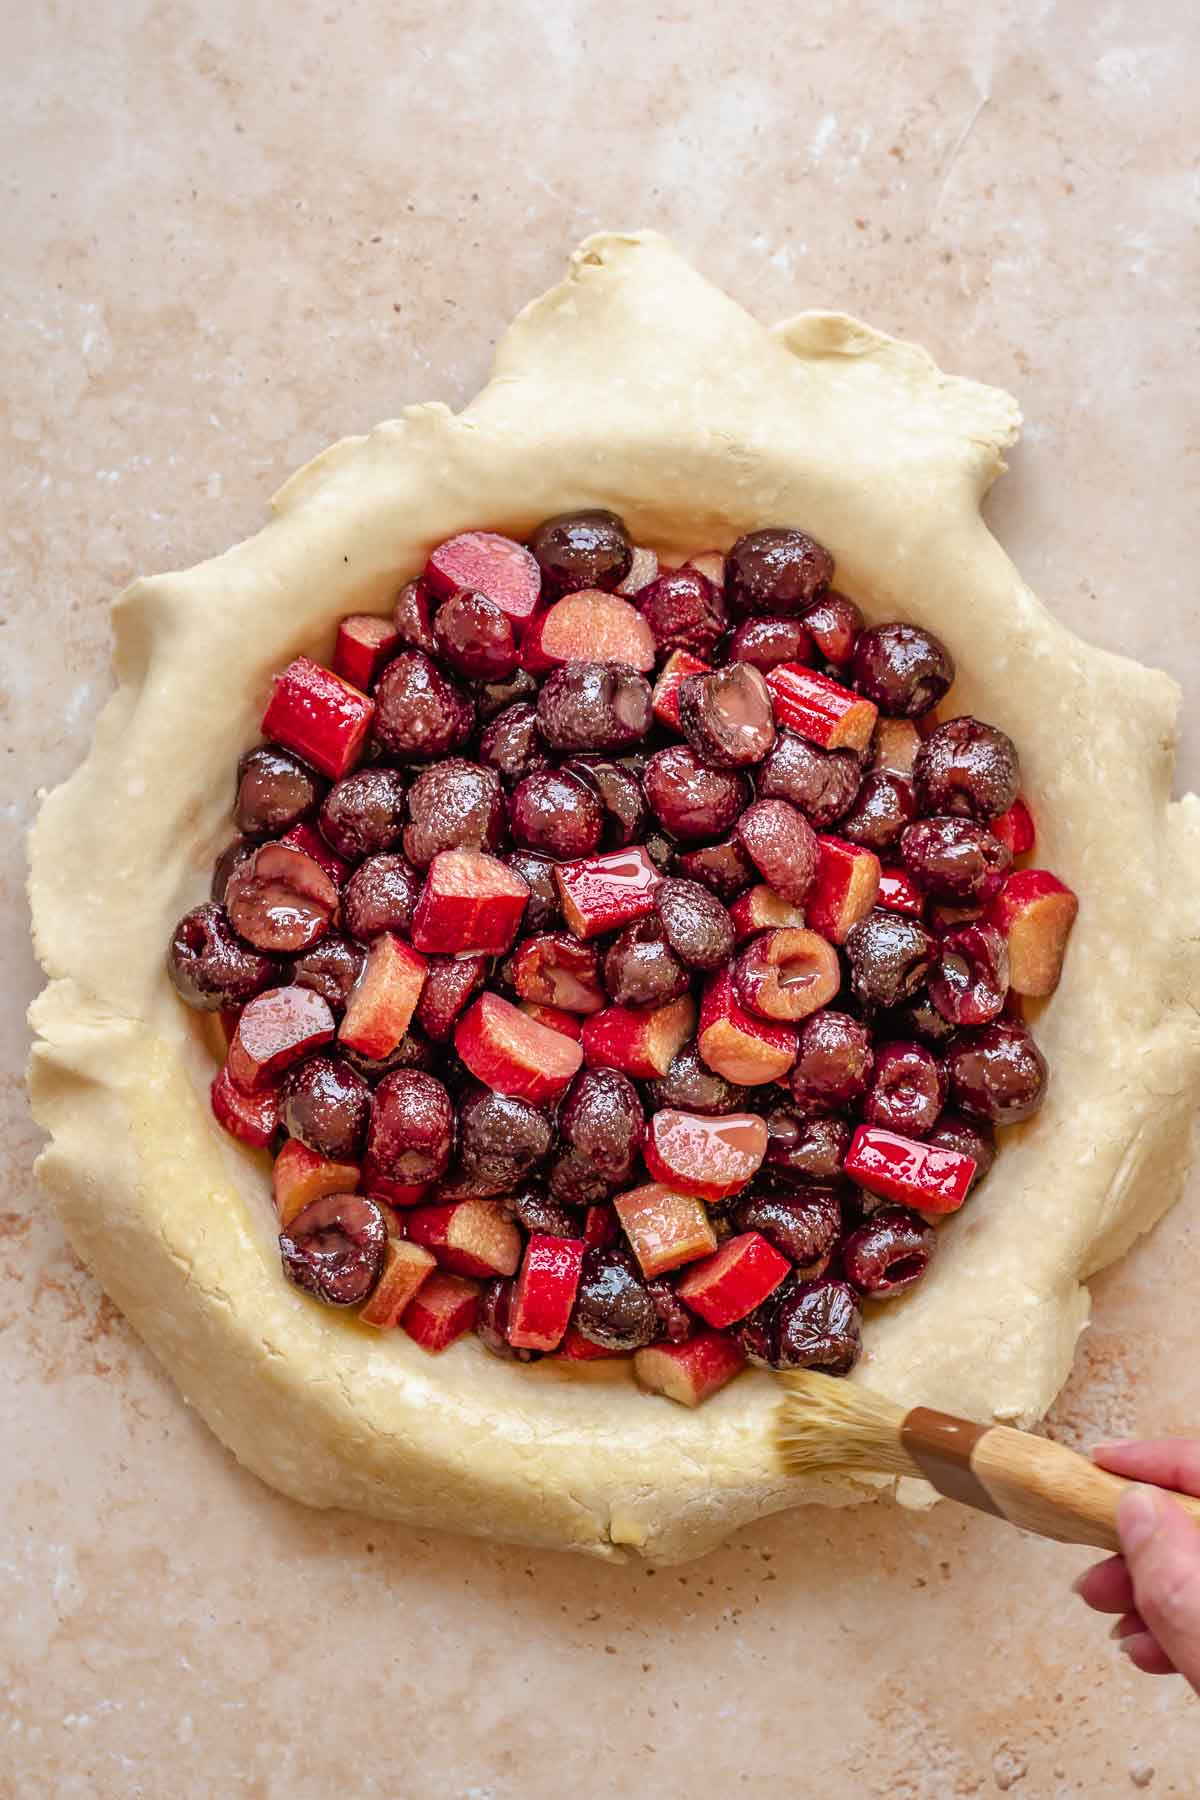
Seven: Mix the filling again, then add to the bottom crust. Egg wash the sides to help the lattice stick.
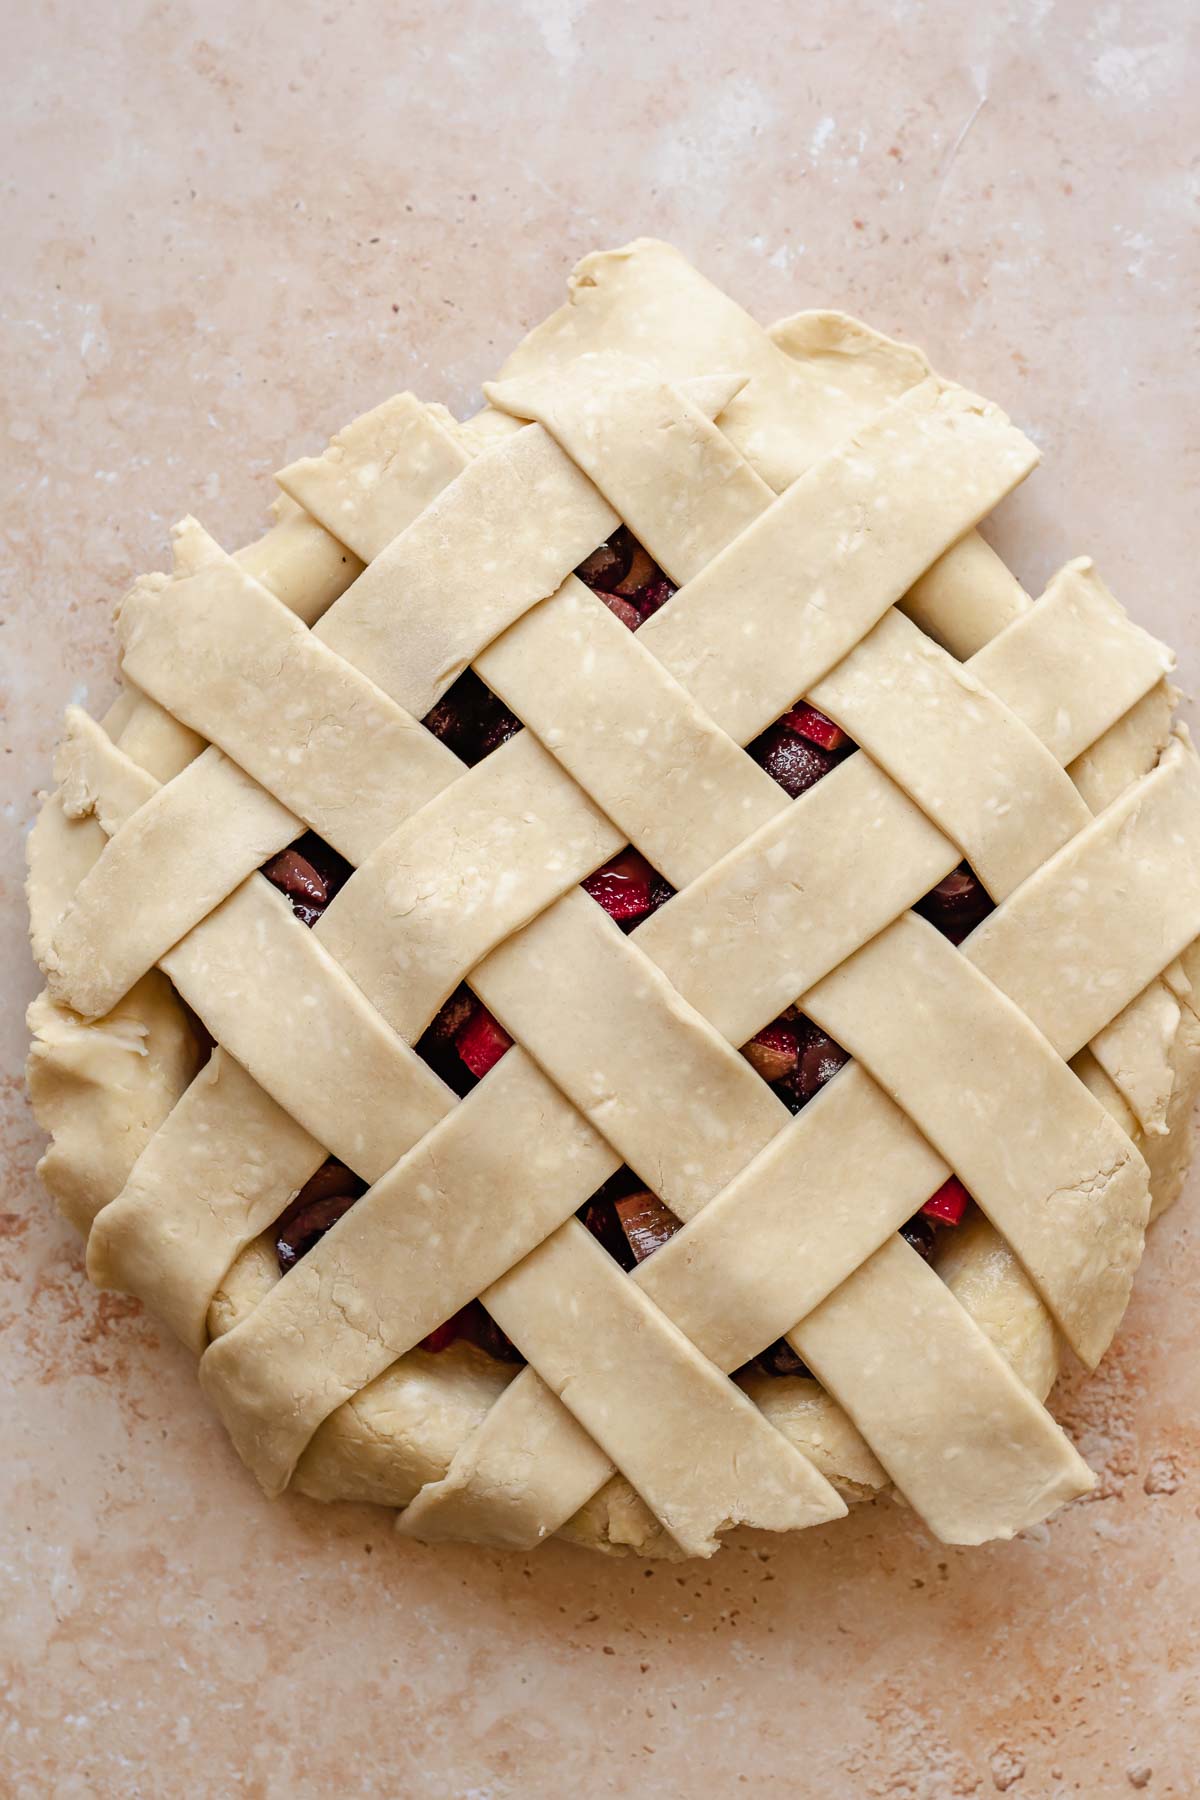
Eight: Add the lattice strips to the top of the pie, and gently push down on the edges.
Hot tip! Unsure how to assemble the lattice? Watch this pie lattice video for help!
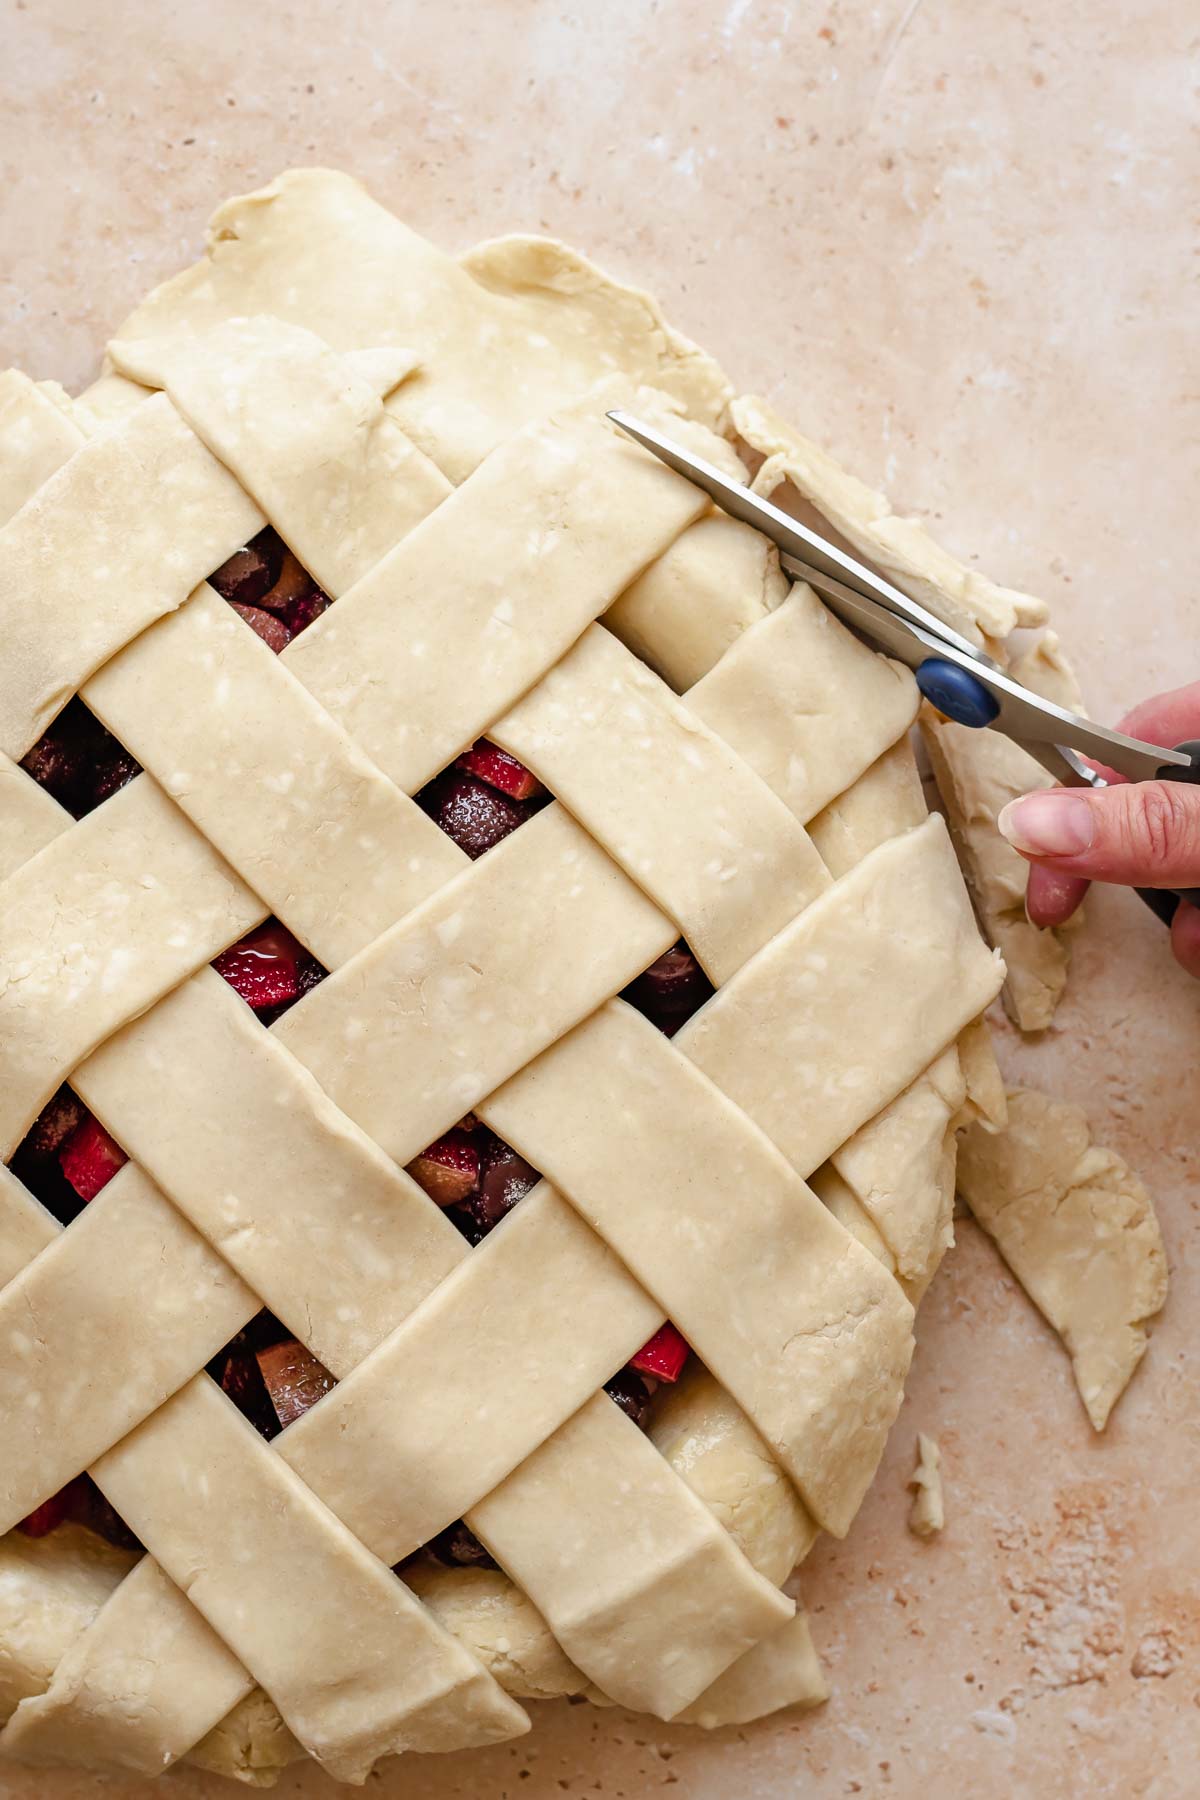
Nine: Use kitchen shears to cut the excess pastry right to the edge of the pie dish.
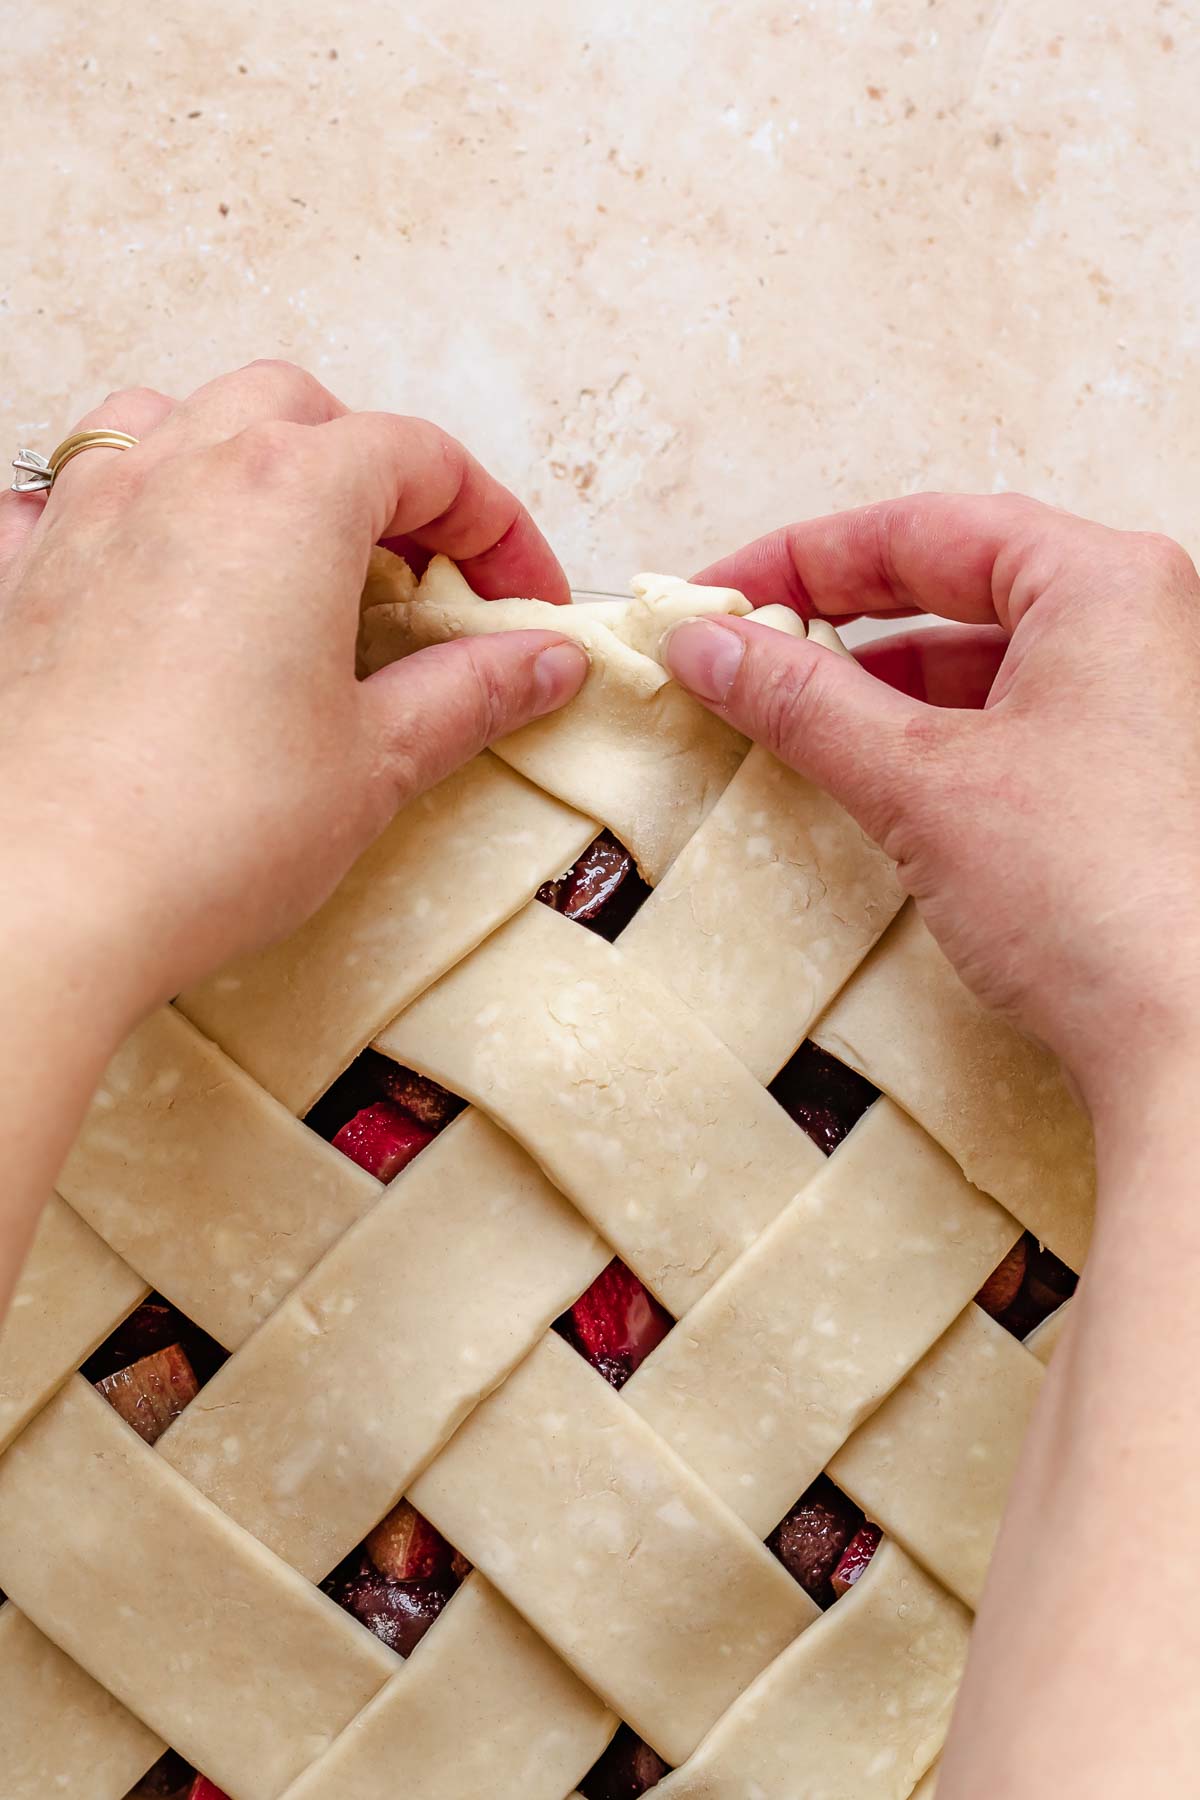
Ten: Fold any excess pastry under itself, then press around the edges to fully seal.
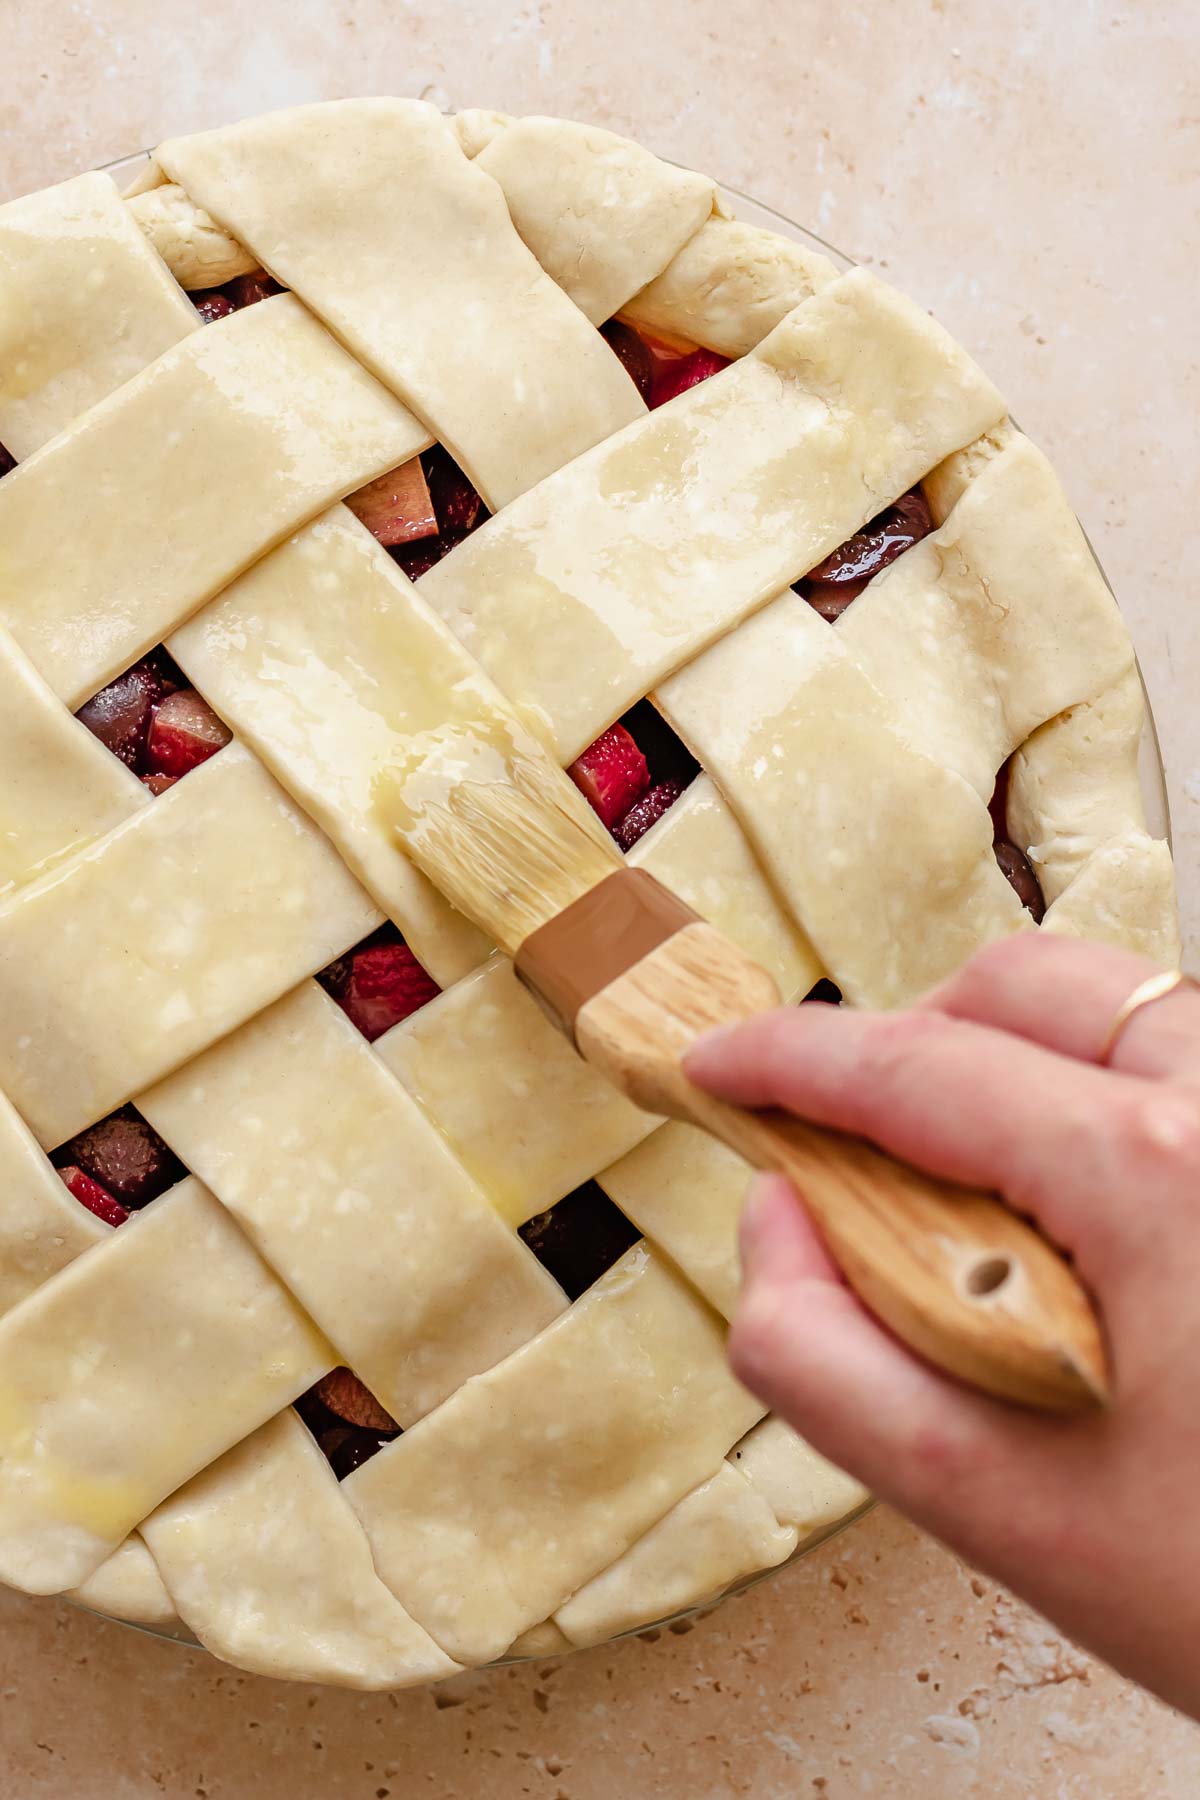
Eleven: Refrigerate the pie while the oven preheats, then add egg wash to cover the lattice strips.
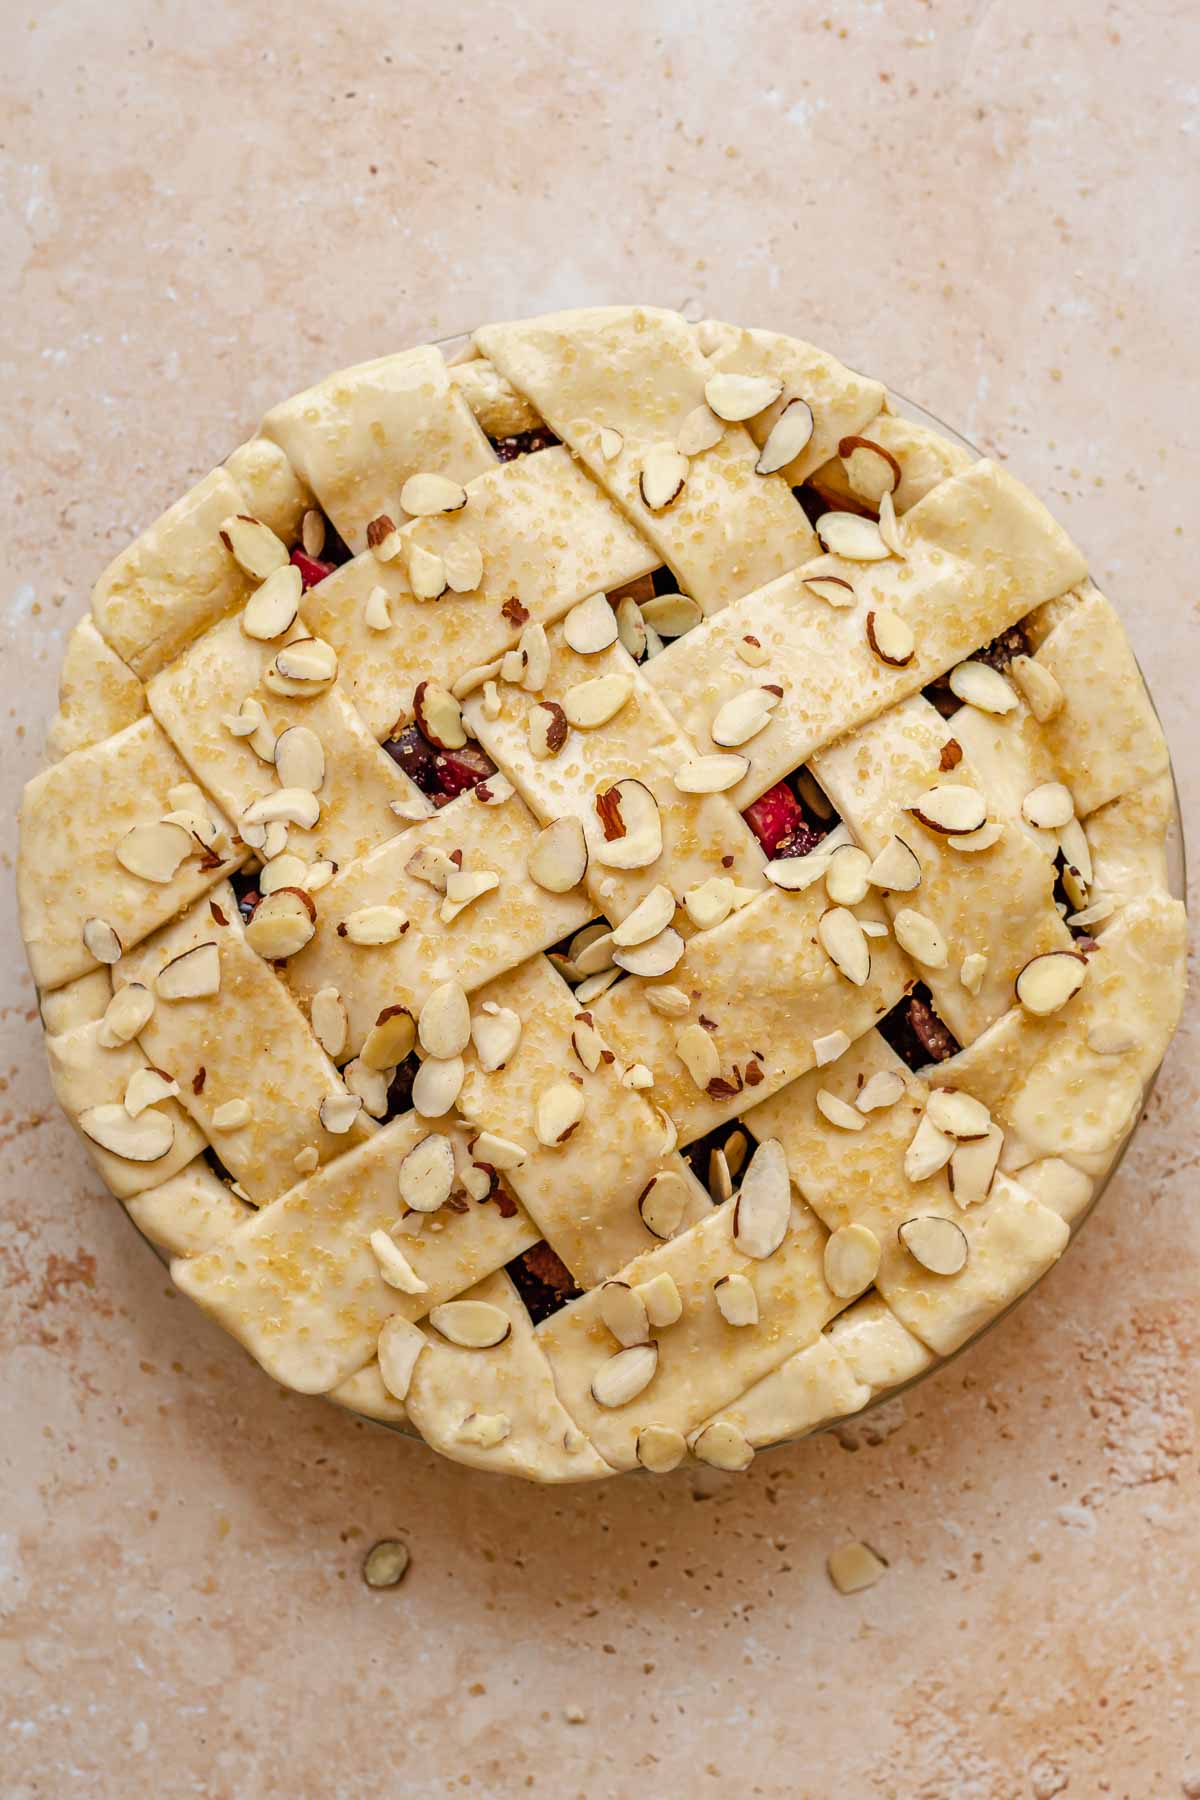
Twelve: Sprinkle on coarse sugar and sliced almonds, then bake until golden brown and the juices are bubbling through.
Expert Tips
- Fill the pie past the crust, mounding it slightly in the center. The filling will cook down as the pie bakes, and this method leads to a full pie.
- Place the pie pan on a baking sheet in case the juices bubble over in the oven. Line the baking sheet with parchment paper for extra security.
- Freeze the bottom crust prior to adding the filling, then chill the filled pie in the fridge while working on rolling and cutting the lattice top.
- Lightly tent the pie with tin foil if you notice the crust starting to get too brown during the baking.
- Move the pie to the bottom third of the oven for the final 15 minutes of baking time to ensure the bottom crust is cooked through.
- Bake until the fruit is bubbling in the center of the pie. This ensures the fruit is cooked all the way and the cornstarch is activated to help the juices thicken.
- Cool the pie completely before slicing it. If sliced when it’s still warm, the juices will flow out.
Recipe FAQs
This could be for a few reasons. First, the pie wasn’t cooked long enough for the juices to thicken. Using a thickener like cornstarch, tapioca starch, or flour helps with this. Additionally, the pie should be completely cool before slicing, which allows the juices to set.
Either option works well to help thicken fruit pies, so use whatever you have on hand. Keep in mind you don’t need too much as the juices reduce and thicken on their own during baking. Tapioca starch, sometimes called tapioca flour, is also a good thickening agent.
This is likely because the pie was not cooked long enough. It’s a great practice to add the pie to the bottom third of the oven for the last 15-20 minutes of bake time to ensure a fully baked bottom crust, especially for fruit and custard pies.
Metal pie plates will produce the best results, but if you are a beginner pie baker, I would suggest using a glass pie dish so you can see when the bottom crust has turned golden brown.
Storage
Store the cherry rhubarb pie covered at room temperature for up to two days, then in the fridge for an additional 5 days.
To freeze, wrap the pie or slices tightly in plastic wrap, then aluminum foil and freeze for up to 6 months. Unwrap completely and thaw at room temperature.
How to Reheat Pie
For best results, reheat the pie or slices of pie in a preheated 375℉ oven for 5-15 minutes or until slightly warmed through. Don't allow the pie filling to get hot, or else it will begin to ooze out of the crust.


Did you make this recipe? Share it with us! Tag @thecozyplum on Instagram & Facebook and leave a star rating ⭐️ below!
📖Recipe
Cherry Rhubarb Pie
Equipment
- 9 inch pie pan
Ingredients
Pie Crust
- 3¼ cups all-purpose flour
- 1 cup + 6 tablespoons unsalted butter cold
- 1 teaspoon kosher salt
- ⅔ cup water ice cold
- 1 egg for egg wash
- ¼ cup sliced almonds optional
- 1 tablespoon turbinado sugar optional
Cherry Rhubarb Filling
- 3 cups sweet cherries fresh or frozen, pitted
- 2 cups rhubarb fresh or frozen, cut into ½” pieces
- ½ teaspoon almond extract
- 1 teaspoon vanilla paste or extract
- ¾ cup granulated sugar
- 3 tablespoons cornstarch
- ¼ teaspoon kosher salt
Instructions
Pie Crust
- Cube the butter into ½" pieces and place in the freezer. In a bowl, add the water and some ice cubes and set aside. Using a food processor, add the flour and salt to the bowl and pulse to combine. Disperse the butter cold butter evenly over the flour around the bowl.3¼ cups all-purpose flour, 1 cup + 6 tablespoons unsalted butter, ⅔ cup water ice cold, 1 teaspoon kosher salt
- Pulse the mixture until the butter reaches pea-sized pieces and looks crumbly. Add in about half of the ice cold water (through the chute), and pulse again until the dough starts to form a ball, adding more water as necessary until it presses together nicely, but it should not feel wet.
- Remove the dough, separate into two even pieces, then flatten into one-inch discs and wrap each piece of dough in plastic wrap. Place in the fridge for 1-2 hours. You will need both discs of dough for this recipe.
Cherry Rhubarb Filling
- If not using frozen, pit the fresh cherries. Keep 1 cup of the cherries whole, and cut the additional 2 cups of cherries into halves. This helps to fill any gaps in the filling.3 cups sweet cherries
- Add the cherries, sliced rhubarb, almond, and vanilla extracts to a large bowl and mix to combine.2 cups rhubarb, ½ teaspoon almond extract, 1 teaspoon vanilla paste or extract
- Whisk together the sugar, cornstarch, and salt, then add to the fruit and mix again to combine and coat the fruit completely.¾ cup granulated sugar, 3 tablespoons cornstarch, ¼ teaspoon kosher salt
Assembly
- Once the dough is chilled, remove it from the fridge and wait about 15 minutes for the dough to slightly come to temperature. This will help you roll out the dough without it cracking. Lightly flour a rolling pin and work surface, then roll out one disc of dough until it’s about ⅛ inch thick and is at least 2 inches wider than the pie dish. Continue to lightly flour the work surface and pin if the dough begins to stick.
- Carefully transfer the dough to the pie dish, pressing it into place on the bottom and sides (there will be an overhang), then place it into the fridge.
- While the bottom crust is in the fridge, roll out the second piece of dough following the same steps above. Using a ruler, cut the lattice strips evenly to the desired thickness (at least one inch). Do this with a knife or pizza cutter.
- Mix the fruit filling again, then add it to the bottom of the pie crust, being sure to scrape out all sugar and cornstarch leftover in the bowl.
- Whip up the egg in a small bowl and brush just the sides of the pie crust to help the lattice strips adhere. Then, lay your lattice strips and assemble. Trim the edges with kitchen shears to ½ inch, then tuck them under themselves.1 egg for egg wash
- Place the whole pie into the fridge while the oven preheats. This will help to prevent the pie crust from shrinking.
- Preheat the oven to 425℉. Remove the pie from the fridge, and eggwash all parts of the lattice and crust. Sprinkle sliced almonds and turbinado sugar on top of the lattice, if using.¼ cup sliced almonds, 1 tablespoon turbinado sugar
- Bake for 15 minutes at 425℉, then lower the temperature to 375℉ and continue baking for 45 - 60 minutes until the juices are bubbling up through the lattice. Transfer the pie to the bottom third of the oven for the final 15 minutes of baking to ensure a cooked bottom.
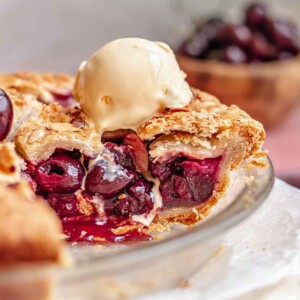
- Cool the pie completely on a wire rack before slicing in, about 4-5 hours. Cutting into the pie before it has cooled and set will have the juices running all over the place. Serve with vanilla ice cream.
A.N. says
Amazing pie! My husband and I loved it.
Nancy says
Tried this rhubarb cherry pie for the first time yesterday for Thanksgiving dinner. It was also my first lattice crust pie. It was so delicious, I think it will become one of my favorites to bake at special occasions from now on. 👍🏽
Callan Wenner says
Thanks so much for sharing this, Nancy! So happy it turned out well and that you enjoyed it.