
All-Butter Pie Crust is a versatile crust that is perfect for any pie. Flavorful, tender, and flaky, this fool-proof pie crust can be used for single or double-crust pies. Made with ease using a food processor, this pie crust can also easily be made by hand with no special equipment needed.
Why You'll Love This Recipe
Reliable - This is my go-to pie dough! It is incredibly simple to throw together, especially if you have a food processor. However, you can absolutely make this by hand, and instructions are provided below. I find that it is so easy to work, smooth, and always bakes up perfectly.
Texture - I would compare this crust to something you could buy at the store. While incredibly tender, I would not consider this to be an overly "flaky" pie crust due the way the butter is processed into the dough. However, it is incredibly tender and melt in your mouth.
Flavor - all-butter pie crust will provide you the most flavorful pie crust. When comparing this to a store-bought pie crust, the flavor of the homemade crust with butter is hands down the winner, especially when you use high quality butter.
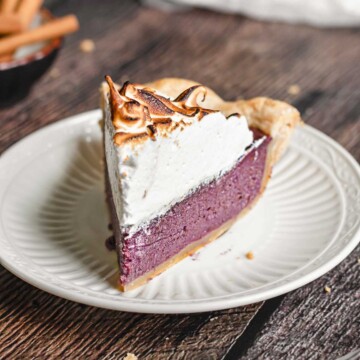
Try this pie crust in the well-loved purple sweet potato pie, dutch caramel apple pie, or apple butter pie.
If you're looking for more pastry crusts, check out:
- Chocolate Sweet Tart Crust (Pâte Sucrée)
- Sweet Tart Crust (Pâté Sucrée)
- Perfect Rough Puff Pastry (with VIDEO) for the flakiest pie dough you'll ever make.
Jump to:
- Why You'll Love This Recipe
- Ingredients
- Suggested Tools
- What is the Best Type of Pie Plate to Use?
- Tips Before Beginning
- How to Make Pie Dough
- Rolling Out the Pie Dough
- How to Set the Pie Crust
- Blind Baking vs Par Baking
- How to Par-Bake Pie Crust
- How to Blind Bake a Pie Crust
- How to Make Pie Crust By Hand
- Expert Tips
- Pie Crust Troubleshooting
- Recipe FAQs
- Storing Pie Crust
- Pie Recipes with All-Butter Pie Crust
- 📖Recipe
- Come Bake With Us!
Ingredients
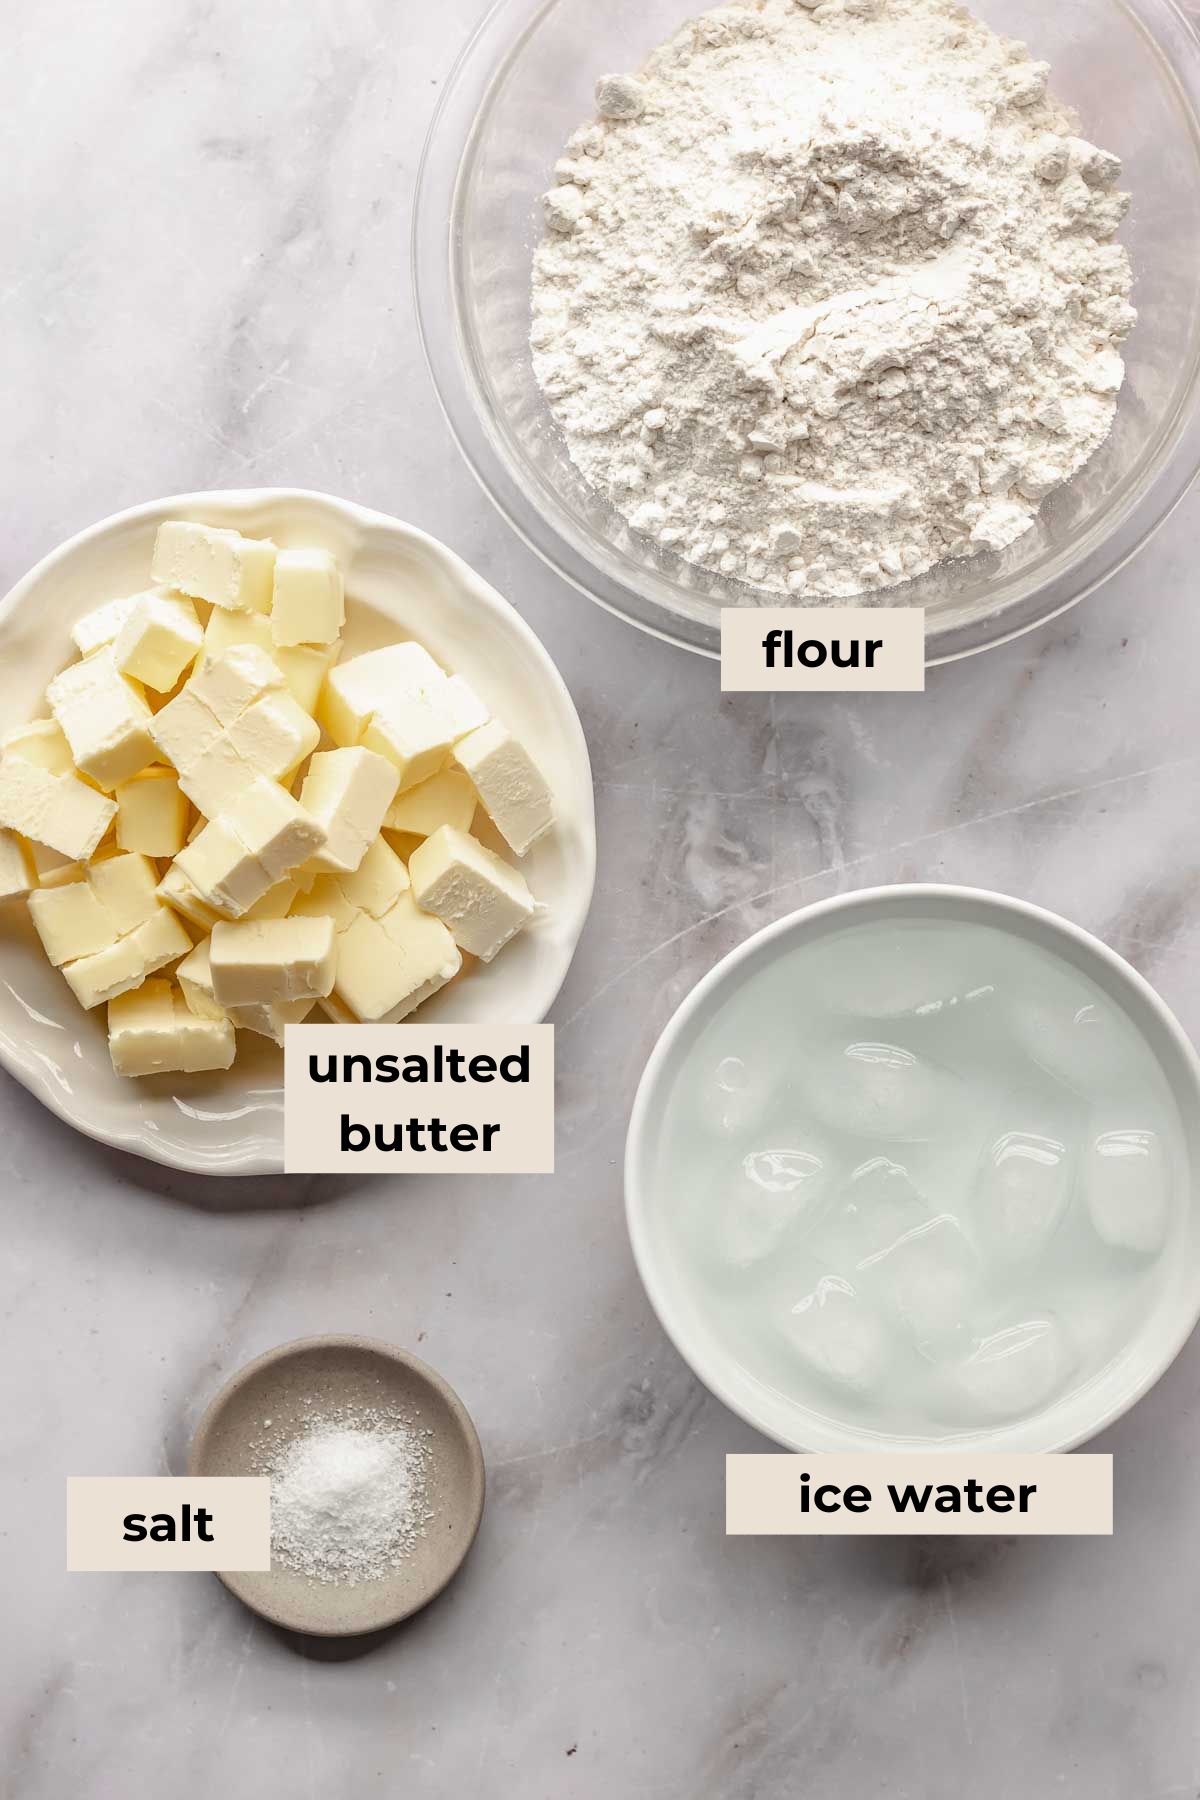
- Unsalted butter. Use the most flavorful butter you can find. Kerry Gold is always a great option and is readily available in most grocery stores. This needs to be very cold or even frozen.
- Kosher salt.
- All-purpose flour.
- Ice water. Be sure to add lots of ice cubes to the water, but don't add the ice cubes when adding the water to the dough.
See recipe card for full ingredients list and quantities.
Suggested Tools
What is the Best Type of Pie Plate to Use?
Metal - this is going to produce the best results for your pie. Metal conducts heat best and most evenly. The down side is that you can't see the bottom of the pie, so it can be tricky to tell when the pie is fully done.
Ceramic - these are typically heavy, conduct heat well, and are often the most decorative. You can typically find a lot of these as deep dish pie plates, which are great for some super thick apple pies. Again, you can't see the bottom, which can add a level of uncertainty to doneness.
Glass - this is the poorest conductor of heat and can sometimes lead to a soggy bottom. However, I actually suggest this for beginner pie bakers. This is because you can see exactly how well the bottom of the pie crust is browning and better manage for doneness.
Tips Before Beginning
- Equipment. Food processor or pastry cutter to make the dough. Then, a rolling pin, 9" pie plate, parchment paper, pie weights or dried rice/beans. Using a glass pie plate is great for beginners so you can actually see how brown the bottom of the pie is.
- Cold ingredients. All of your ingredients should be as cold as possible. After cutting the butter, add it to the freezer while preparing the remaining ingredients.
- Rolling. Be sure to keep the dough as even as possible when rolling out. Use even pressure on the rolling pin as you roll so you don't make certain spots too thin.
- Make ahead. The pie crust can last in the fridge - in disc form or rolled out into the dish - for three days.
- Freezing. The dough can be stored in the freezer for up to 3 months, tightly wrapped in disc form. A formed shell set in the pie plate can also be frozen if completely wrapped in plastic wrap and foil.
How to Make Pie Dough
Watch the real-time version of making pie dough in a food processor.
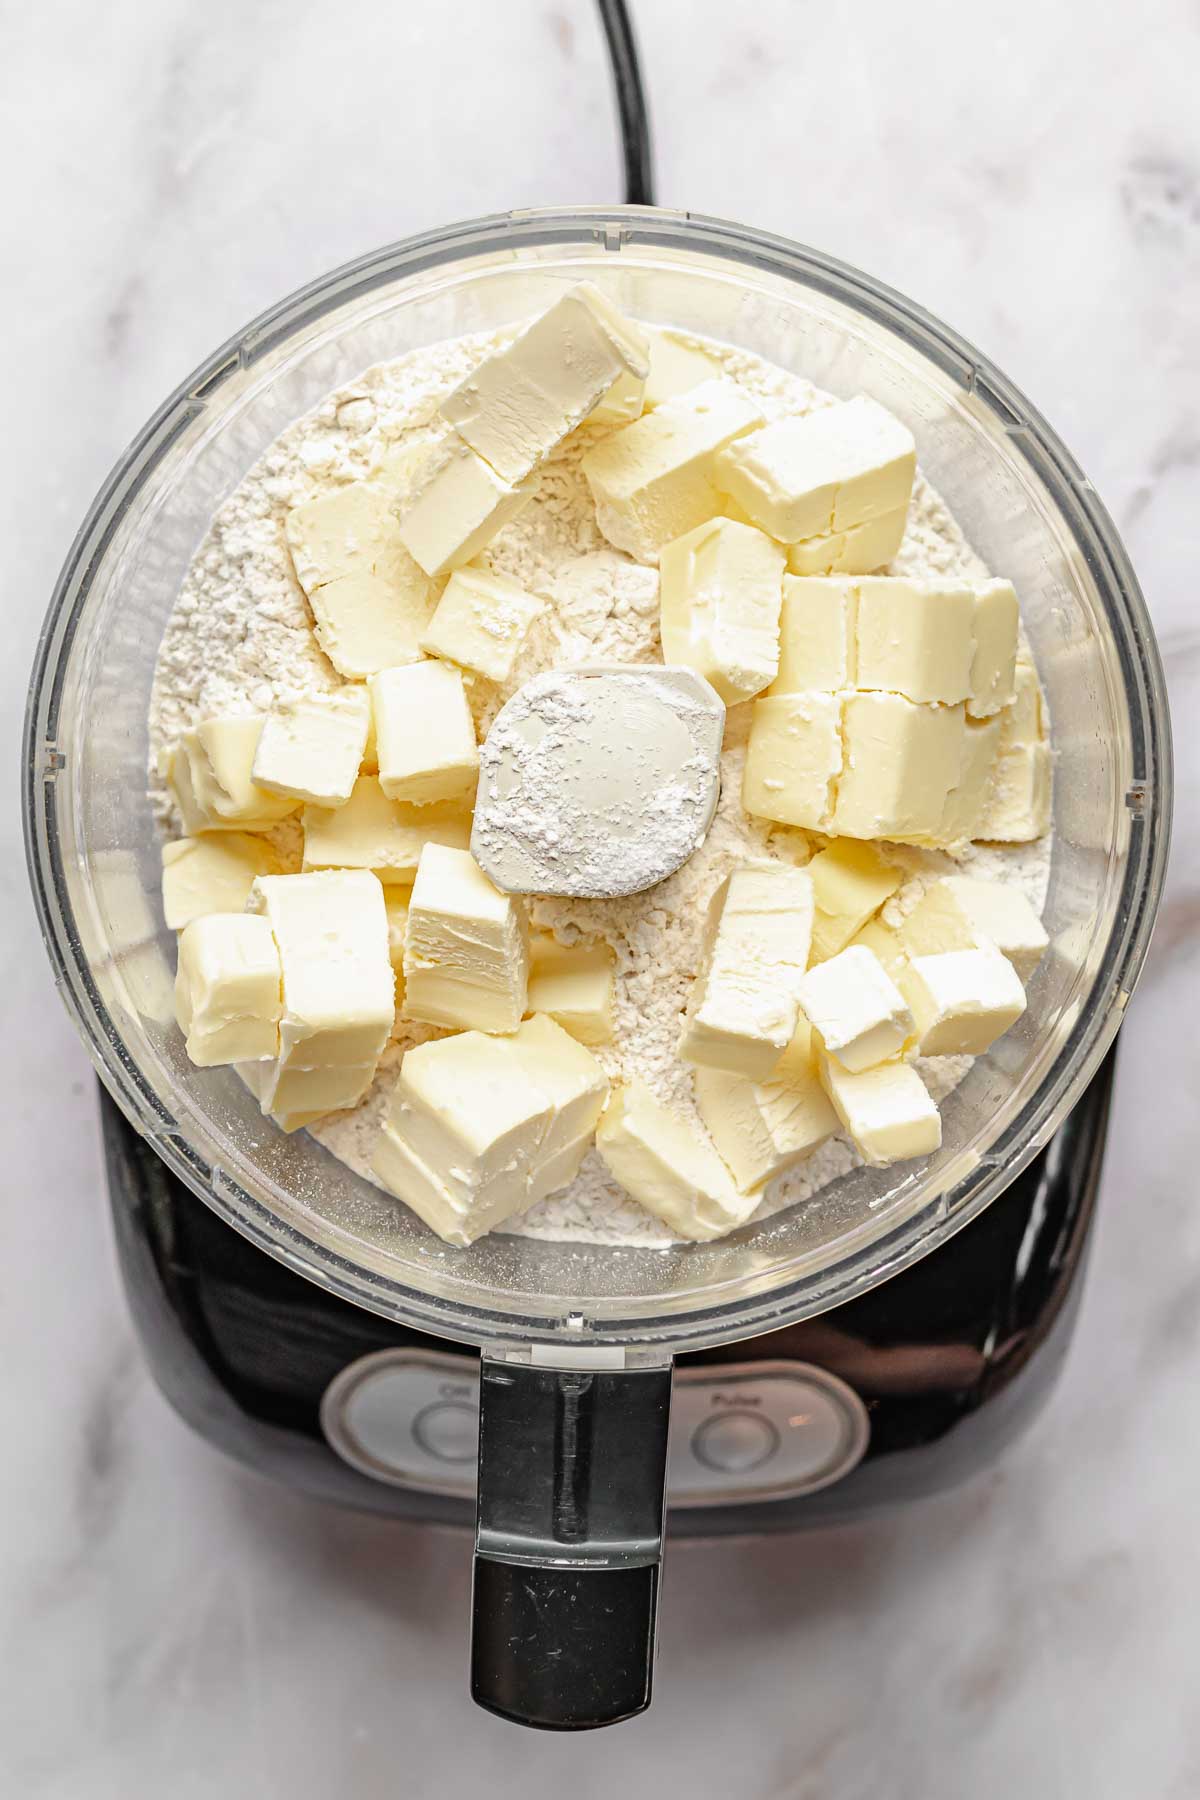
One: Add flour, salt, and cubes of cold butter to a food processor.
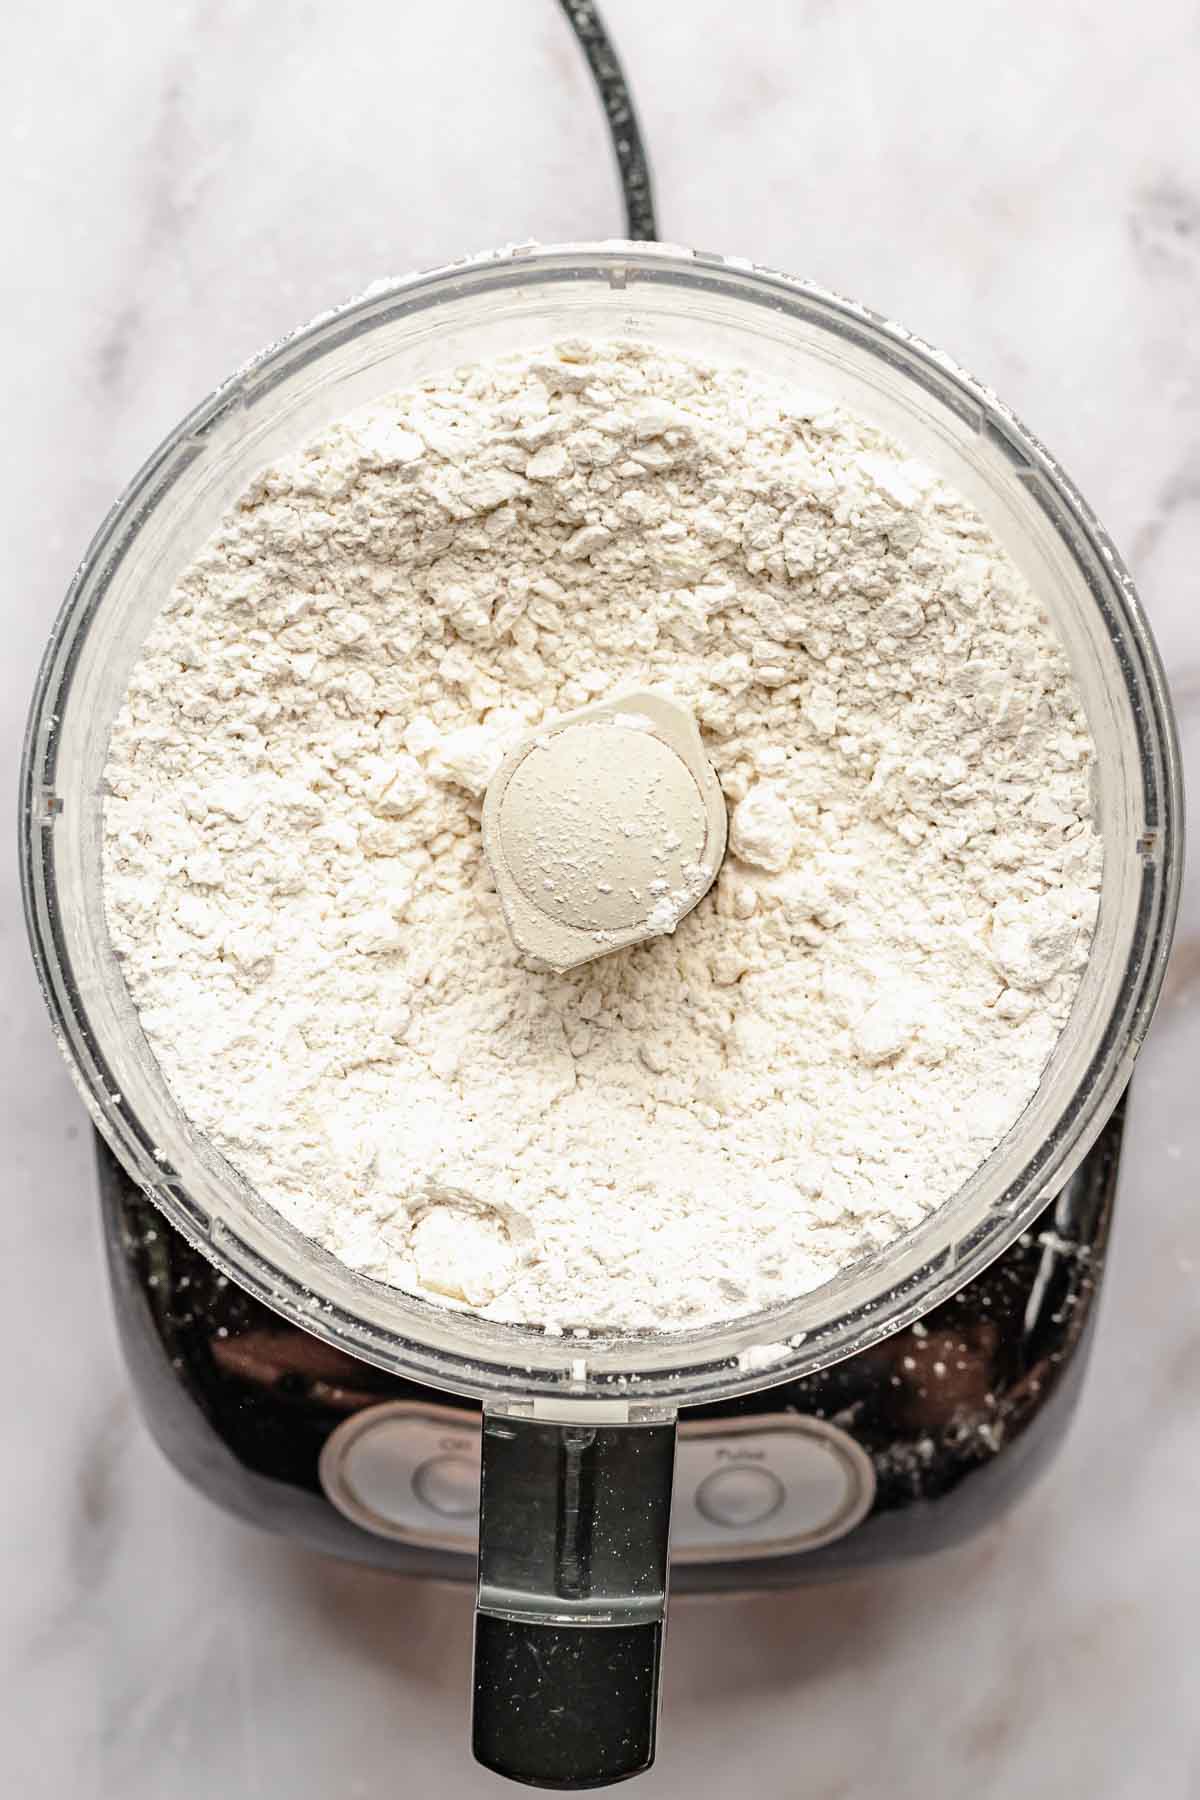
Two: Pulse the mixture until the butter breaks down into pea-sized balls.
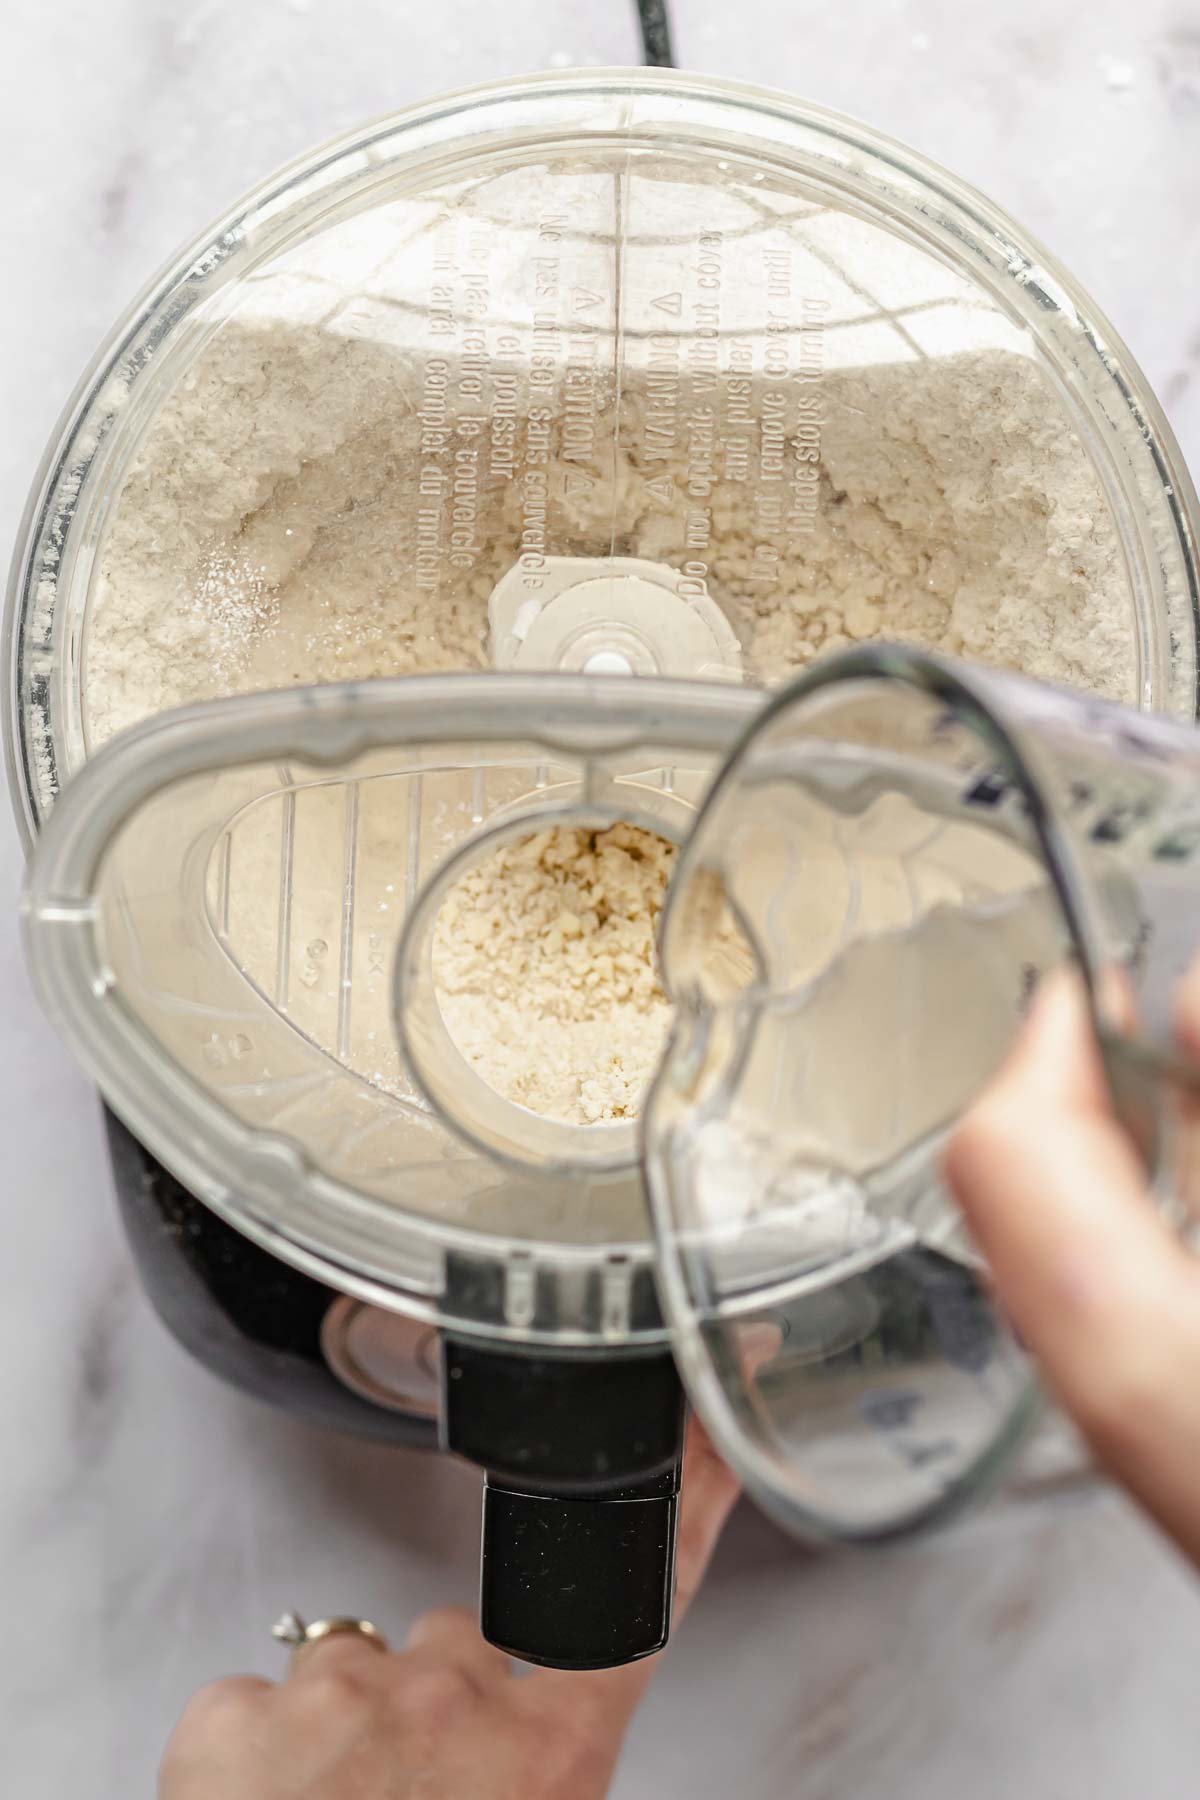
Three: While pulsing, drizzle in the ice cold water.
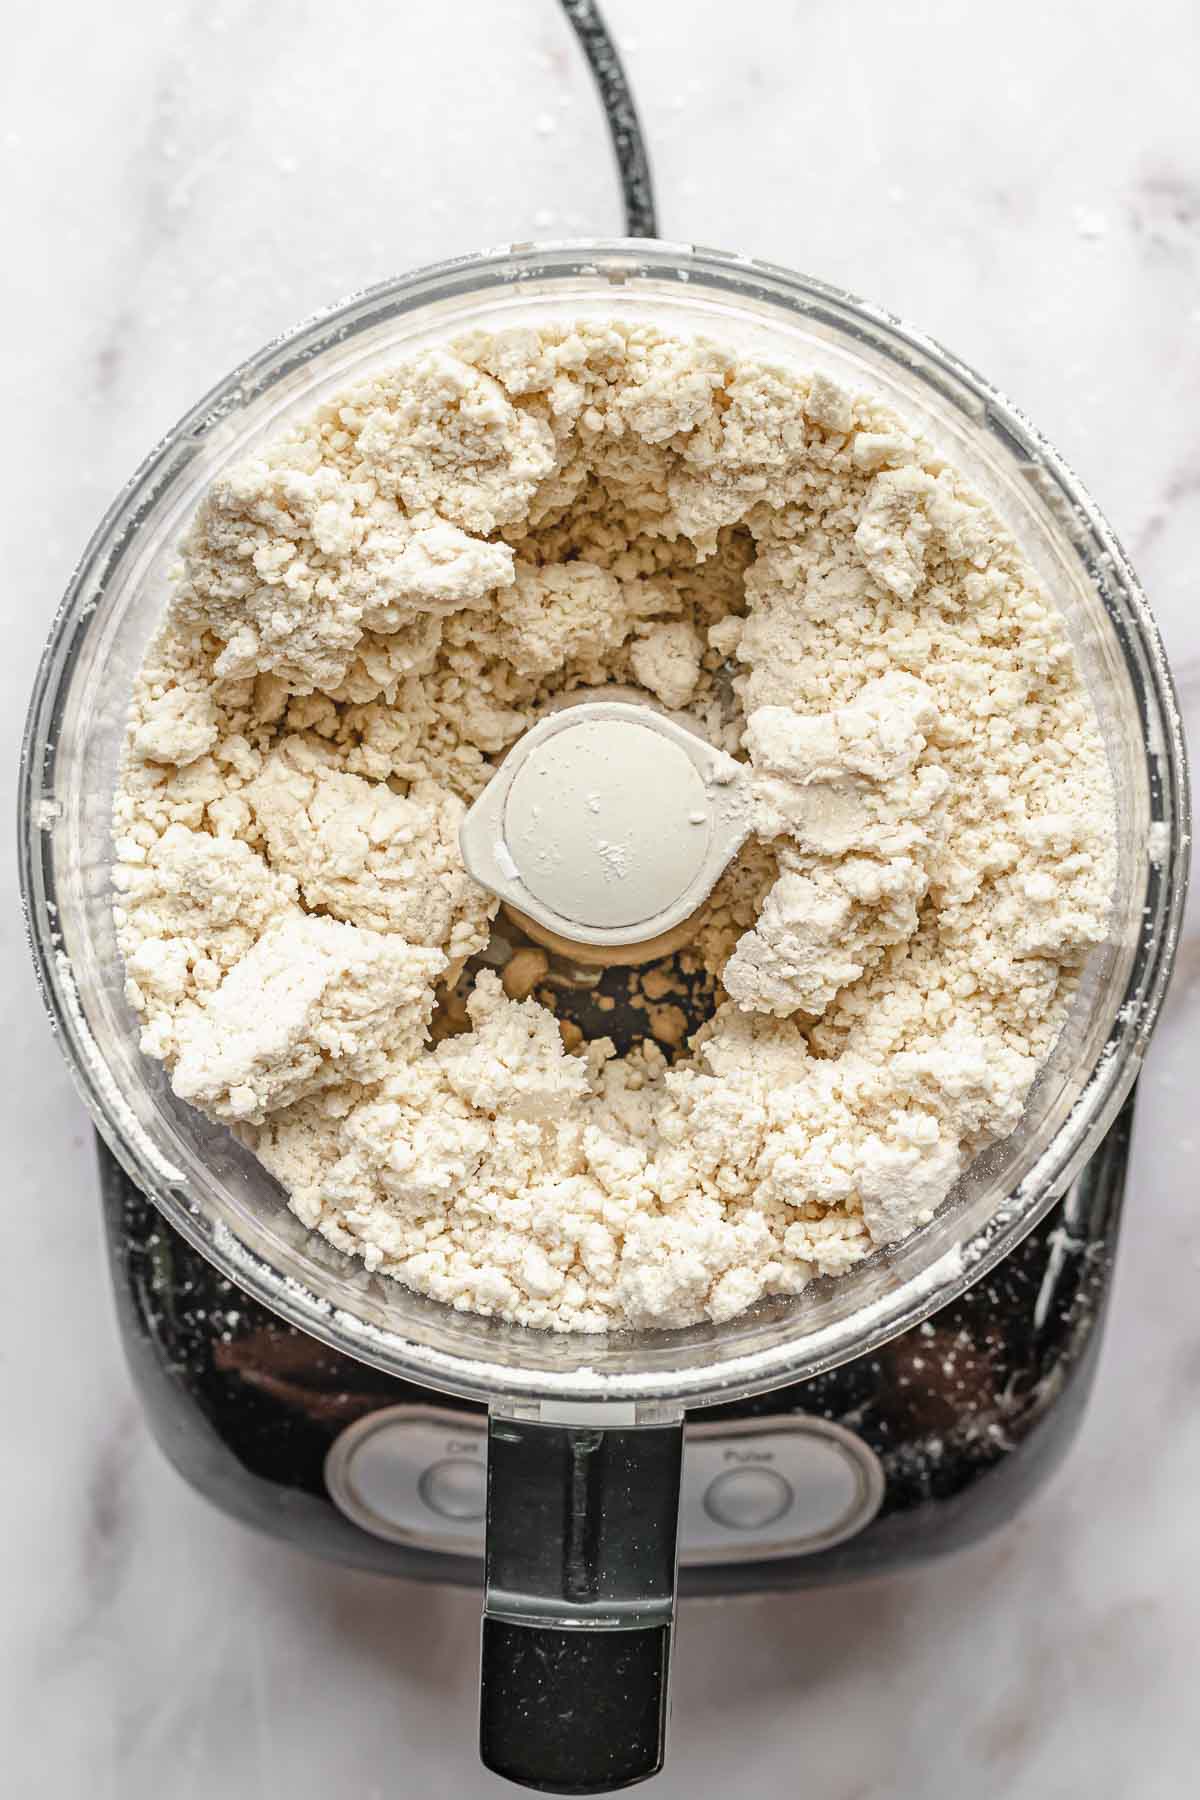
Four: Continue pulsing until crumbles form. Do not allow the mixture to form a ball.
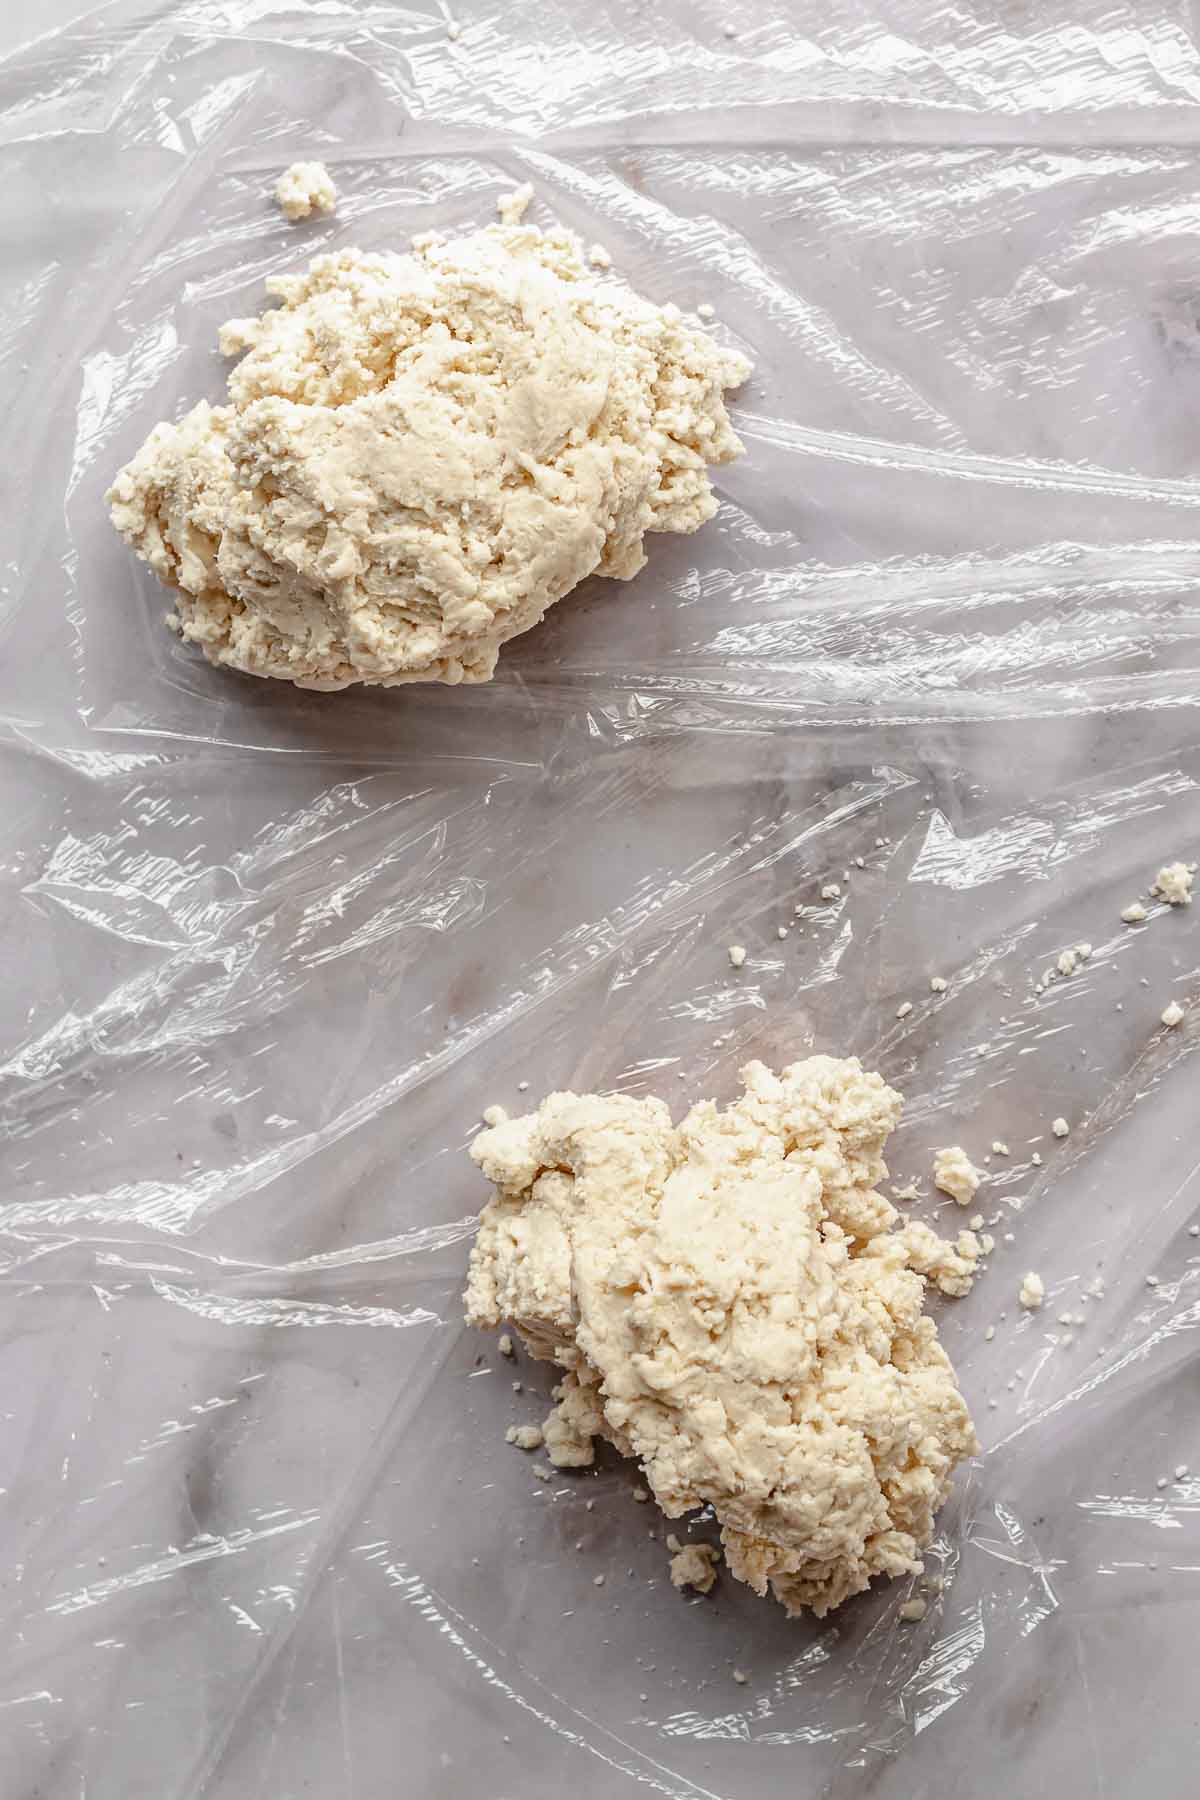
Five: Split the dough in half and place each piece onto a sheet of plastic wrap and wrap it up so no air can get in.
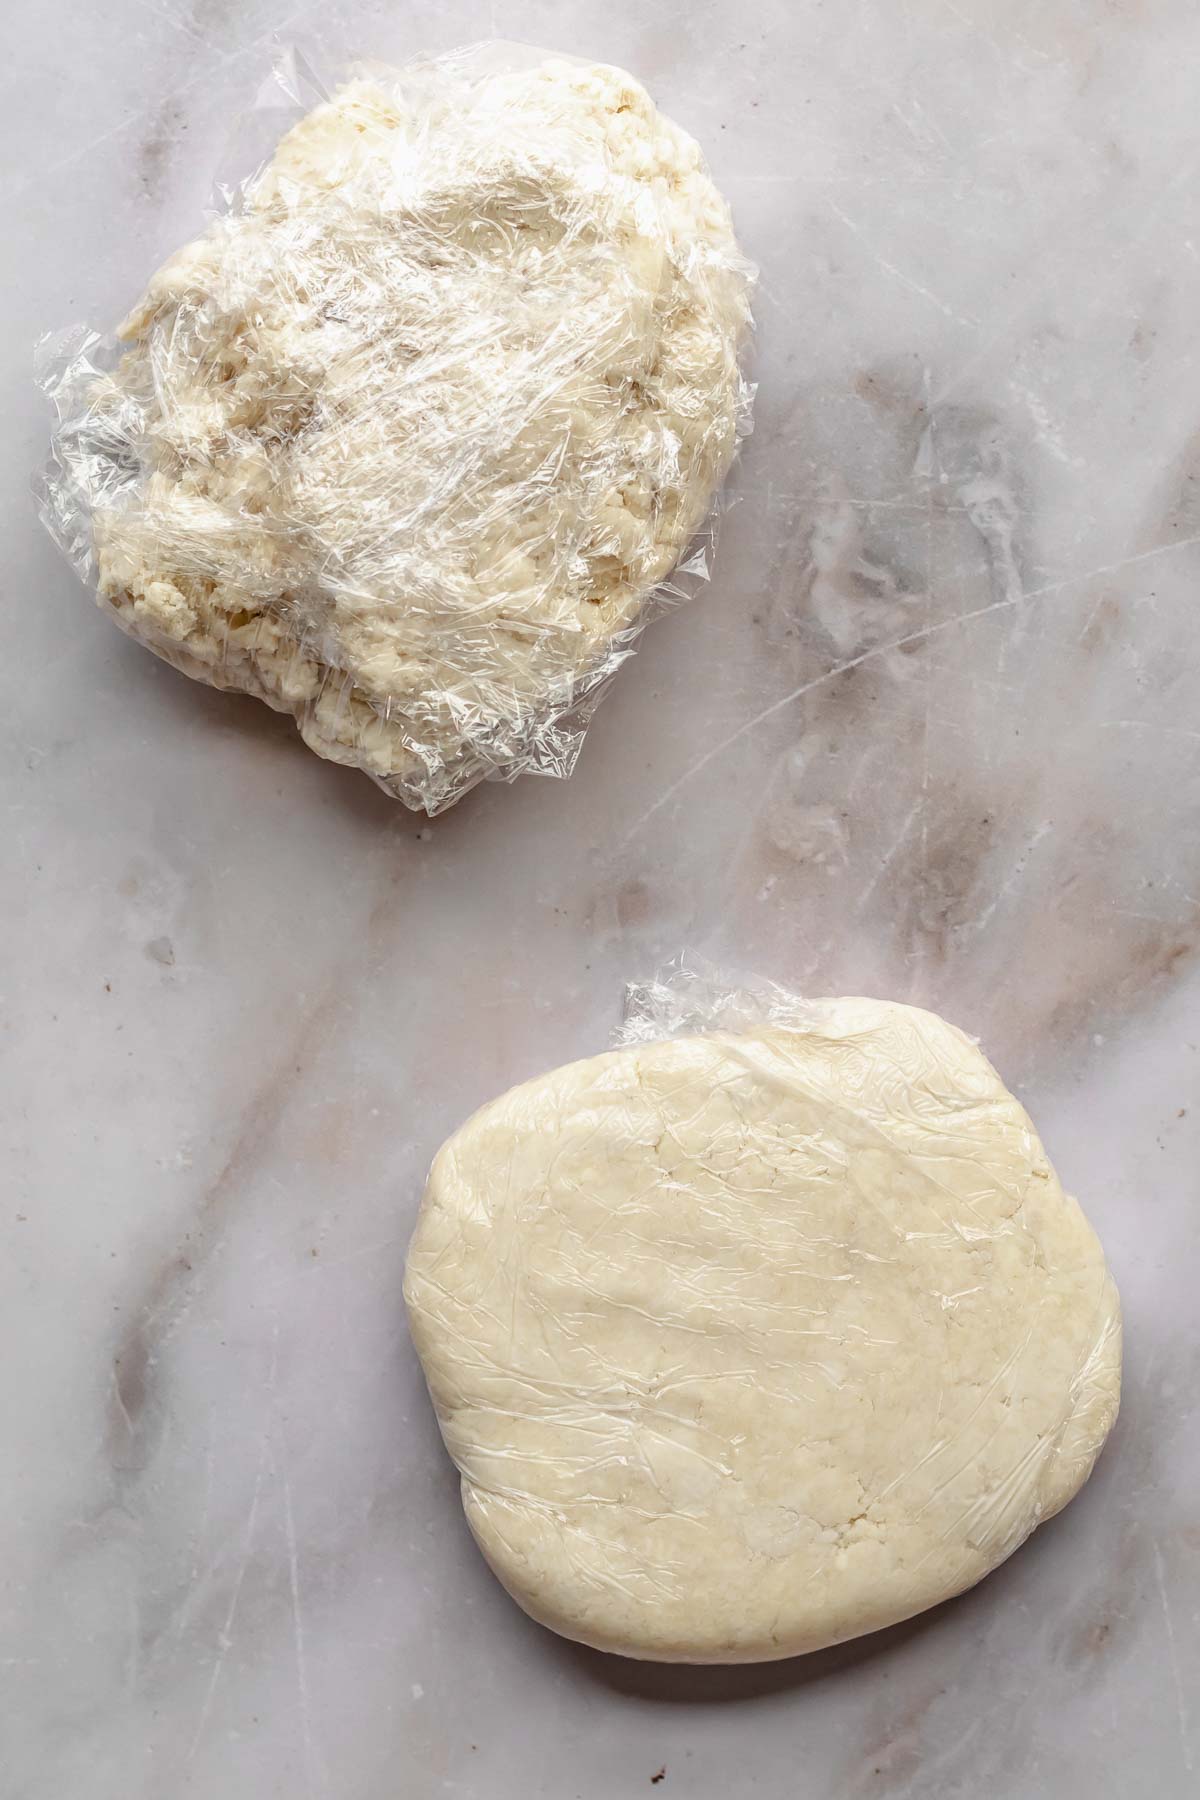
Six: Flatten each piece of dough into a disc. Use a rolling pin to remove all cracks.
Hot tip! Allow the dough to hydrate in the fridge for at least two hours. Overnight or a full 24 hours is best.
Rolling Out the Pie Dough
Once the dough has been in the fridge for at least 2 hours, remove it and allow it to sit at room temperature for about 15 minutes to take the chill off. This helps to prevent the crust from cracking too much.
Lightly flour your work surface and rolling pin, then press the rolling pin into the dough three times (top, middle, bottom) to make a slight indent to get you going.
Using even pressure, roll forward and backward a few times, turn the dough a quarter turn, and continue the process. Add a dusting of flour anywhere you feel the dough sticking to the counter or rolling pin during this process. Try to keep the dough as round as possible during this process, and keep it an even thickness.
If cracks begin to form, push the edges together with your hands, then continue rolling. Note this could also mean you are applying too much pressure.
Once the dough reaches about ⅛" thick and 2-3 inches wider than the pie plate, roll it over itself on the rolling pin (brushing off any excess flour as you roll it on the pin), set it over one side of the pie dish, then unroll the dough over top.
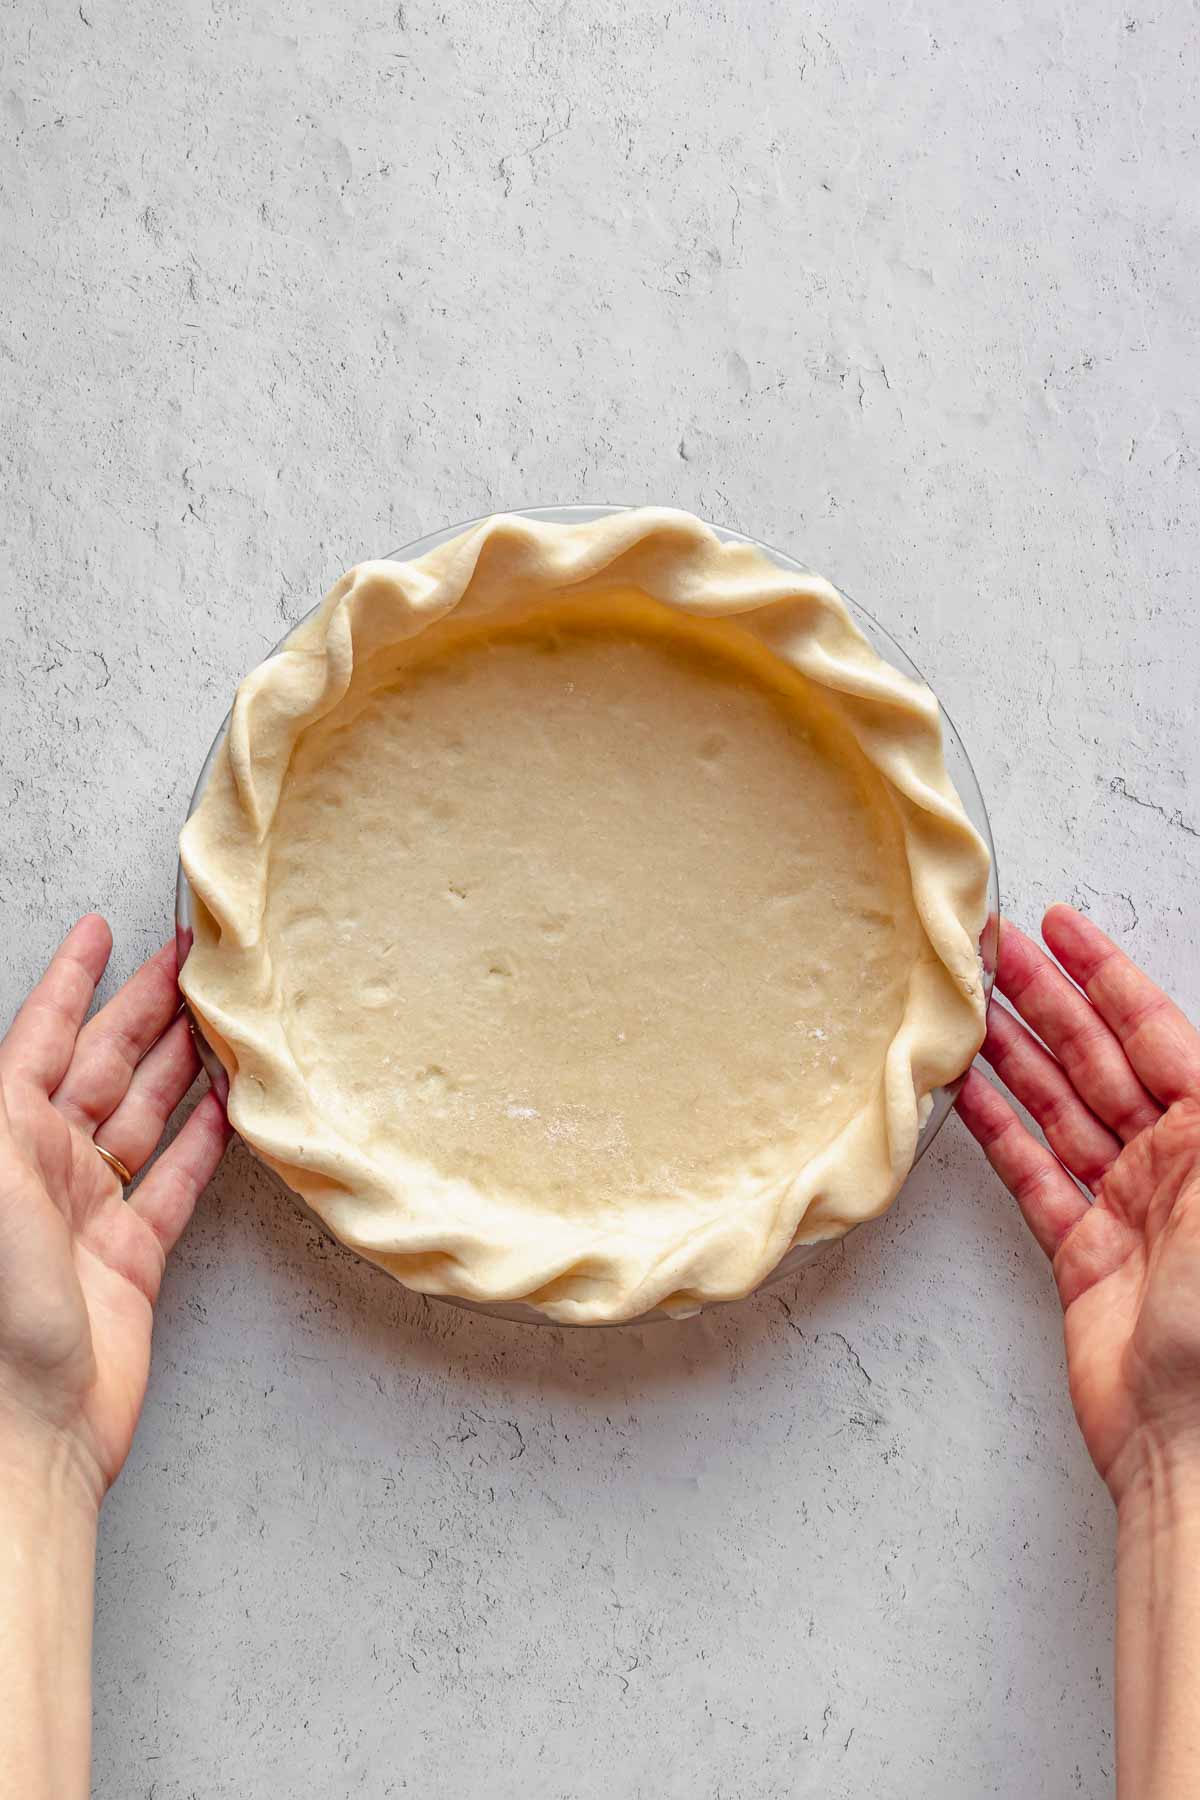
How to Set the Pie Crust
Watch how to set a pie crust for live version.
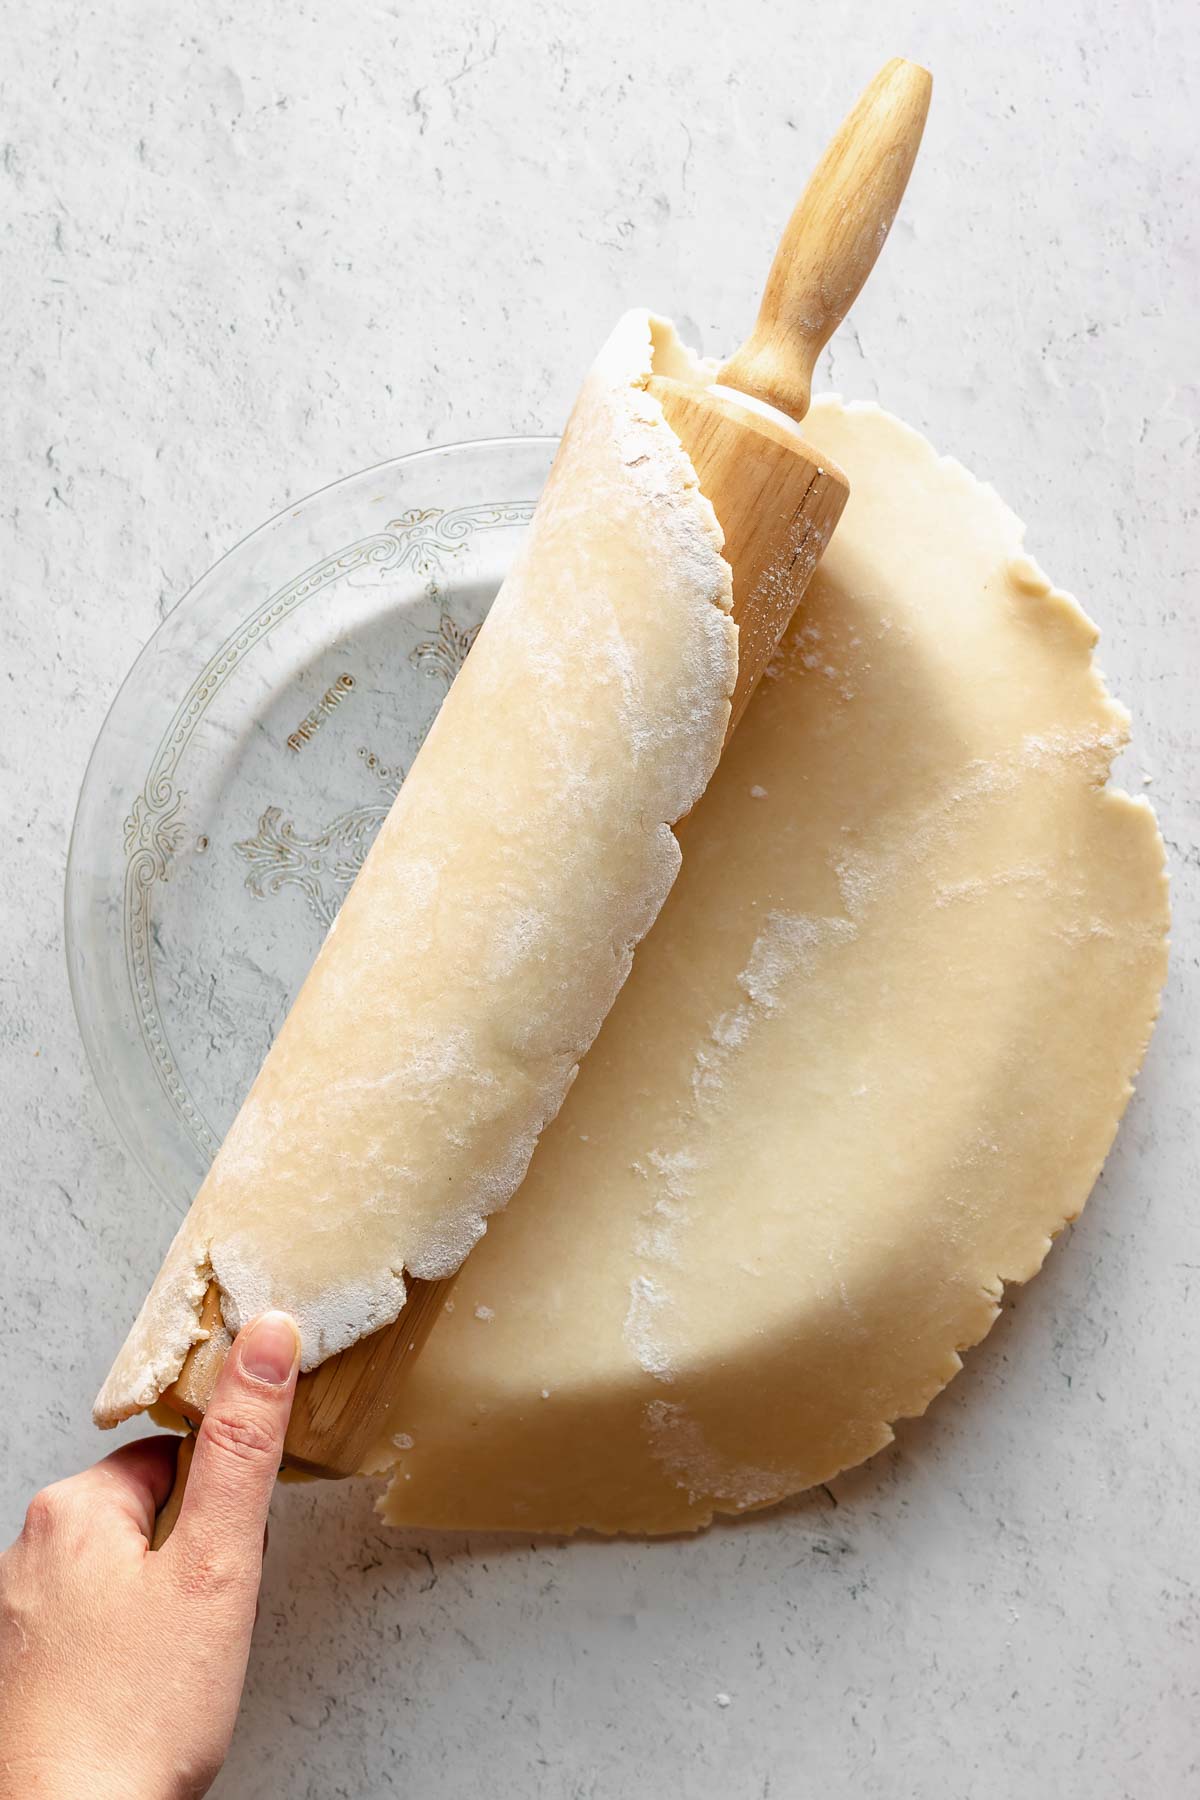
One: Roll out the dough to ⅛" thick and 2-3 inches wider than the pie dish. Roll the dough onto the rolling pin and transfer it to the pie plate.
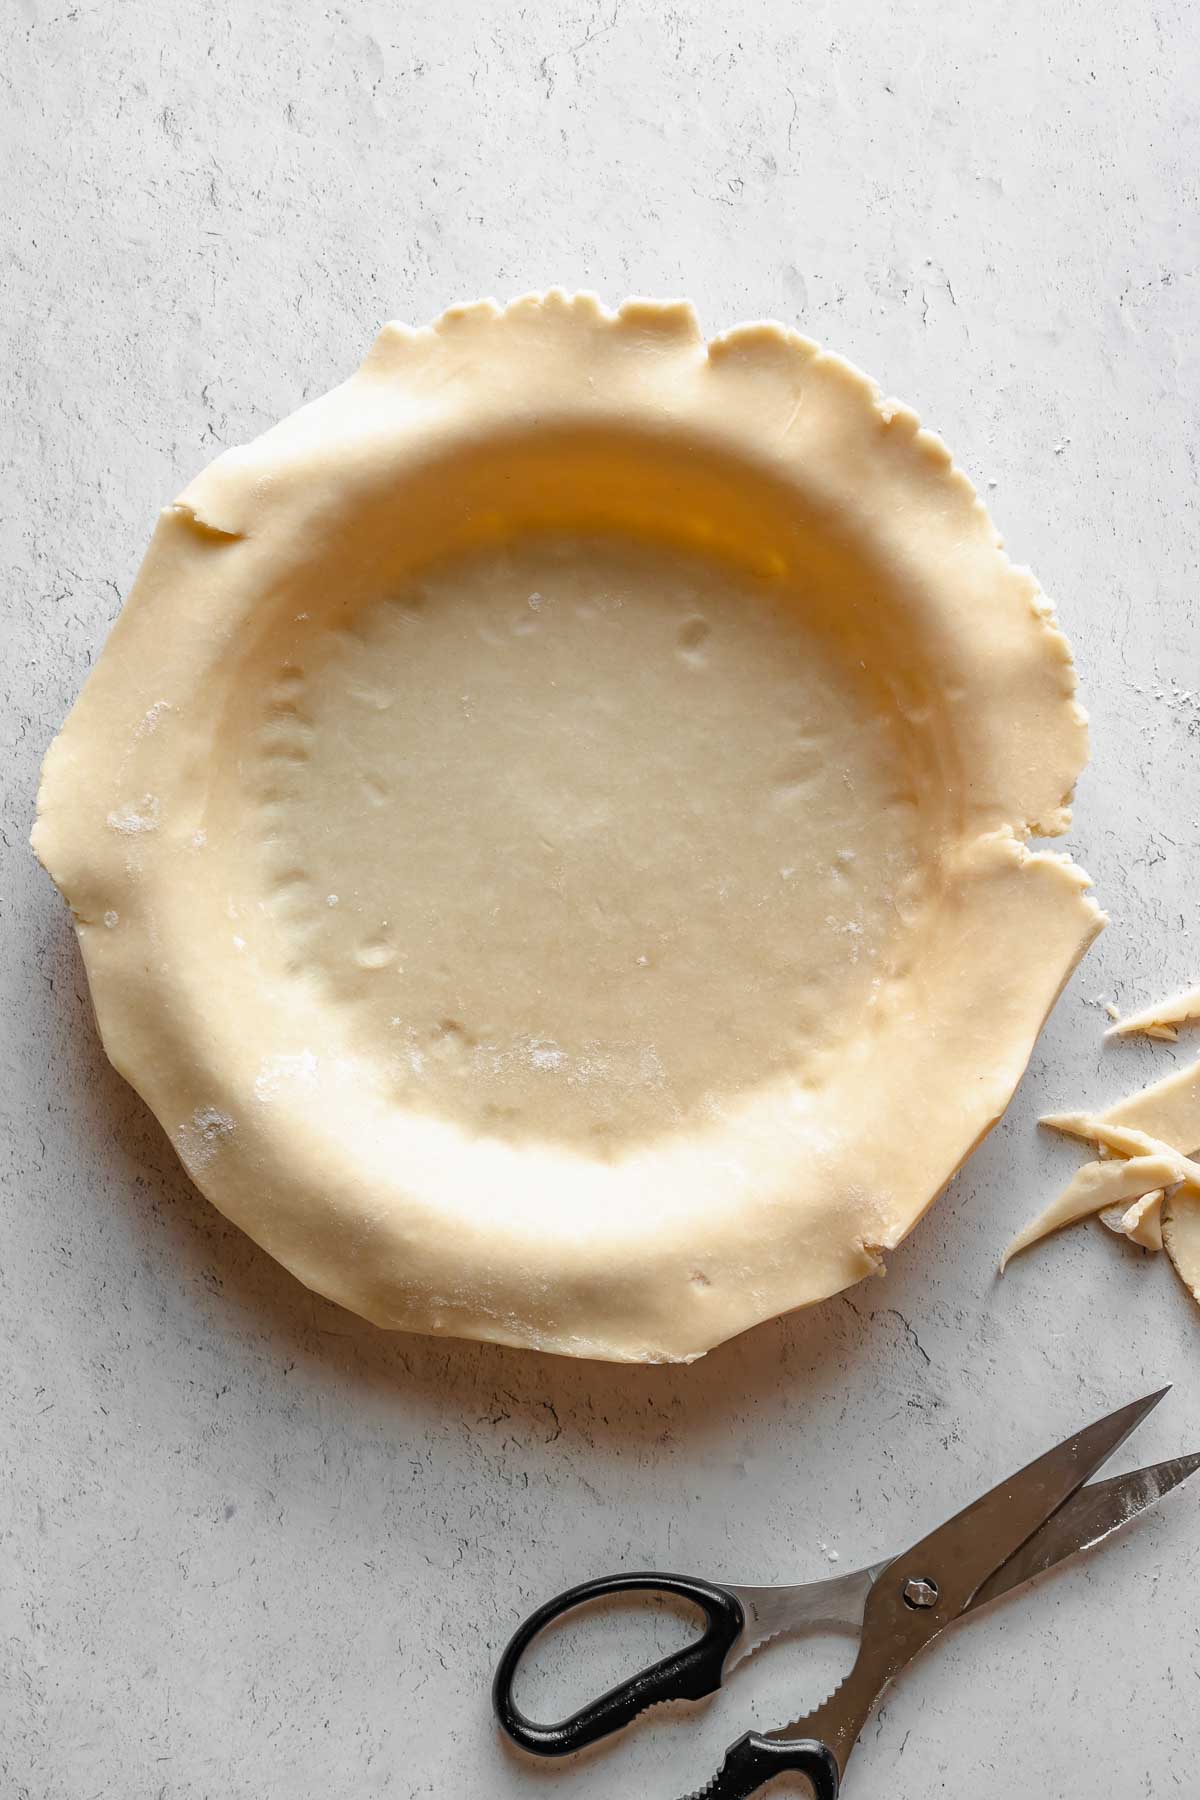
Two: Press the crust into the edges of the pan, then trim off the edges with kitchen shears, leaving 1 inch of dough hanging over.
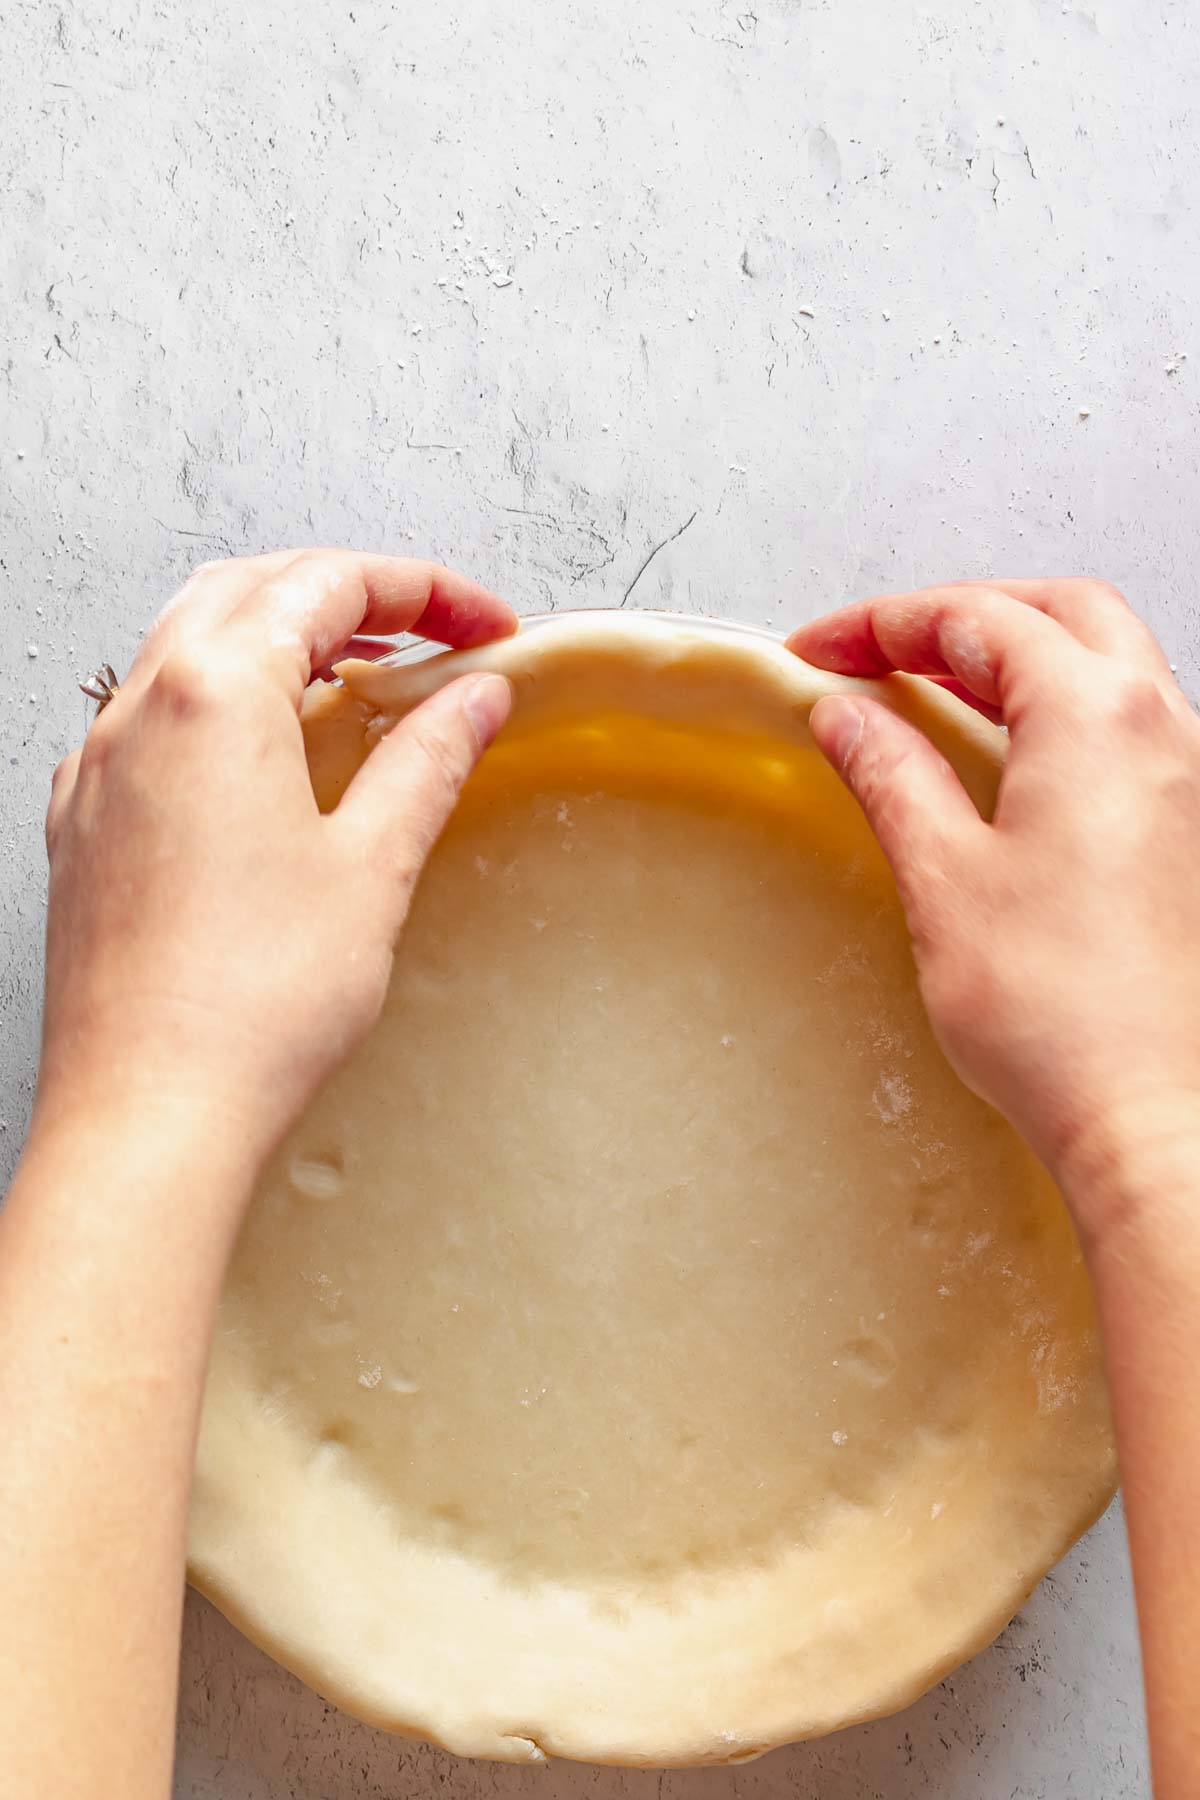
Three: Fold the excess dough inwards underneath the crust and in between the crust and the pan.

Four: Crimp the edges of the dough into the desired design. Freeze the crust for at least 15 minutes.
Blind Baking vs Par Baking
These use the same technique, however, the baking time for each is slightly different, with blind baking requiring a longer bake time. When you use each of these techniques is dependent on the type of pie you're making.
- Par-baked crusts: This partially baked crust is used when you're going to fill the pie, then continue baking it. This is used for things like custard pies (e.g. pumpkin pie), apple butter pie, sweet potato pie, maple bourbon pecan pie, honey chess pie, and savory pies like smoked salmon quiche and ham and Swiss quiche.
- Blind baked crusts: these are used in recipes that have a no-bake filling and need to have a fully baked crust prior to filling and eating. This method is used in my banoffee cream pie and mini lemon meringue tarts.
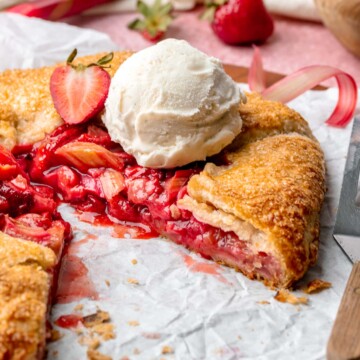
- Fruit pies are typically not par-baked in any capacity, because they require a longer bake time and it gives the crust time to fully cook during the process. This method is used with my dutch caramel apple pie, strawberry rhubarb tartlets, peach frangipane galette, and classic cherry pie.
How to Par-Bake Pie Crust
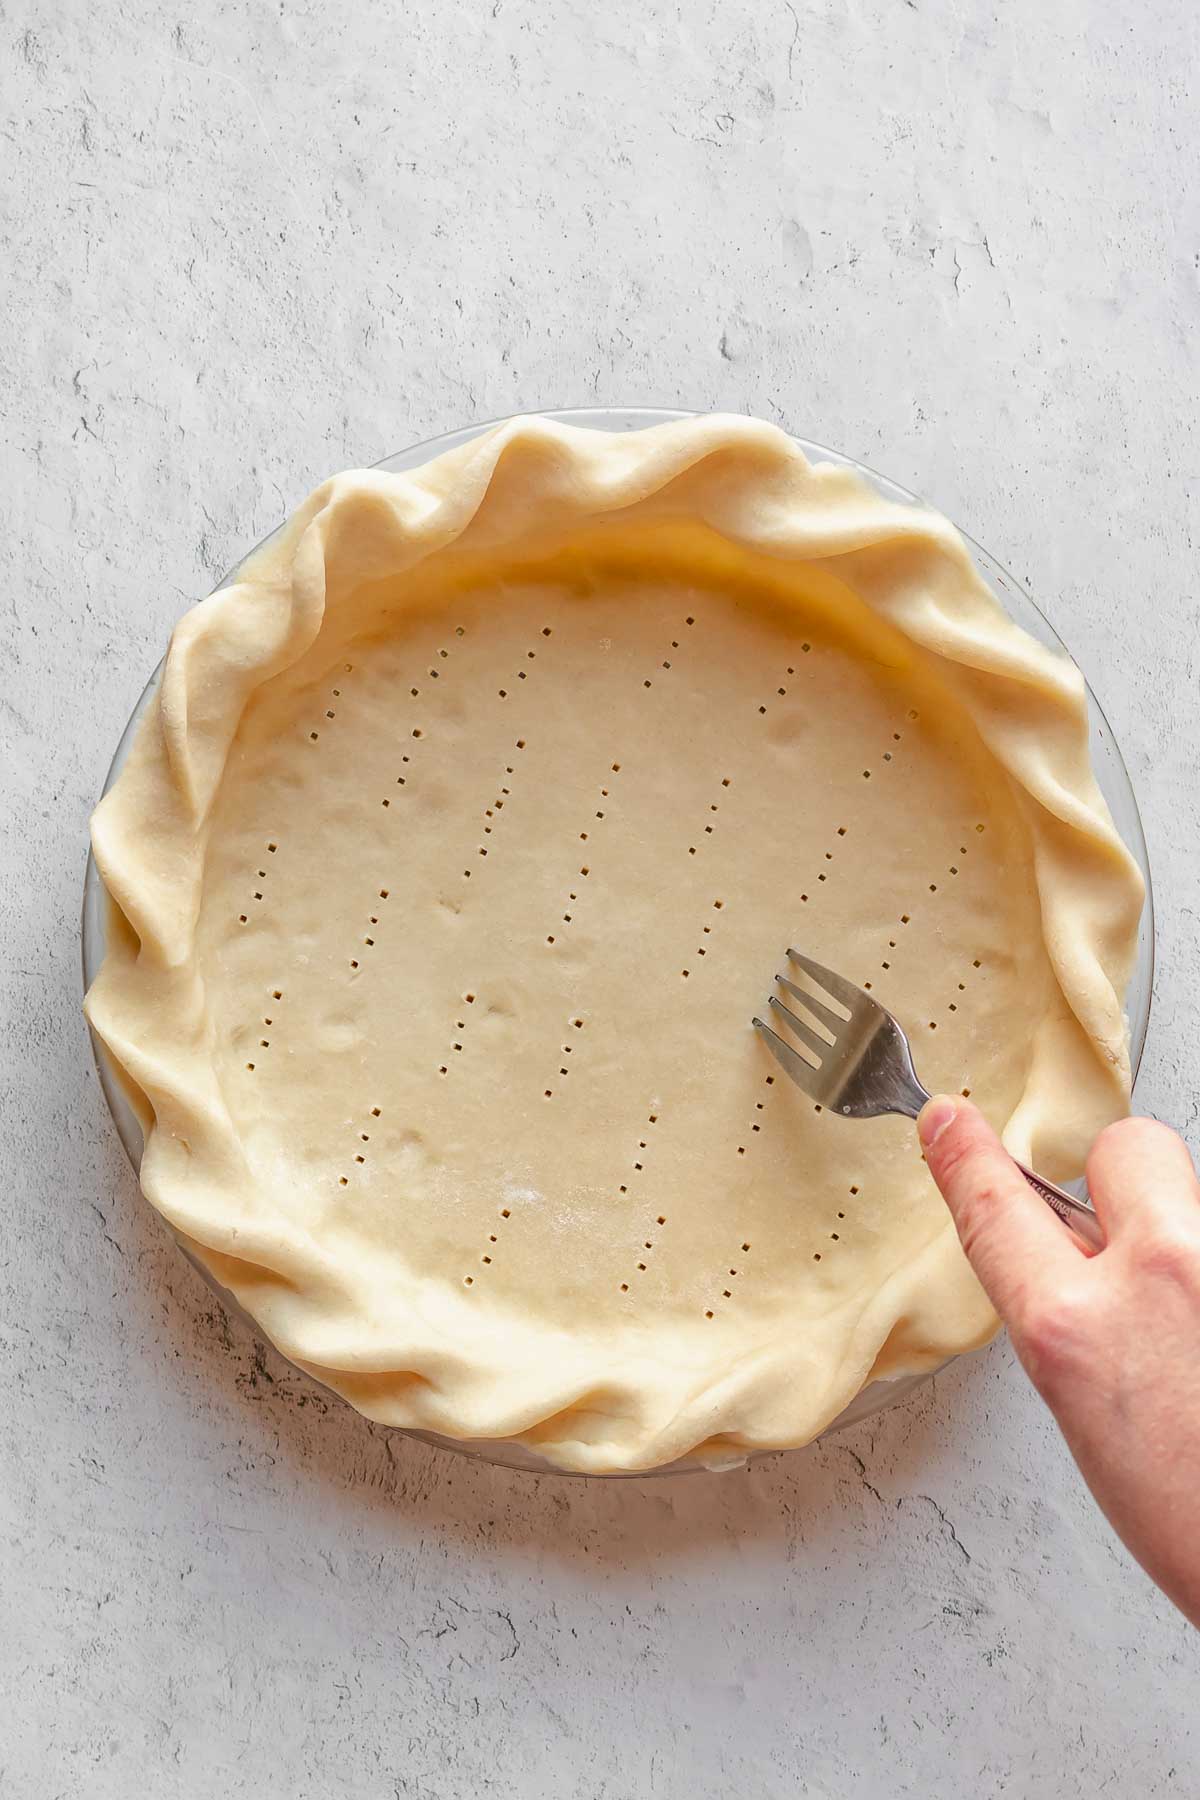
One: Dock the bottom and sides of the crust with the tines of a fork.

Two: Tightly crumble up a piece of parchment paper.
💌 Save This Recipe
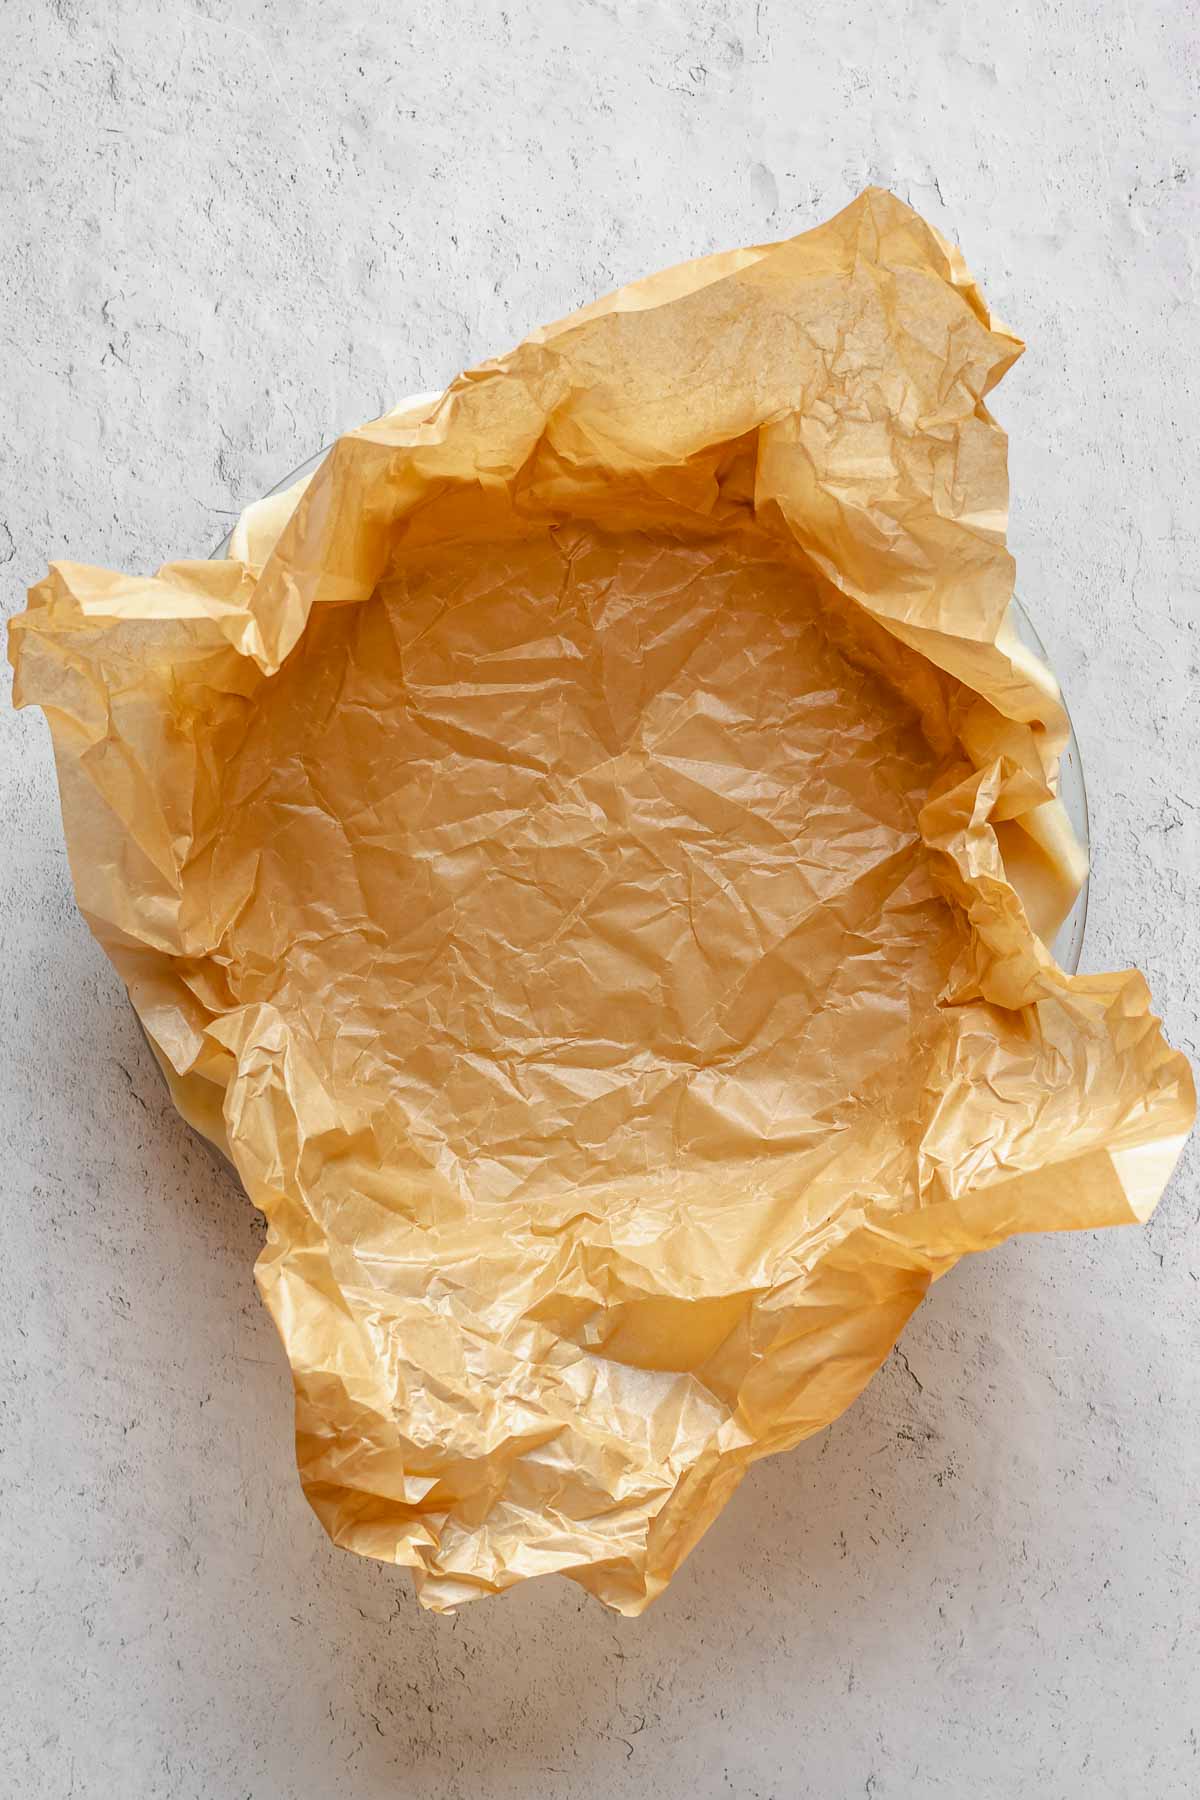
Three: Unravel the parchment paper and open it and press it into the pie crust.
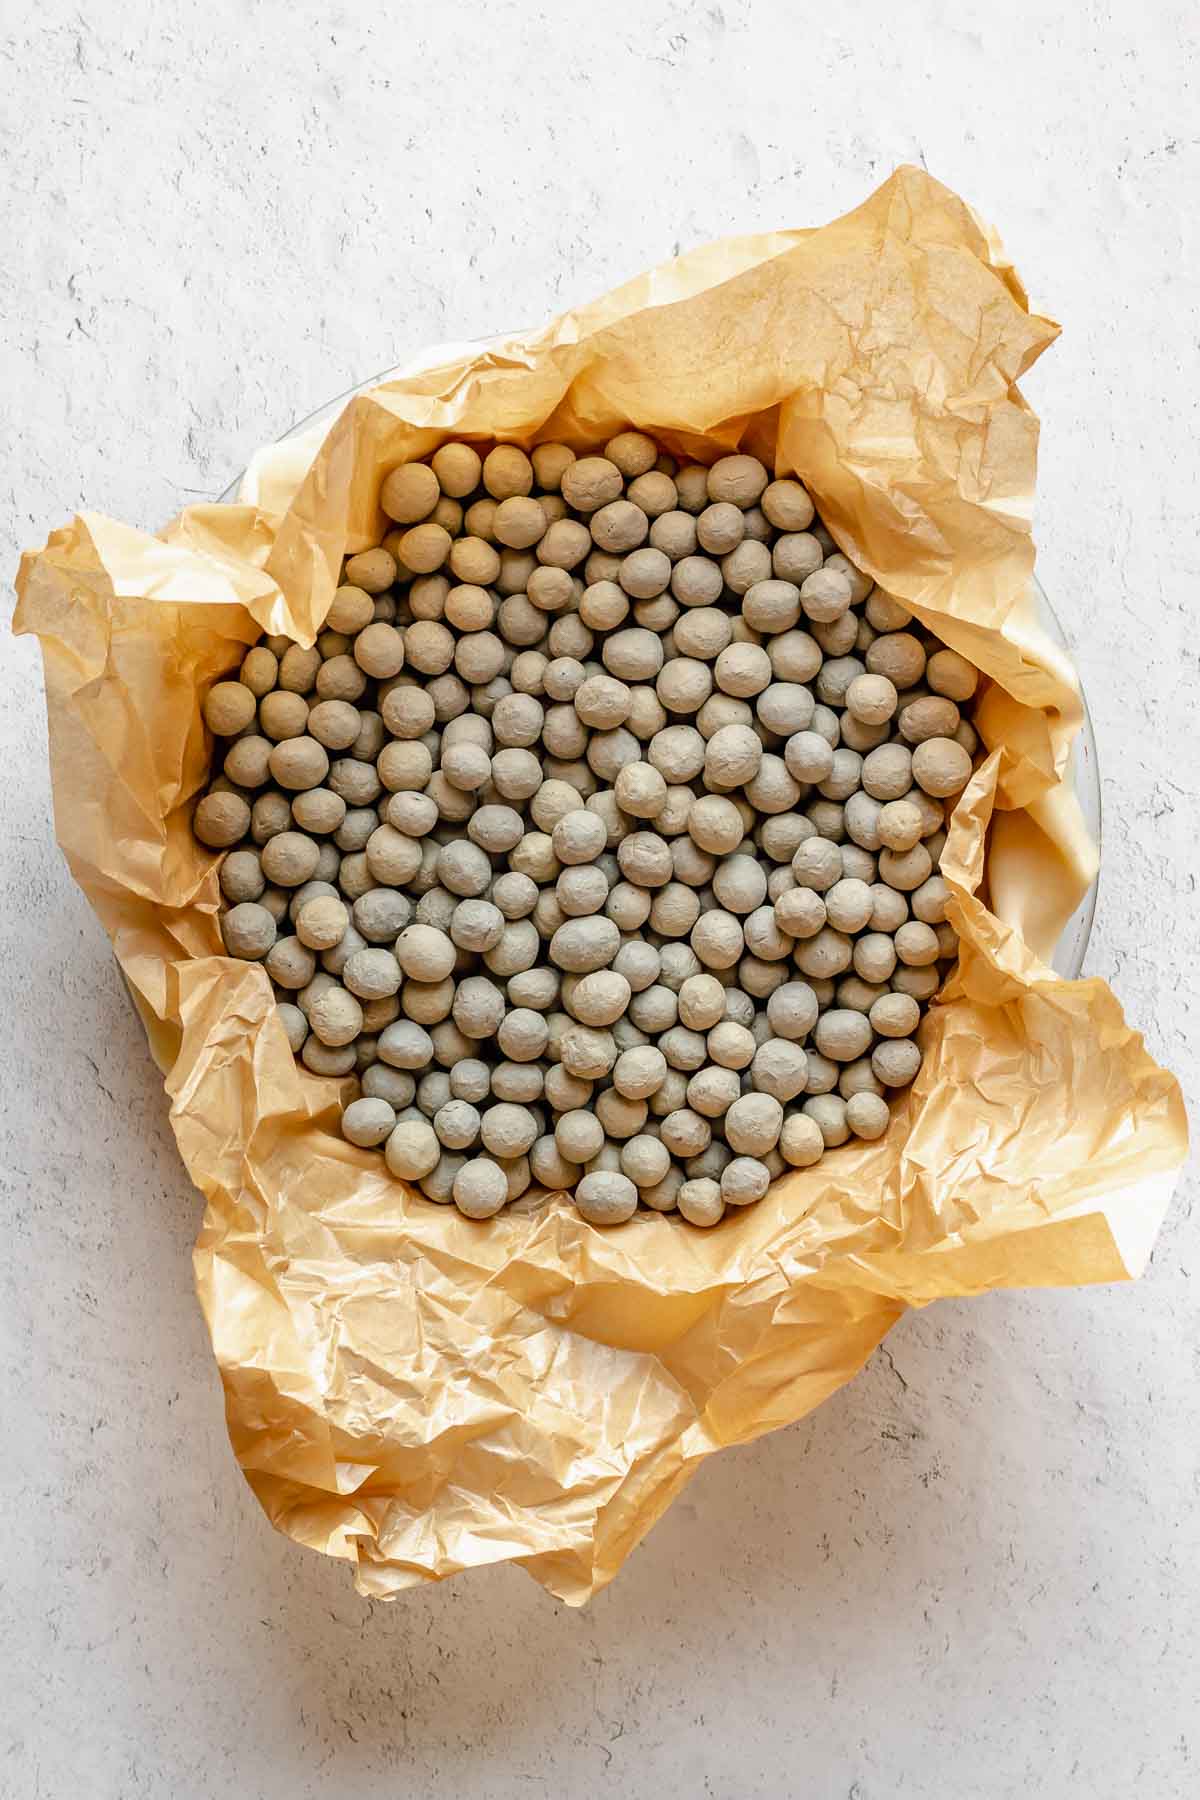
Four: Fill the crust completely with pie weights (or dried rice and beans), pushing it into the sides.
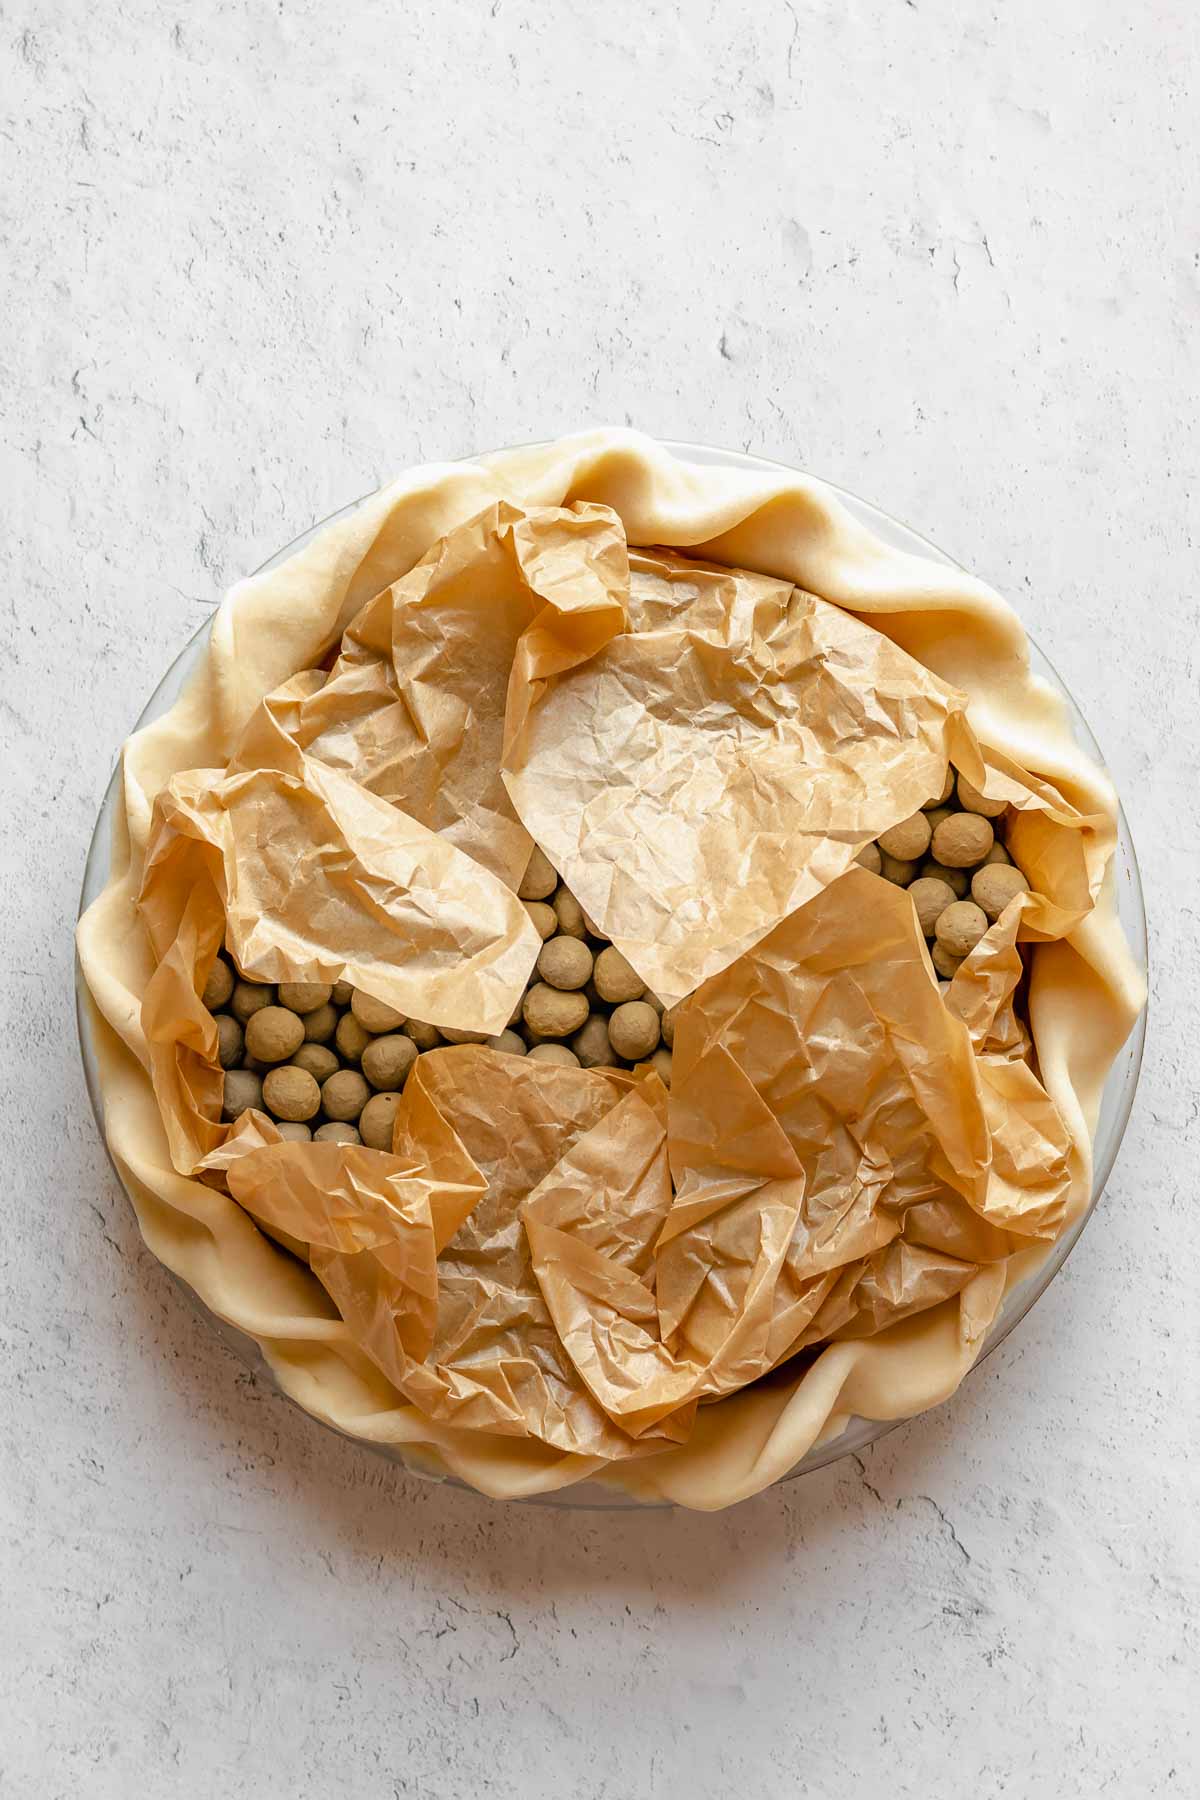
Five: Fold the parchment paper inwards so it doesn't bake into the crimped edges. Bake for 15 minutes, then remove the weights and parchment.
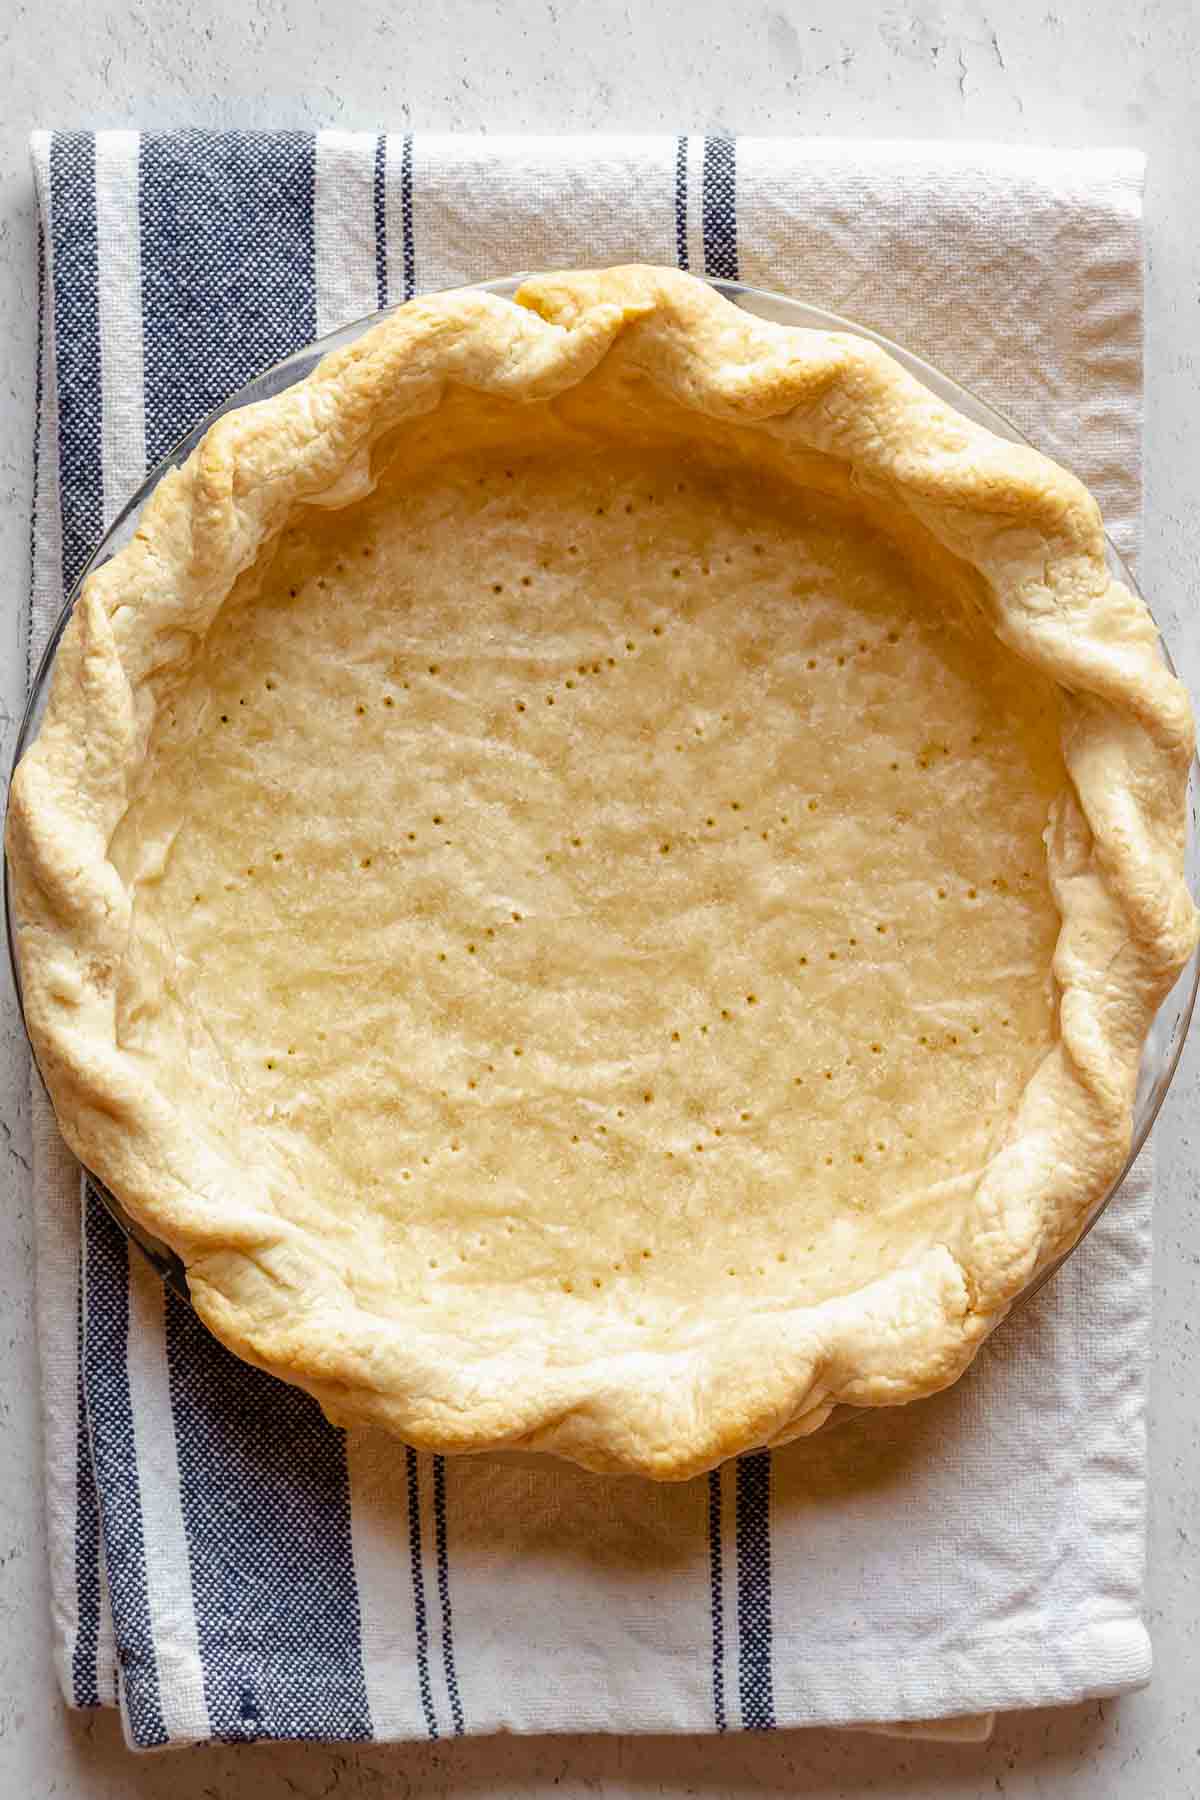
Six: Bake the crust for another few minutes. The bottom will still have wet spots, but the edges and crust will be slightly browned and set.
The pie is now par-baked and ready for filling and final baking.
How to Blind Bake a Pie Crust
Watch this video about the difference between par-baking and blind baking a pie crust.
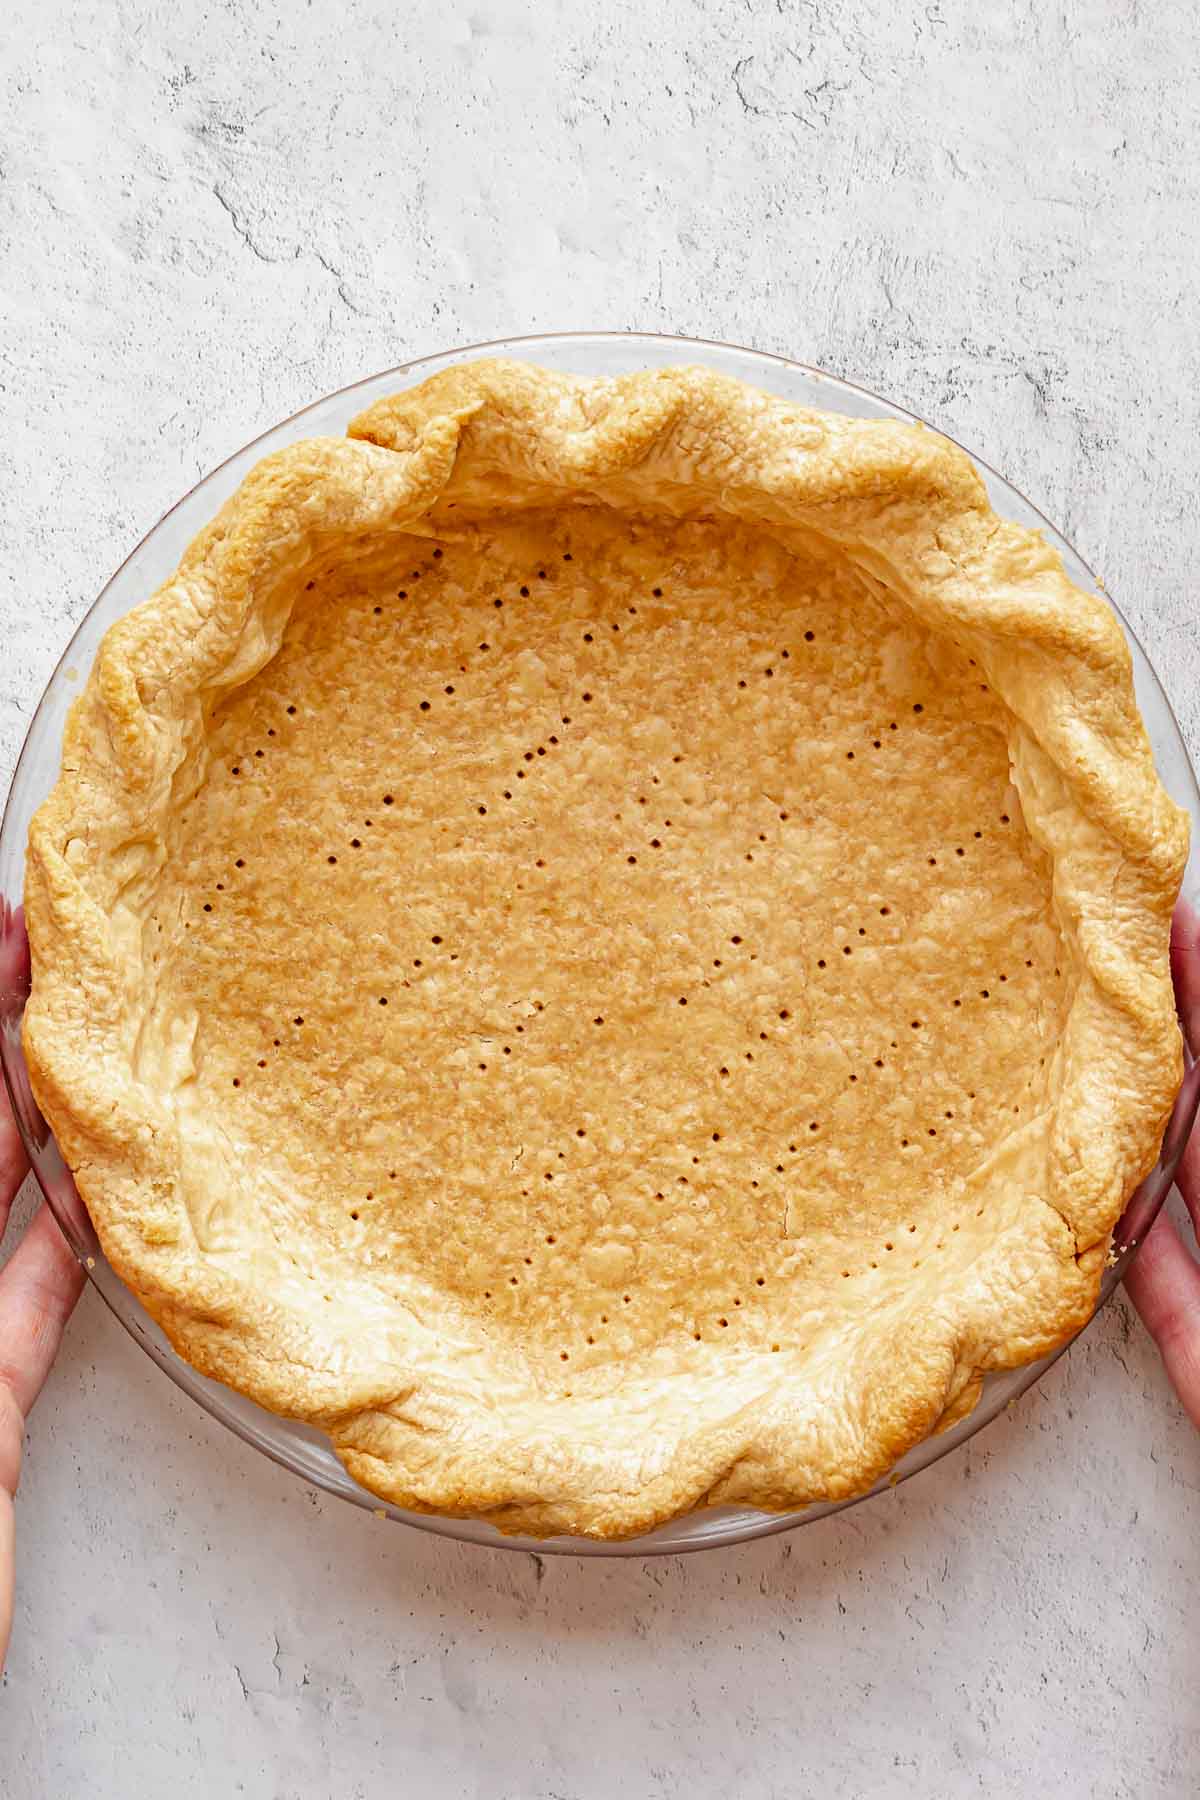
Follow all the same steps for par-baking, adding extra bake time after the weights are removed until no wet spots remain and the crust is fully baked and golden on the edges and bottom.
The pie is now fully baked and can be filled with no bake fillings according to any recipe instructions.
How to Make Pie Crust By Hand
If you don't have a food processor, you can absolutely make this crust by hand! The next easiest way is to use a pastry cutter, pressing down and turning until the butter pieces are cut into pea-sized pieces.
If you don't have a pastry cutter, you can also flatten the butter cubes with your thumbs and forefingers, then continue rubbing the butter into the flour until it forms a sandy texture.
Because this part of the process takes a bit longer by hand, once the butter gets broken down, place the entire bowl in the freezer for about 15 minutes to get the butter cold again.
From this point, drizzle the water (leaving one tablespoon left) around the flour and use a spatula or wooden spoon to mix it together until moistened.
Use your hands to push everything together into a large ball. If it does not hold into a ball, drizzle in a teaspoon of water at a time into the dry areas until it comes together.
Split the mixture into two, wrap in plastic, and refrigerate for at least 2 hours, then roll out and use according to recipe instructions.
Expert Tips
- It's best to make the dough 24 hours ahead to allow the dough to fully hydrate, but at least two hours is required.
- The colder the ingredients and dough, the better the results. Freezing the pie crust for at least 15 minutes minimum prior to any baking is best, but 12-24 hours is even better!
- Fill the pie crust completely with pie weights (or dried rice or beans) and press it fully into the sides. This will prevent the crust from slouching. If using dried goods, don't eat them afterward, but store them as your new, reusable, pie weights.
- Use any of these crimping techniques for an awesome, decorative pie crust!
Pie Crust Troubleshooting
How do I stop my pie crust from shrinking?
First, you want to make sure the dough can rest in the pan for about 15 minutes to allow the gluten strands to relax, otherwise, it will seize up during baking and shrink.
Second, you'll want to be sure the pie crust is very cold and even frozen prior to baking. I ensure my crust is frozen for at least fifteen minutes before beginning the baking process.
How do I stop my pie crust from slouching?
Being sure the crust is completely cold or frozen, and also using pie weights. The addition of pie weights during the par-baking process is what helps to keep the sides in tact. Without the weights, the crust will surely slouch and fall.
Be sure the pie is completely filled to the top with weights, and also give it a little push out to the edges to make sure it's set evenly in there.
Why did my crust lose its crimp during baking?
This is because the crust is not cold enough. Be sure to give the set and crimped crust at least one hour in the fridge, or 15 minutes in the freezer prior to baking to keep the best crimp shape.
Why did the bottom of my crust puff up after removing the pie weights?
This can happen if you didn't dock the bottom of the pie enough, but even so, can still occur after removing the weights. Keep an eye on the pie during the additional baking time, and simply use a fork or the tip of a parking knife to pierce the areas that are puffing up.
This will release the steam and pressure and allow the crust to fall back into place.
Recipe FAQs
All-purpose flour is best. You don't want anything with too high of a protein percentage (like bread flour). All-purpose has the perfect amount of protein to yield a tender, flaky crust.
This is a personal preference, but pie crust made with butter will yield a much more flavorful crust, as Crisco or shortening does not have any flavor. However, a crust made with shortening can be better for pies that need to be fully blind baked, as they don't "stale" as quickly.
Metal pie dishes conduct heat best, and most evenly and will typically produce the best crust. However, baking with a glass pan also produces wonderful results and is great for beginners, as you can check the bottom of the crust to see how brown it is, and if it's done.
Storing Pie Crust
Pie dough discs - keep wrapped in plastic wrap, then add the discs of dough to a zip top bag. Refrigerate for 3 days, or freeze for up to two months. Allow the frozen discs to thaw in the fridge, then roll out.
Pie dough in pie plate - set the pie dough in the pie plate, then wrap with plastic wrap and refrigerate for 3 days, or freeze for up to two months. Bake the pie crust directly from frozen (unwrapped).
Note that if you are planning to freeze your assembled crust in the plate for more than 15 minutes before baking, you'll want to use a metal dish. Glass and ceramic dishes can crack in the oven when going from very cold to very hot.
Par-baked crust - store at room temperature, lightly tented with foil, for 2 days. Alternatively, store in the fridge, lightly covered with foil, for 5 days.
Blind-baked crust - store at room temperature, lightly covered with foil, for three days. Alternatively, store in the fridge, lightly covered with foil, for 5 days.
Pie Recipes with All-Butter Pie Crust

Did you make this recipe? Share it with us! Tag @thecozyplum on Instagram & Facebook and leave a star rating ⭐️ below!
📖Recipe

All-Butter Pie Crust
Equipment
- 9" pie plate
- Pie weights, or dried beans/rice
Ingredients
- 3¼ cups all-purpose flour 390g
- 1 cup + 6 tablespoons unsalted butter, cold 311g
- 1 teaspoon kosher salt
- ⅔ cup water ice, cold 5.3oz
- 1 egg for egg wash optional
Instructions
- Cut the cold butter into ½” cubes and place in the freezer for about 15 minutes while you prepare the other ingredients.
- In a bowl, add about a cup of water and a handful of ice cubes and set aside.
- Add the flour and salt to a food processor and pulse once to incorporate the salt.
- Disperse the cold butter cubes around the flour in the food processor, then pulse the mixture until the butter reaches pea-sized pieces and looks slightly textured, almost like wet sand.
- Measure out ⅔ cup ice cold water (sans ice cubes) and drizzle it through the chute while pulsing (leave one tablespoon remaining). Continue pulsing until the dough just starts to form shaggy crumbles, adding the last tablespoon of water only if the dough looks extra dry. Don't let the dough turn into a ball in the processor. The dough will easily press together in between your fingers, but should NOT feel wet.
- Remove the dough, separate into two even pieces, then wrap separately in plastic wrap and flatten into a 1” thick disc. Place in the fridge for 1-2 hours until firm. Freeze the other disc of dough if not using (after the chill time).
- Once chilled, remove from the fridge and wait about 15 minutes to take the chill off the dough. This will help you roll out your dough without it cracking. Lightly flour your rolling pin and work surface, then roll out the dough, turning a quarter turn every few rolls to keep it round and even.
- Roll the dough until it’s about ⅛” thick and is at least 2 inches wider than your pie dish. Continue to lightly flour your surface and pin anytime the dough begins to stick.
- Carefully transfer the dough to a pie dish, pressing it into place on the bottom and sides (there will be overhang), and trim the edges with kitchen shears so they’re even and about 1” wider than the dish.
- Fold the sides underneath the crust so the fold meets the edge, then crimp. Follow any recipe instructions of how to fill or bake from here.
Par Baking
- To par bake the crust, freeze the crust for 15 minutes, then dock with a fork all over. Add a piece of parchment paper to the inside and fill completely with pie weights or dried rice/beans. If using egg wash, brush the edges of the crust with a beaten egg. Bake in a preheated 375℉ oven for 15-20 minutes, then remove the weights and parchment and finish baking according to the recipe.
Blind Baking
- To blind bake, follow the same instructions as above, remove the weights and parchment paper at the 20 minute mark, then return to the oven another 10-15 minutes until golden. If you want a very golden edge, you can add another round of egg wash. For a fully blind baked crust, there should not be any moist spots showing on the bottom of the crust. If the crust still appears to have moist spots, continue baking.
Video
Notes
- It's best to make the dough 24 hours ahead to allow the dough to fully hydrate.
- The colder the ingredients and dough, the better the results. Freezing the pie crust for at least 15 minutes minimum prior to any baking is best.
- Fill the pie crust completely with pie weights (or dried rice or beans) and press it fully into the sides. This will prevent the crust from slouching. If using dried goods, don't eat them afterward, but store them as your new, reusable, pie weights.
DIAN says
Can I make the peanut crumbs the night before I make the pie?
Callan Wenner says
Hey there! This should be fine for the amish peanut butter pie - you can store it at room temp (just be sure to tightly cover it)!
Liz says
I'm someone who always defaults to store-bought pie crusts with homemade pie fillings, but this post makes pie crust feel so simple and approachable. There are so many details for any question that I could possibly have and the step by step instructions are a perfect guide. I might start making pie crusts instead of buying them from now on! Plus, it's really fun to crimp the edges and try different patterns! Thank you, Callan!!
Callan Wenner says
This makes me SO incredibly happy and I love that you're thinking of making your own when time allows. Woo!
Ed says
Hello! Can I make this dough on a blender like a Kitchen Aid ? Or is necessarily doin it with my hands the problem is that I don’t have a food processor. And it’s my first time doing this recipe. Thanks!
Callan Wenner says
Hi Ed, I've never tried with a blender... I think it could work, though! Just be sure not to overwork the dough. I'd probably try adding half of the water into the blender and seeing how it does. You may need to transfer the dough to a bowl then add the second half of the water and finish tossing it in by hand (or with a pastry blender). Alternatively, you could just do it by hand with a pastry blender! Let me know how it goes!
Pam says
Love the « how to » tutorials as well as the recipe itself!
Thank you!!
Avery says
Made this recipe for an apple pie with a lattice top and it worked great! The smoothest, softest and easiest dough to roll out. Plus it was delicious to eat. And it worked great with non-dairy butter.
My food processor must be on the small size because it barely contained the dough so I ended up kneading it a cutting board to get it to come together, but it was really easy and quick. Will use again!
Callan Wenner says
Hi Avery, great news! So good to hear on the non-dairy butter, too. Good call on the pivot for the food processor - I guess in the future you could have the recipe and make one disc of dough at a time!
sharon alvarenga says
This recipe truly does produce the most delicious and flaky pie crust! I generally shy away from making my own pie crusts because it seems like a lot of work but Callan makes this one so easy! It’s definitely now my go to recipe!
Callan Wenner says
Ahh this is the greatest news! You are just the best.
Ashley says
Excellent pie crust recipe! This is my go-to pie crust recipe, so flaky and delicious!
Callan Wenner says
So happy to hear this, Ashley! Appreciate it.
Jaime says
Such an easy recipe to follow! My baking usually consists of chocolate chip cookies so this was outside my comfort zone but so glad I tried it! I will be making my own pie crusts in the future for sure with this easy recipe!
The Cozy Plum says
Jaime I can't tell you how happy this makes me!! Amazing. Thanks so much for making it!
Shelby says
This will be my go to recipe for pie crust from now on! I have been terrified of pie crust in the past. I always do something wrong and have to start over and throw out. This came out perfectly! I am so happy and cannot wait to bake all the pies and treats!
The Cozy Plum says
This is the greatest review and is exactly how I want people to view pie crusts. Thanks so much for making and sharing!