This quick flaky pastry recipe, also known as rough puff pastry, creates the crunchiest layers in this cheat version of puff pastry. Made by hand, this dough can be created in 1 hour and used in place of puff pastry in any recipe!
Published 5/22/20; Republished 1/30/22
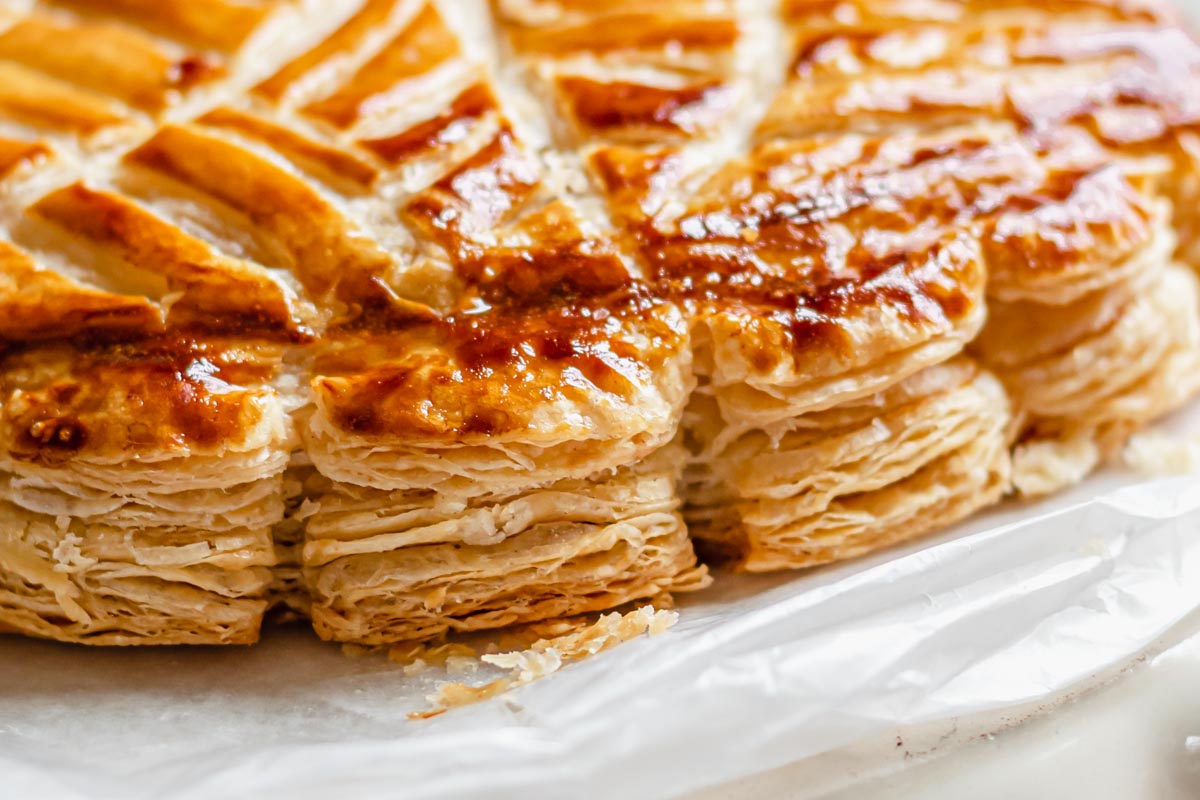
Rough puff pastry is a buttery, flaky, crunchy pastry once baked. This dough is made without yeast or eggs, and without food processor. The whole thing is made by hand! And bonus - the only ingredients are butter, flour, and water (and a bit of salt).
The process of making this dough is fun and simple — but does take a bit of time because the dough should ideally chill in between each round of folds (three total).
This can be made in a total of one hour, however, I find it best to leave yourself about 2 hours so the butter remains properly chilled. In terms of active time, it’s only about 30 minutes of actual hands-on time, which will dwindle the more you practice.
This foolproof rough puff pastry recipe shows you how easy it is to create your own incredibly quick and easy flaky pastry by hand and used for any recipe calling for puff pastry. Whether sweet or savory, this is the perfect recipe to make in place of store bought puff pastry.
What is Rough Puff Pastry?
Rough puff pastry is essentially a cheat version of puff pastry. There, I said it - we’re cheaters! It’s far less laborious, takes less time, and provides practically identical results.
In a traditional puff pastry, butter is broken down, formed into a large sheet, cooled, wrapped in dough (which has to be made separately), and only then does the folding process (3-5 folds) even begin.
In rough puff pastry, smaller pieces of butter are broken down and mixed with flour, salt and water to form a shaggy dough, and then rolled and folded three times. See? So much easier.
There are quite a few methods for creating rough puff pastry, from combining the fat and flour to the types and number of folds. I first learned this specific method from Molly J. Wilk and I've never turned back.
How the Flaky Layers are Created
A quick overview of the science behind the process... As the large pieces of butter are incorporated by folding it into the dough, multiple sheets and thin layers of butter are formed.
When the dough bakes, the butter within all the folds release steam as it melts, which makes each layer of dough rise and and creates all of the flaky layers! The butter is also the agent that crisps up the flour.
What Can You Make with Rough Puff Pastry?
My top recipe using rough puff pastry are these Fruit and Cream Cheese Puff Pastry Danishes. A show stopper pastry recipe is my Galette des Rois, which also happens to be my favorite pastry to make and eat.
However, rough puff pastry can be used interchangeably for any recipe that calls for puff pastry and achieve the same results.
From tarts to turnovers and hand pies, to topping chicken pot pie or making sausage rolls, there's no need for ready made puff pastry when you can make cheat puff pastry yourself!
Jump to:
- What is Rough Puff Pastry?
- How the Flaky Layers are Created
- What Can You Make with Rough Puff Pastry?
- Ingredient Notes
- Necessary Tools
- How to Make Rough Puff Pastry
- Forming the Dough
- Trifold or Envelope Fold (Pastry Fold #1)
- Book Fold (Pastry Fold #2)
- Book Fold (again) - Pastry Fold #3
- How to Use and Bake the Rough Puff Pastry
- How to Store Rough Puff Pastry
- Best Tips
- Storing and Freezing
- FAQs
- 📖Recipe
Ingredient Notes
For this rough puff pastry recipe, the ratio of fat to flour is 1:1. The advantages of this specific recipe is that it uses all butter rather than shortening, margarine, or oil like most store-bought puff pastry. All-butter means it's packed with flavor!
- Unsalted butter. Cold, and sliced into tablespoons pieces. 300 grams/2 ½ sticks/1 ½ cups is needed.
- All-purpose flour. Rough puff pastry is made using all-purpose flour. 300 grams/2 ½ cups is needed.
- Kosher salt. Use a full teaspoon for this recipe. I would not omit this ingredient, as it provides extra flavor.
- Ice water. A standard bowl of water with about 6 ice cubes will suffice. Keeping the pastry cold is crucial.
Necessary Tools
Here you'll find every tool needed for a seamless rough puff pastry process.
- Large bowl
- Standard bowl
- Tablespoon measure
- Teaspoon measure
- Scale or measuring cups
- Rolling pin
- Pastry brush (note: not the silicone type. If you don’t have a soft-bristle brush, lightly crumble a piece of paper towel and use that to brush flour off of the dough.
- Bench scraper (not necessary, but incredibly helpful)
- Plastic wrap
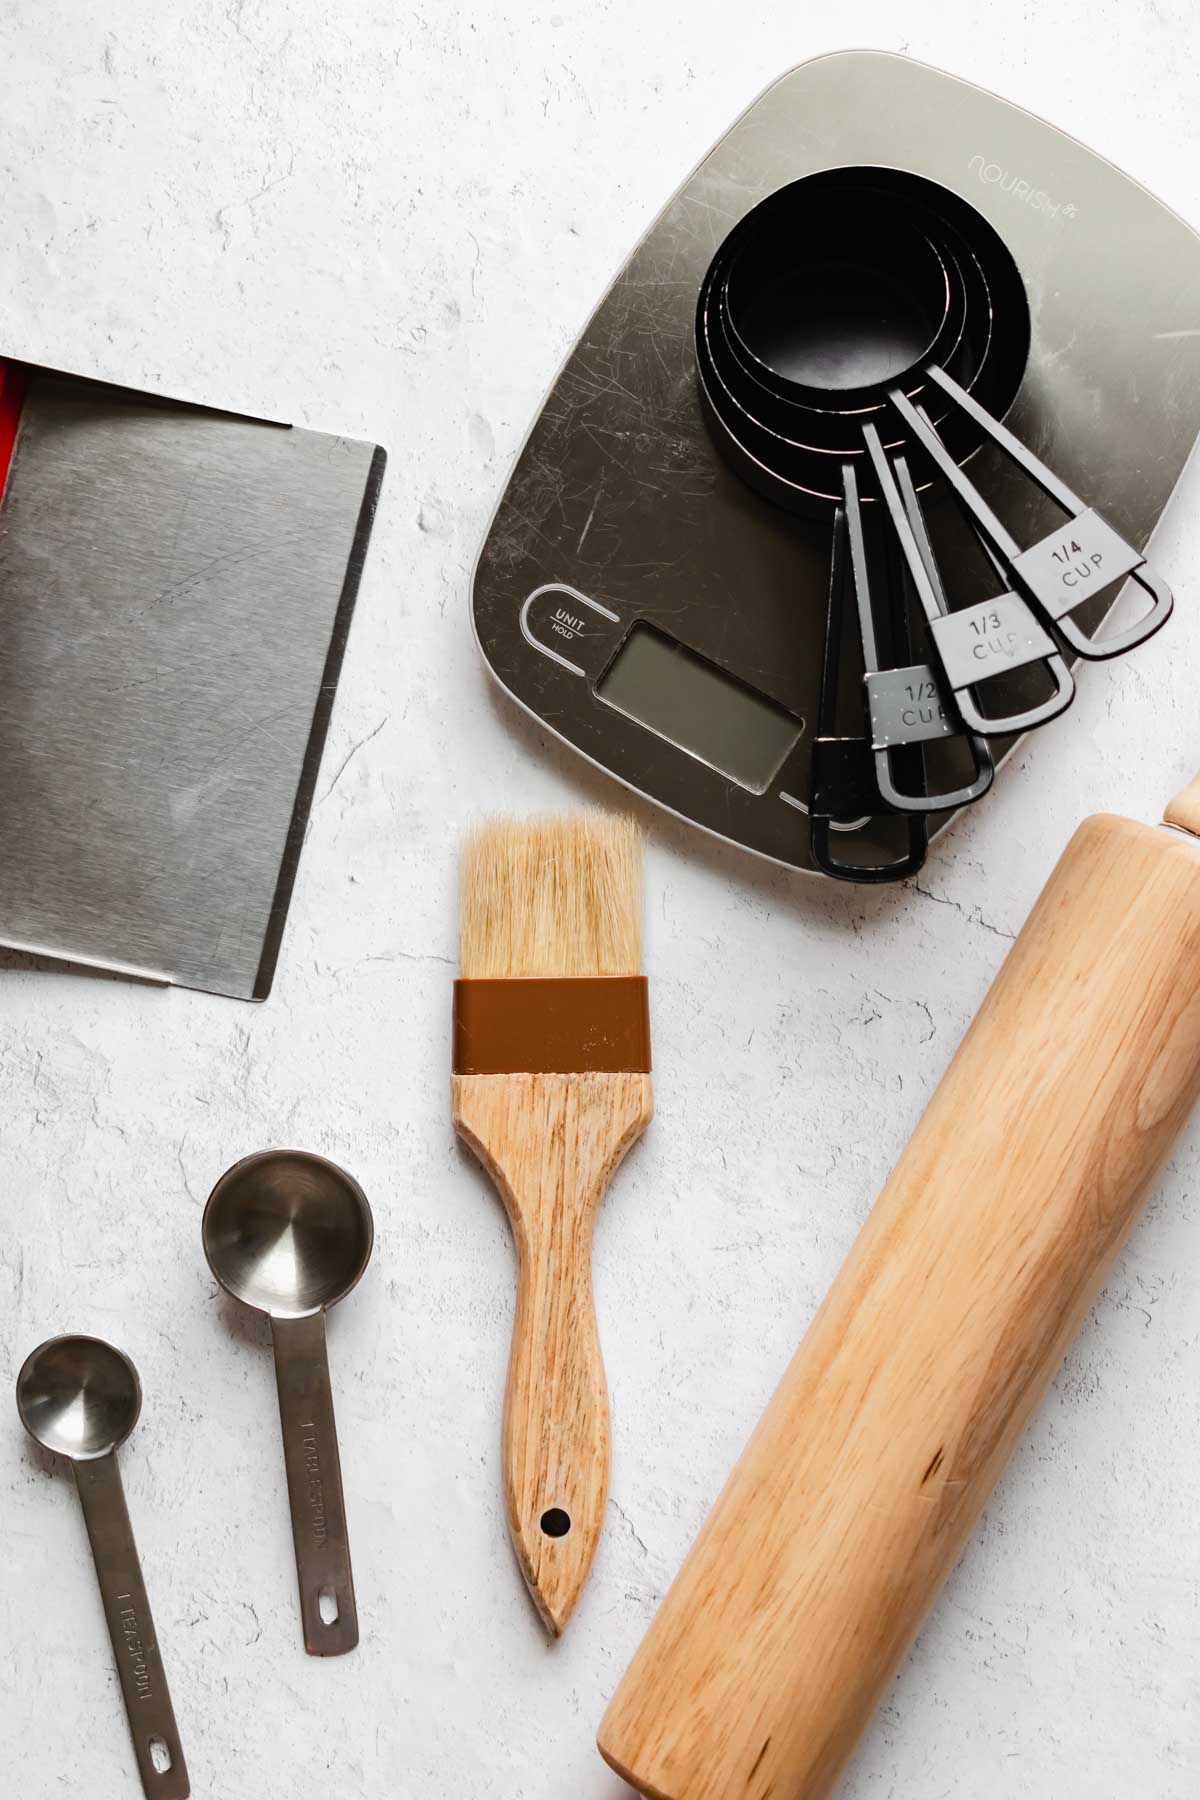
Tools needed. 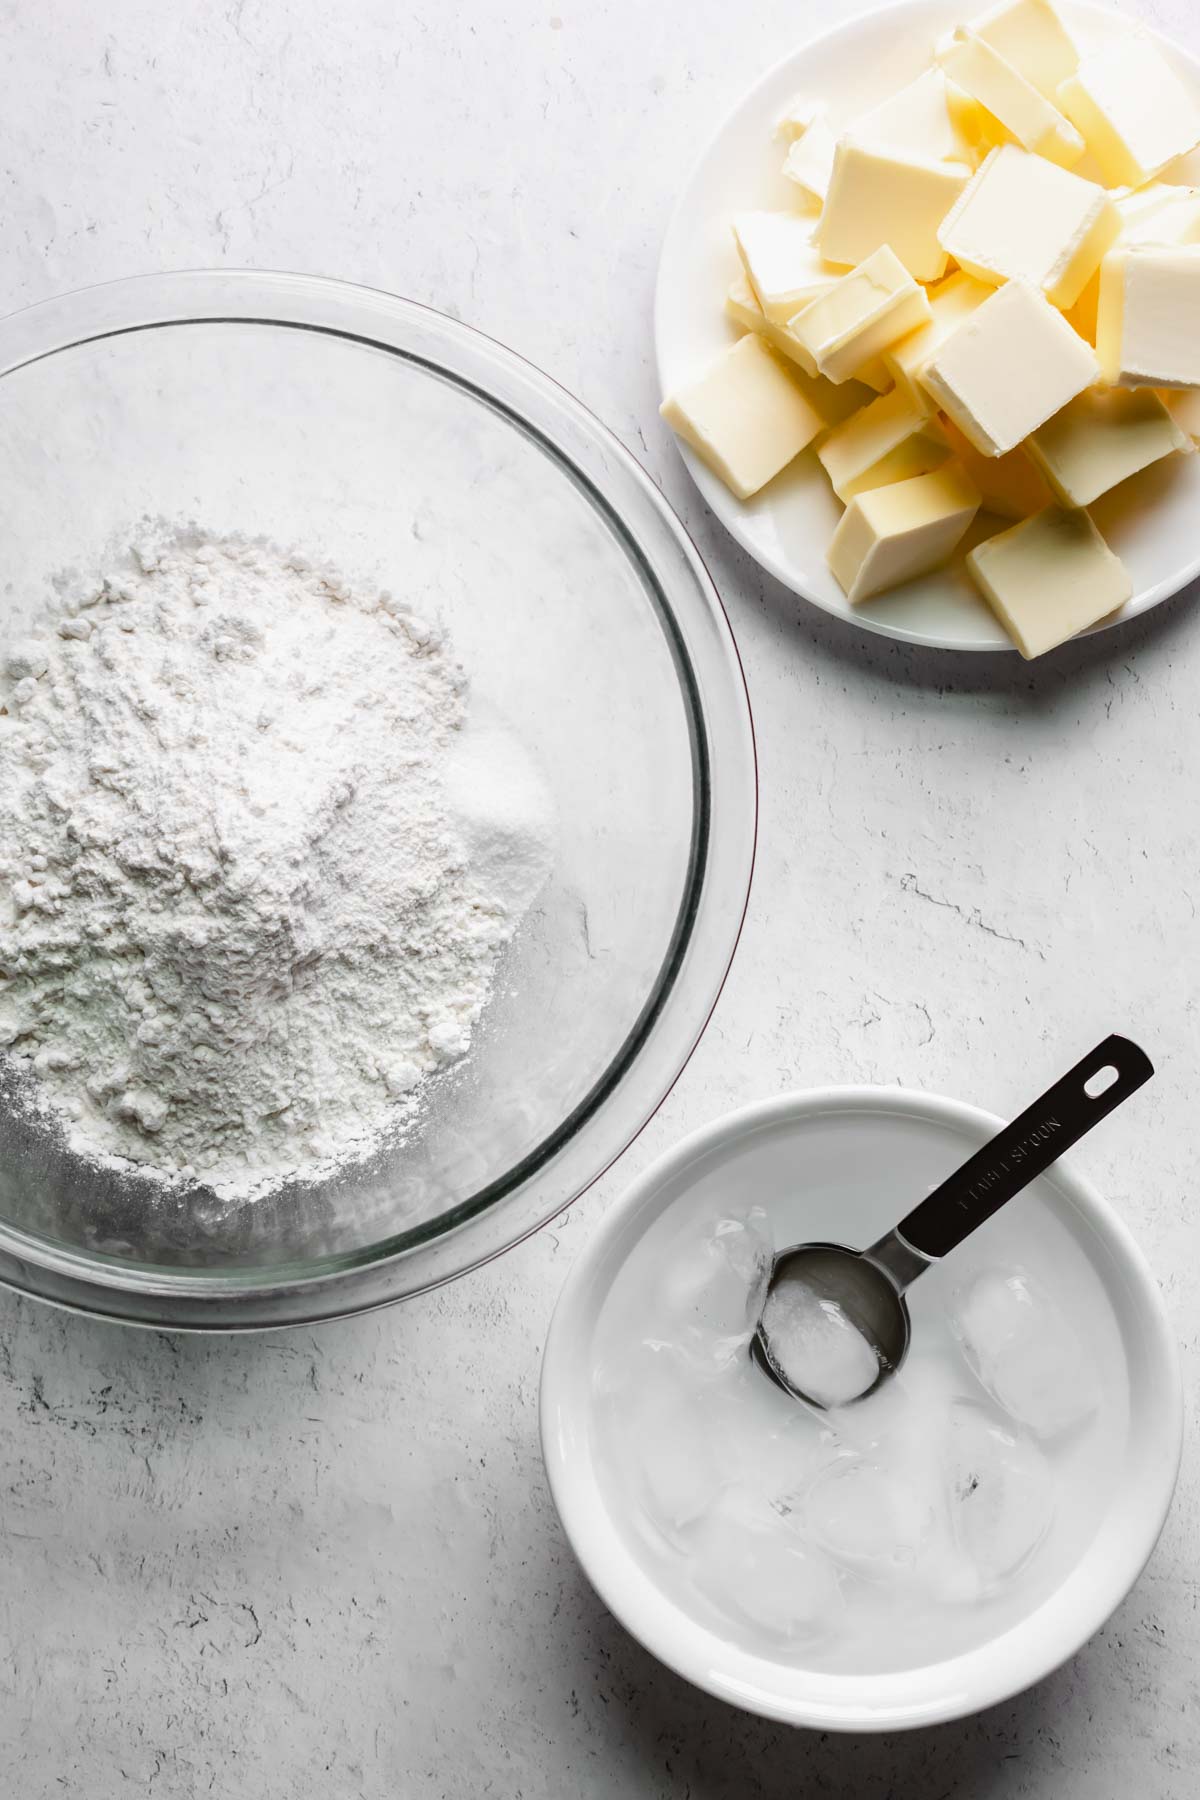
Butter, flour, salt, and ice water.
How to Make Rough Puff Pastry
I suggest reading through the entire recipe post and looking at the photographs before beginning. It would also be beneficial to watch me make the rough puff pastry live time in this video before starting.
Note the recipe in the video is for one sheet of rough puff pastry, or half of the recipe in the recipe card.
Finally, this recipe can be made without the chill time in between the folds, but I'd only suggest doing this after practicing a few times and feeling comfortable working quickly and accurately.
STEP 1: Add the butter pieces into the flour and toss (with wide fingers, aka “claw hands”) until all pieces of butter are separated and completely coated in flour.
Working quickly (so the butter stays as cold as possible), flatten out each tablespoon piece of butter. This can be done with fingertips and thumbs, or by pressing the butter in between the heels of your hands.
If using the second method, be sure to flour your hands to prevent the butter from sticking.
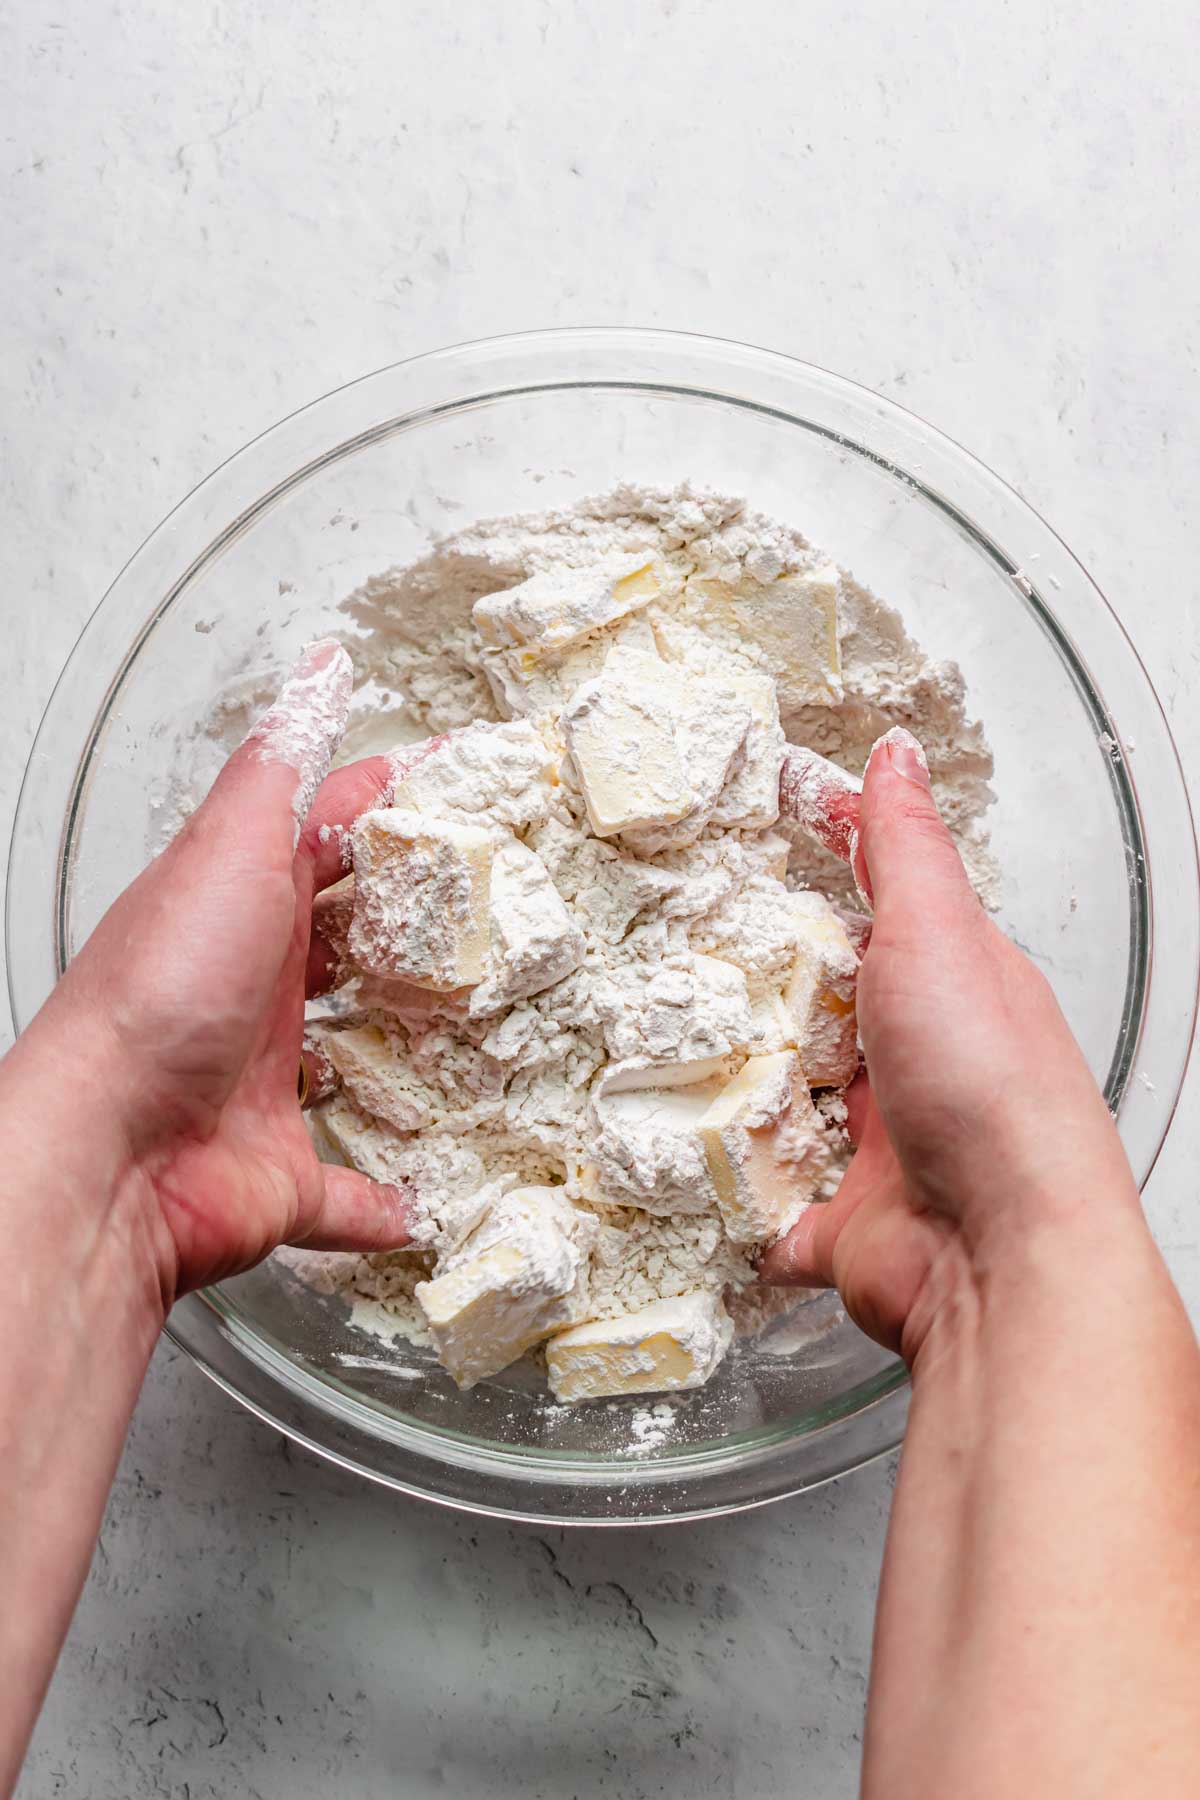
Toss the butter to coat with flour. 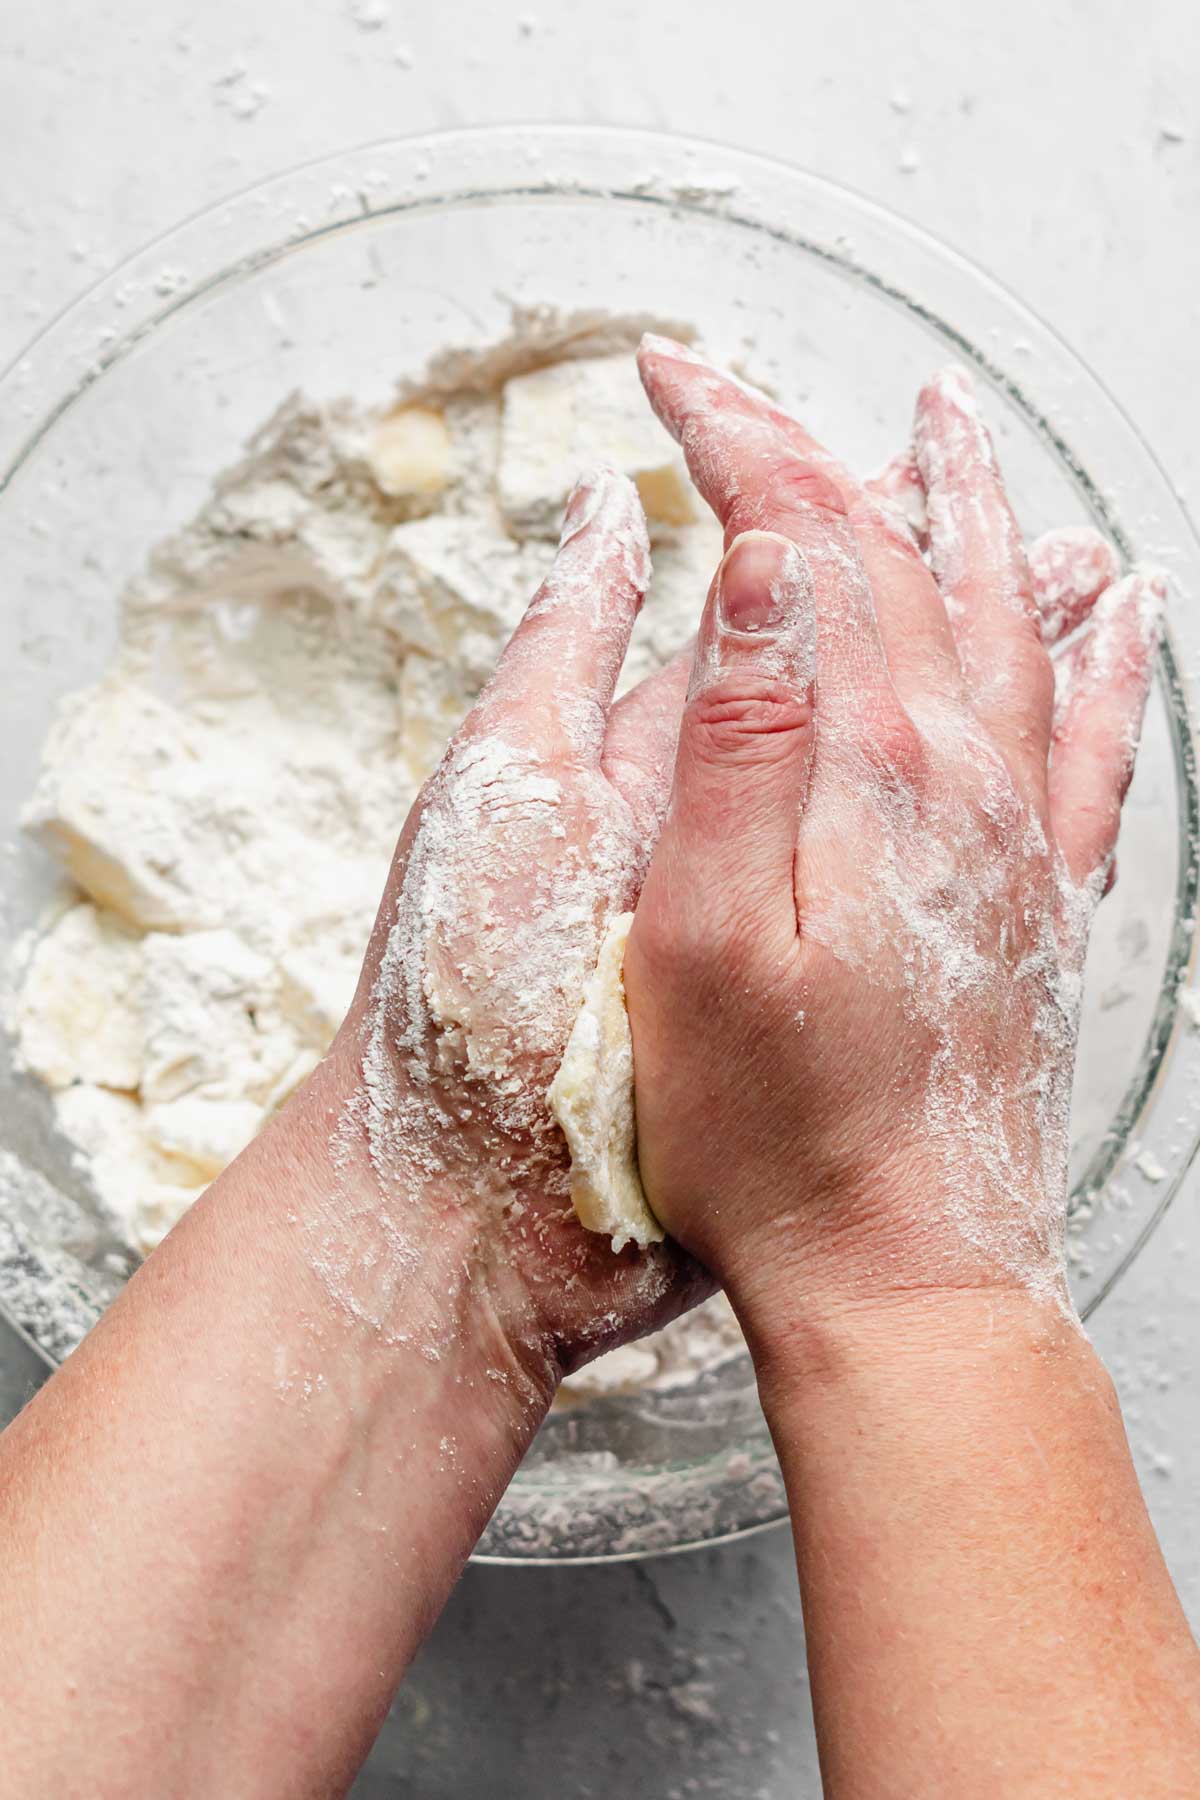
Flatten the pieces of butter. 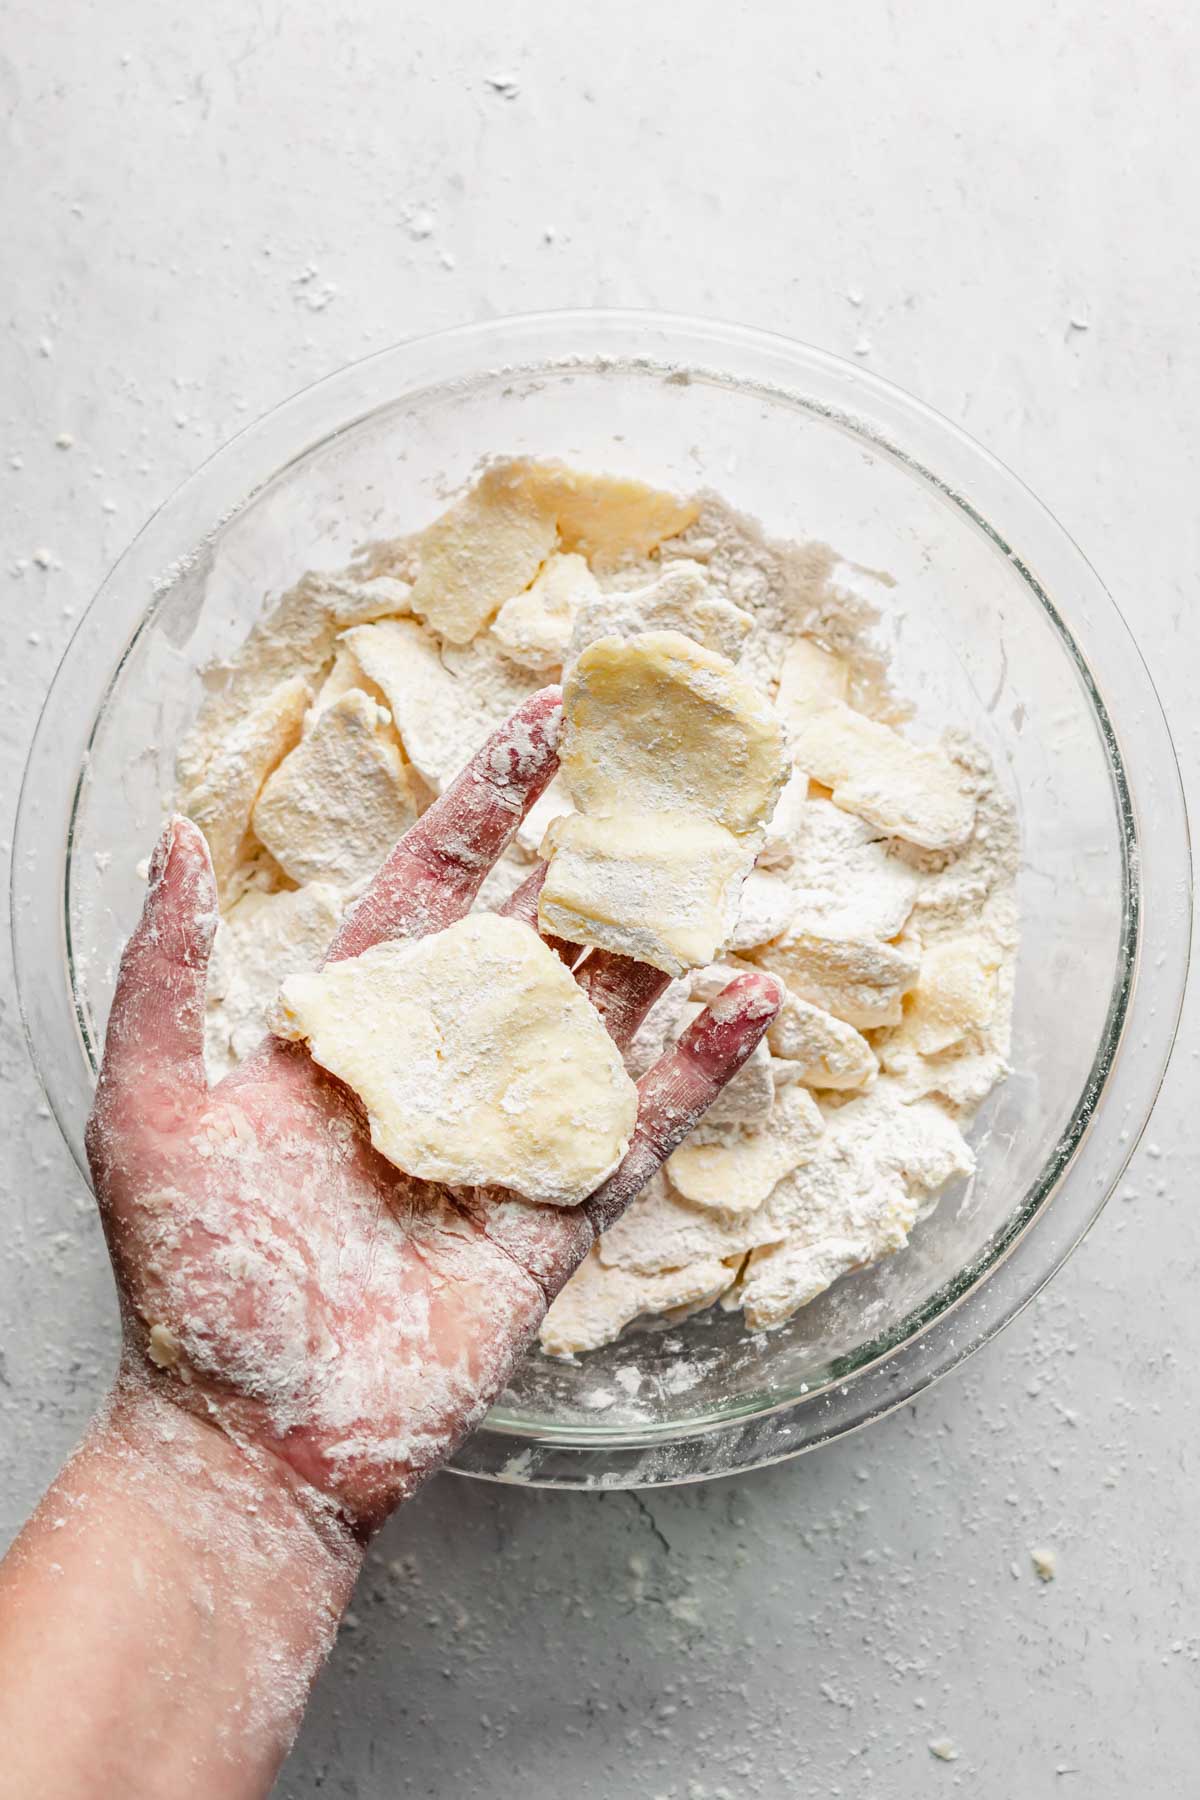
Flatten all pieces of butter and toss with flour.
Forming the Dough
STEP 2: Toss the flattened pieces of butter to fully coat in flour. Then, begin drizzling one tablespoon of ice water around the mixture at a time, tossing with claw fingers in between each addition.
After about 5 tablespoons of water, the mixture will start looking shaggy. Add just enough water that all of the dry dough pieces and flour at the bottom of the bowl become incorporated, without making the dough too wet.
This can be a different amount of water depending on the day, but start “testing” the dough at the shaggy stage, and continue adding one tablespoon at a time until it comes together.
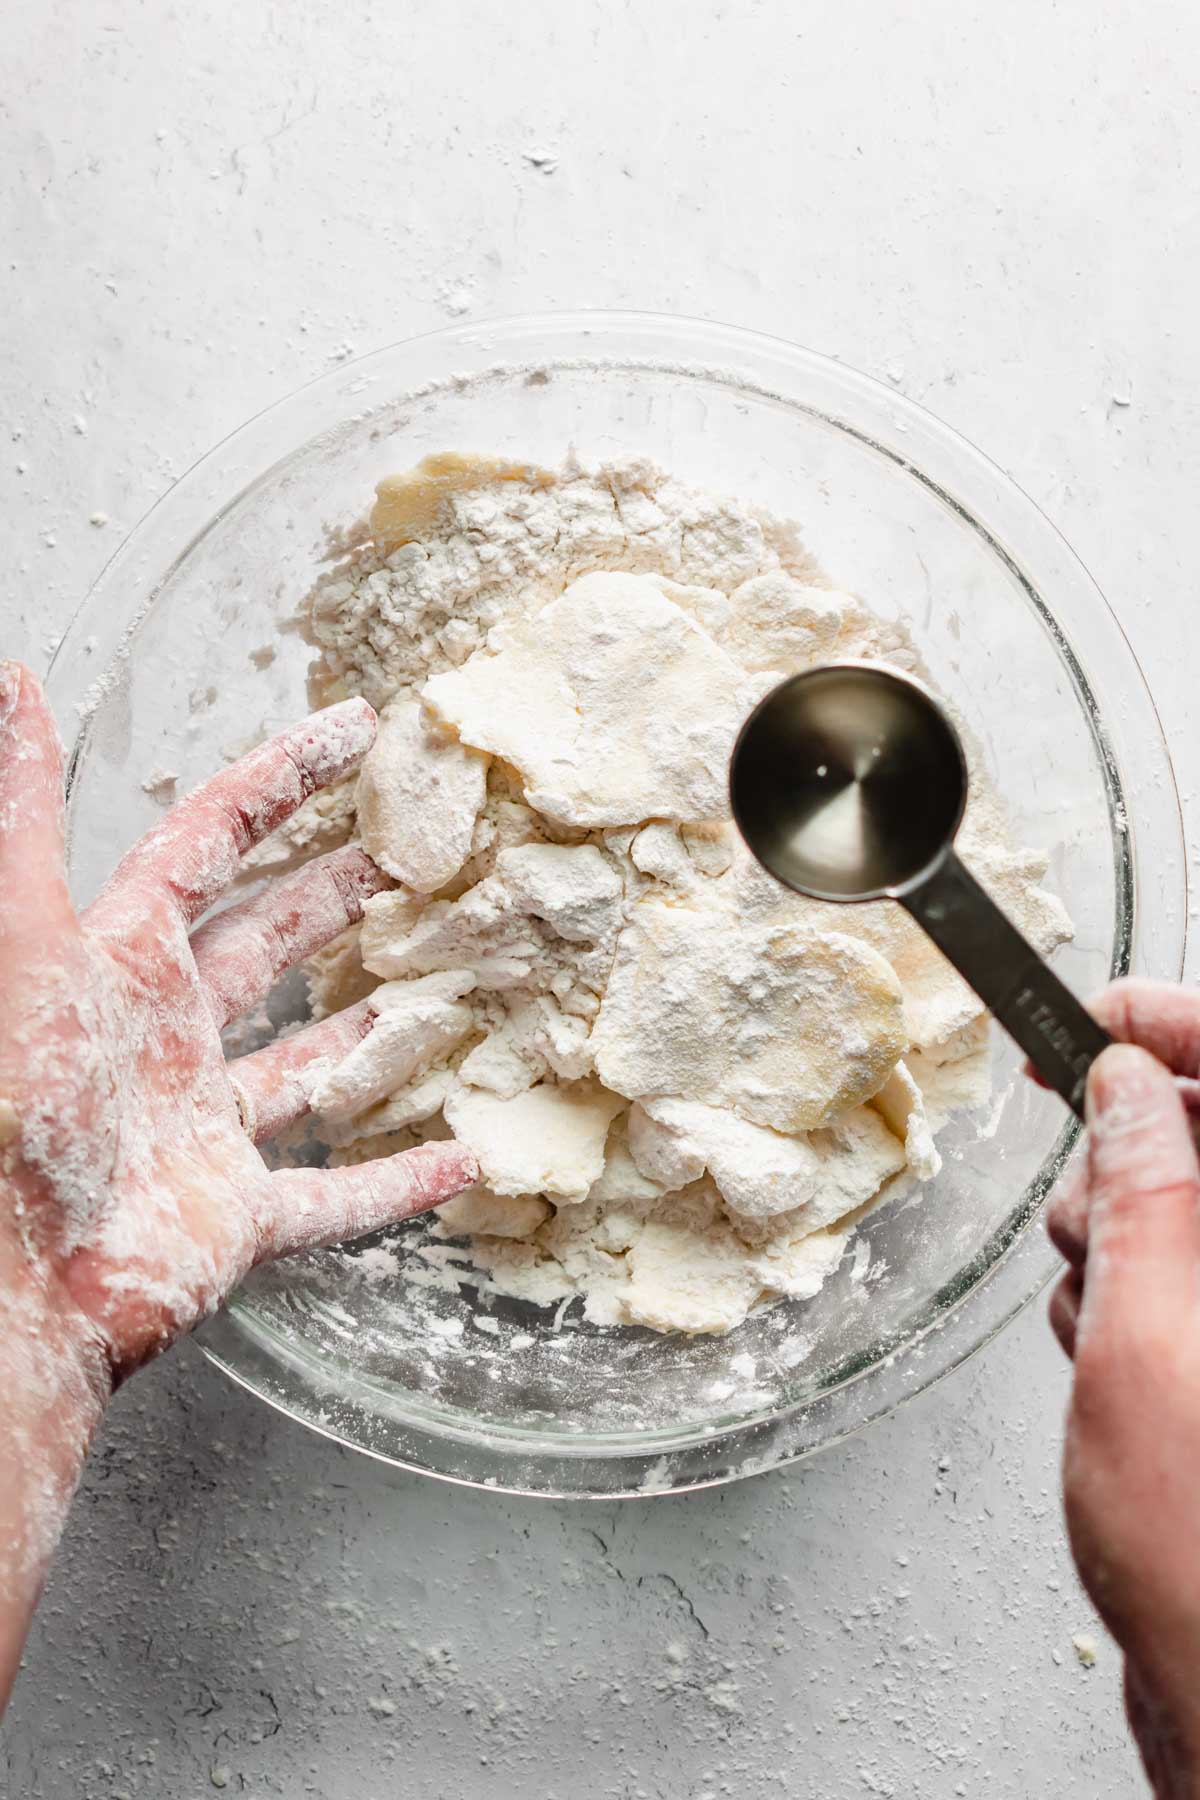
Add a tablespoon of water and toss. 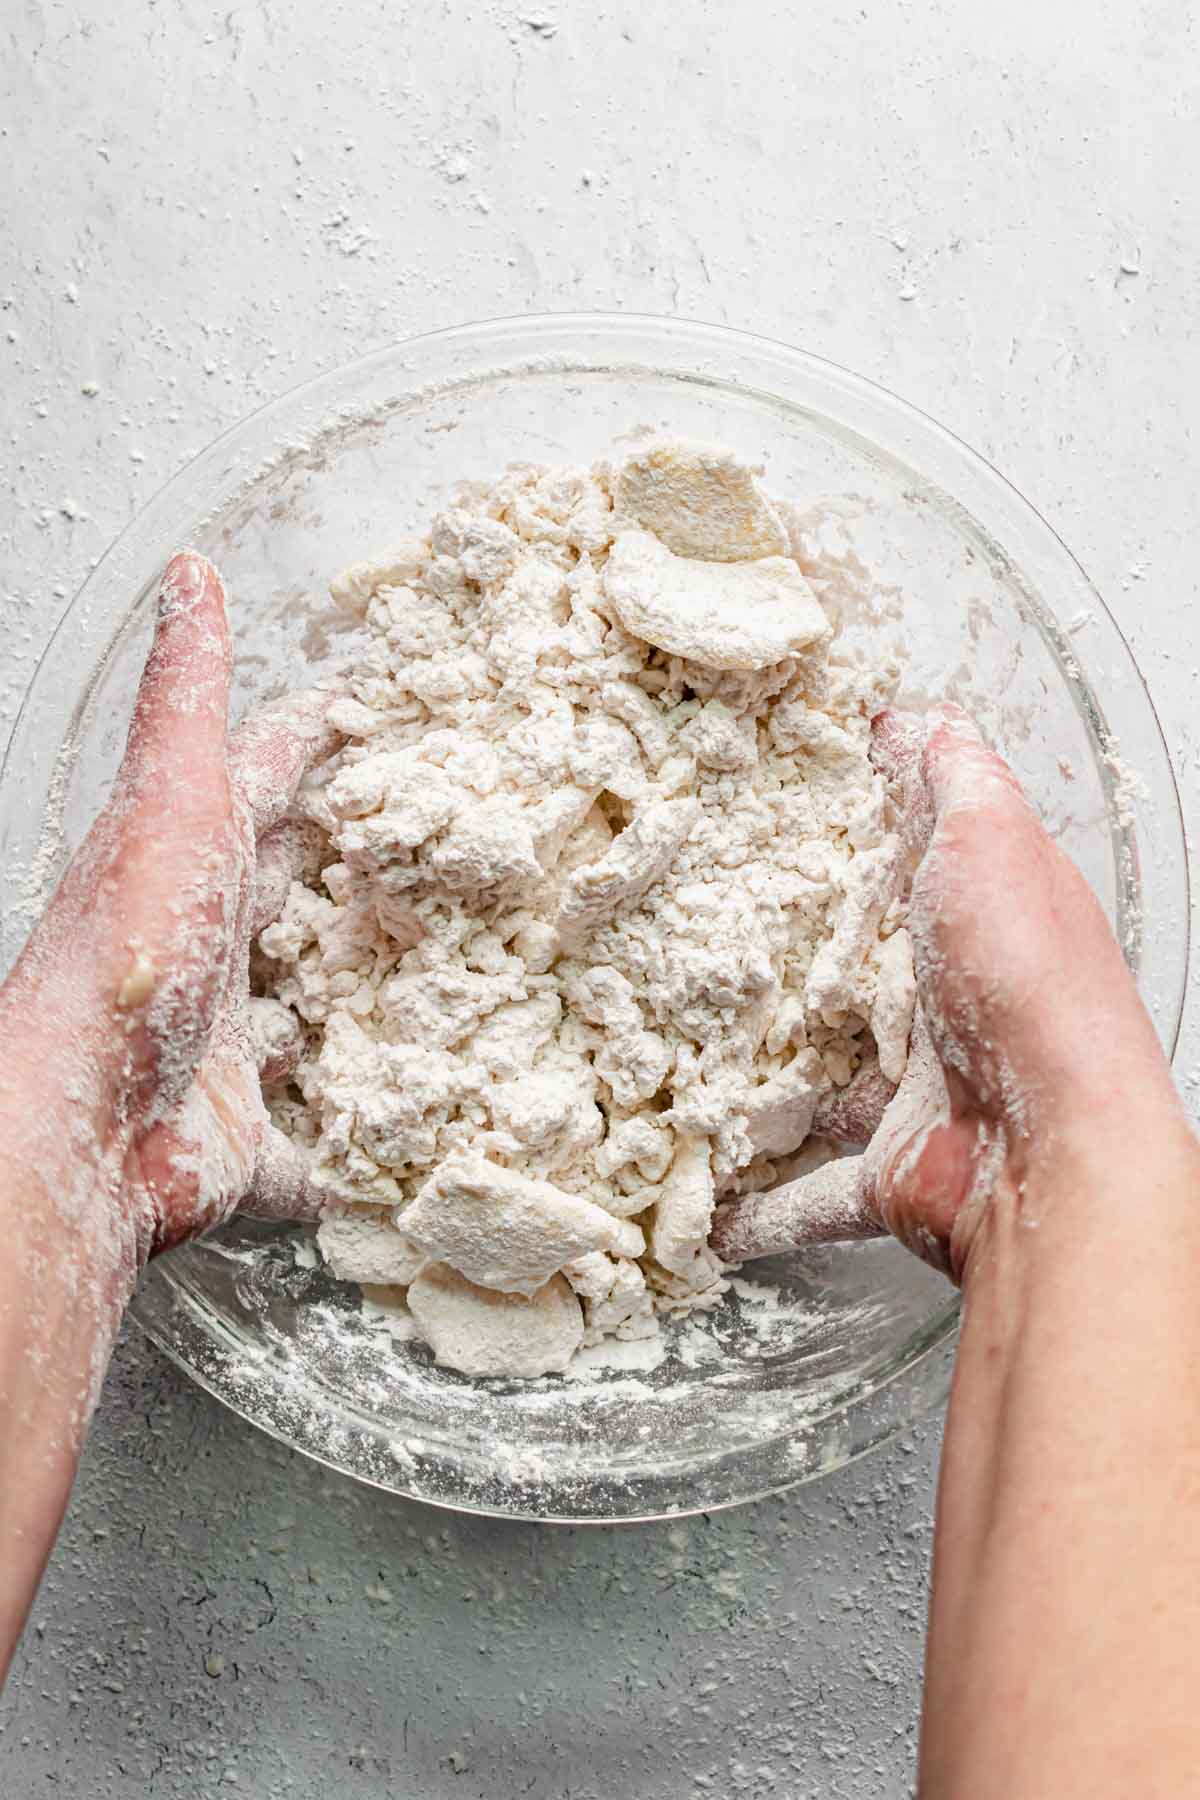
Continue adding water and toss. 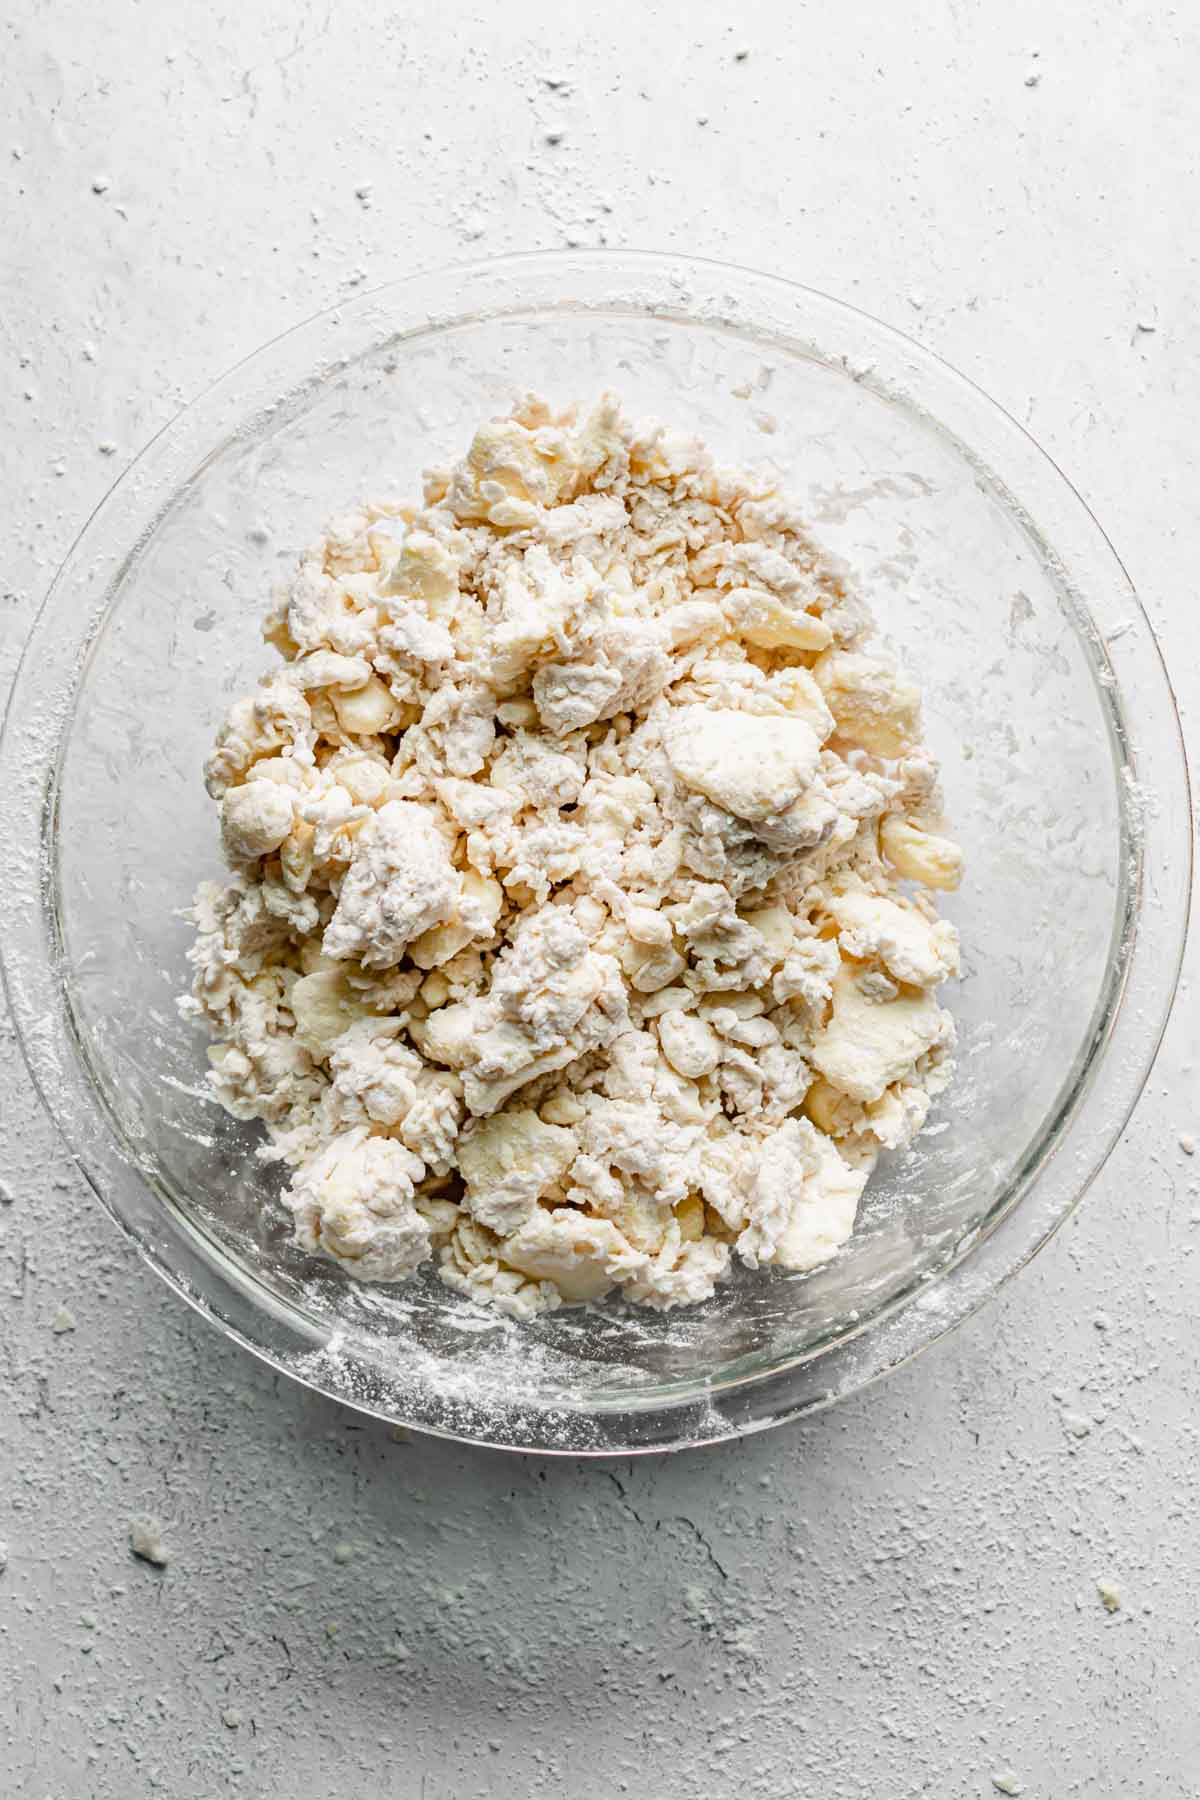
Dough after 5 tablespoons of water added.
To test if the dough is ready, squeeze the whole thing together with both hands. If the dough holds together and there are no longer crumbles in the bottom of the bowl, it’s ready! It should not feel wet or sticky.
Lay the dough on a sheet of plastic wrap and wrap tightly, then form the dough into a rectangle. This step is best practice, and will help tremendously in the first roll out.
Once wrapped and formed, place the dough in the refrigerator for 20 minutes.
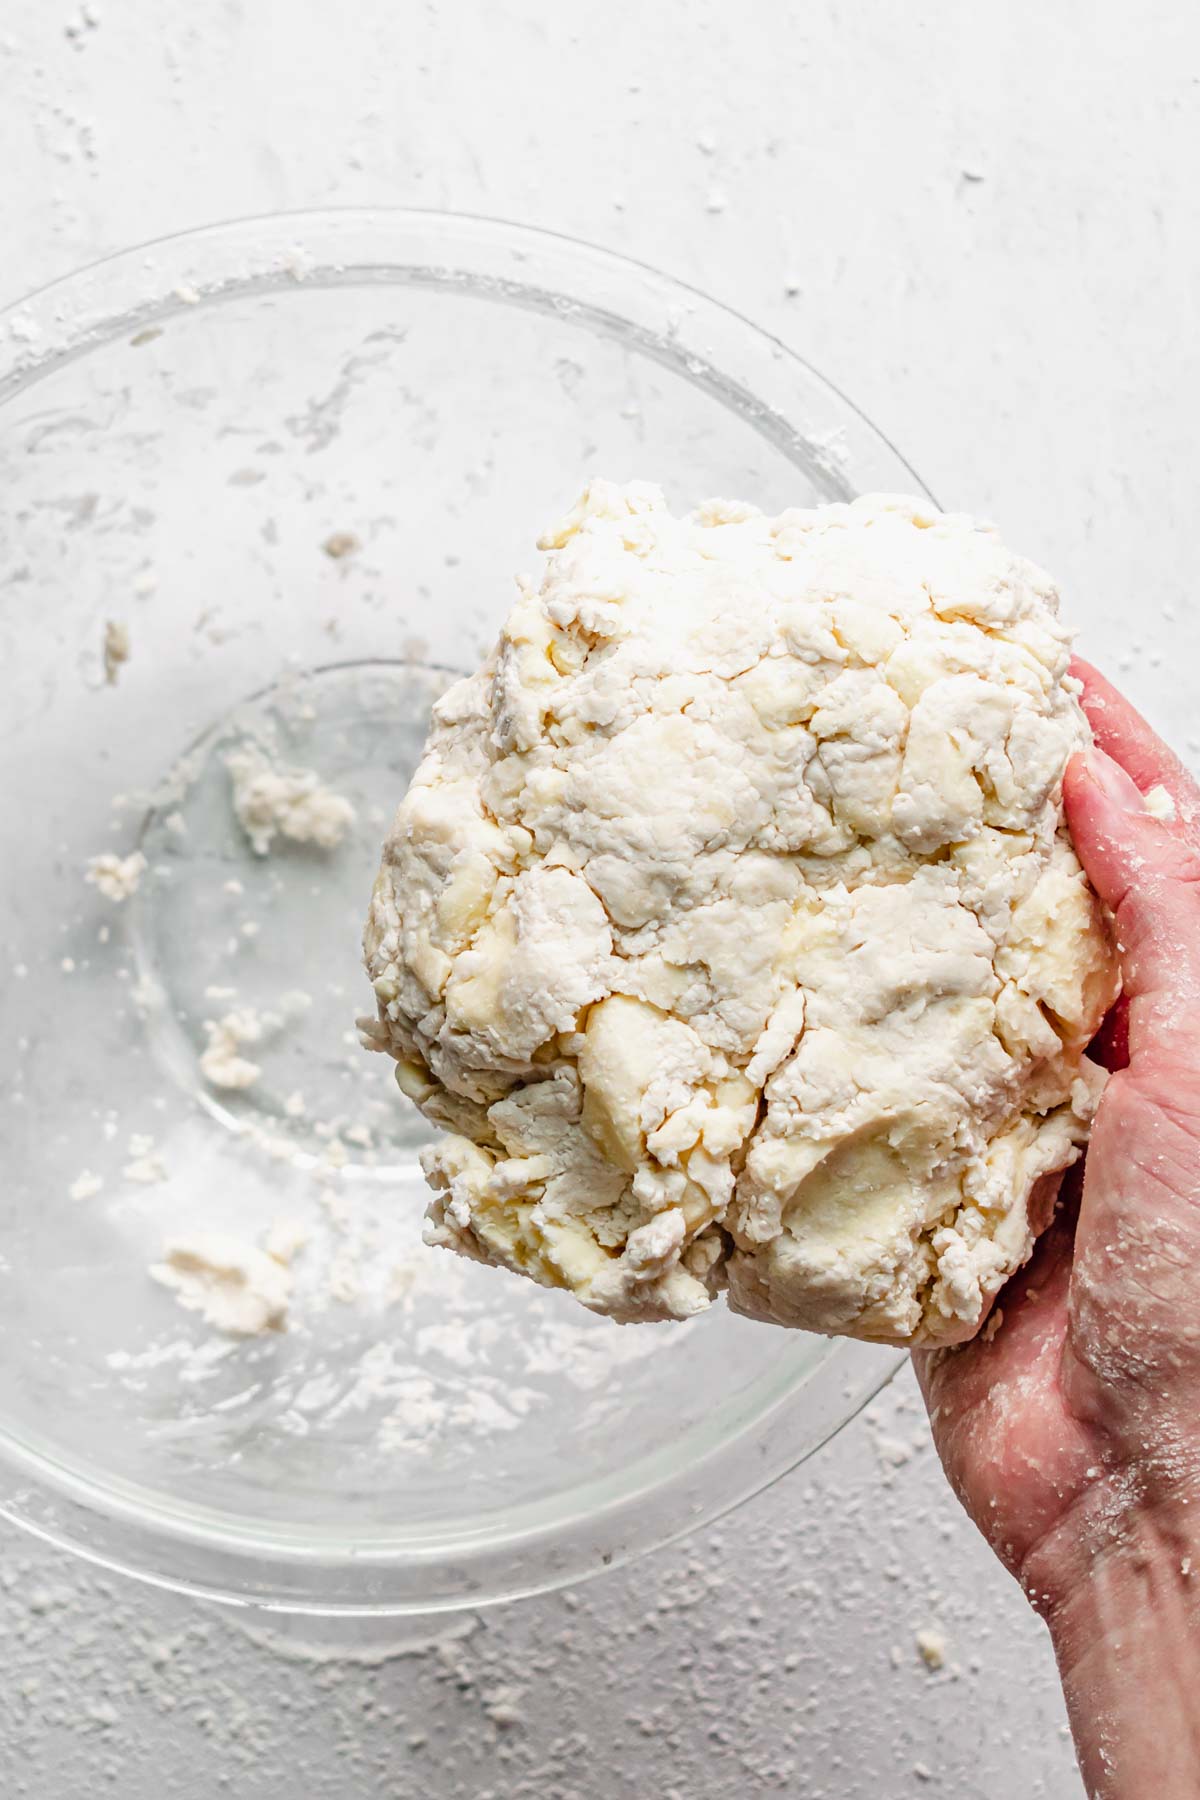
When the dough can hold together, it's ready. 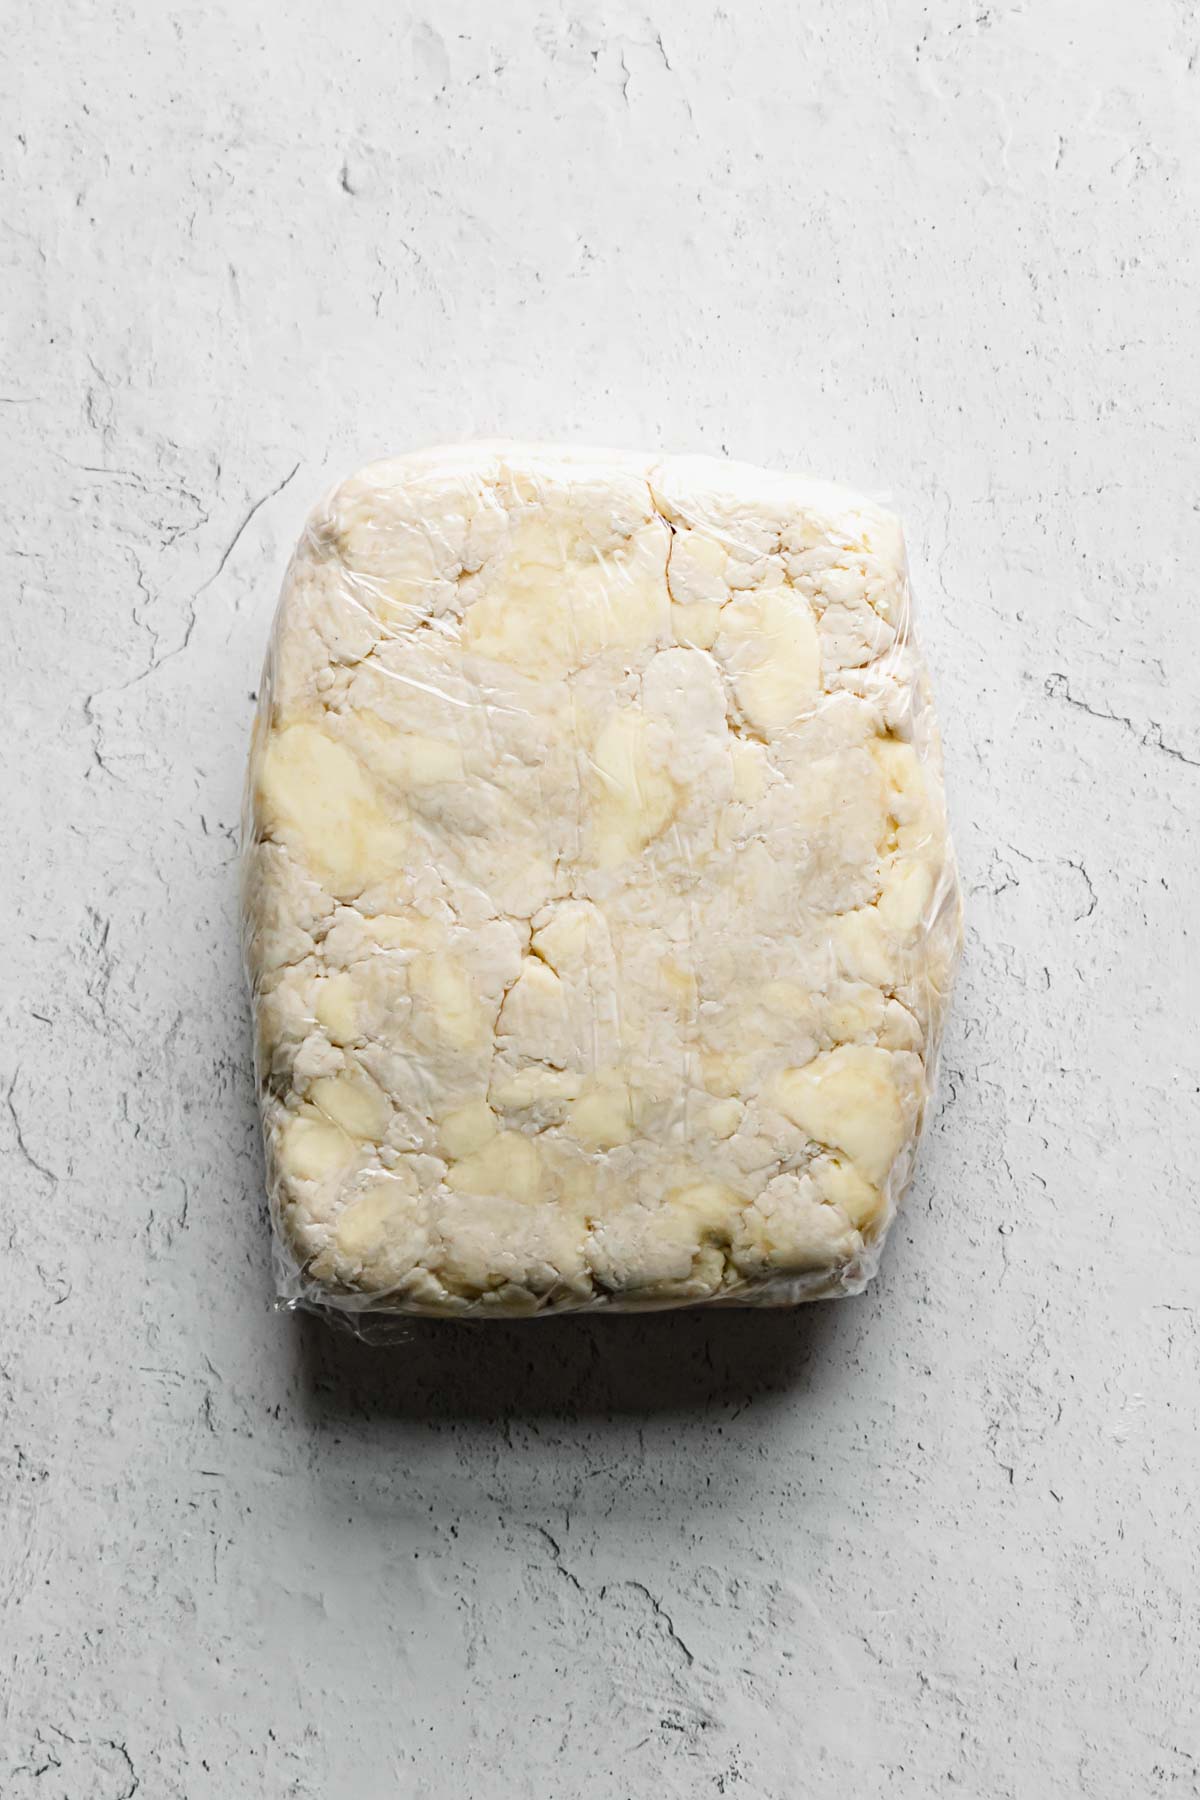
Wrap in plastic wrap and form into a rectangle.
Trifold or Envelope Fold (Pastry Fold #1)
STEP 3: Unwrap the dough and lightly flour the work surface and rolling pin. Roll the dough into a long rectangle, using a bench scraper to press the sides inward and keep a clean, long rectangle. Only roll out the dough to ¼" thickness.
Use a pastry brush to wipe all flour off the top of the dough, then make a trifold (just like folding a letter for an envelope). Fold the top third of the dough down, brush off the flour, then fold the bottom third up and brush off the flour.
Gently pick up the dough, turn it over and brush flour off of the final side. Place the dough back into the plastic, wrap, and place in the refrigerator for 15 minutes.
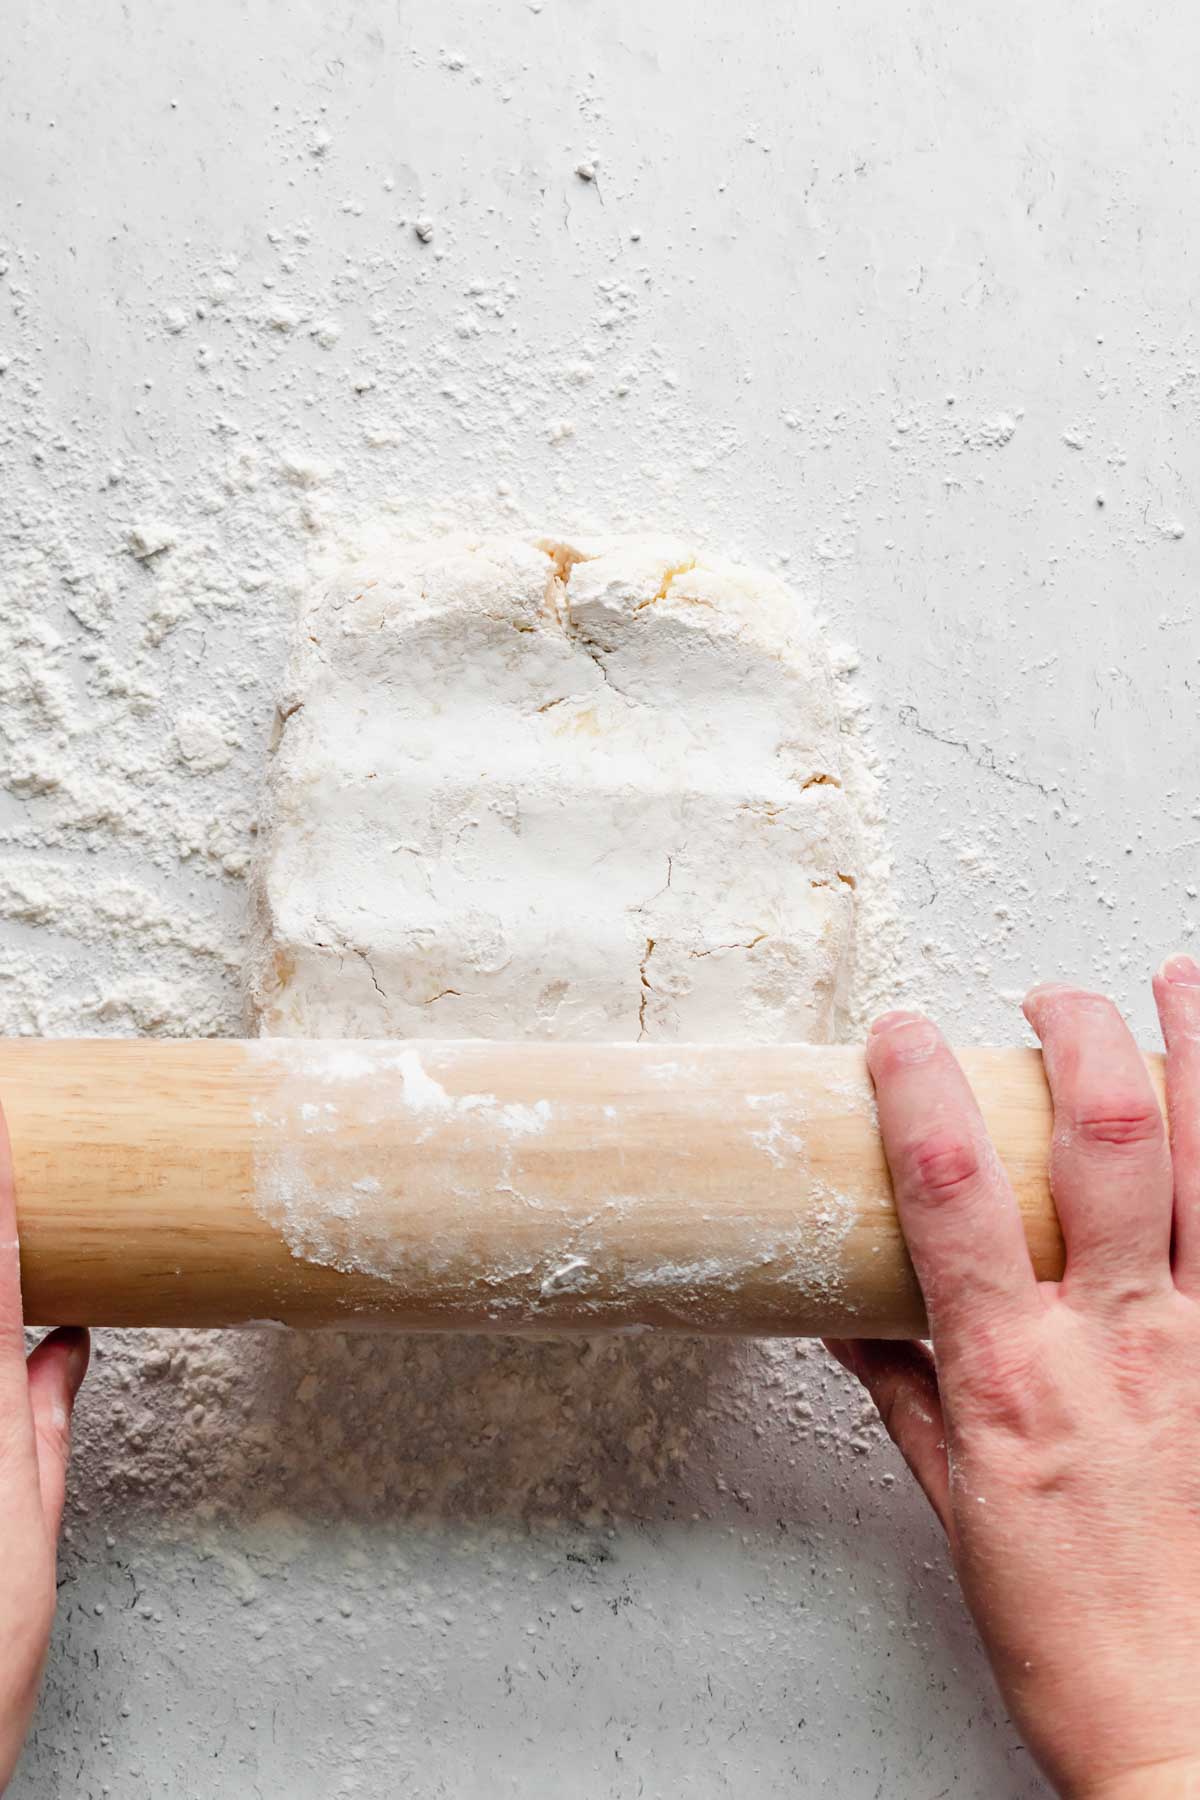
Flour a surface and begin to roll. 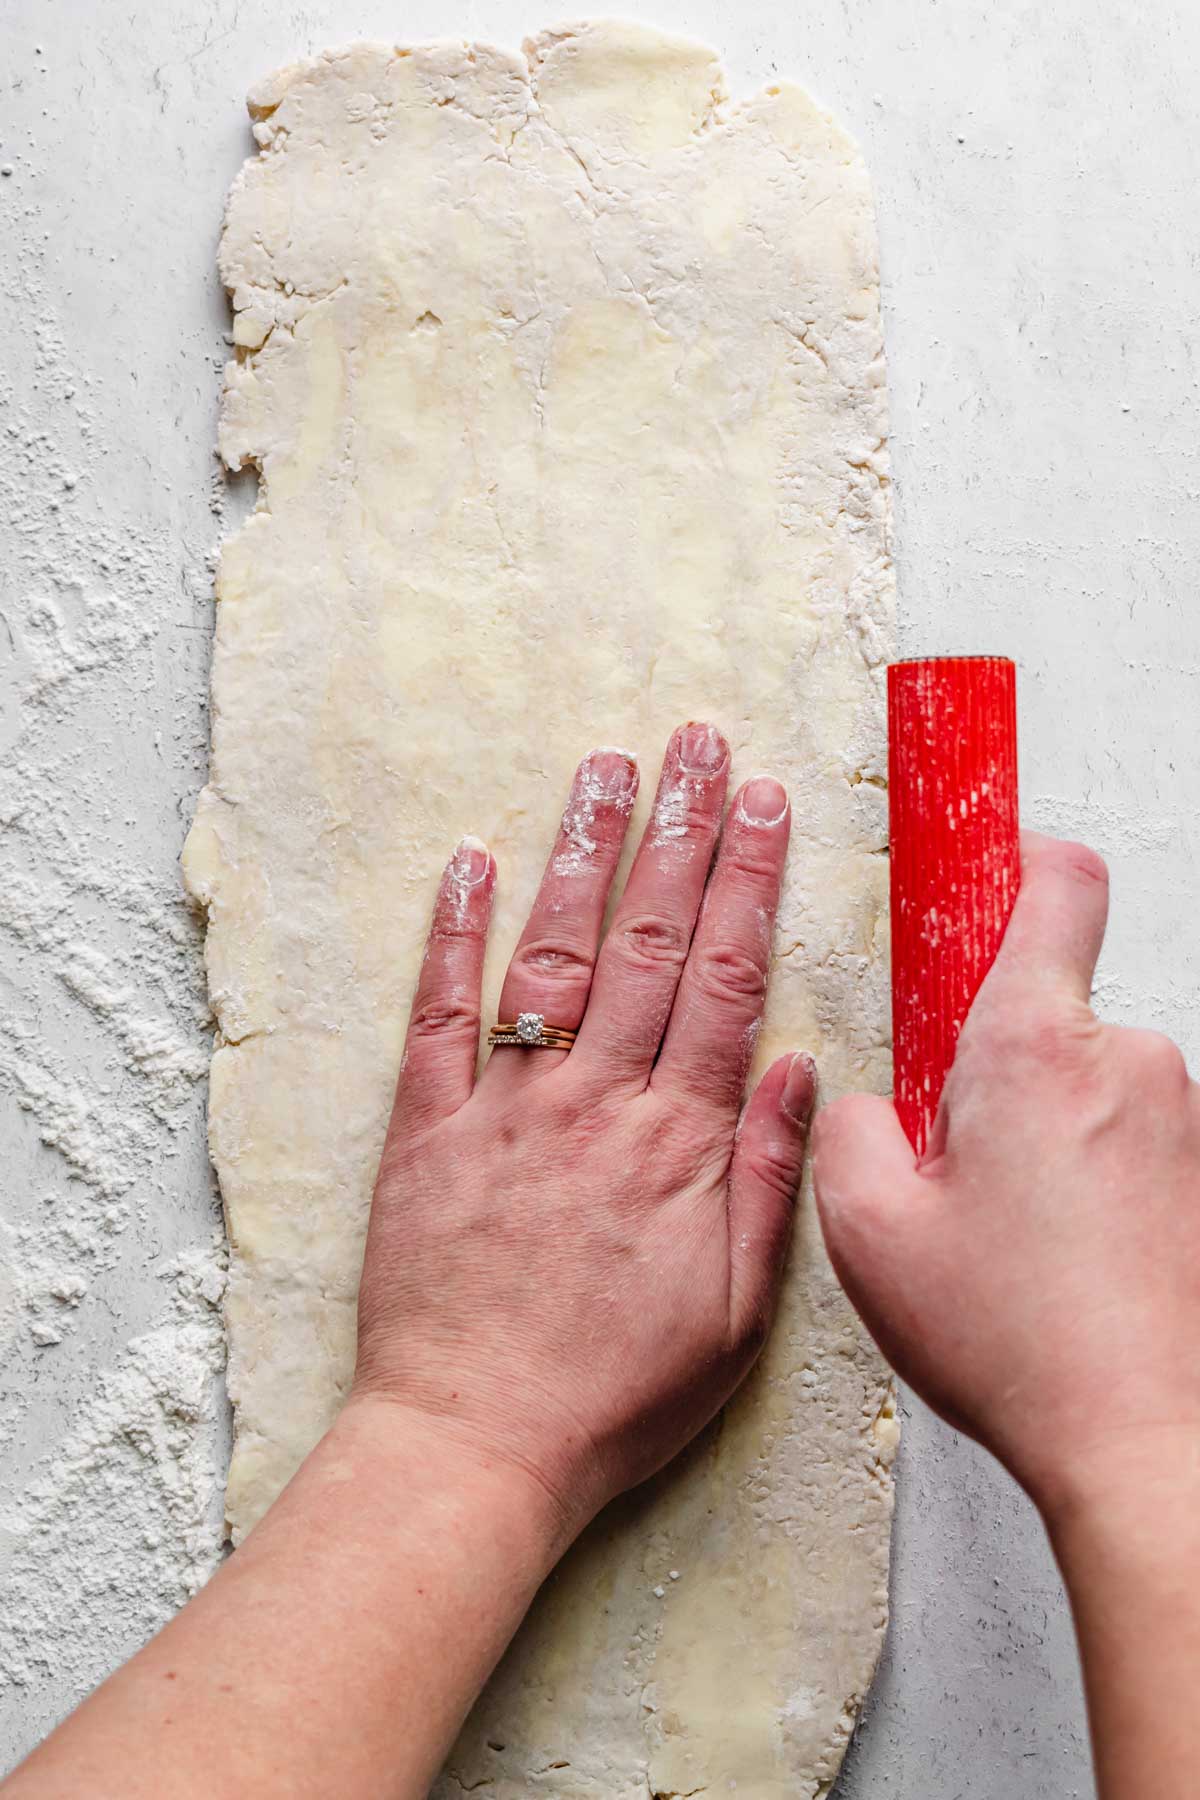
Use a bench scraper to keep the edges clean. 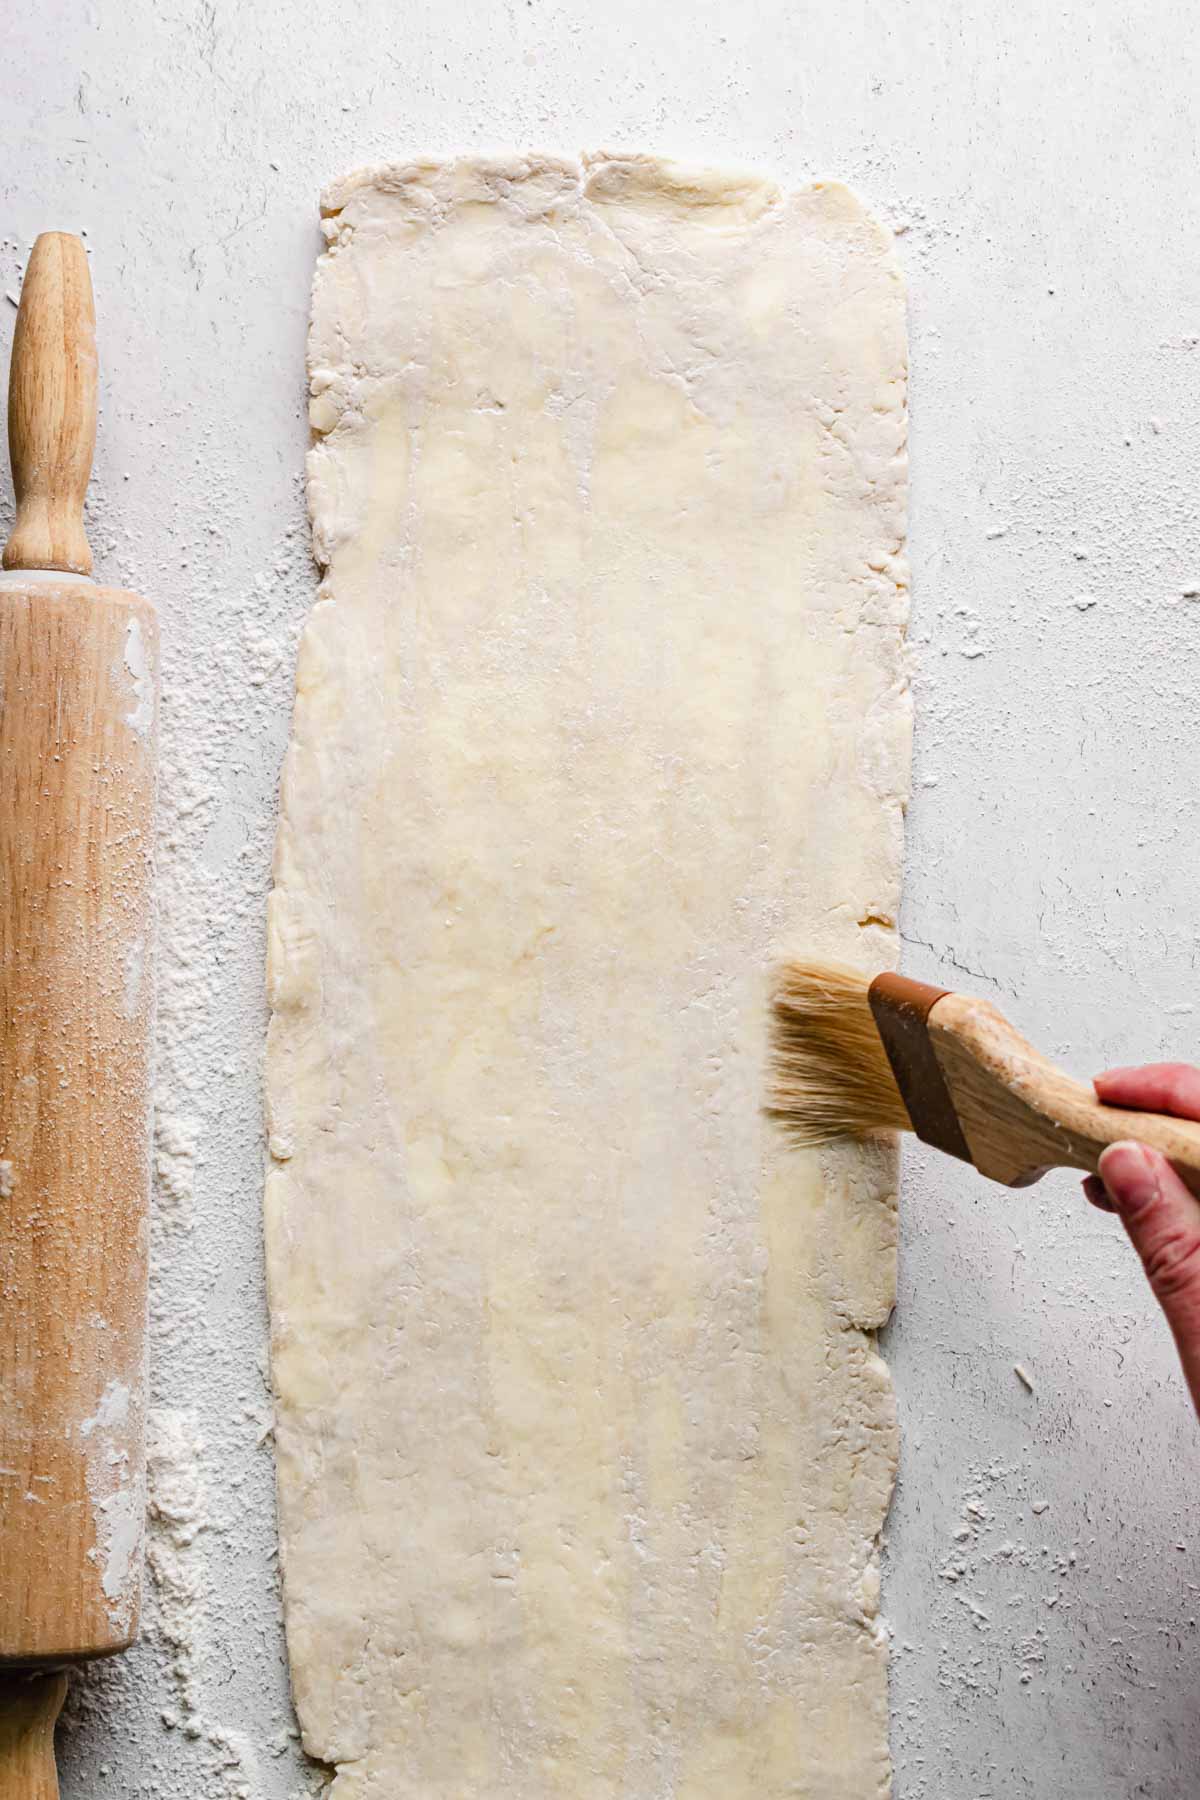
Remove excess flour with a pastry brush. 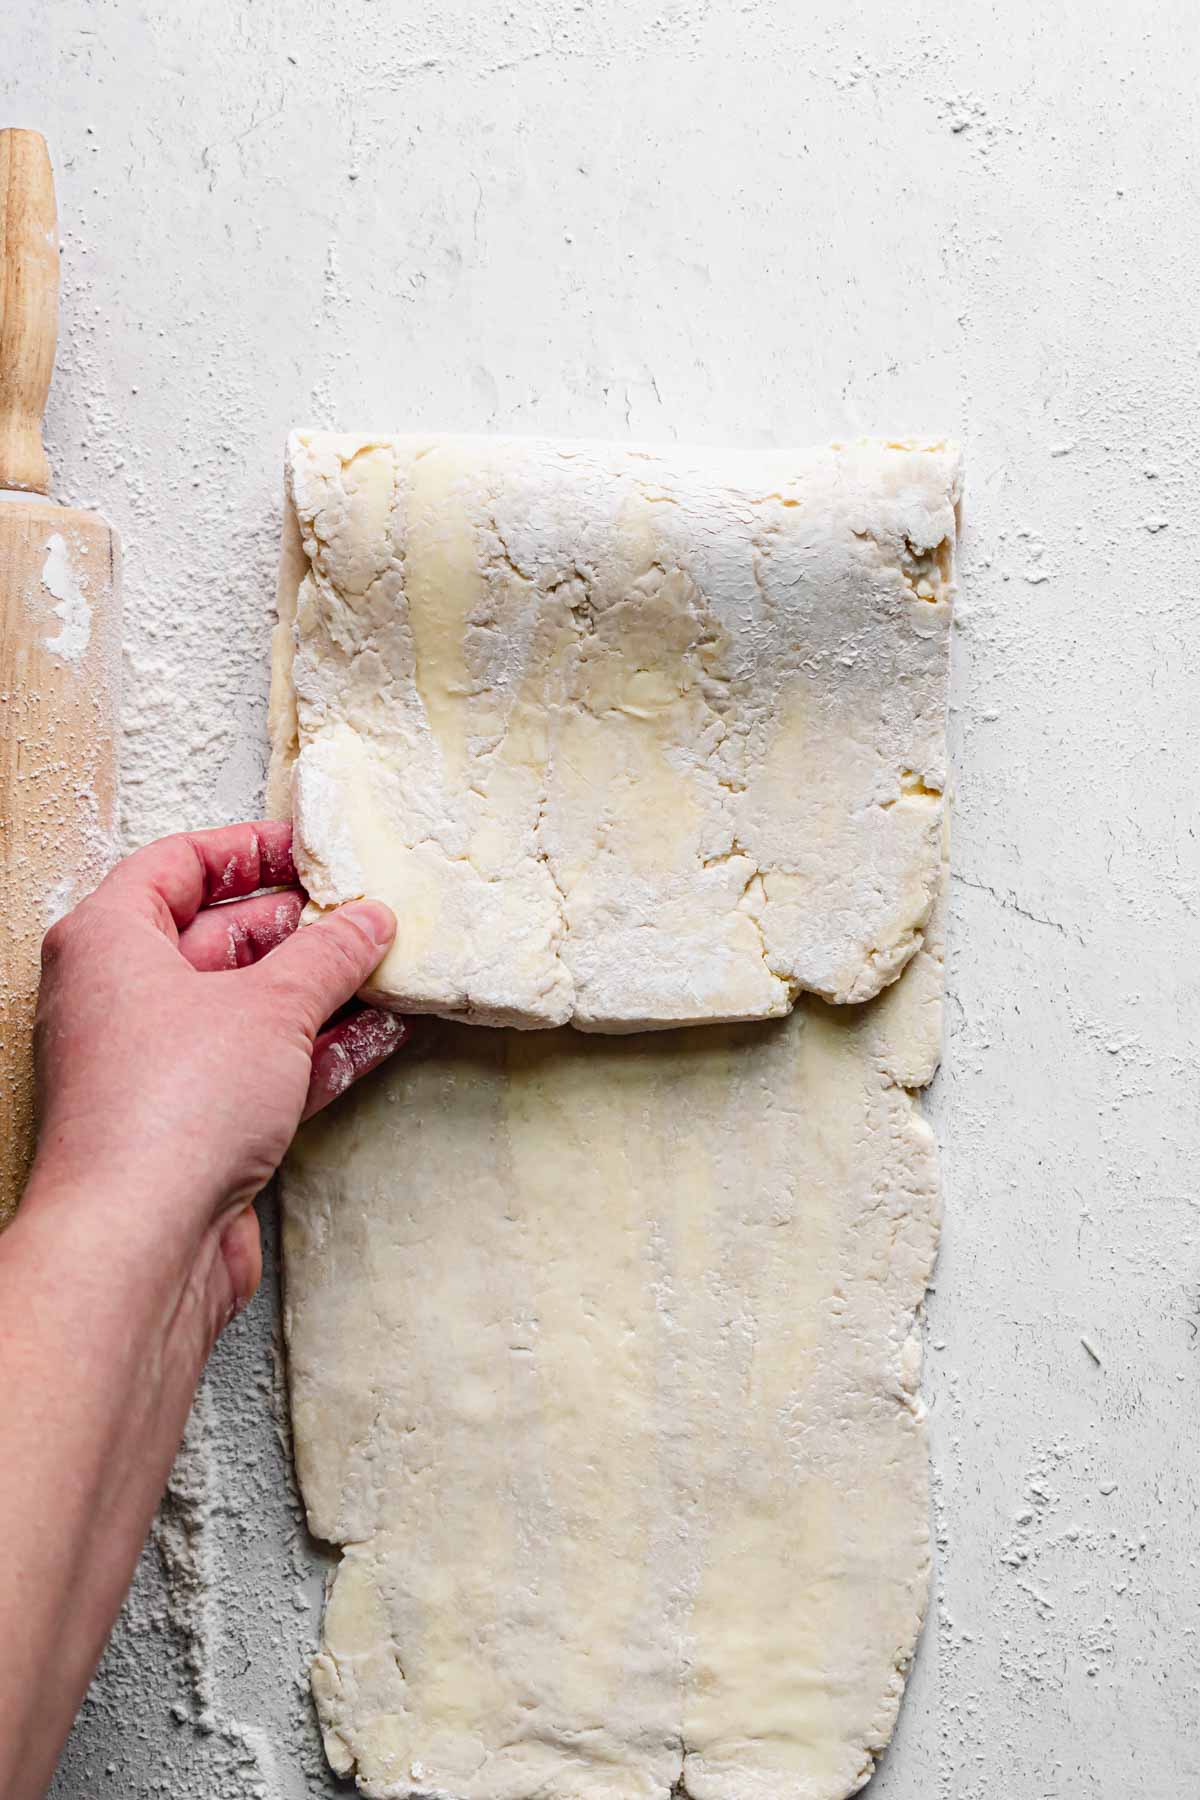
Fold the top third down. 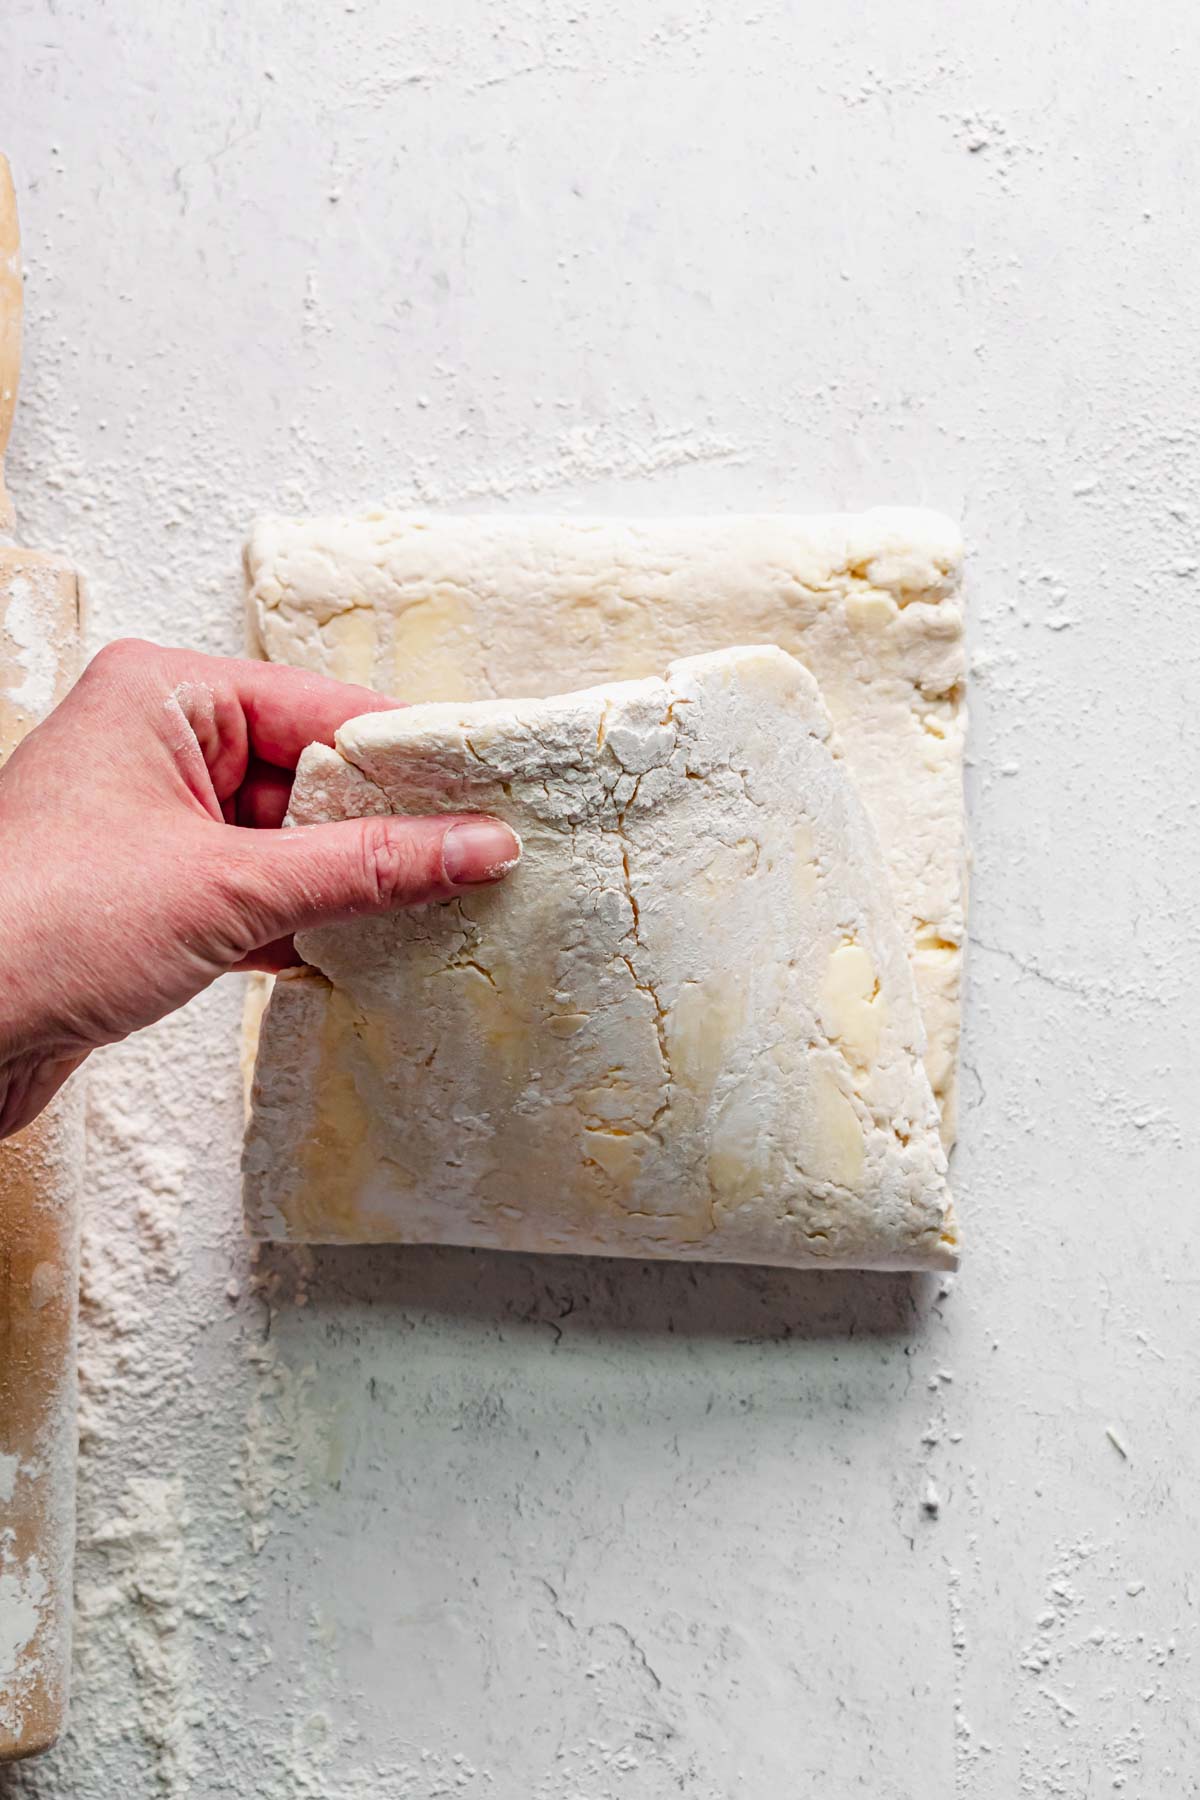
Fold the bottom third up.
Book Fold (Pastry Fold #2)
STEP 4: Remove the dough from the refrigerator, and place the dough on a lightly floured surface so the cross section of the fold is facing your body. Roll the dough out in the same method as before, utilizing the bench scraper to keep the form.
Brush off the excess flour from the top, then complete a book fold. Fold down the top of the dough so it meets the middle and brush off the flour. Bring the bottom up to meet the other side in the center and brush off the flour.
Fold the dough together as if you’re closing a book (hence, a book fold). Brush off the flour from all sides, wrap in plastic wrap, and rest in the refrigerator for another 15 minutes.
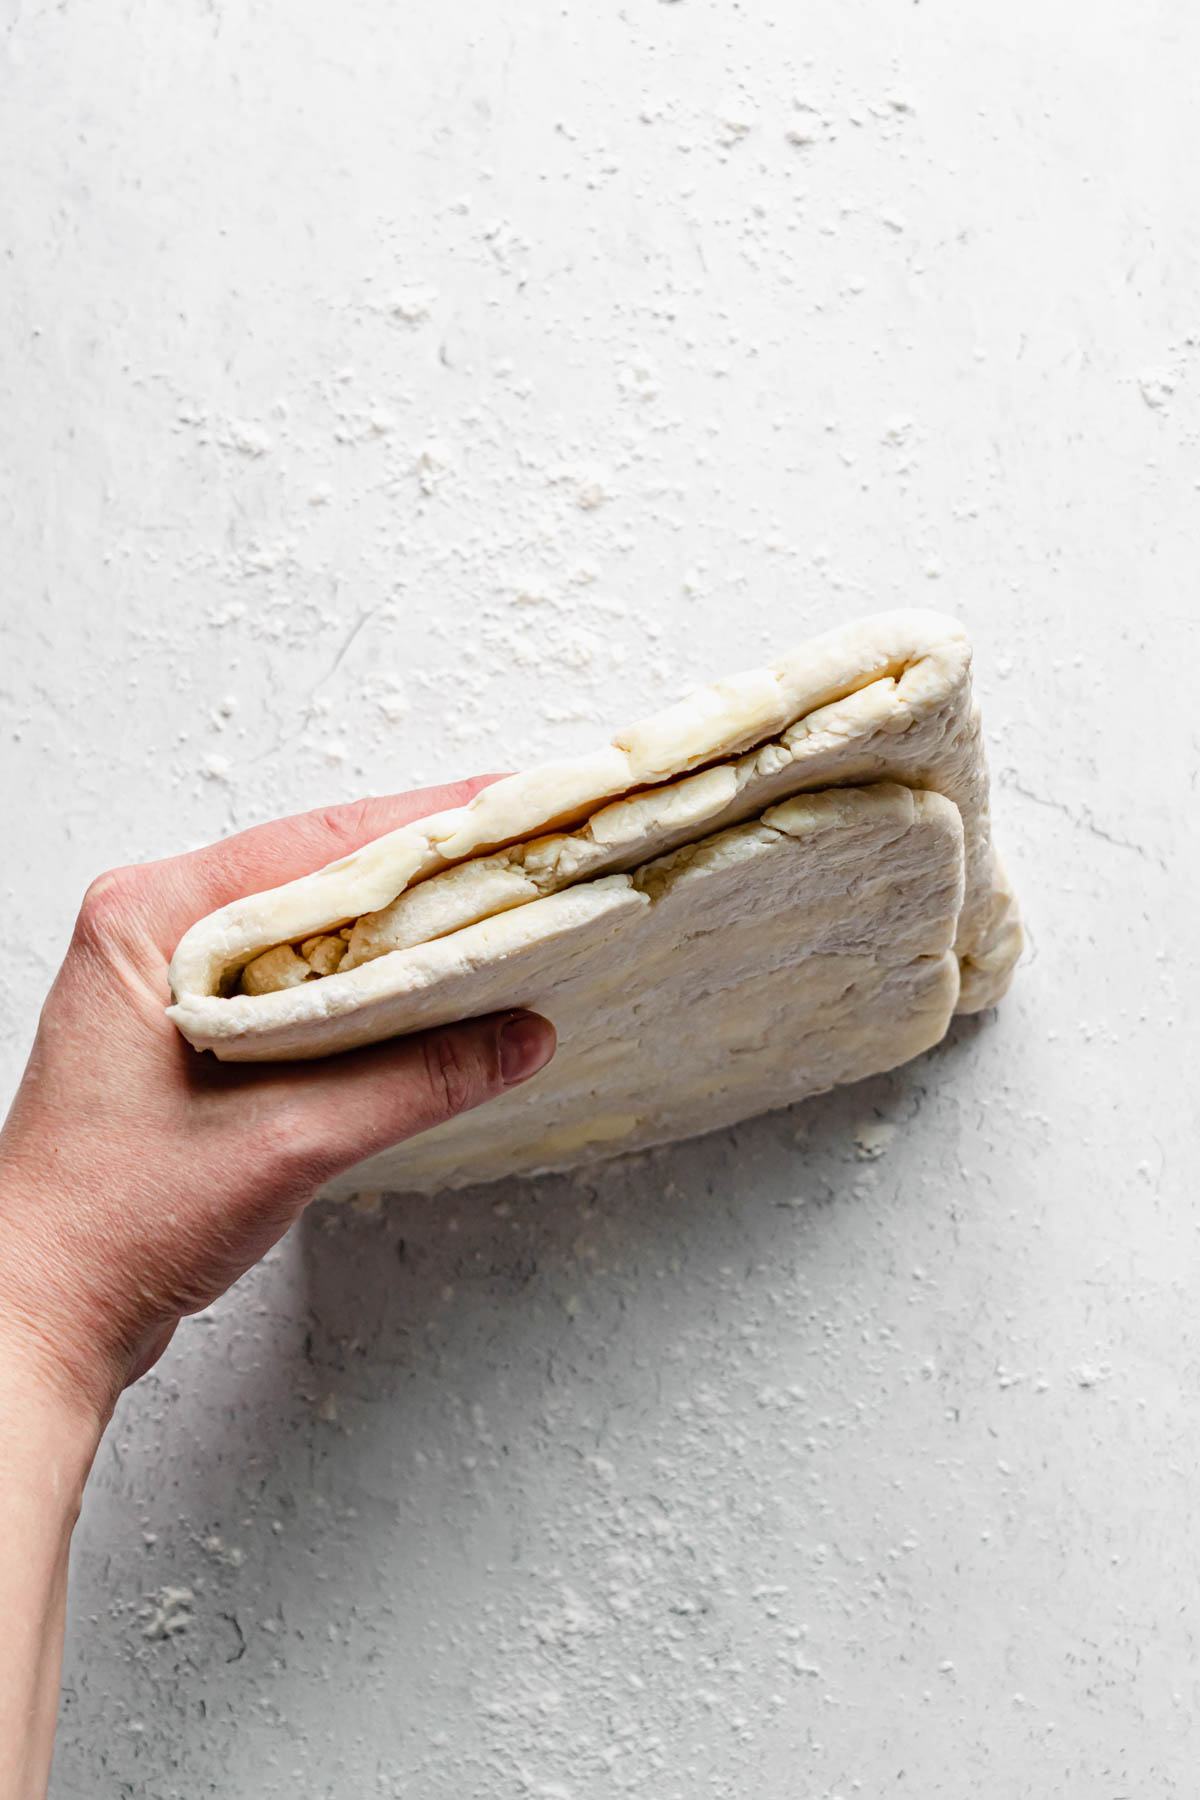
Place the exposed edge towards the body for the next roll. 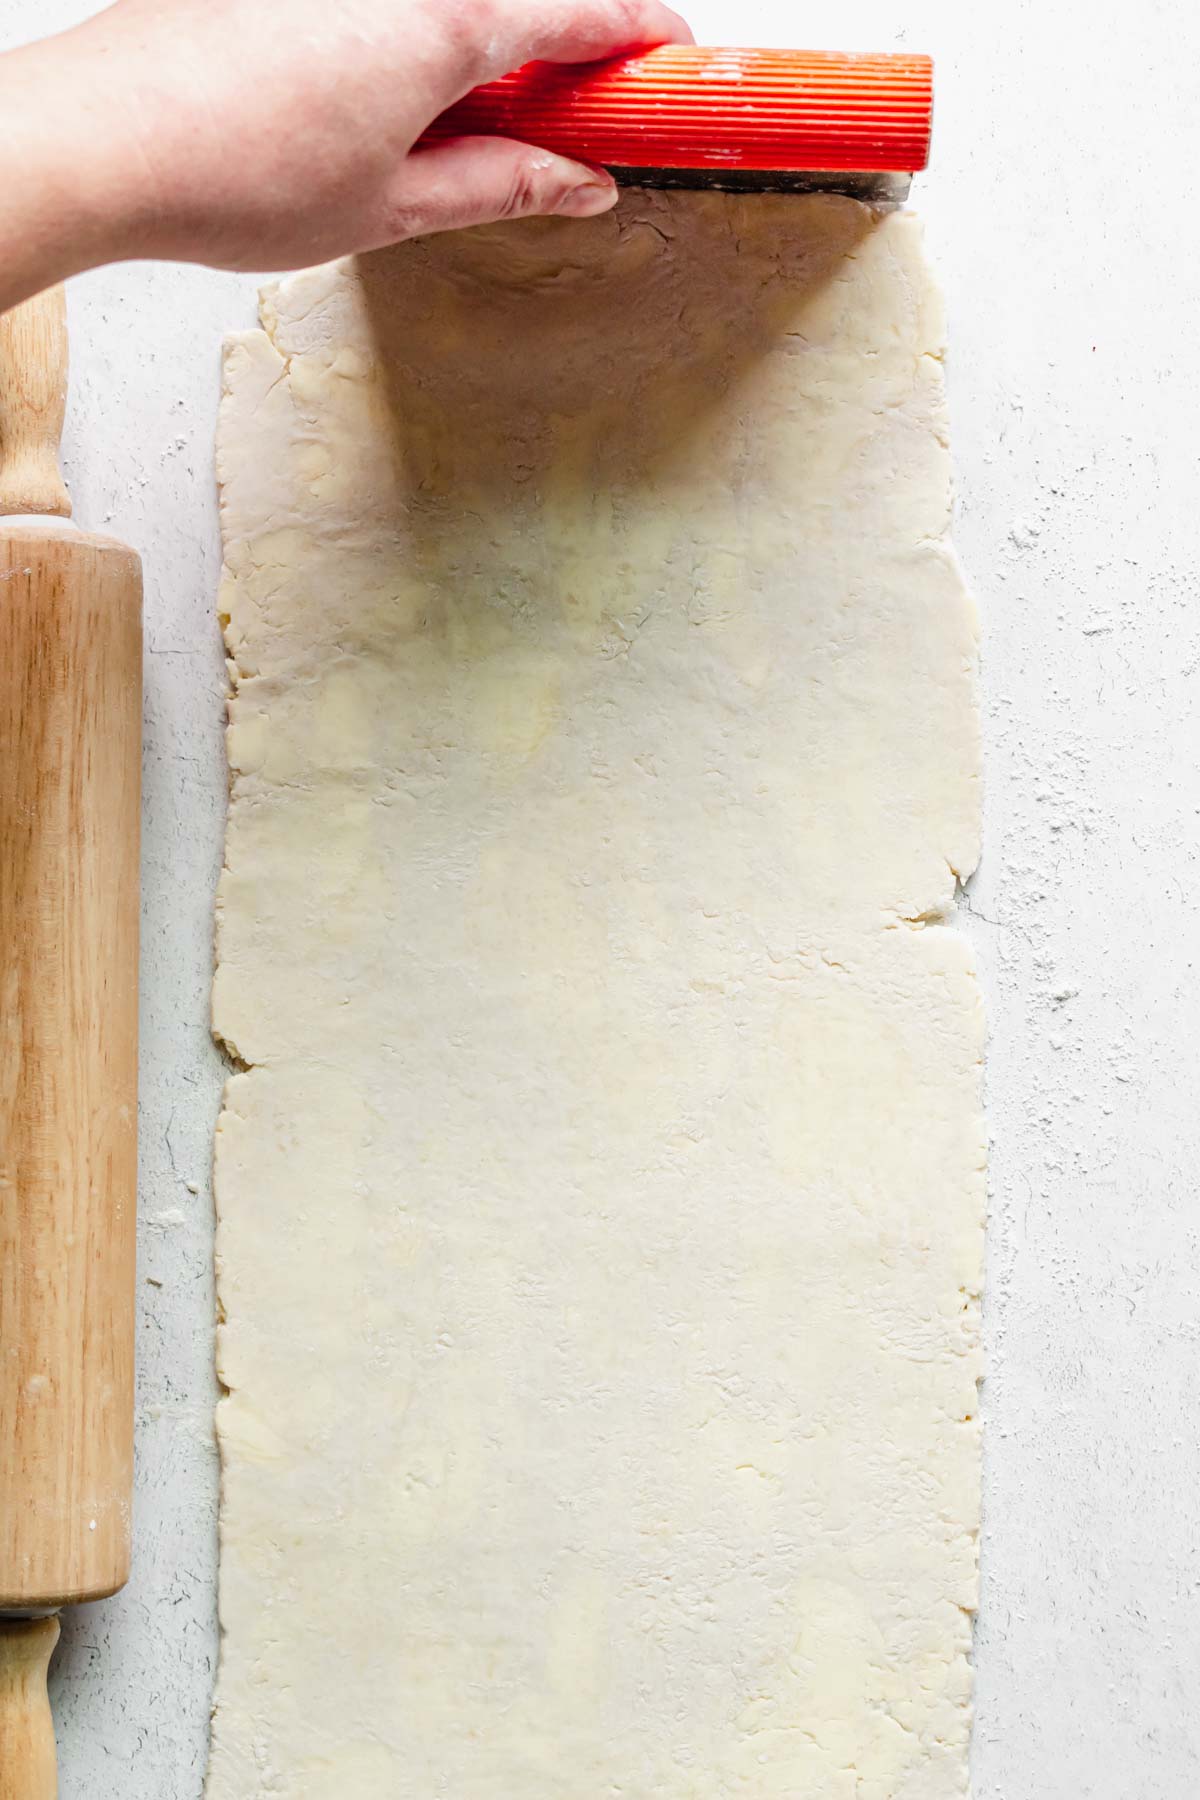
Roll the dough out for the second time and square up the edges. 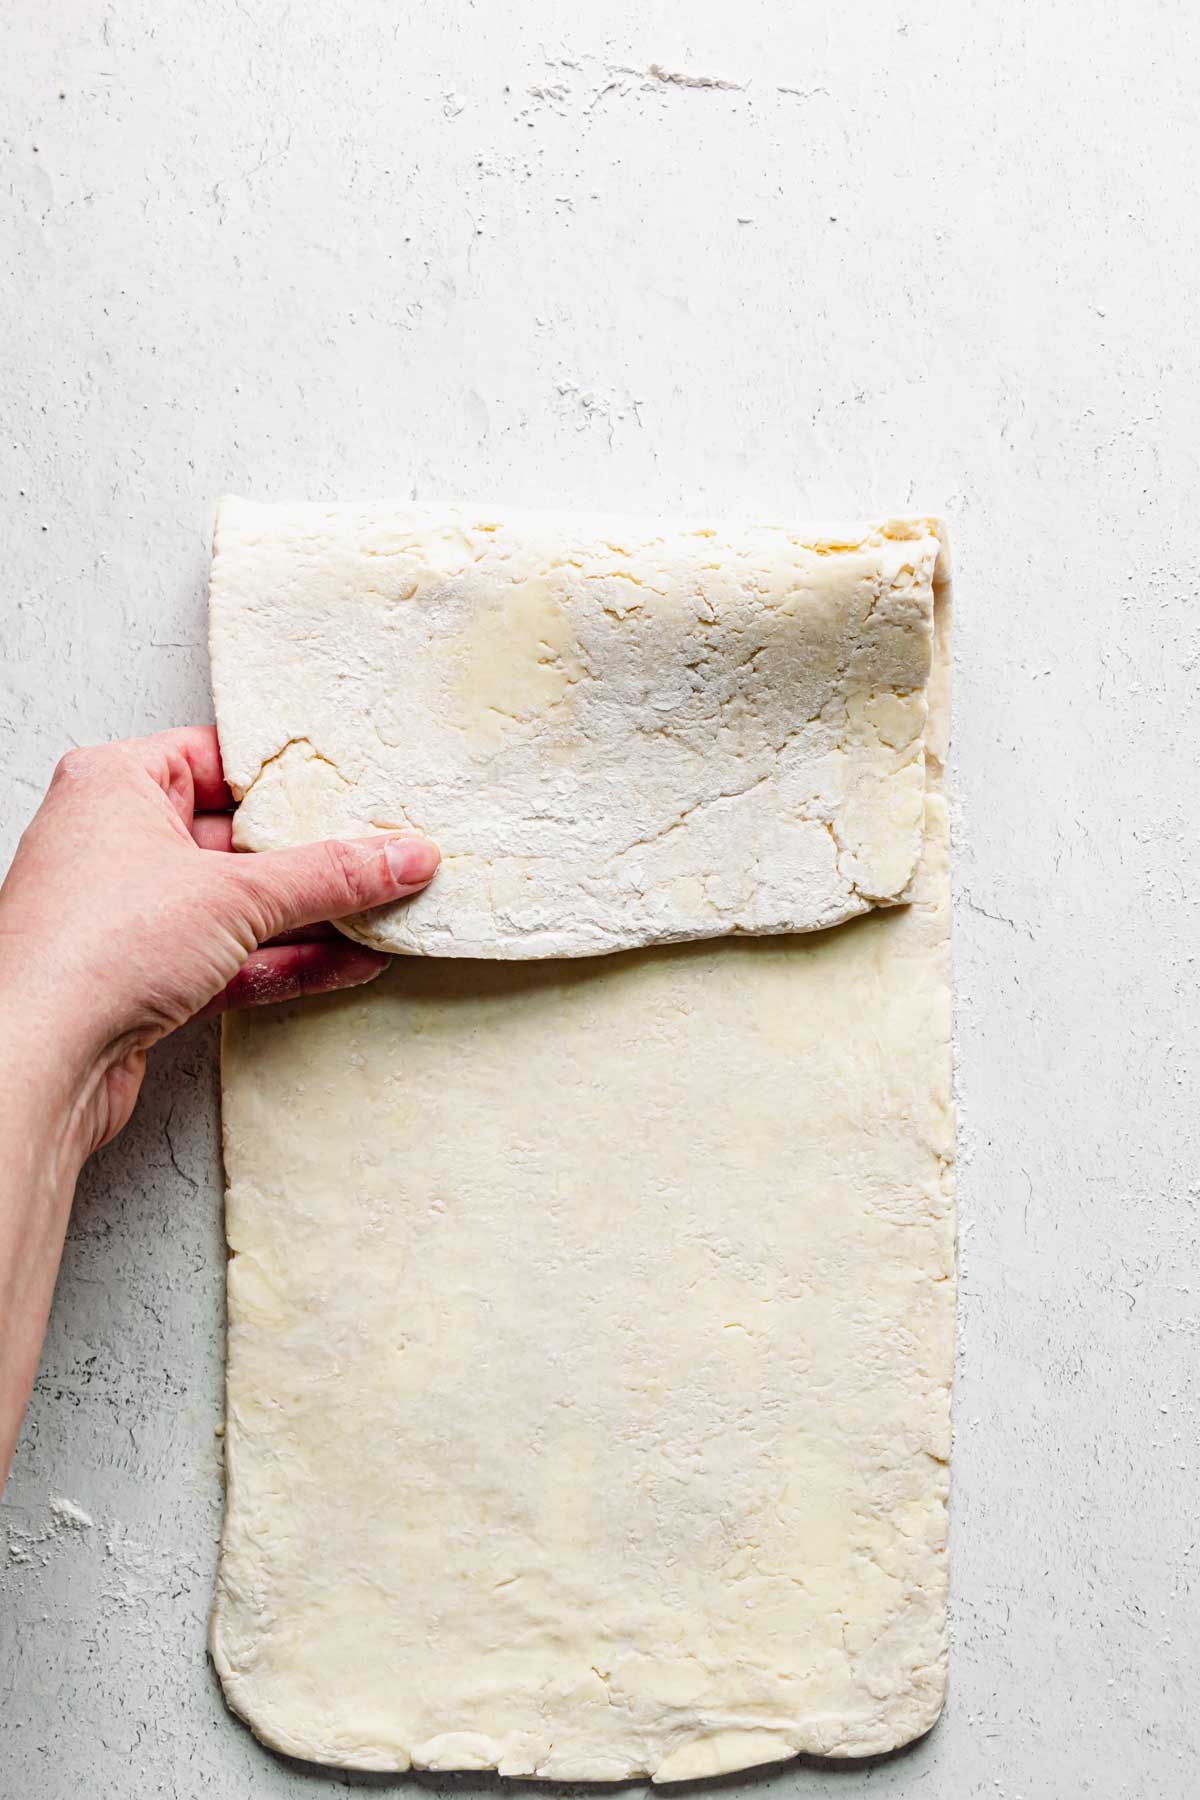
Fold the top quarter down to half. 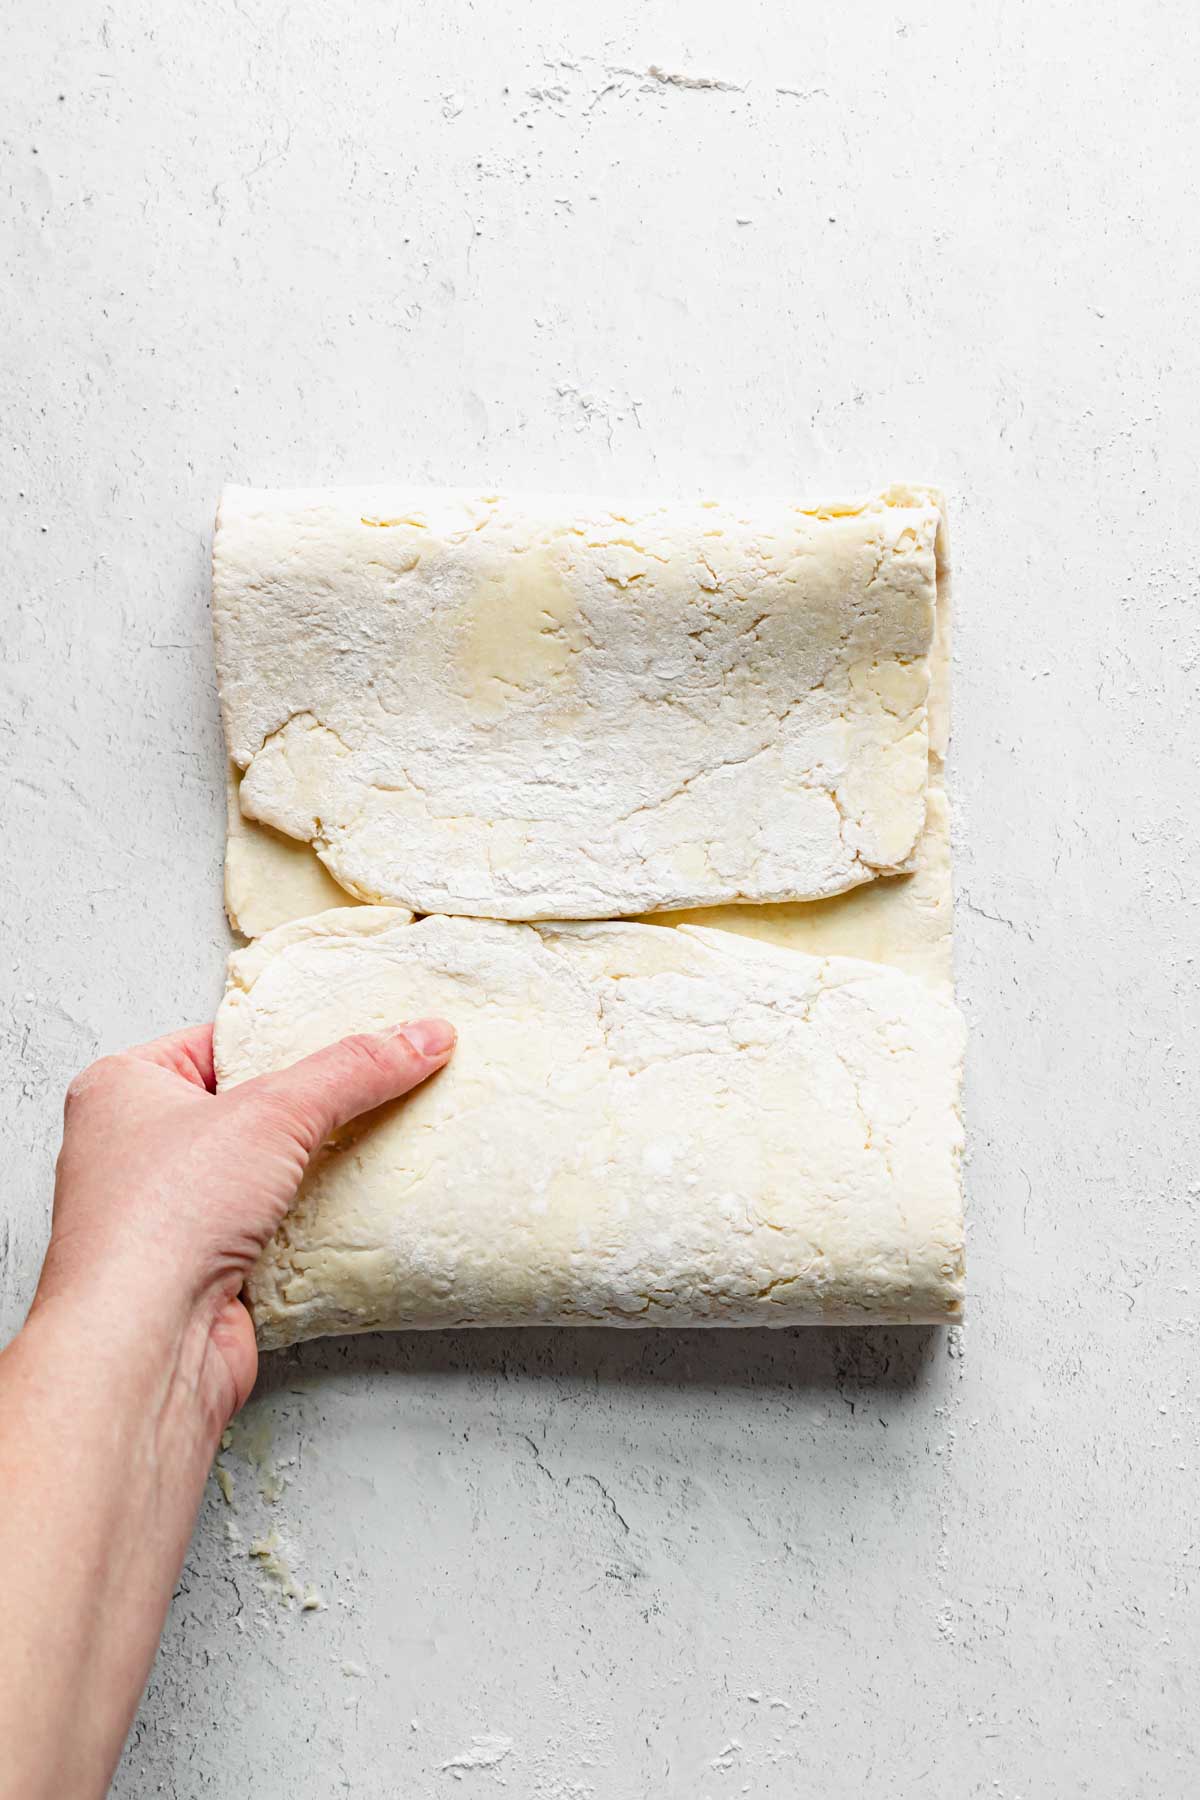
Fold the bottom quarter up to half. 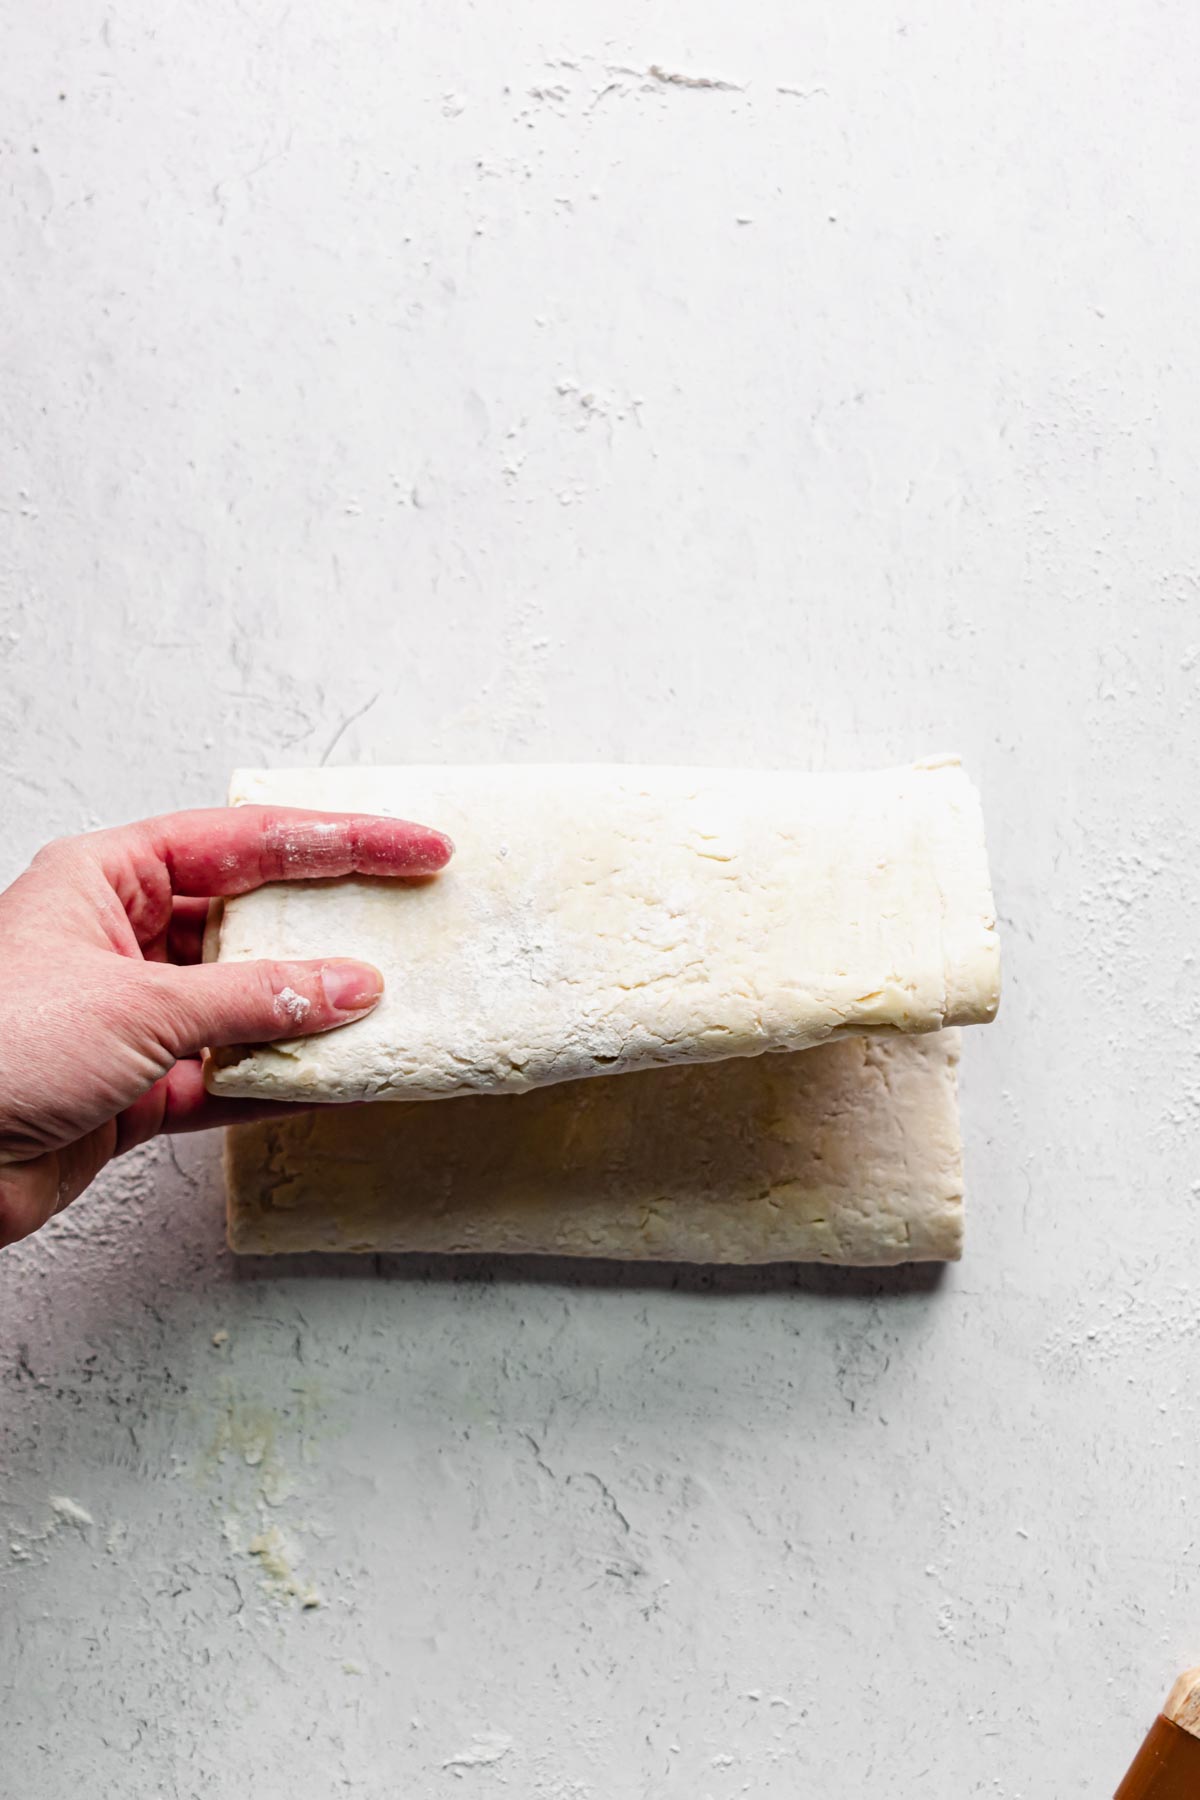
Fold the "book" to close.
Book Fold (again) - Pastry Fold #3
STEP 5: Remove the dough from the refrigerator and follow the exact same steps just completed (the roll and book fold). The dough will feel soft and supple at this point. Wrap it in plastic and place in the refrigerator for a final 15 minutes, then clean off your work surface.
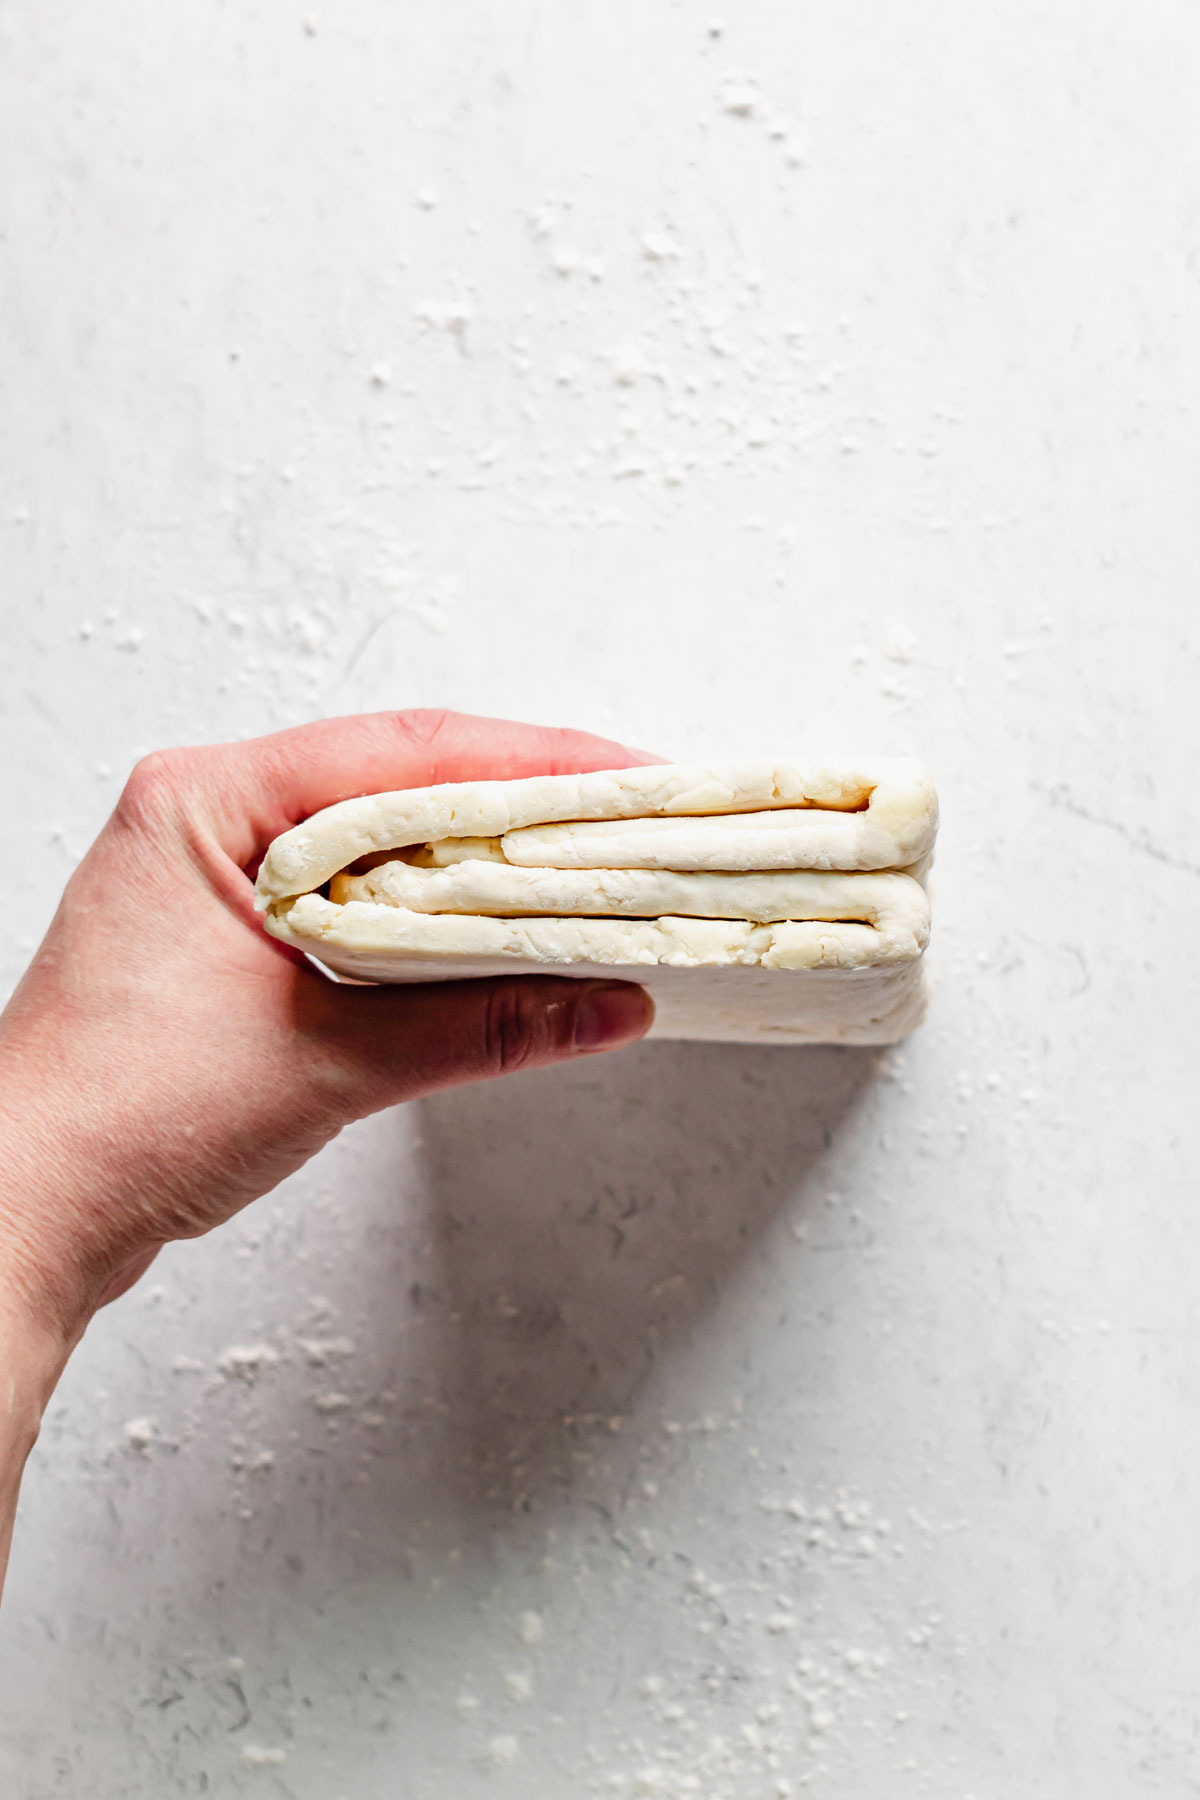
Place the exposed edge towards the body for the next roll. 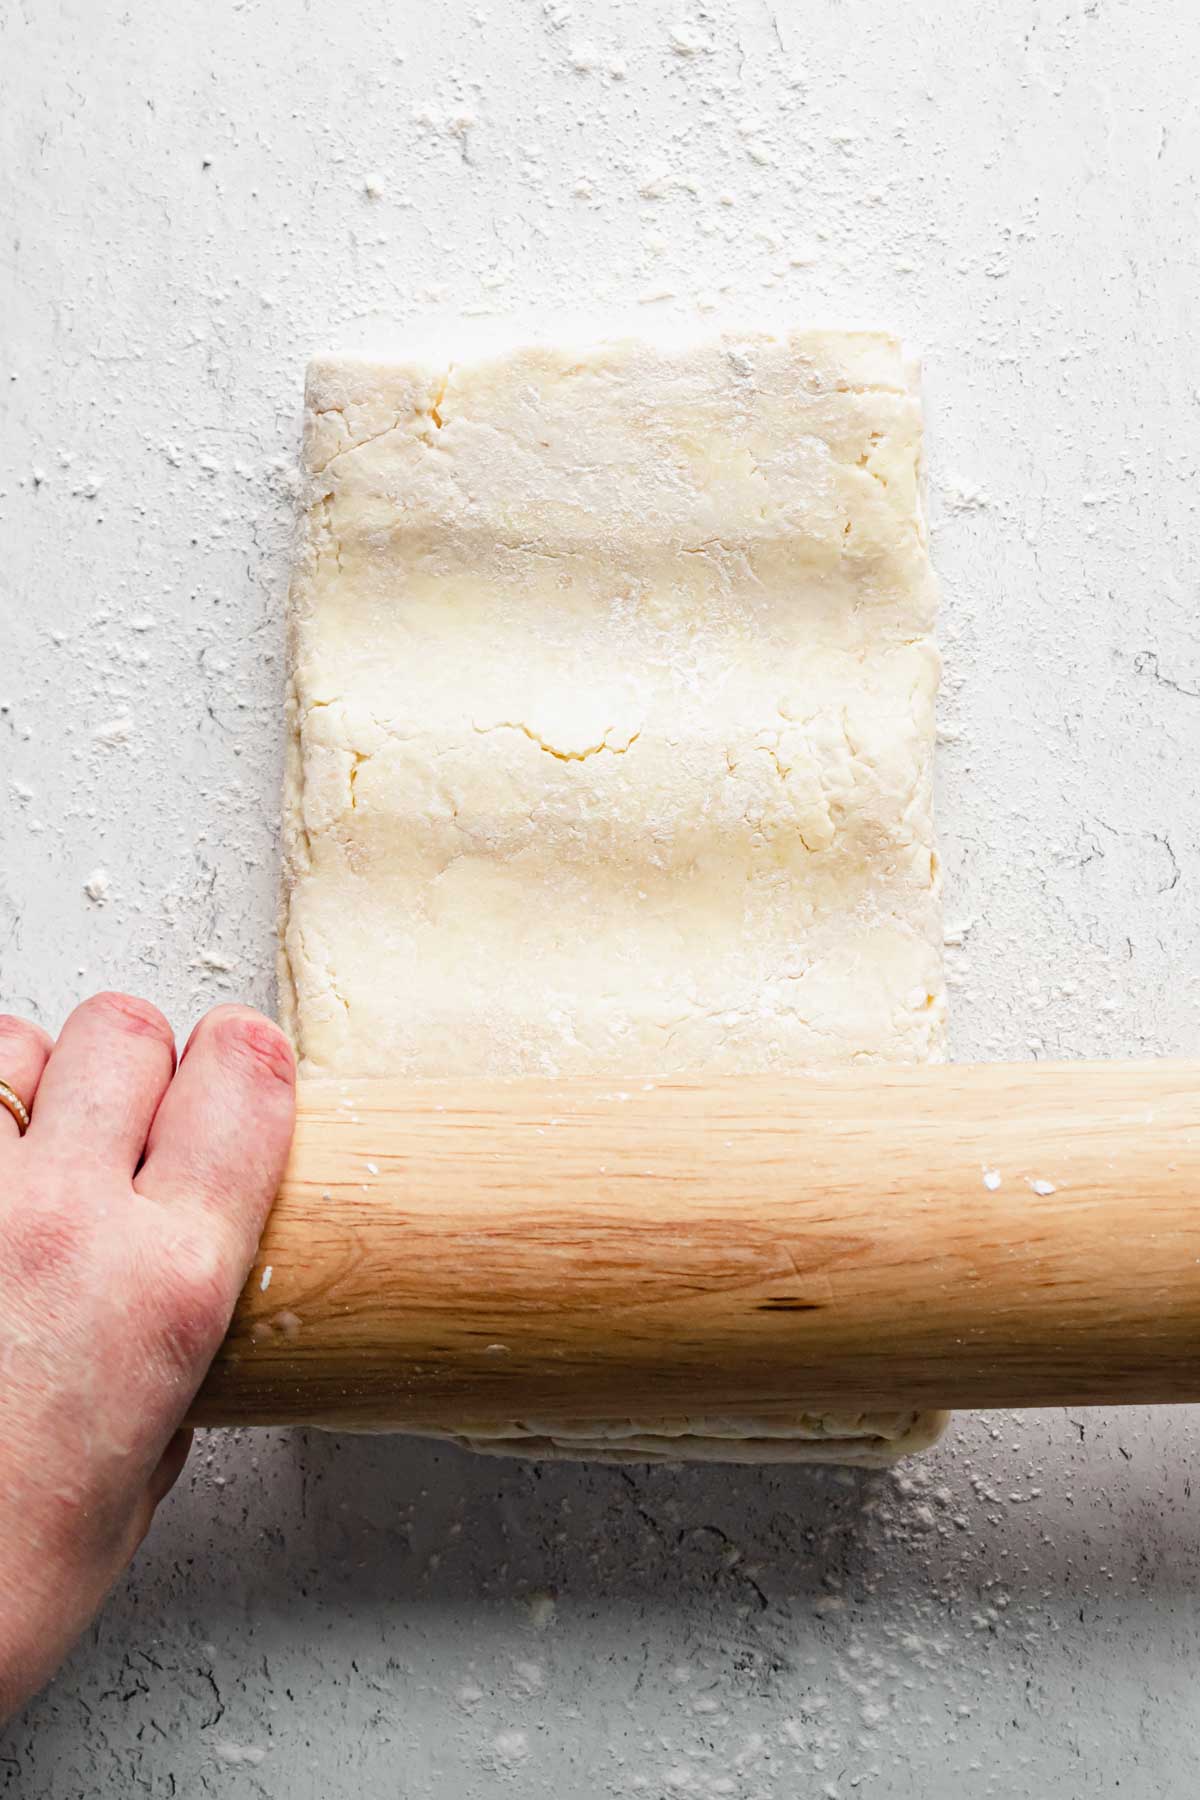
Push the rolling pin into the dough a few times to start the roll. 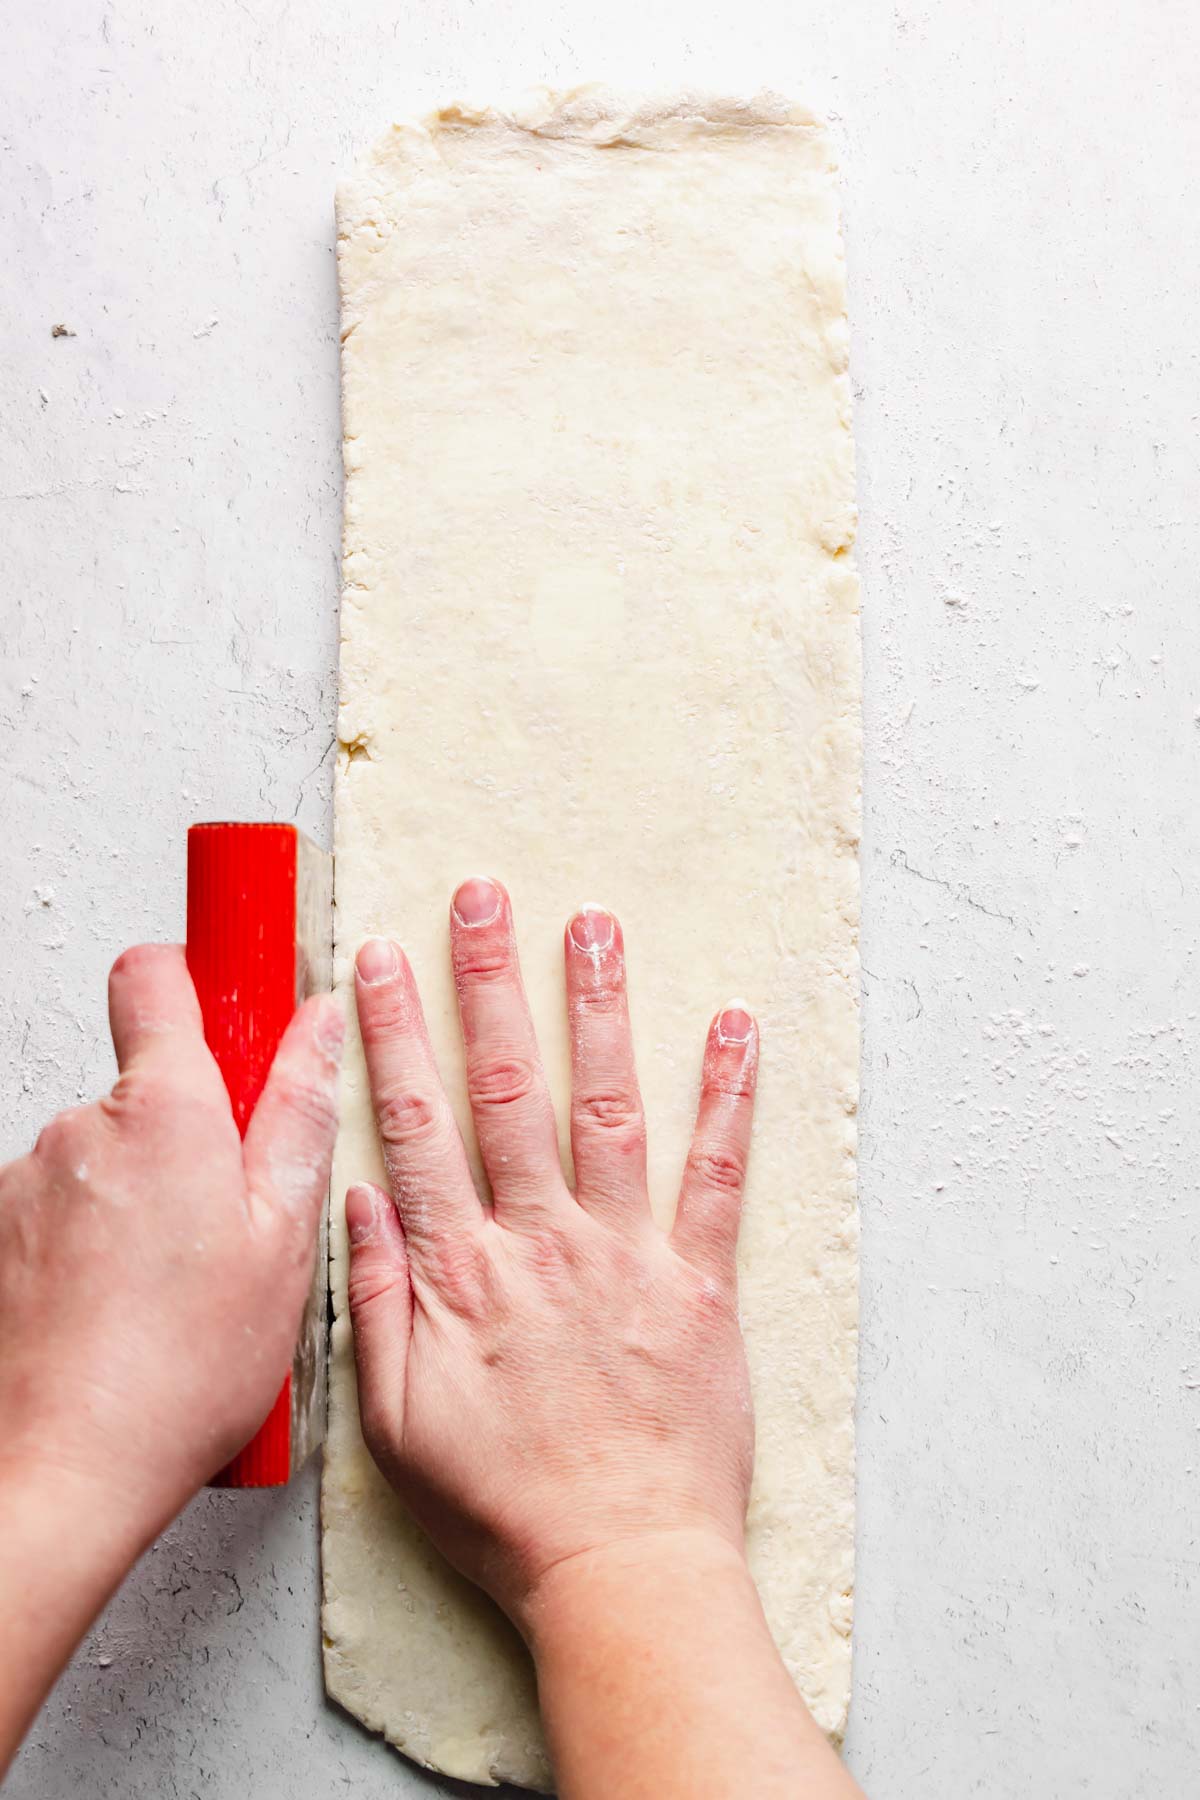
Roll out the dough and use a bench scraper to edge the sides. 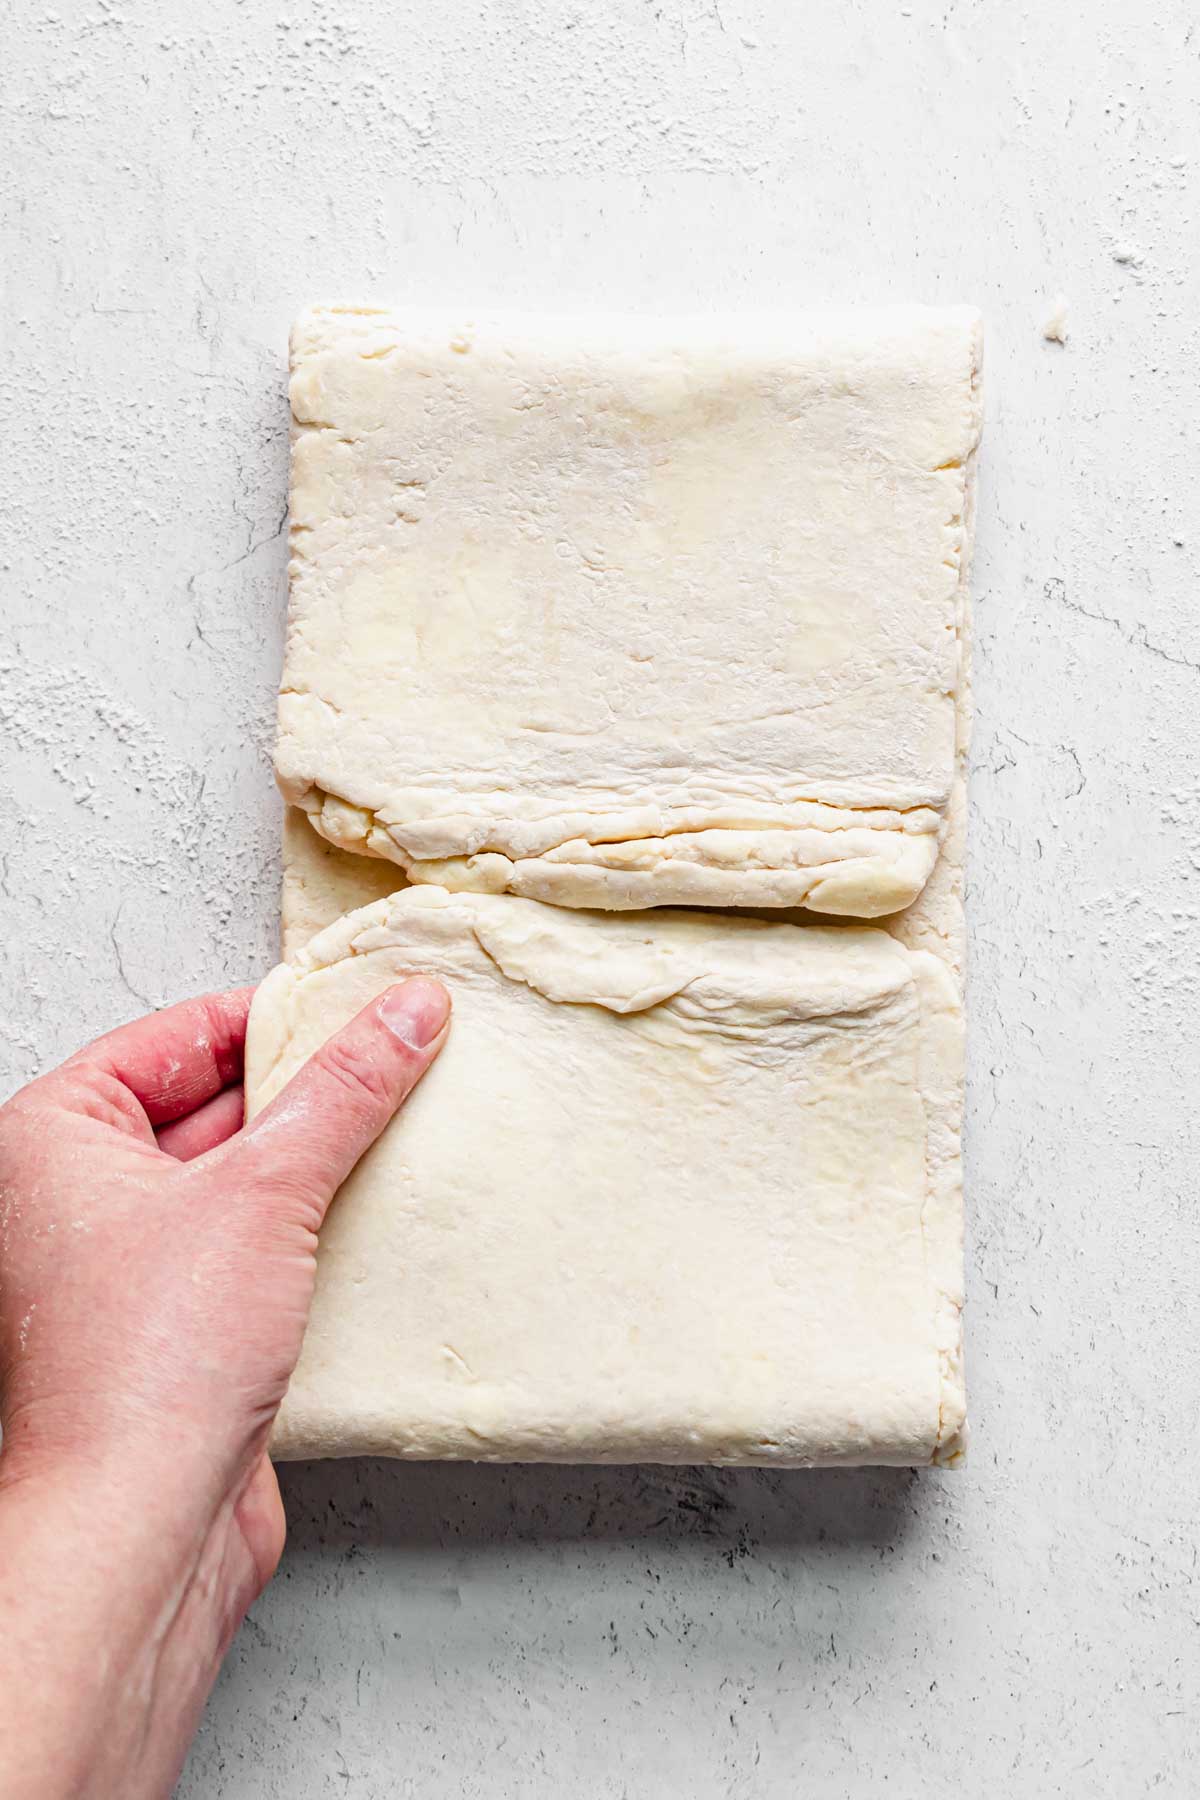
Create a book fold for the second time.
From this point, the dough can either be rolled out to ⅛" to 1/16" thin, cut to shape, and used as directed in the recipe. OR the dough can be rolled out to a ¼" rectangle, split into two, and folded together to store or freeze.
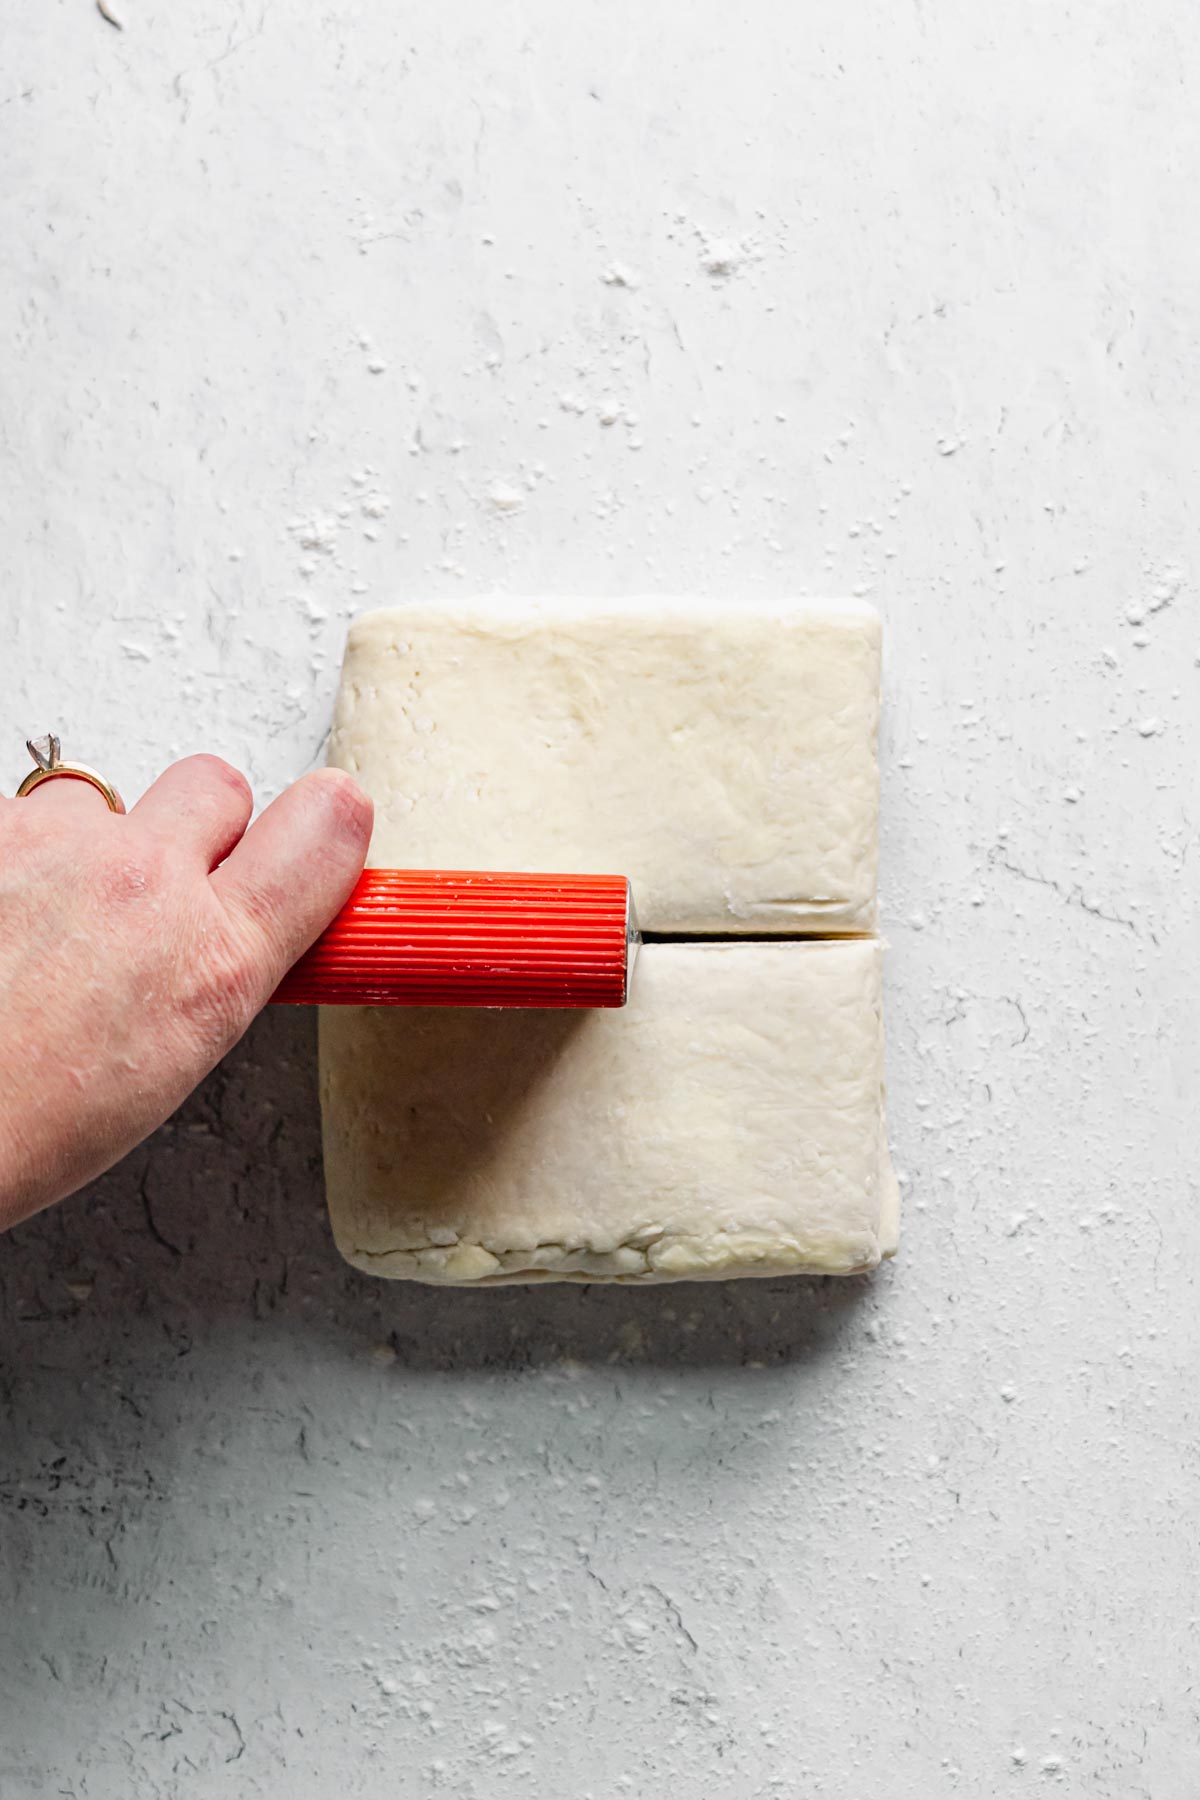
Cut the folded dough in half to create two pieces of pastry. 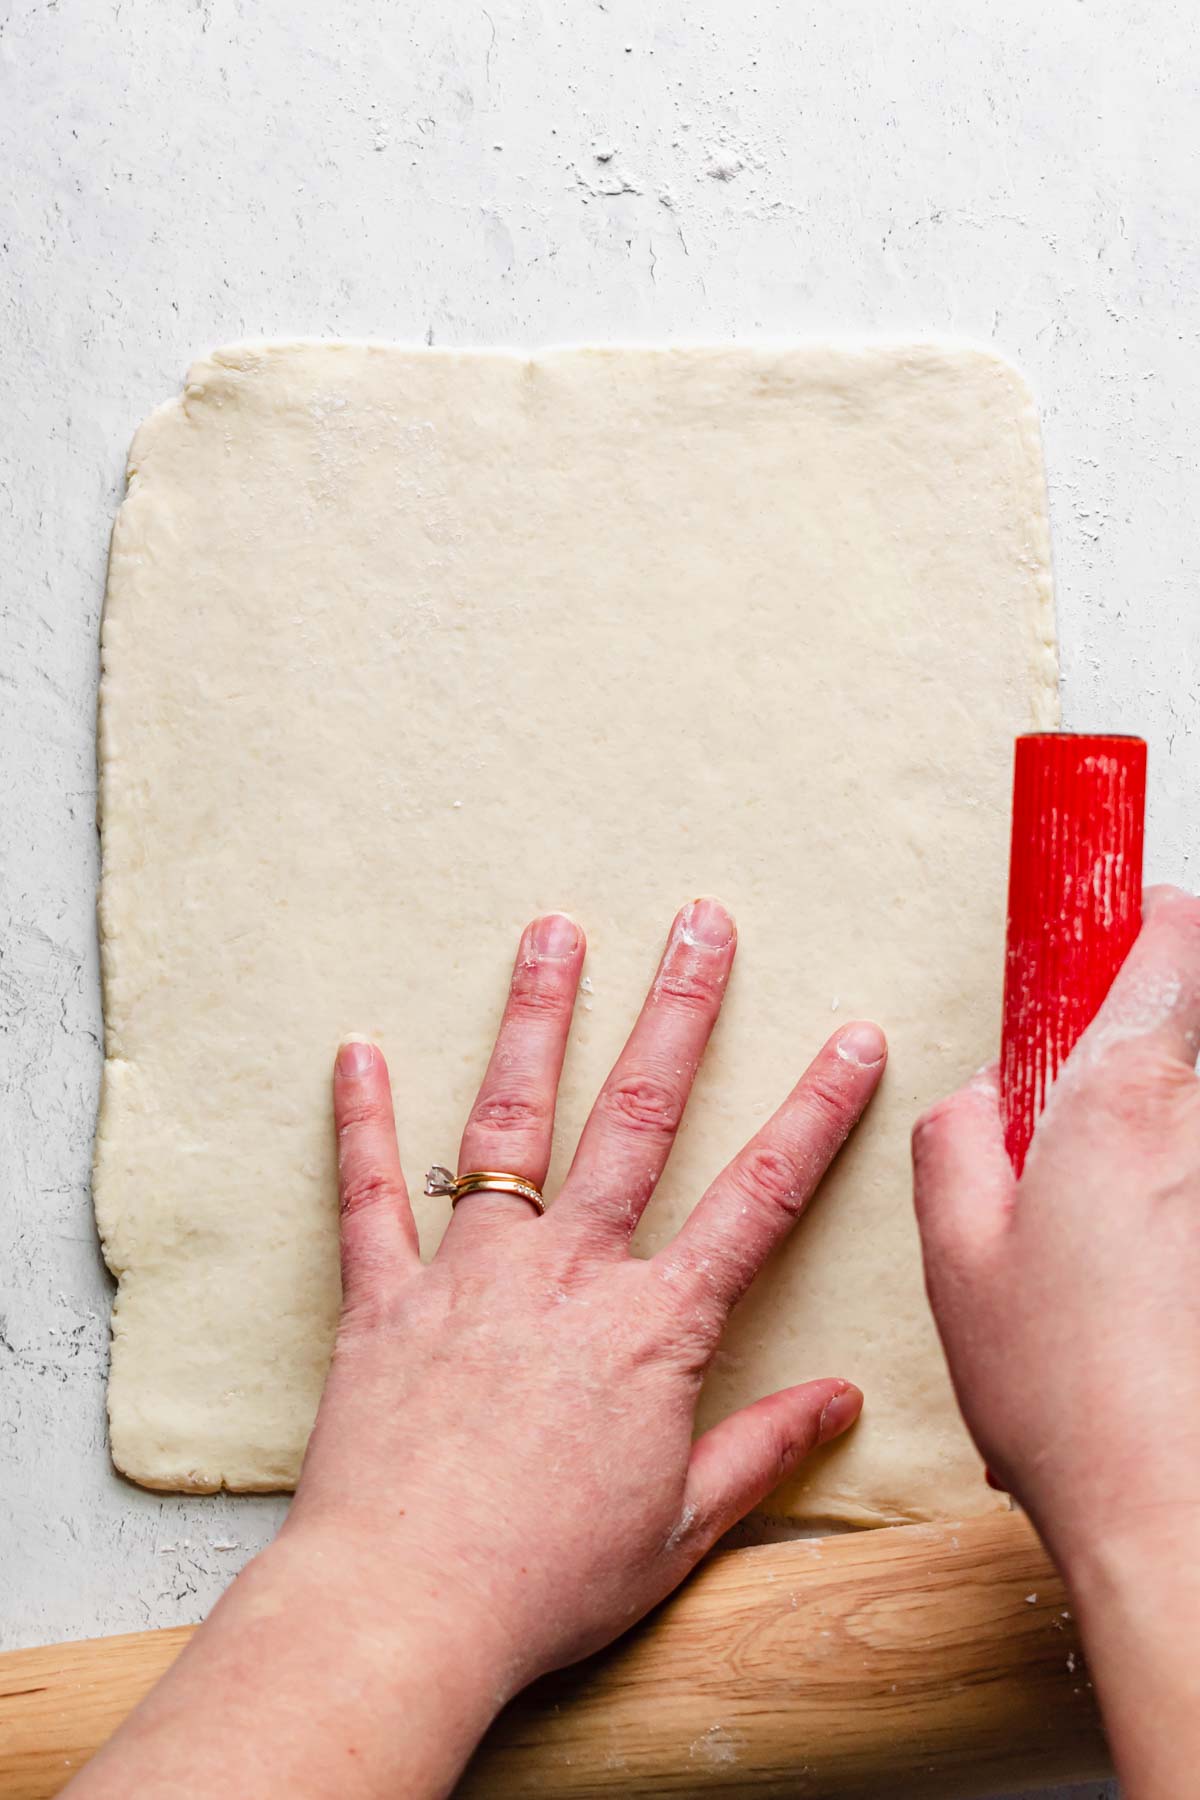
Roll the dough out into a large rectangle to use or store.
How to Use and Bake the Rough Puff Pastry
After the third round of folding, the dough is ready to use! Remove the dough from the refrigerator and place the cross section side towards your body and roll out the dough into a large thin sheet —AKA your usable rough puff pastry!
You will need to turn your puff pastry 90 degrees after every few rolls as you roll it to get the large rectangle shape. While rolling the dough, pull gently on the sides as needed so it remains even as you roll. Brush off any excess flour.
Cut the pastry into the desired shape and follow recipe instructions for filling or baking.
How to Store Rough Puff Pastry
- Roll each pieces of the finished dough out to ¼" thick large rectangles.
- Cut four, 3-inch strips of parchment paper.
- Add a piece to the center, then create the first fold of a tri-fold/envelope fold. Place the second strip of parchment on top, then fold the second third over. Repeat with the second piece.
- Wrap each piece in plastic wrap, then place in a gallon ziptop bag and store in the fridge for 2 days or the freezer for 2 months.
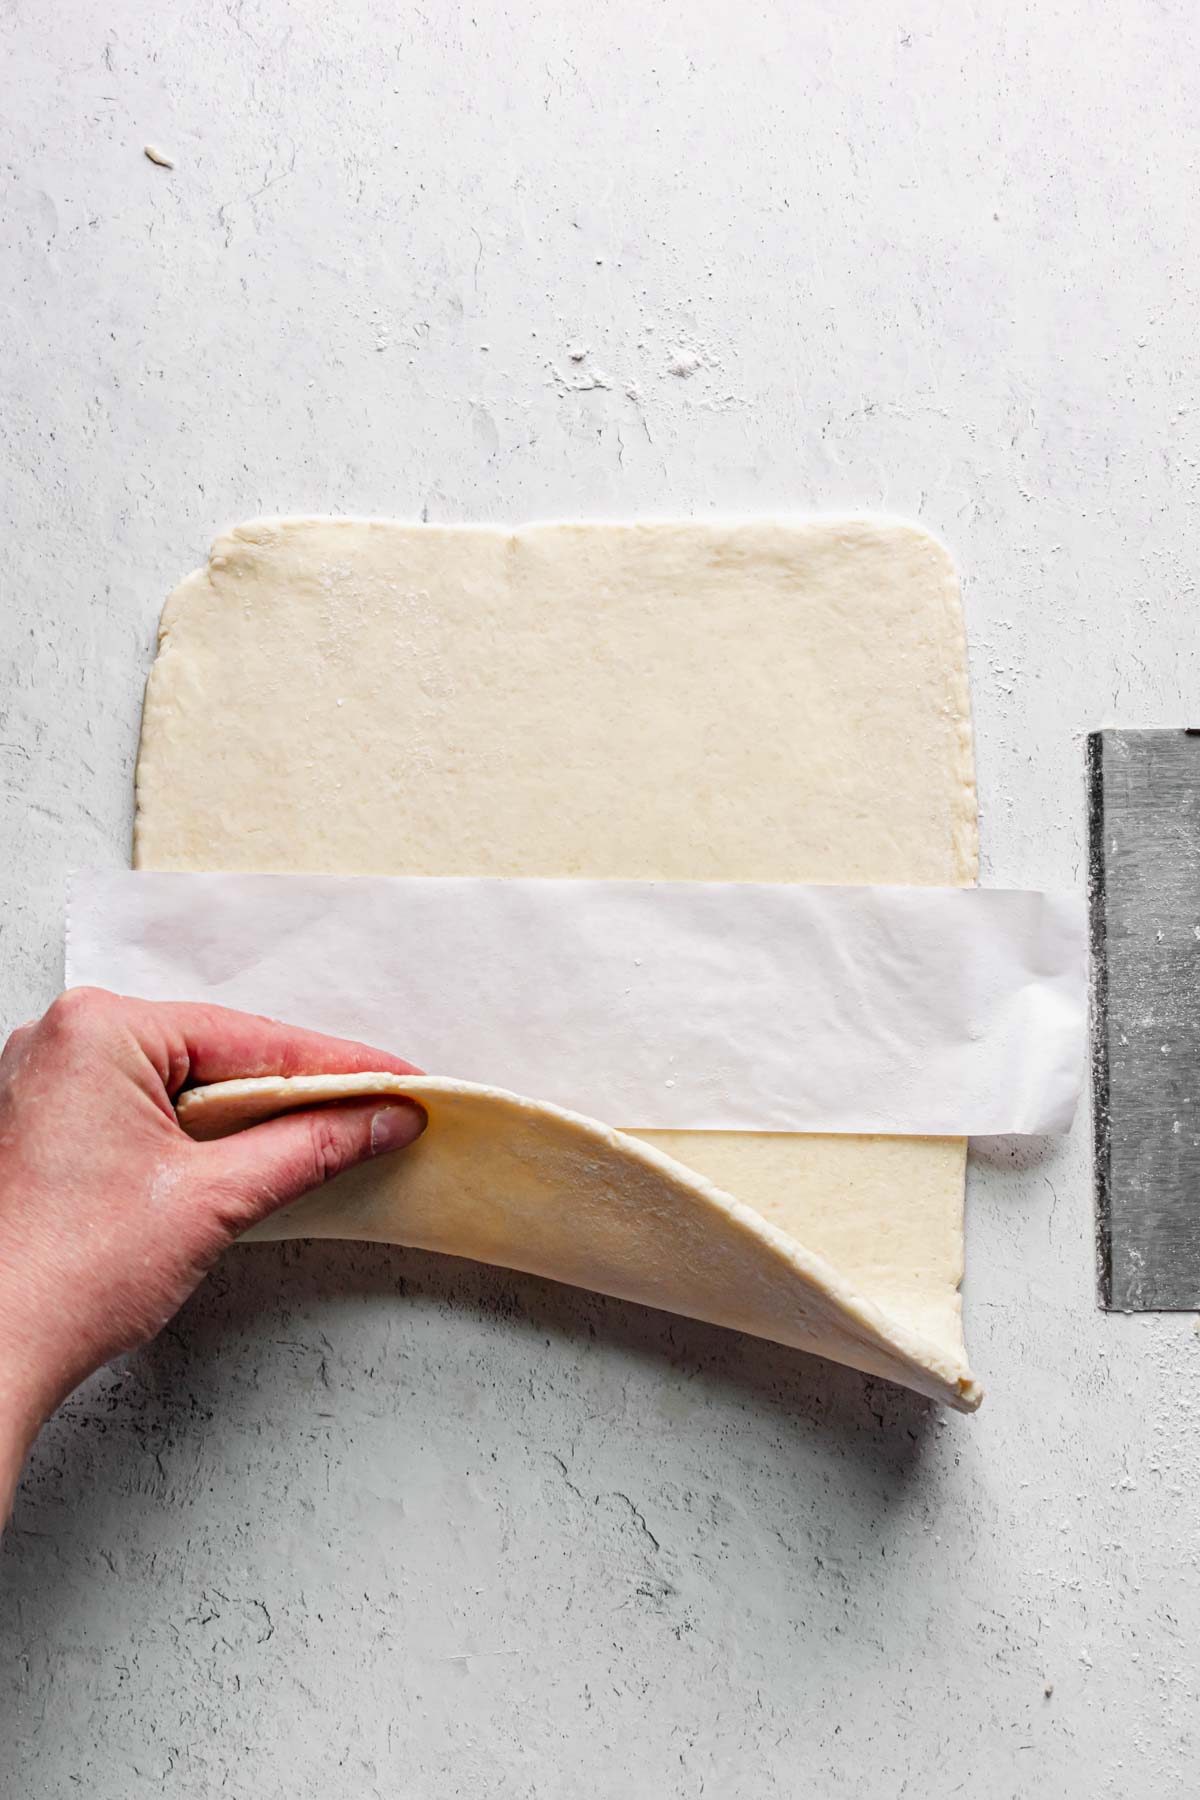
Add a strip of parchment to the center. 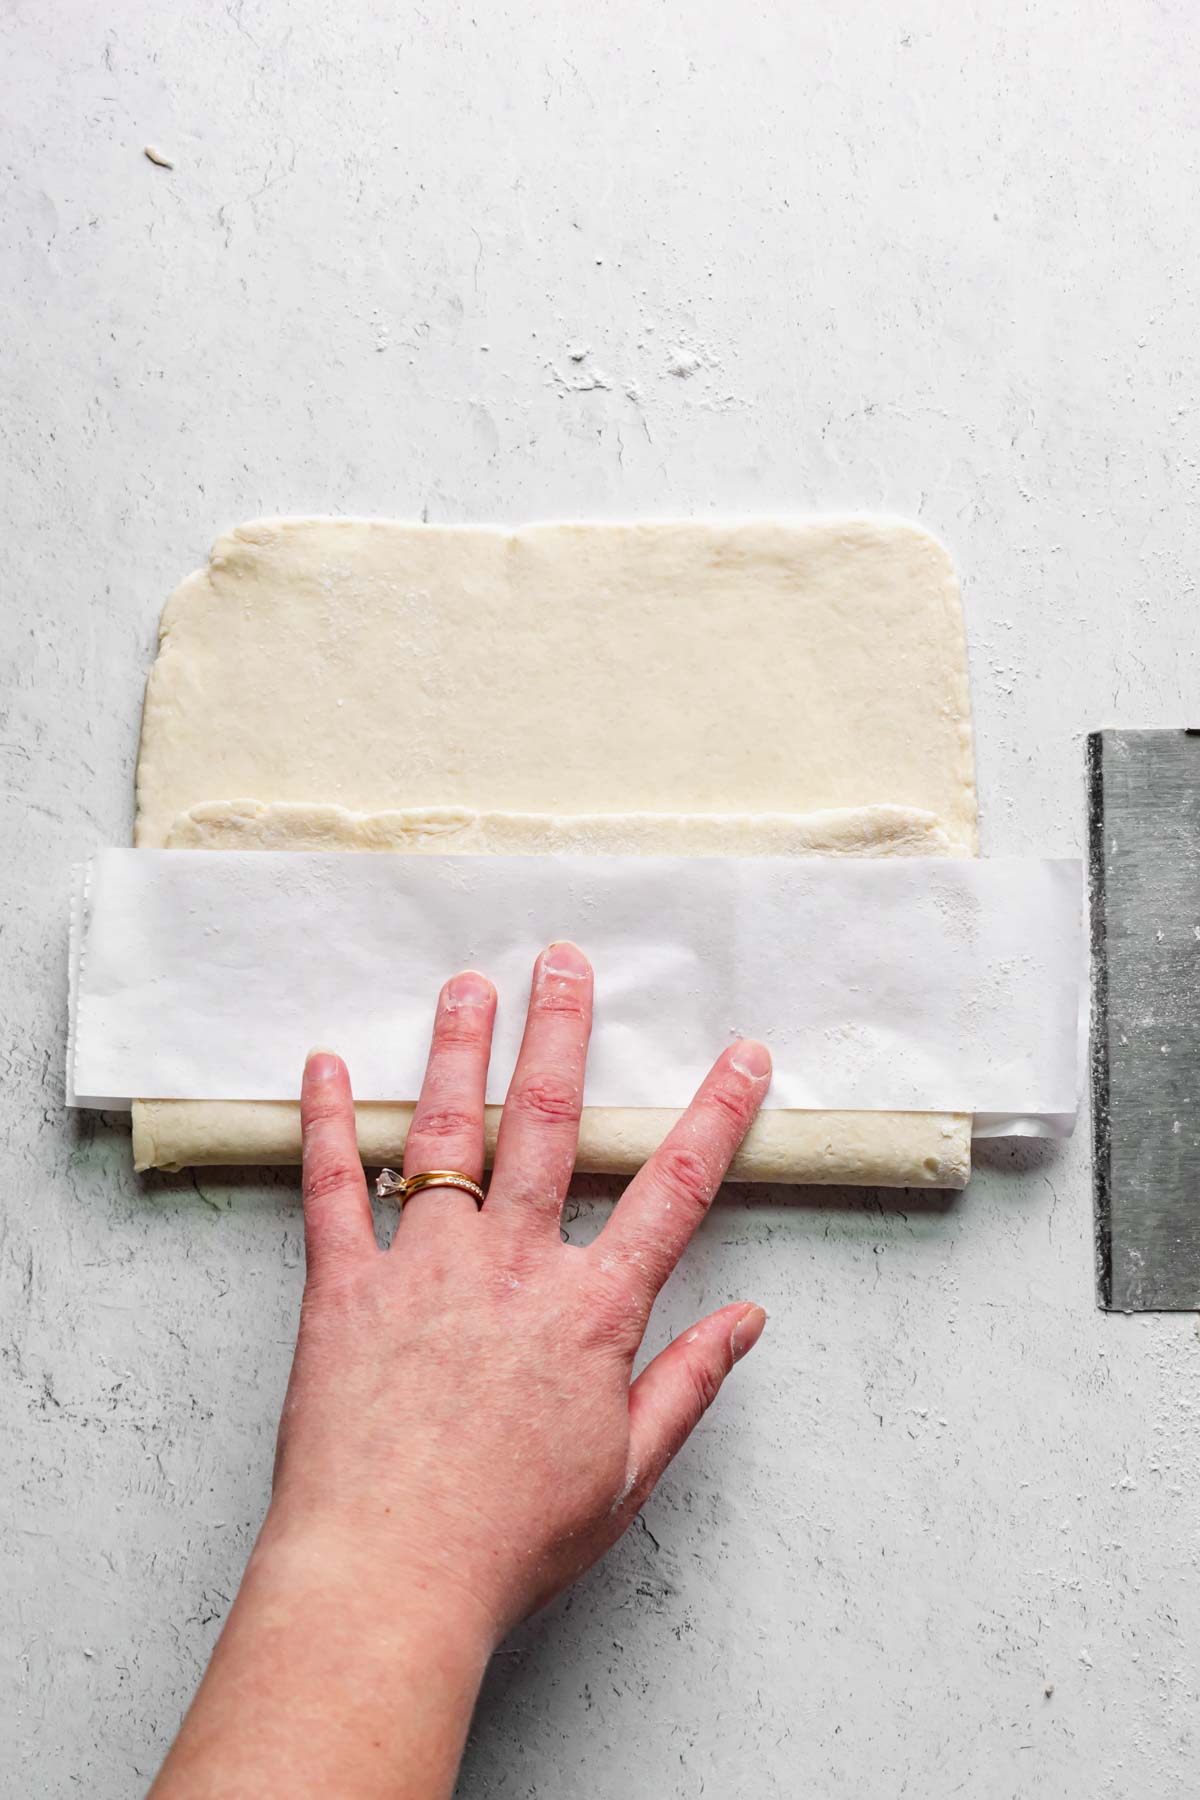
Fold one third over and add another strip of parchment. 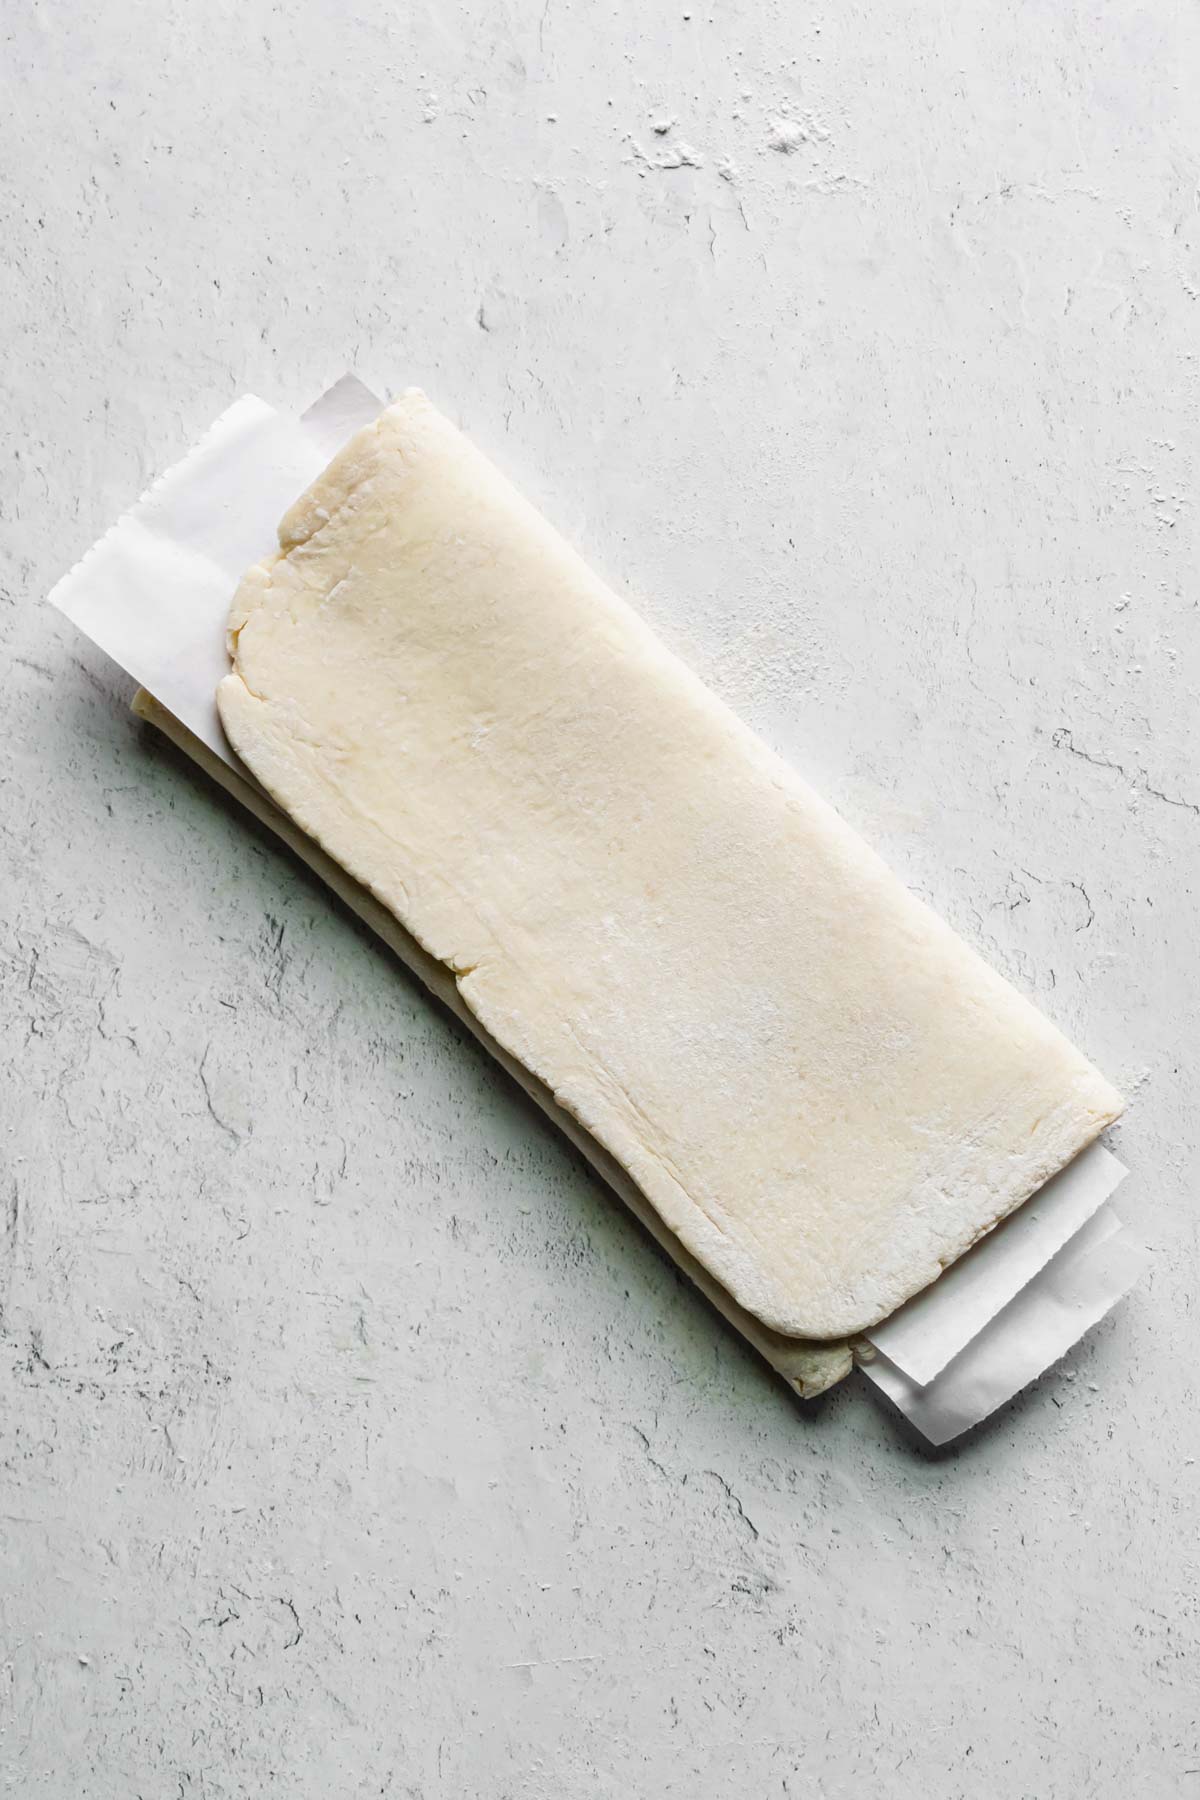
Close the trifold and store in a ziptop bag.
Best Tips
- Handle the dough as little as possible. Only manipulate it enough to bring it together at the start. Once it sticks together, do not squish it and form it into a ball. Just bring it together.
- If any butter gets rolled out of the sides or top, press a bit of flour onto those pieces to cover them up again. If the rough puff is baked with any pieces of butter still exposed, that butter will melt right out of the dough and could create a greasy pastry.
- Lift the dough carefully every once in a while as it’s being rolled out. Any time it starts to stick, toss a bit more flour under it. Utilize your bench scraper to get under the dough rather than your hands. The more you touch the dough, the more the butter melts, and you want the butter to remain as cold as possible. Same goes with the rolling pin.
- If you don’t have a bench scraper, you can use the edge of your rolling pin or the side of your hand.
- It’s crucial that the flour is brushed off the dough in between each fold. Incorporating too much flour into the dough will make it too dry and cause cracks. Use a pastry brush (the non-silicone kind) or a crumpled paper towel to remove the excess flour.
- The dough should only need about 15 minutes of chill time in between each folding series. It should feel pliable, but still firm. If it feels too soft, give it another 5-10 minutes in the refrigerator. If it feels too hard, let it sit at room temperature for 5 minutes before rolling out.
- Wipe down your work surface and rolling pin completely after each folding session. Dry bits should not be incorporated into the soft dough.
- Keep the plastic wrap and re-use it for each chill time.
Further Baking Tips
- When cutting the dough to the shape needed for the recipe, be sure not to touch the sides of the dough after making any cuts. Manipulating the cut sides can potentially seal the edges, which will prevent the flaky sides from forming and rising appropriately. If you do accidentally mess up one of the edges, recut it if there is room to do so.
- When using egg wash, take care not to get any onto the cut edges of the pastry. This could seal the edges and prevent the pastry from rising.
- Add the prepared bake to the fridge for at least 15 minutes prior to baking. This ensures the butter is cold, which produces more steam and a higher rise.
Storing and Freezing
Allow the refrigerated, prepared dough to sit at room temperature for 5 minutes before unfolding. Then, carefully unfold. If any cracks occur along the seams, gently push it back together with your fingers. You can also slightly wet your finger to re-seal it.
Roll out the dough until it's ⅛" to 1/16" in thick and use as directed in the recipe.
To use frozen dough, allow it to thaw in the fridge overnight (covered), or at room temperature (uncovered) for about an hour to thaw. Then follow the same instructions as above to roll it out and use it for the recipe.
For both of these methods, brush off any excess flour after rolling out and before assembling and baking.
FAQs
Roll out the dough to about ⅛" thickness then use as directed in the recipe. It's typically best to place the prepared rough puff pastry in the fridge for about 15 minutes before baking to be sure it's fully chilled. This allows for the best rise.
Puff pastry is typically baked between 400℉/204℃-425℉/218℃. A high heat is necessary to immediately melt the butter and create the steam that allows the layers to rise.
The leftover scraps should never be thrown away! You can fill and roll any larger pieces, cut and bake them flat on a cookie sheet, cut strips, twist, bake and toss with cinnamon sugar to name a few.
The scraps can also be cut and frozen and used on top of items like chicken pot pie.
There are occasions where puff pastry is blind baked or fully baked before using. An example of this would be a full tart that gets spread with cream cheese and fresh tomatoes. Another example is when making vol au vents.
Absolutely. It can be frozen for two months. See the post details above on how to freeze, store, and defrost the rough puff pastry.
Related Pastry Recipes
Did you make this recipe? Tag me on Instagram or Facebook and leave a star rating below! For more ideas, follow me on Pinterest.
📖Recipe
Rough Puff Pastry (with video)
Equipment
- Large bowl
- Small bowl or cup
- Tablespoon measure
- Teaspoon measure
- Scale or measuring cups
- Plastic wrap
Ingredients
- 300 grams unsalted butter cold (1 cup + 4 tablespoons, or 2 ½ sticks)
- 300 grams all-purpose flour 2½ cups
- 1 teaspoon kosher salt
- Ice water
Instructions
- Cut the required amount of butter into tablespoon-size pieces and transfer to a plate or bowl. Measure out the flour into a large bowl and mix in the salt. Gather a standard bowl of water and throw a handful of ice cubes into it. Clean and sanitize a counter space to work on.
- Once everything is prepped and ready, add the butter pieces into the flour and toss (with wide fingers, aka “claw hands”) until all pieces of butter are separated and completely coated in flour.
- Working quickly (so the butter stays as cold as possible), flatten out each tablespoon piece of butter. This can be done with fingertips and thumbs, or by pressing the butter in between the heels of your hands. If using the second method, be sure to flour your hands to prevent the butter from sticking.
- Once all the pieces of butter are flattened out, toss them again to fully coat in flour. Then, begin drizzling one tablespoon of ice water around the mixture at a time, tossing with claw fingers in between each addition to help the flour absorb the water. Be sure to get your fingertips to the bottom of the bowl and move upwards.
- After a few tablespoons of water, the mixture will start looking shaggy. Add just enough water that all of the dry dough pieces and flour at the bottom of the bowl become incorporated, without making the dough too wet. This can be a different amount of water depending on the day, but start “testing” the dough at 5 tablespoons, and continue adding one tablespoon at a time until it comes together.
- To test if the dough is ready, squeeze the whole thing together with both hands. If the dough holds together and there are no longer crumbles in the bottom of the bowl, it’s ready! It should not feel wet or sticky. If that is the case, too much water has been added - sprinkle 1 tablespoon of flour over the dough and incorporate in the same claw finger method. Continue with another tablespoon, if needed.
- Lay the dough on a sheet of plastic wrap and wrap tightly, then form the dough into a rectangle by pressing down on the dough and squaring up the sides. This step is best practice, and will help tremendously in the first roll out. Once wrapped and formed, place the dough in the refrigerator for 20 minutes. Clean off your work surface so that no crumbs or pieces of dough remain.
- Unwrap the dough (don’t throw away the plastic, you’ll reuse it) and lightly flour the work surface and rolling pin. Roll the dough into a long rectangle, using a bench scraper to press the sides inward and keep a clean rectangle. The dough should be about 6 inches in width, and about 20 inches in length, however, keeping the correct thickness is most important. The dough should only be rolled to about ¼” at the thinnest during the folding process.
- Use a pastry brush to wipe all flour off the top of the dough, then make a trifold (just like folding a letter for an envelope). Fold the top third of the dough down, brush off the flour, then fold the bottom third up and brush off the flour. Gently pick up the dough, turn it over and brush flour off of the final side. Place the dough back into the plastic, wrap, and place in the refrigerator for 15 minutes. Clean off your work surface.
- Remove the dough from the refrigerator, and place the dough on a lightly floured surface so the cross section of the fold is facing your body. This will be the side where you can see the folds inside. Roll the dough out in the same method as before, utilizing the bench scraper and following the same dimensions.
- Brush off the excess flour from the top, then complete a book fold. Fold down the top of the dough so it meets the middle and brush off the flour. Bring the bottom up to meet the other side in the center and brush off the flour. Fold the dough together as if you’re closing a book (hence, a book fold!). Brush off the flour from all sides, wrap in plastic wrap, and rest in the refrigerator for another 15 minutes.
- Clean off your work surface. Remove the dough from the refrigerator and follow the exact same steps (the roll and book fold) you just completed. The dough will feel soft and supple at this point. Wrap it in plastic and place in the refrigerator for a final 15 minutes, then clean off your work surface.
- Remove the dough from the refrigerator and place the cross section side towards your body. This time, you will roll your dough out into a large thin sheet —AKA your usable rough puff pastry! You will need to turn your puff pastry 90 degrees after every few rolls as you roll it to get the large rectangle shape. As you roll out the dough, pull gently on the sides as needed so it remains even as you roll.
- If utilizing for a recipe right away, ⅛” thick and cut into the desired shape(s) needed. Do not roll the dough thinner than ¼” if you plan to freeze it. See "Notes" section for freezing instructions.
- Prepare and bake the rough puff pastry according to the recipe instructions it's being used for.
Video
Notes
- Roll the finished dough out to ¼" thickness then cut it in half.
- Cut four, 3-inch strips of parchment paper.
- Add a piece to the center, then create the first fold of a tri-fold/envelop fold. Place the second strip of parchment on top, then fold the second third over. Repeat with the second piece.
- Wrap each piece in plastic wrap, then place in a gallon ziptop bag and freeze for 3 months.
- Unwrap and thaw at room temperature, then open and roll it out to the desired thickness).


Michael
So the recipe is for two sheets. Does that mean the dough should be split in half between steps 6 and 7?
Thanks!
Callan Wenner
After the third book fold (before it's officially ready to roll out), you'll want to split it in half to get two chunks of dough to equal two sheets (as you would with store-bought). However, if you want to just roll out the entire large sheet to use right away (if you're cutting shapes, for example), you can also do that!
Marianette
Hello . I would like to know the length and width of last roll out of dough before you divide it in half to make two sheets. Thank You.
Callan Wenner
Hey there - go for roughly 24" x 20" - but it's more important to keep it at about 1/4" thickness prior to dividing, that way you'll be able to roll out closer to 1/8" for the actual recipes. Just try to keep it in a clean rectangle or square before dividing!
Ana
I used your rough puff pastry guide and your galette des rois recipe to make a rough puff dessert for the first time! It turned out well! Thank you for pulling this together!
The Cozy Plum
Thank you Ana!! I appreciate you leaving this review here and I'm so glad it worked out!!
Kayla
I used this puff pastry for beef wellington and it was perfect! The step by step instructions with photos were so helpful!
The Cozy Plum
What a perfect way to use this and so glad you enjoyed. Thanks, Kayla!