
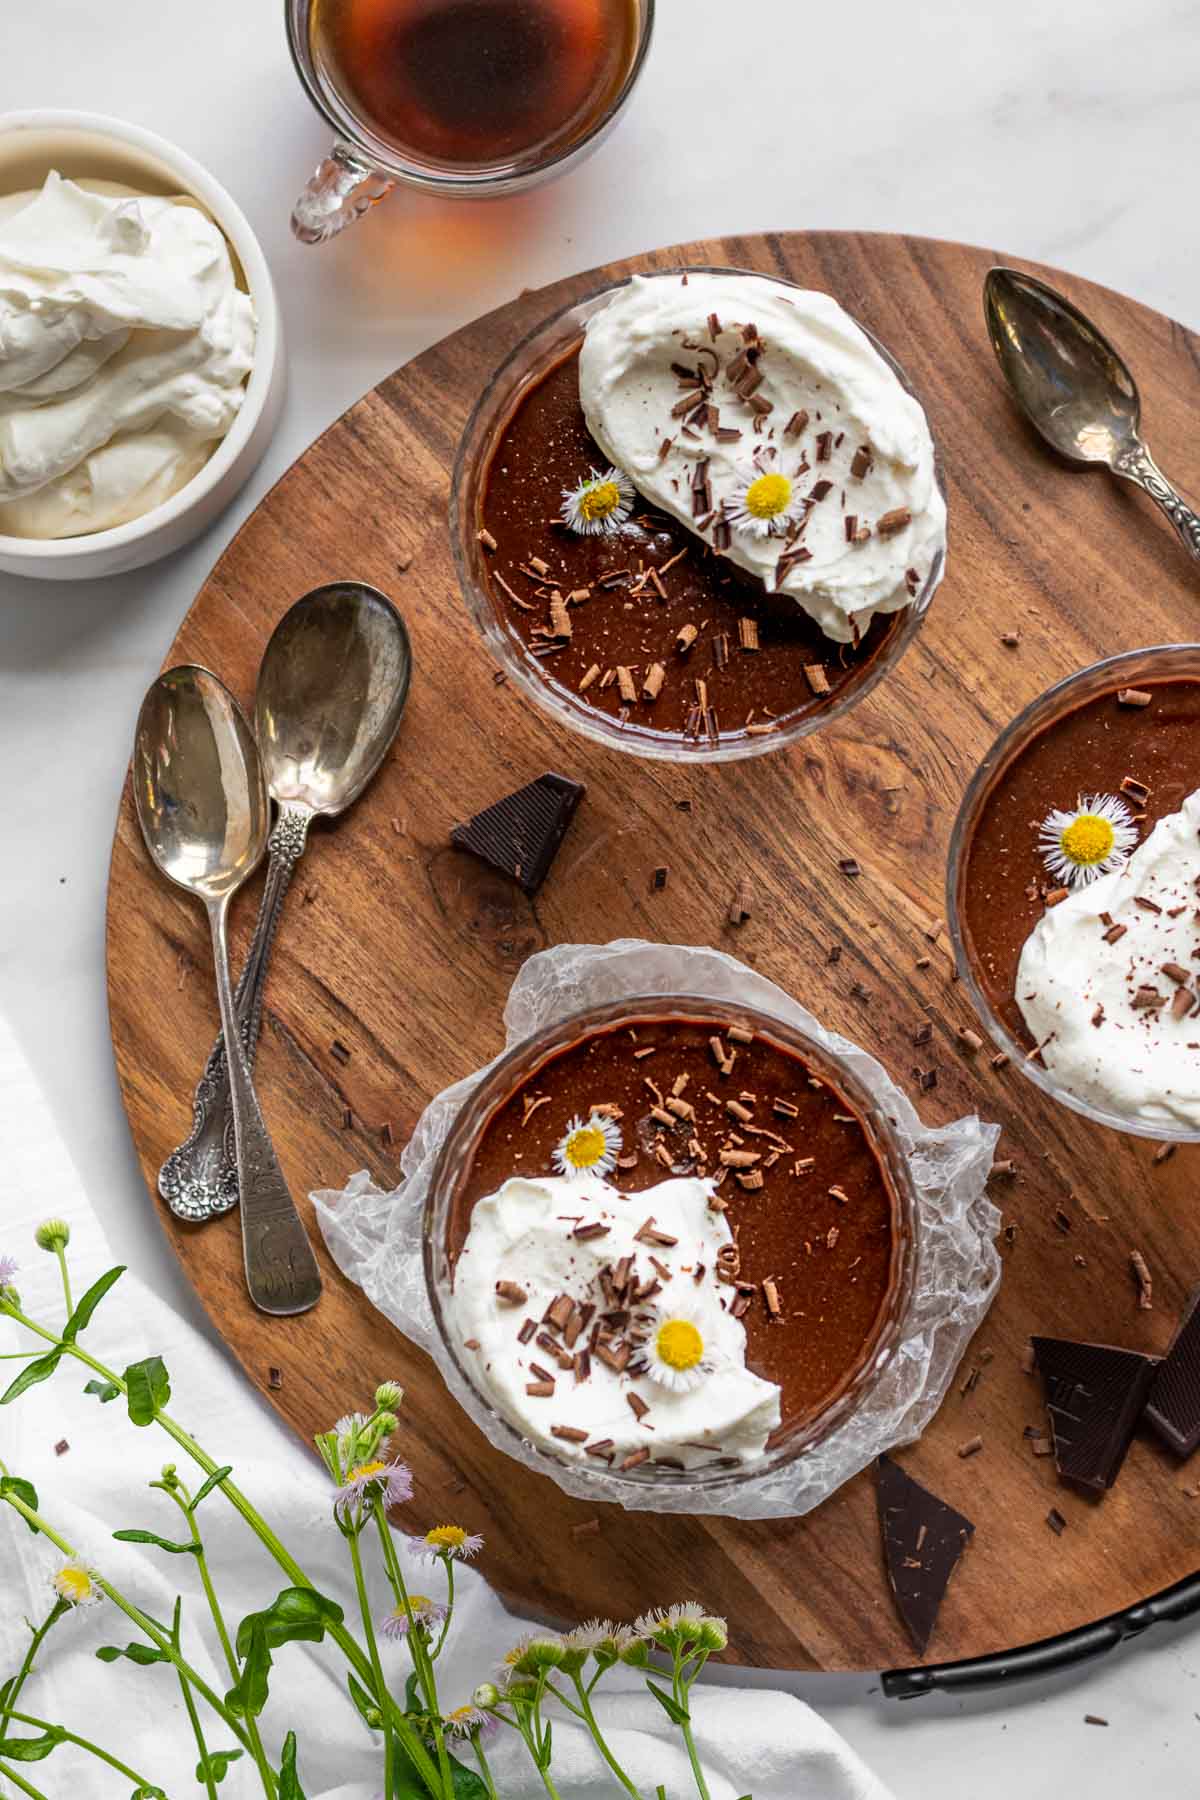
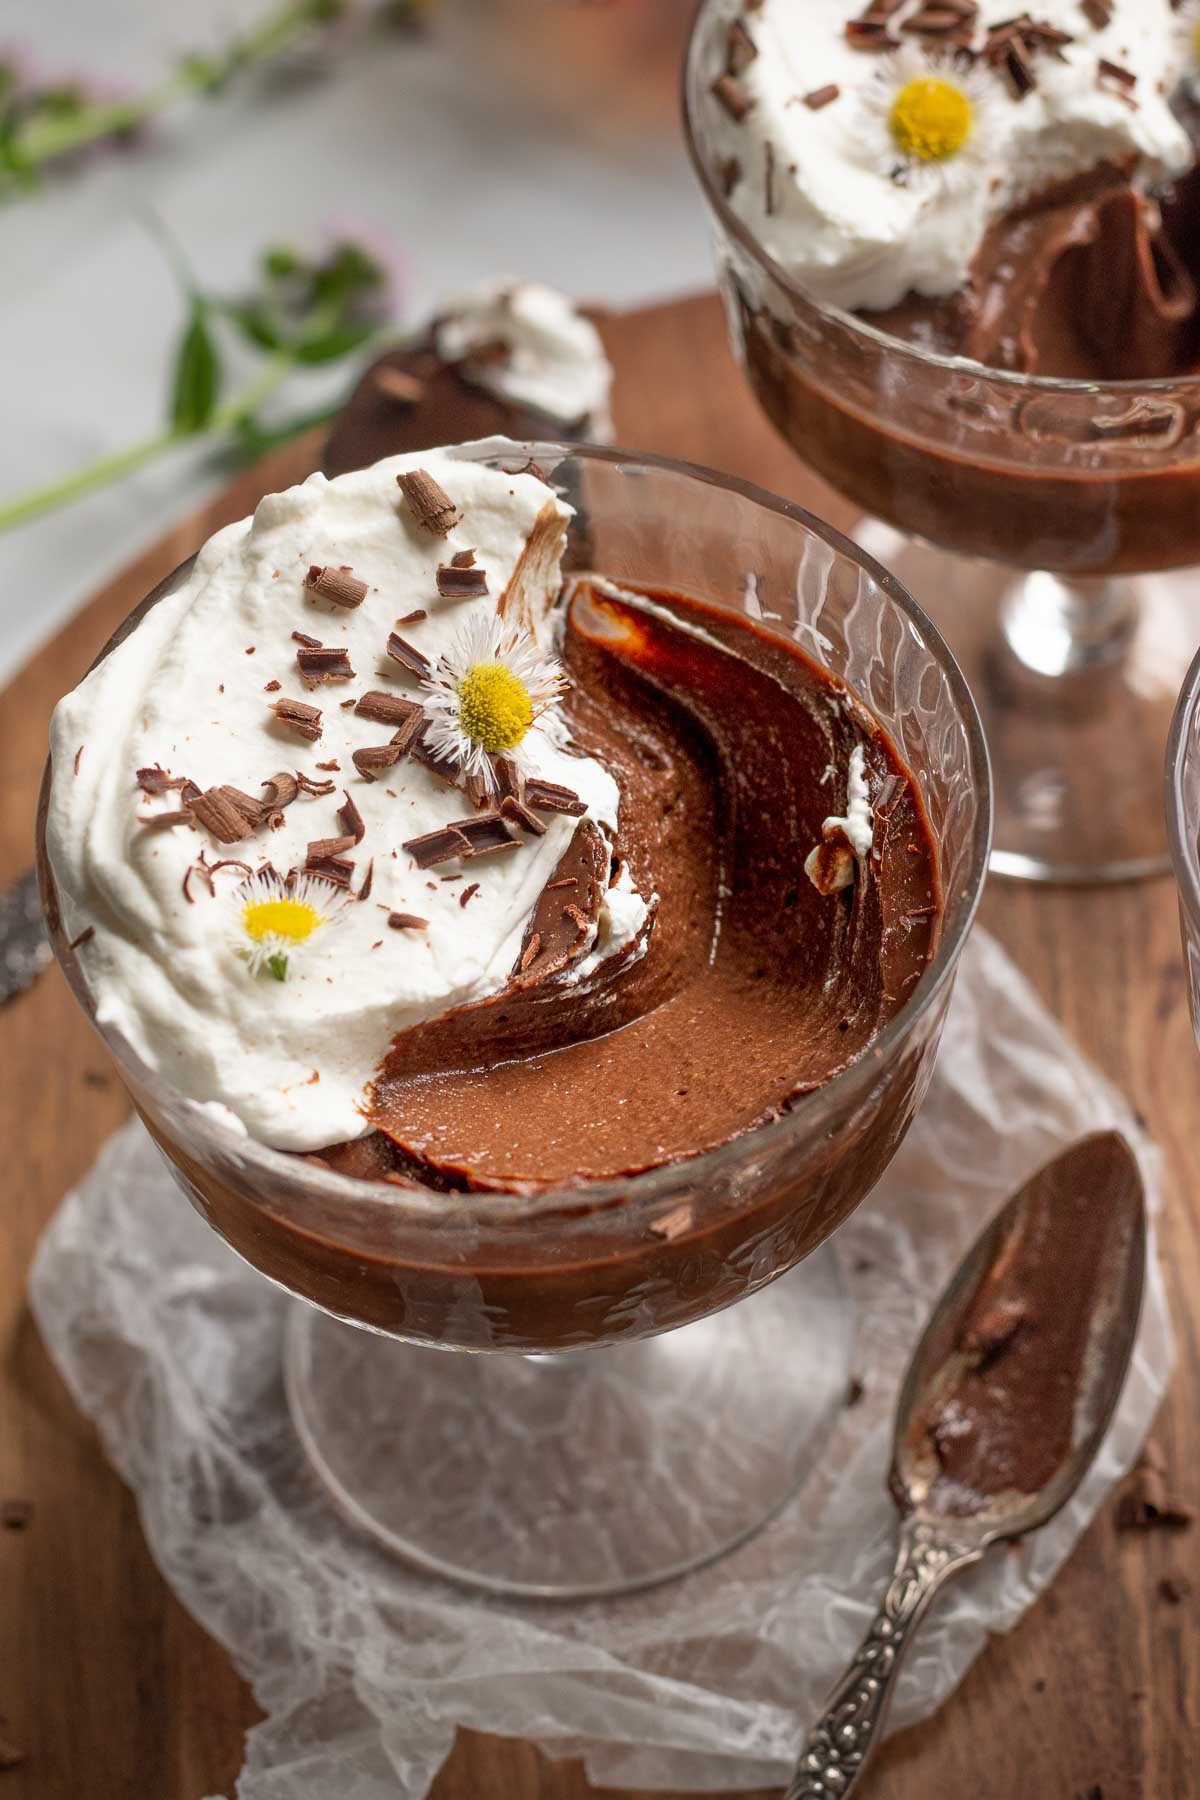
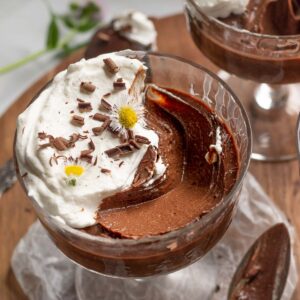
This Dark Chocolate Pots de Crème or pot de crème au chocolat is an easy no bake dessert that's made right on the stovetop! It has the most luxurious, creamy texture and numerous flavor and liqueur variations to make it just the way you like it.
Want a hot version? Try its cozy sister the chocolate fondant cake, which is also made in individual servings!
This is a simple dessert that uses only 5 household staples but tastes entirely lavish. It's one of those treats that everyone loves and forgets why they don't eat it or make it more often!
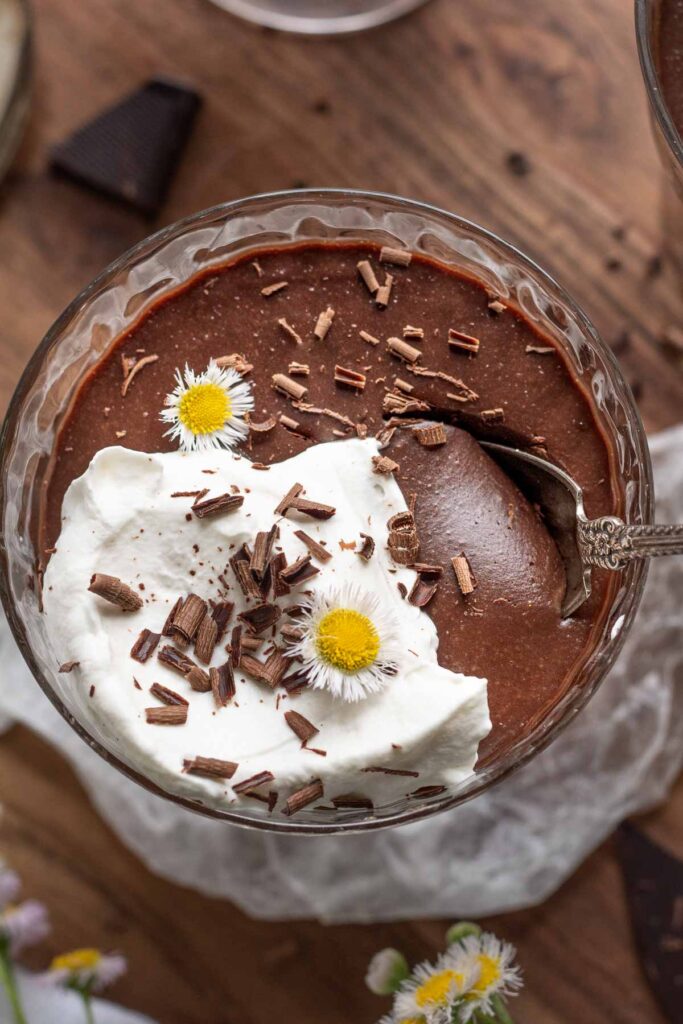
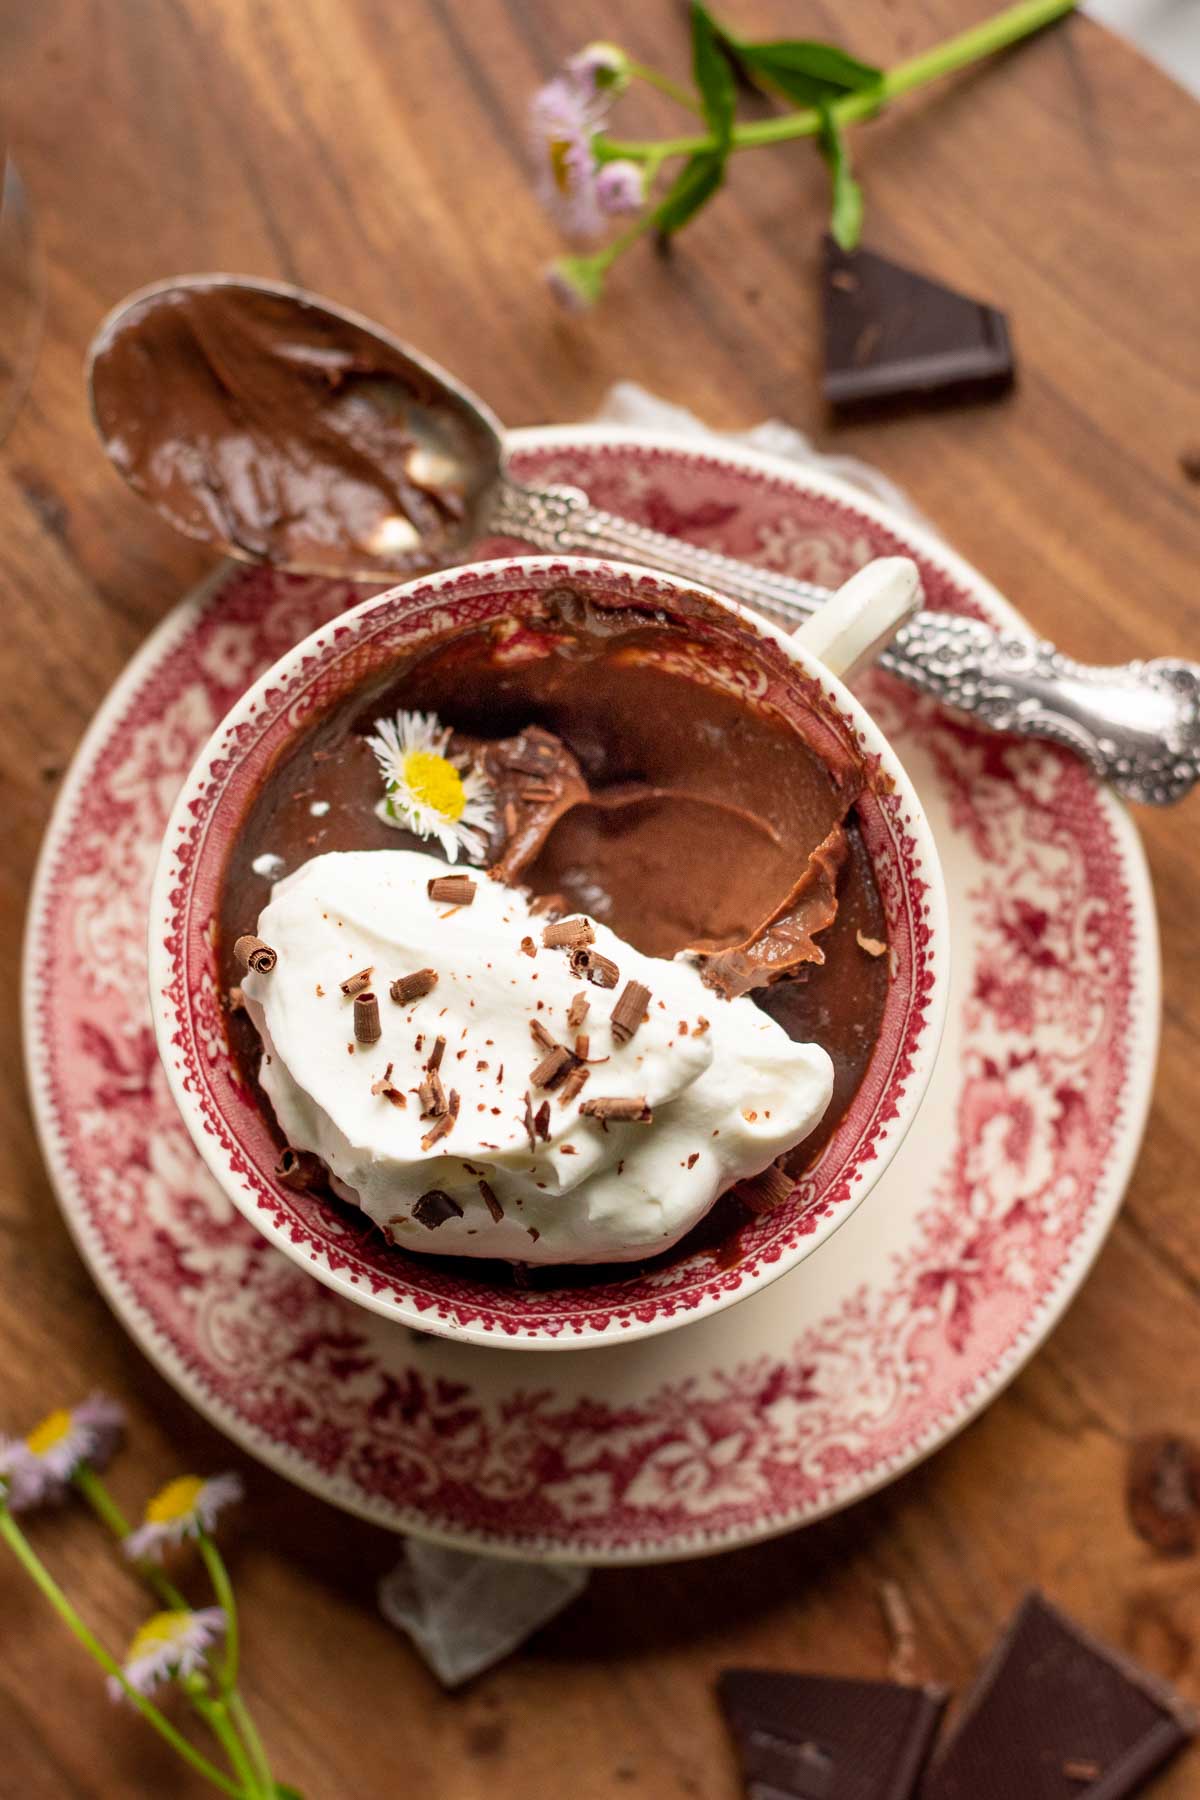
It's thick, creamy, not overly sweet, and leaves you going back for bite after bite. Though optional, I love to top them with a lightly sweetened whipped cream, which helps to cut the chocolate a bit. Pots de crème is also incredibly quick to make (though it does need at least 6 hours to set up).
Pots de Crème was originally made to be eaten in pots de crème cups, which are adorned sets used back in the day and I need to get my hands on a set!
Custard-based recipes like this one are always such a treat to enjoy. You can also try my Thai tea creme brûlée or eggnog creme brûlée for non-chocolate variations of a similar bake!
Want an even lighter version of this chocolate pudding? Try this airy, yet decadent hazelnut chocolate mousse.
Jump to:
What is Chocolate Pots de Crème?
Chocolate pots de crème is a cross between creme brûlée and mousse. Unlike a creme brûlée, this gets cooked on the stovetop rather than in the oven.
Texture-wise, pots de crème is lighter than a creme brûlée but thicker and denser than a mousse.
Ingredient Notes
- Semi-sweet chocolate (~60-70% cacao). It's best to use chopped chocolate bars or Belgium chocolate chips or chunks.
- Granulated Sugar
- Egg yolks
- Heavy whipping cream
- Whole milk
How to make Chocolate Pots de Crème
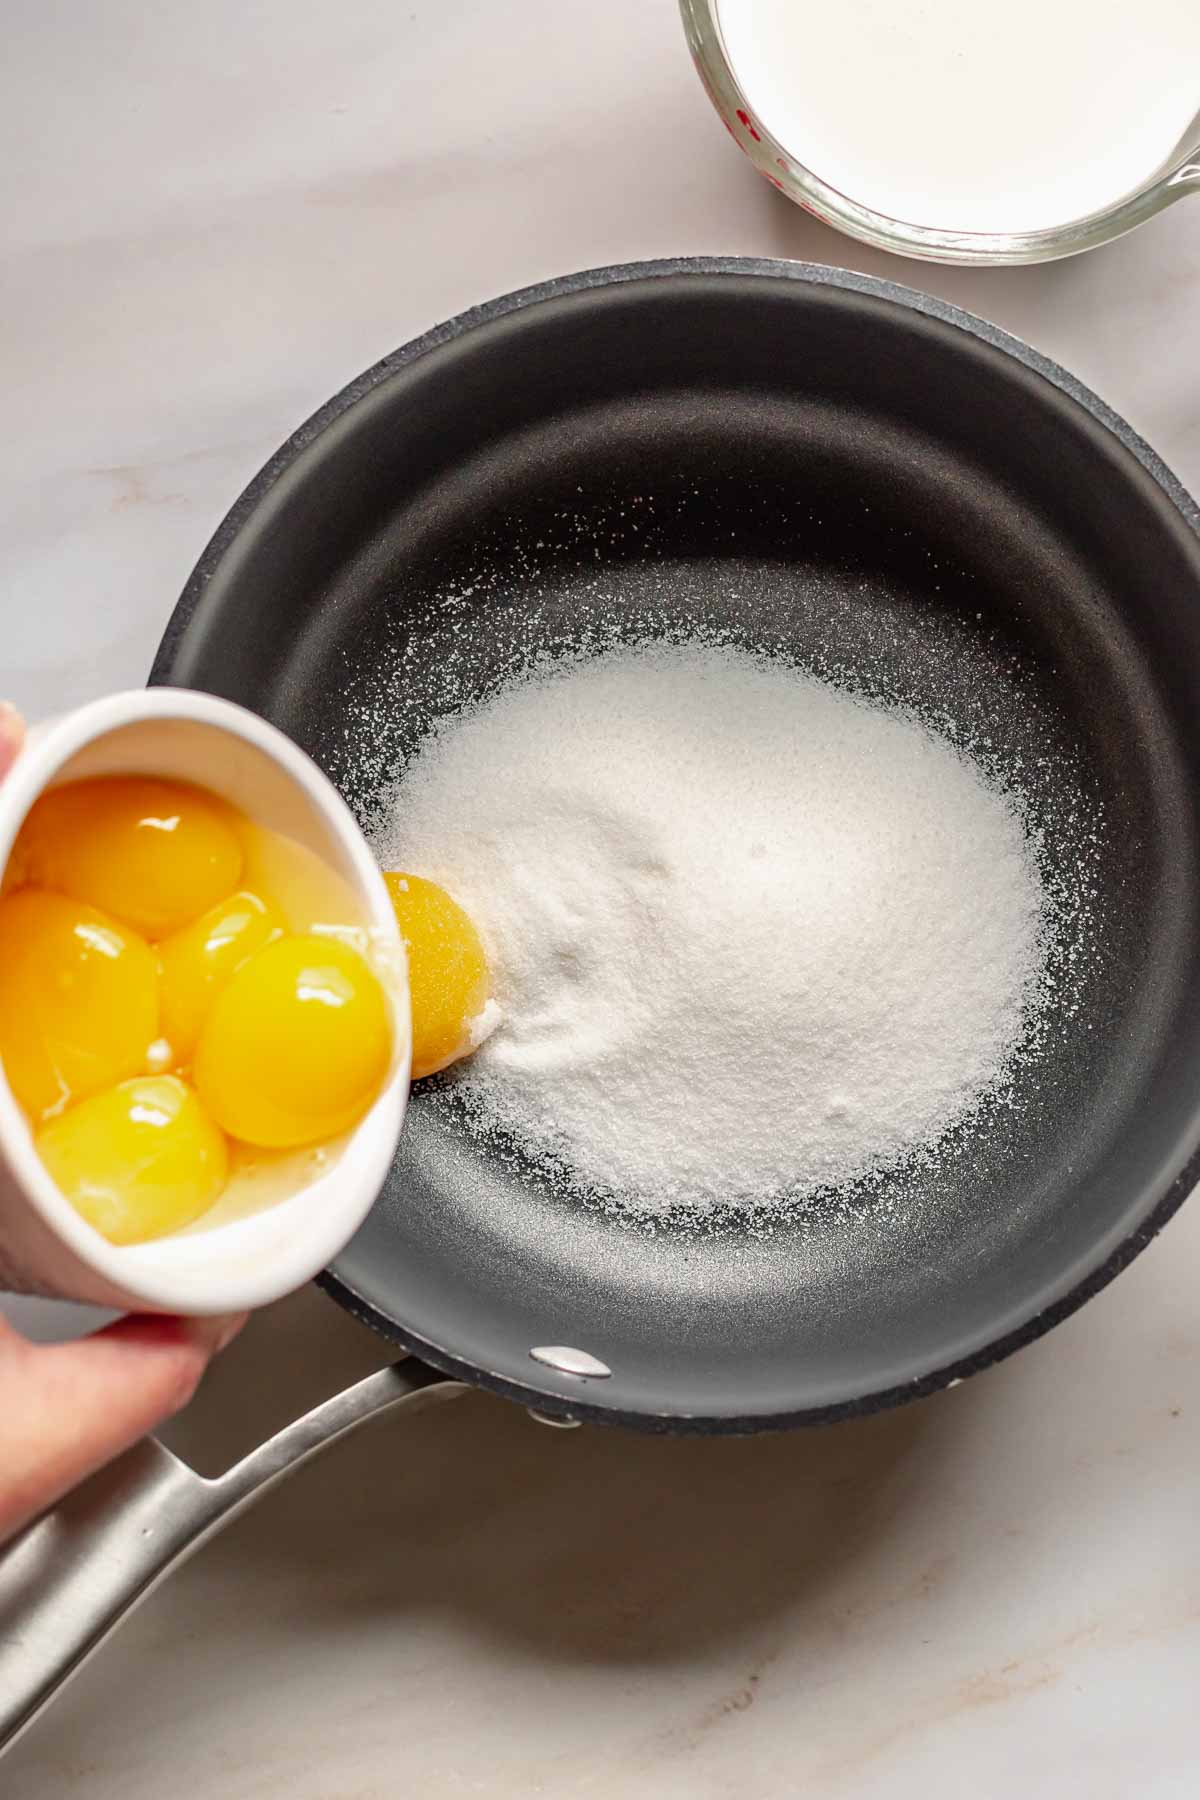
STEP 1: Separate the eggs and reserve the whites for another time (or use them for my mini pavlova nests). Also chop chocolate and add it to a large heat proof bowl.
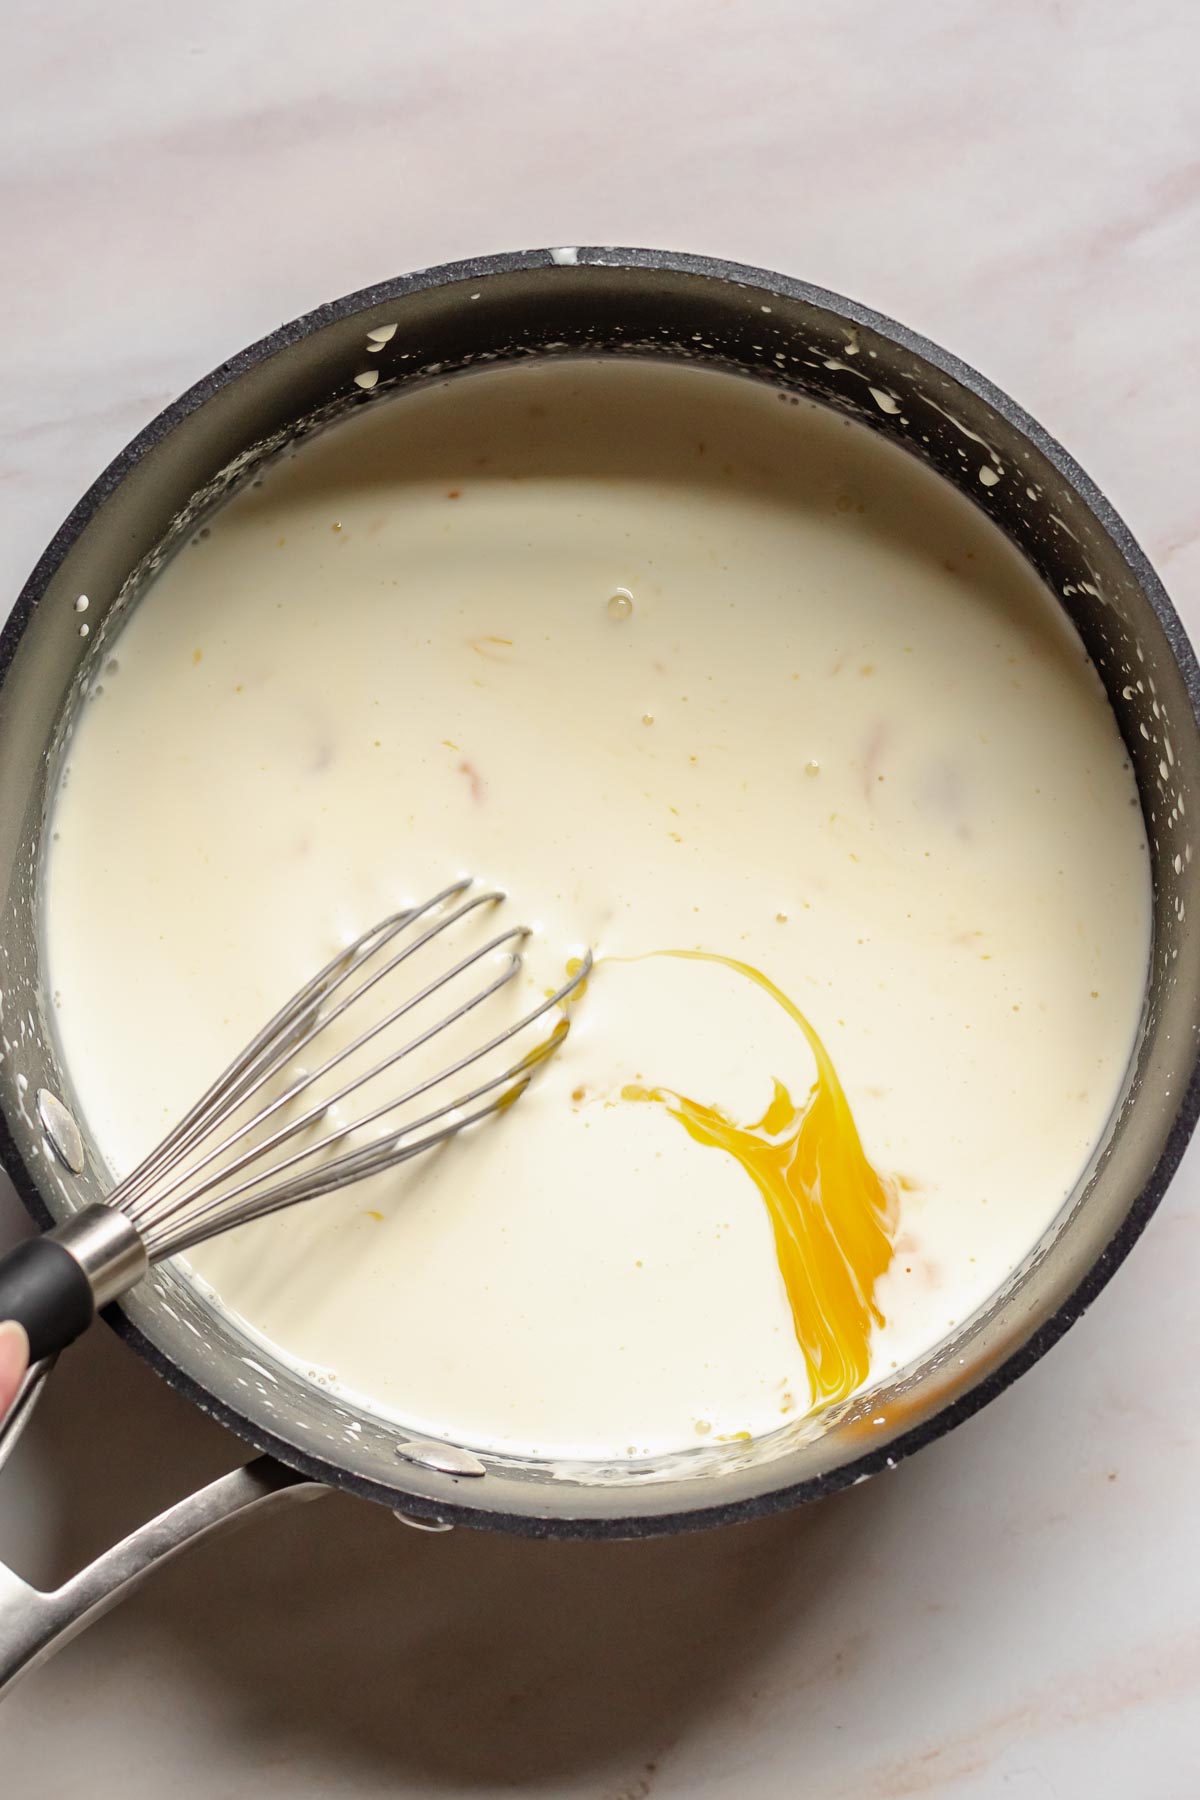
STEP 2: Add the sugar, egg yolks, heavy cream, milk, and a pinch of kosher salt to a medium saucepan and whisk to combine. Heat over medium-low heat, whisking constantly until the mixture thickens.
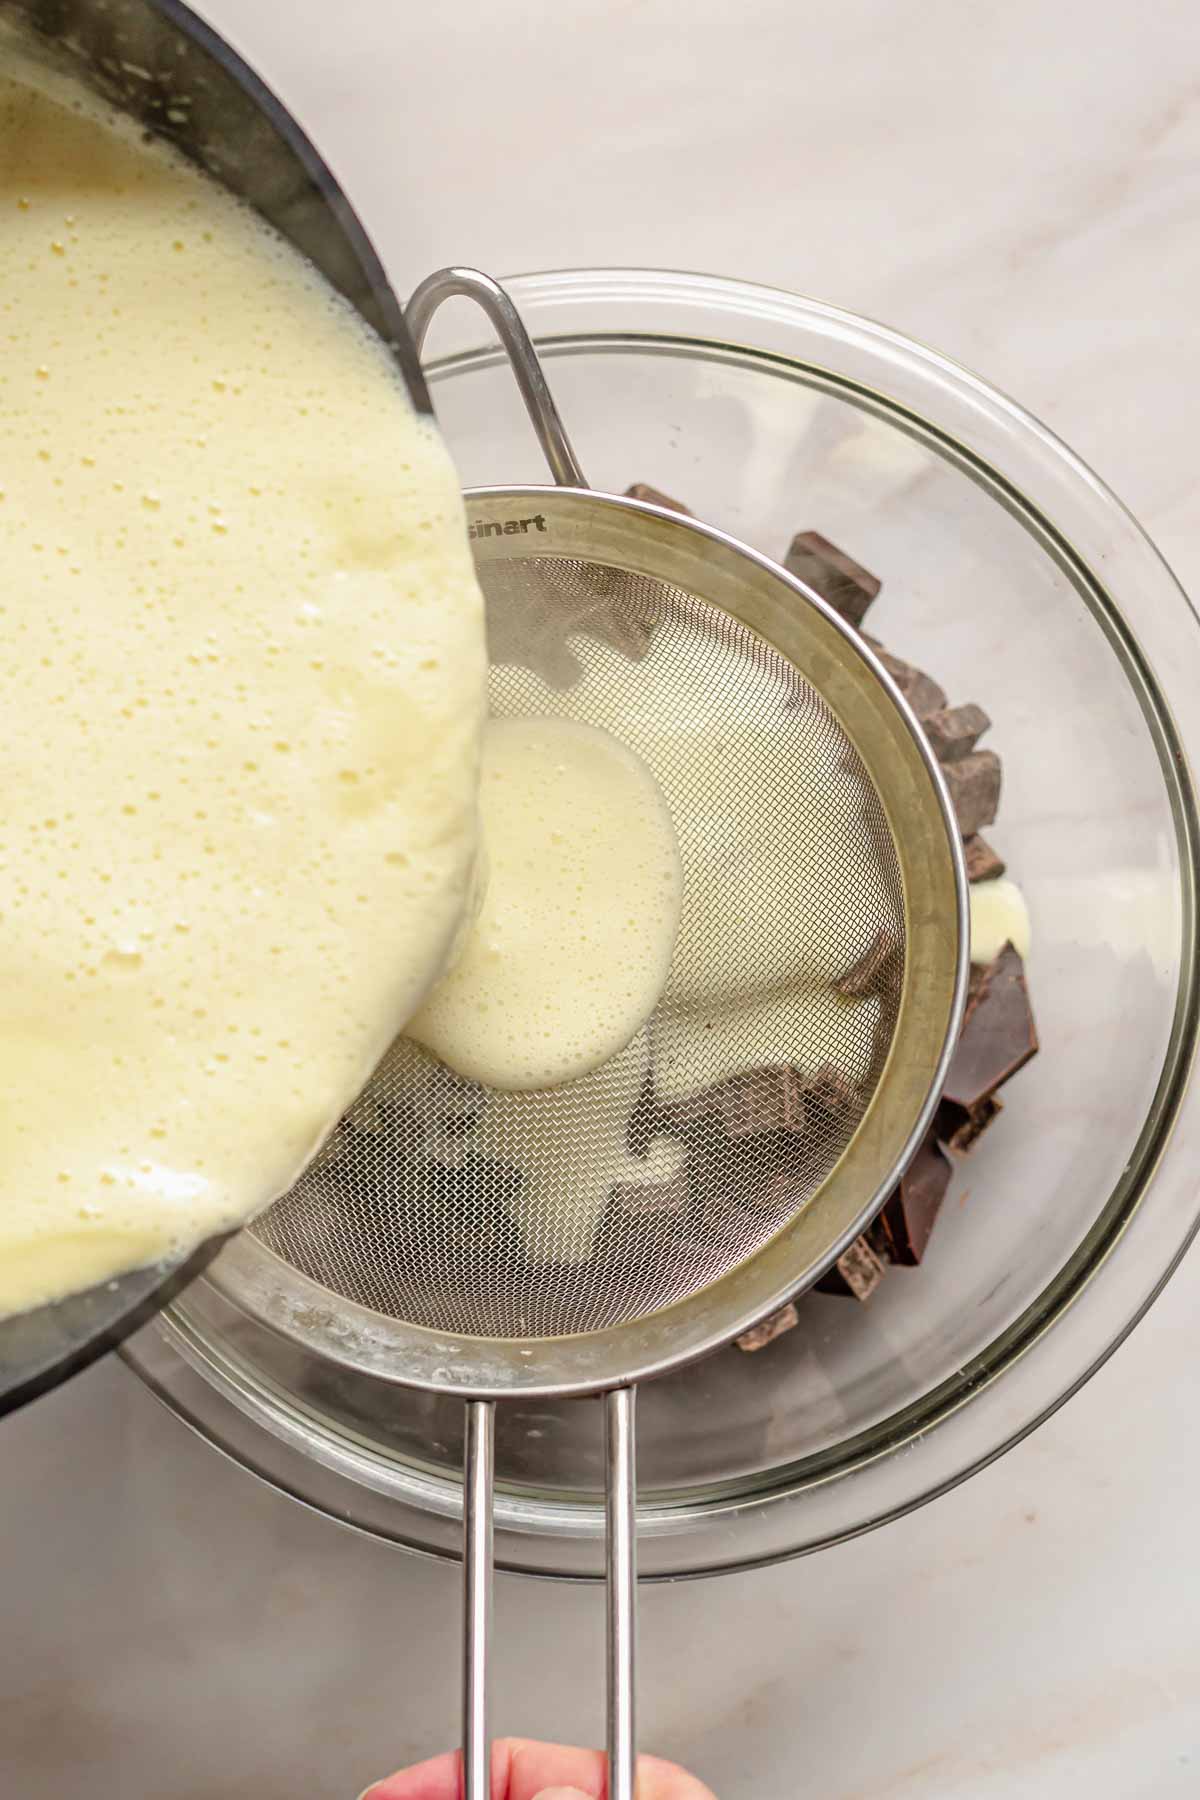
STEP 3: Pour the thickened custard through a fine-mesh sieve over the chocolate and let it stand for a minute, then mix to combine.
Hot tip! If using alcohol, mix in 1 ounce after the mixture is combined.

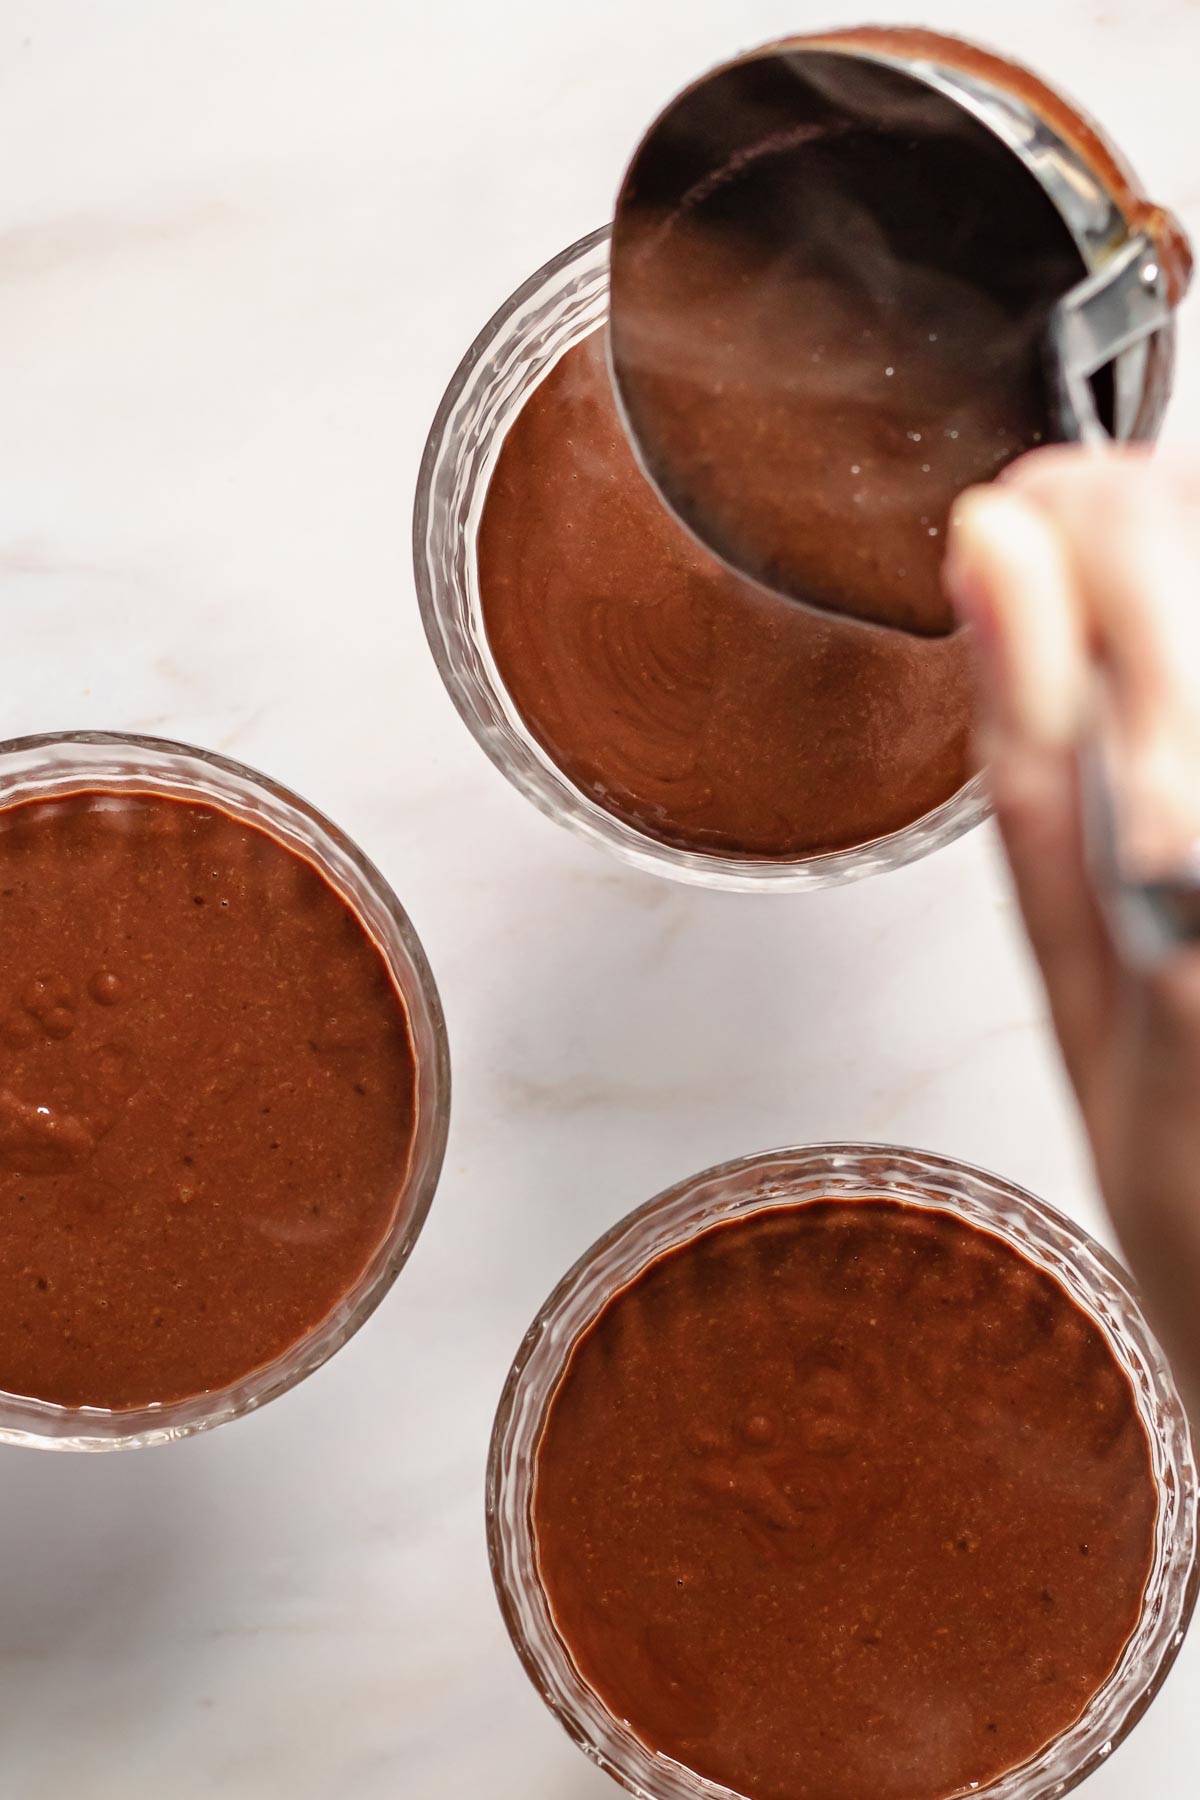
STEP 4: Ladle the chocolate evenly into coupe glasses, ramekins, coffee mugs (or any vessel you like).
STEP 5: Refrigerate the dark chocolate pots de crème for at least 6 hours to fully set.
STEP 6: Top the chocolate pots de crème with fresh whipped cream and chocolate shavings. Fresh raspberries or strawberries are also an excellent addition.
💌 Save This Recipe
Flavor Variations & Liqueur Additions
Here are some additional flavor variations to consider using extracts or spices:
- Hazelnut
- Cardamom
- Espresso (add 1-2 teaspoons of espresso powder to the mixture)
- Milk chocolate
- Lavender
- Peppermint
- Malted milk
If you'd like to turn this boozy, add 1oz of any of the following when stirring the final mixture together:
- Grand Marnier (orange)
- Irish whiskey
- Chambord (raspberry)
- Kailua (coffee)
- Creme de menthe (mint)
Making Ahead, Storing, and Freezing
This recipe is an excellent make-ahead option and can be made up to four days in advance. Only add the whipped cream and chocolate shavings when ready to serve.
Store the pots de crème in the fridge for one week. Note that the whipped cream will weep after a day or two, which is why it's best to only add it to ones you know you'll eat.
The set pots the crème can also be tightly wrapped in plastic wrap and frozen for 2-3 months. Be sure the containers are freezer safe if you go for this route. Unwrap completely, then thaw in the fridge.
FAQs & Tips
This is likely because the custard mixture was cooked too quickly or on too high of heat, making the custard curdle or scramble.
Be sure the pass the mixture through a fine-mesh sieve, passing it through an additional time before adding to the chocolate if it looks particularly thick or curdled.
Yes! Once they've set in the fridge for 24 hours, wrap them tightly in plastic wrap and then freeze them for 2-3 months. Be sure whatever vessel used is freezer safe.
Unwrap them completely, then thaw in the fridge.
I prefer to use a 60-70% cacao chocolate bar (chopped), or the same grade Belgium chocolate chips or chunks. Note that a chocolate bar melts best, as chips and chunks can have additives preventing easy melting.
More Chocolate Recipes
- Chocolate Raspberry Mousse Cake
- Chocolate Peanut Butter Tart
- Black Forest Chocolate Cherry Brownies
- Triple Chocolate Layer Cake
- Chocolate Snack Cake (with Salted Caramel Frosting)
- Rich Dark Chocolate Espresso Dessert
Did you make this recipe? Tag me on Instagram or Facebook and leave a star rating⭐️ below! For more ideas, follow me on Pinterest.
📖Recipe
Dark Chocolate Pots de Crème
Equipment
- Whisk
- Ramekins, cups, bowls, etc.
Ingredients
- 8 oz semi-sweet chocolate ~60-70% cacao, chopped bar or chips (1 ⅓ cup)
- 6 large egg yolks
- ¼ cup + 2 tablespoons granulated sugar
- 1½ cups heavy whipping cream
- 1 cup whole milk
- ⅛ kosher salt
- Liqueur optional (see notes)
- ½ cup heavy whipping cream
- 1 tablespoon powdered sugar
- ½ teaspoon vanilla paste or extract
Instructions
- Place the chocolate in a medium to large heatproof bowl. Add a fine mesh strainer to the top of the chocolate.8 oz semi-sweet chocolate
- Separate 6 eggs and place the whites in a sealed container and refrigerate for another day.
- In a medium saucepan over medium low heat, combine the sugar, egg yolks, heavy cream, milk, and salt and whisk to combine.6 large egg yolks, ¼ cup + 2 tablespoons granulated sugar, 1½ cups heavy whipping cream, 1 cup whole milk, ⅛ kosher salt
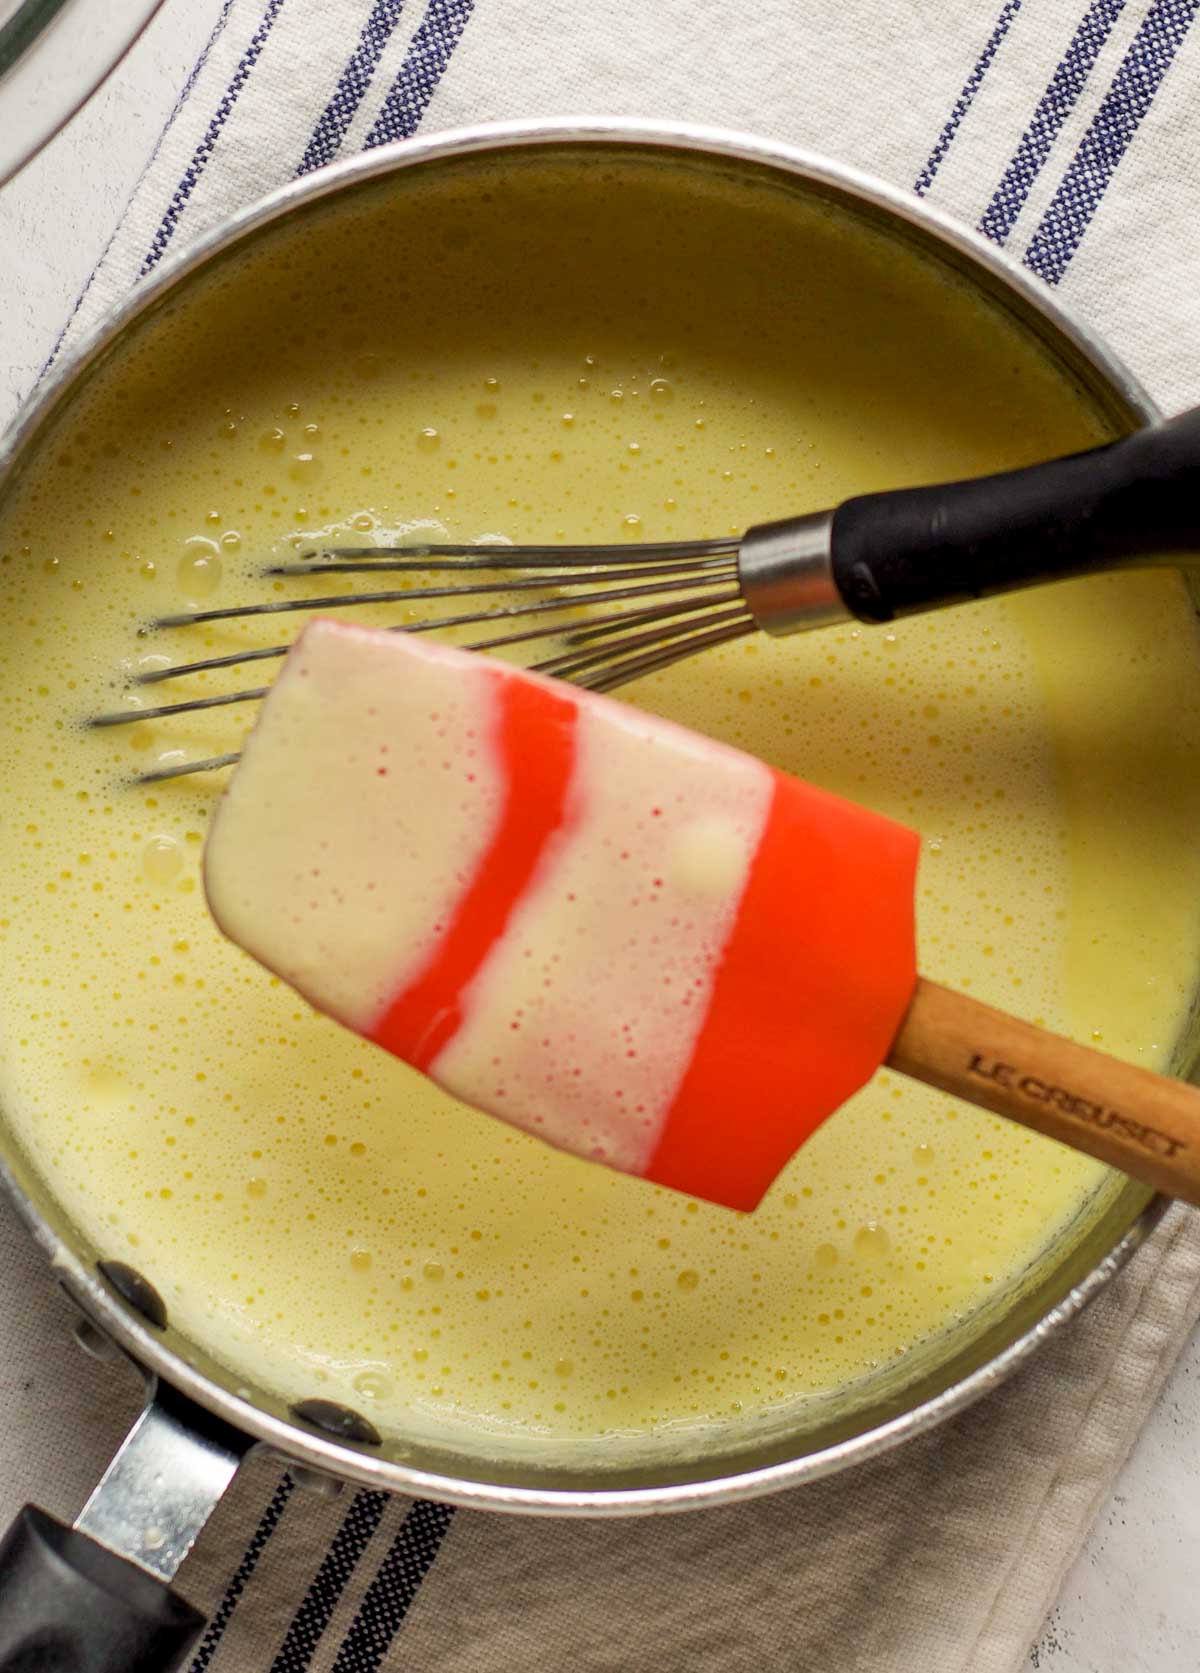
- Continue whisking constantly until the mixture thickens considerably and reads about 190℉ on a kitchen thermometer. Wiping a finger across the spatula will leave a clean track.
- Pour the custard into the strainer over the chocolate and work it through the strainer with a spatula. Allow it to sit for one minute, then stir the mixture from the center, slowly working your way outwards, until the mixture is completely combined.
- If adding liqueur or other flavors, mix in now.Liqueur
- Place the ramekins/cups/small bowls on a cookie sheet and evenly distribute the mixture between ramekins (this makes six, 4oz ramekins). Tap them carefully on the counter remove air bubbles, and pop any large bubbles with a toothpick.
- Place the ramekins in the refrigerator for six hours to fully set.
- Before serving, make the fresh whipped topping. Add the bowl of your stand mixer and whisk attachment to the freezer for 15 minutes. Add the heavy cream, powdered sugar, and vanilla and whip on high speed until light and fluffy.½ cup heavy whipping cream, 1 tablespoon powdered sugar, ½ teaspoon vanilla paste or extract
- Add a scoop to each pots de crème and top with chocolate shavings. To do this, use a vegetable peeler on the edge of a bar of chocolate.
susan says
where's the metric toggle on the website? i can't find it
Callan Wenner says
Hi Susan, looks like something was awry with this recipe (thank you for bringing it to my attention, and my apologies!!) - it looks like it's up and working now! You can find the toggle directly next to the "Ingredients" header in the recipe card.
Emily says
Made these for a Valentine's gathering and they were SUCH a hit with both the adults and kids alike! And as a bonus they were much easier than I anticipated. Will absolutely make again. 10/10.
Tracy says
So simple and outstanding! Thank you for sharing another excellent recipe!
Callan Wenner says
Yay! So happy you enjoyed it.
JR says
I compared 5 pots de creme recipes and picked yours. I was not disappointed. I used Lindt 70% bars and the chocolate flavor was deep and smooth, just like the texture of the creme. I bake a lot and always seem to have egg yolks, milk and heavy cream in the frig so i now have another tasty and easy way to use them. The hardest part is waiting for it to set. A+
Callan Wenner says
This comment just made my day! I appreciate you sharing, and so glad you ended up trying this recipe and that you enjoyed it. Thanks for reporting back!
Anna says
This looks amazing! If we add liqueur, in what quantity?
Callan Wenner says
Hi Anna - 1 oz of liqueur for this recipe! There's some more details about this in the body of the blog post if you want to check it out!
Thea says
This was fabulous and such a great make ahead recipe for a gathering! I’ve heard from a dietician that one can sub full fat coconut milk for heavy cream in some recipes, do you think this may work in this recipe or for 1/2 of the cream? Thank you so much!
The Cozy Plum says
Hi Thea - so happy to hear this! Totally agree on a great make-ahead option. Full-fat coconut milk does have very similar fat content to heavy whipping cream. So...while I haven't tried this substitution, I suspect it would work just fine! Let me know if you try it!
Emilie says
Honestly the best chocolate dessert everrrr!! So smooth and luscious this is going to be a go to for sure!
The Cozy Plum says
The best news! Thanks so much, Emilie 🙂
Kelli says
Could half and half be used instead of heavy whipping cream?
The Cozy Plum says
Hi Kelli, half and half will not work for this recipe. Heavy whipping cream must be used!
Kayla Burton says
I had 3 leftover yolks from making cupcakes so I cut this recipe in half and made 2 pots for my boyfriend and I on Valentine's Day! They were so rich and delicious, perfect for the special occasion! Also - super quick and easy to make!!
The Cozy Plum says
This sounds like a perfect decision! So glad you made them and enjoyed them for your special night!
Jess says
Made these for V day and turned out AMAZING! I did a mint variant by melting in some Andes mints, and a cherry variant with almond extract and cherry liquor. Divine, and super easy to make. The texture is very unique, almost like a cheesecake, but it tastes like a brownie!
The Cozy Plum says
Thanks so much for making these, Jess!! Just love those variations. And totally agree on the texture!