
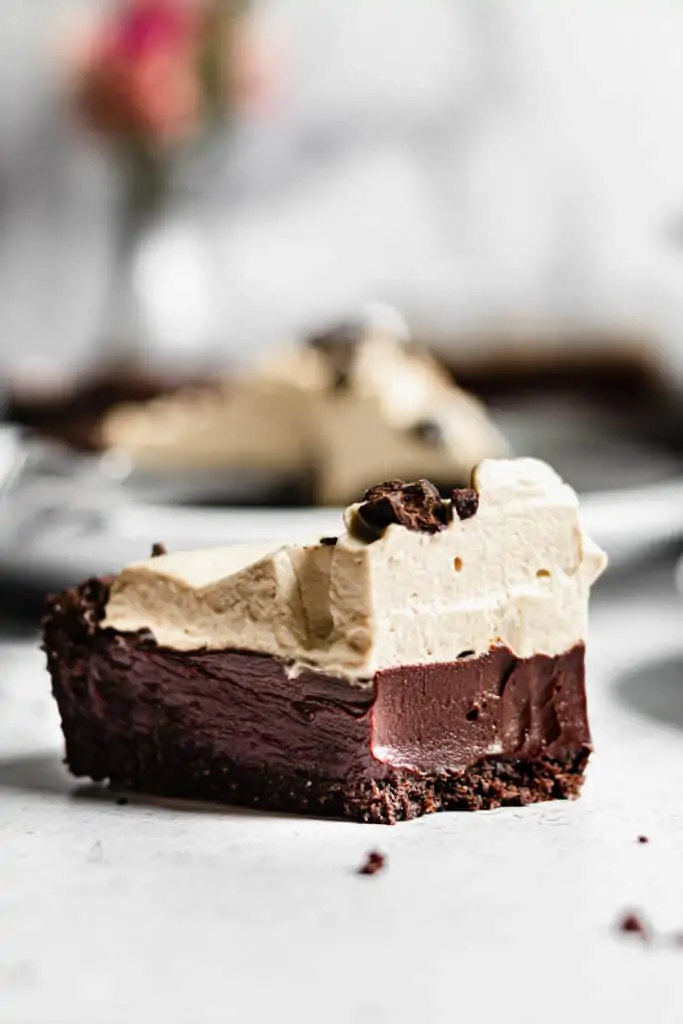
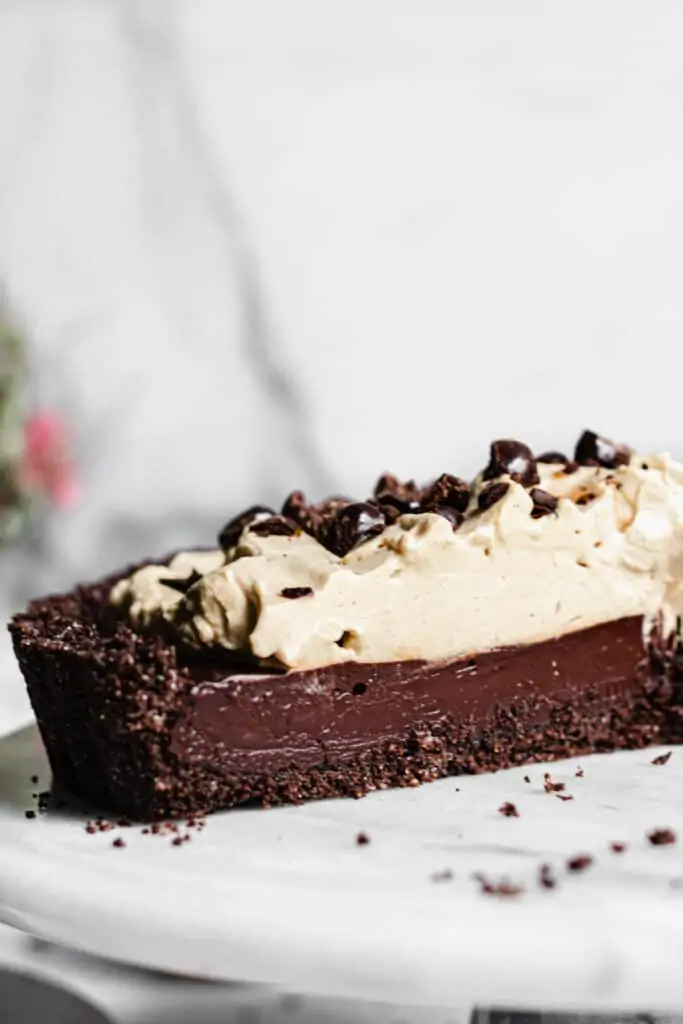
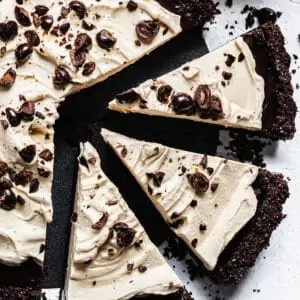
This Chocolate Espresso Tart has a rich and silky dark chocolate ganache that sits in a crunchy chocolate graham cracker crust and is slathered in espresso whipped cream. A perfect treat for coffee lovers!
This post contains affiliate links. As an Amazon Associate, I earn from qualifying purchases.
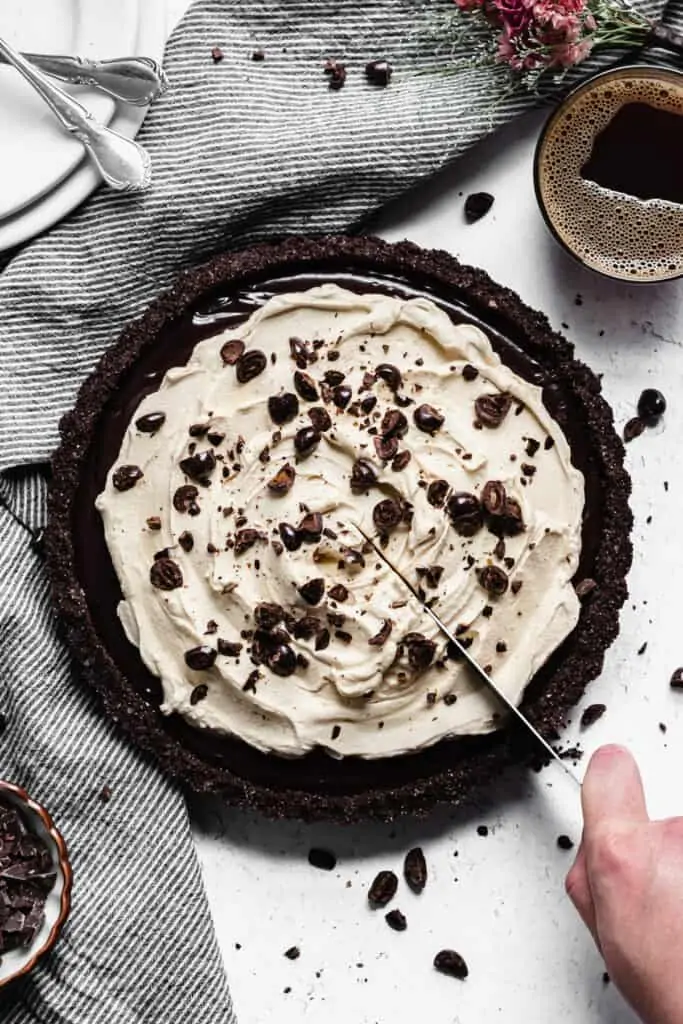
You know what I love about this Chocolate Espresso Tart (other than how amazing it tastes)? It looks very fancy and like it took you a full day to make (side note, it doesn't), but it's so simple and easy. You don't need any piping tips, just smooth a big dollop of the whipped cream over the top in nice swoops, throw on some chopped chocolate espresso/coffee beans, and you've got yourself a stunner!
Chocolate Ganache Tart Recipe
As I mentioned, this recipe is *bible* so simple. There's only three components: the graham cracker crust, the dark chocolate ganache, and the espresso whipped cream. All of the prep work can be done in under 30 minutes, but you do have to wait around for an hour or two for the ganache to set. It's the hardest part, but you can do it!
Chocolate Graham Cracker Crust from Scratch
Now, you don't have to make your own graham crackers here - absolutely buy store bought. But rather than buying a pre-made graham cracker shell, here's how you make your own graham cracker crust:
- Pulse the graham crackers until they are super fine and sandy. You can do this in a food processor, blender, or even in a ziplock bag with a rolling pin or can!
- Add the graham crackers to a bowl and add the sugar, salt, and melted butter. Use a fork to mix and mash everything together until everything looks moist.
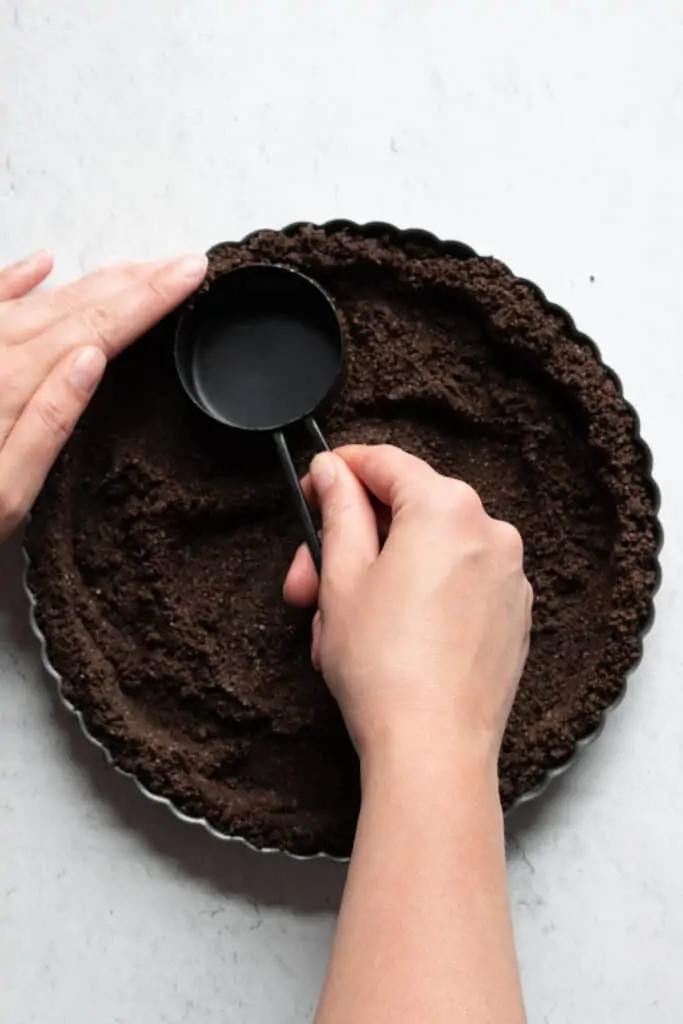
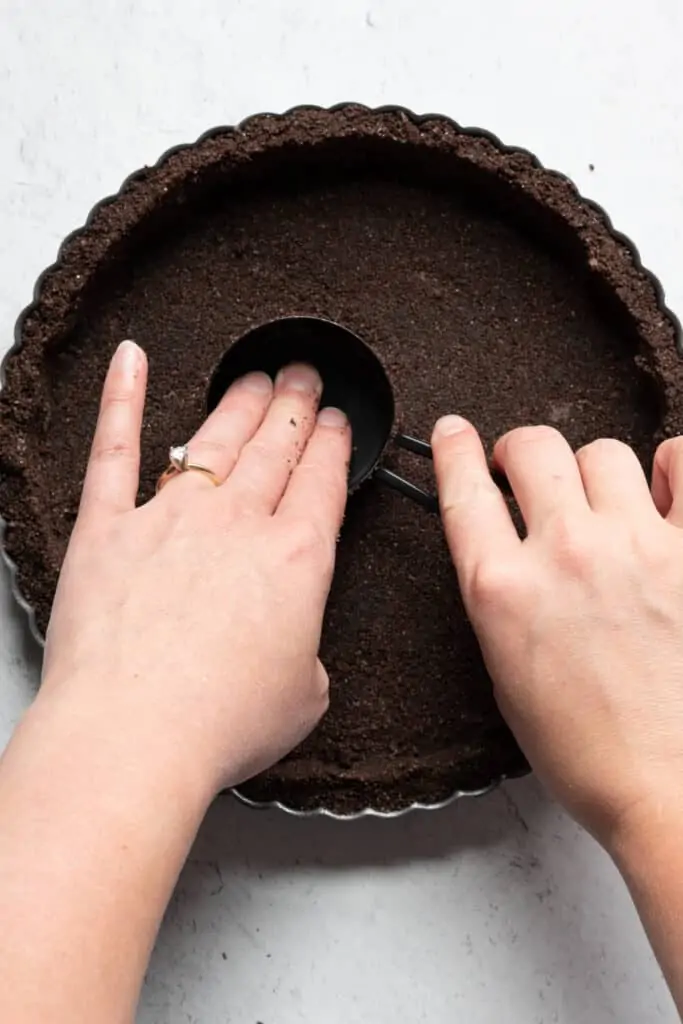
- Then, add all of the crumbs to the tart pan (you could also do this in a pie dish) and press the crumbs in to the sides and bottoms. I like to use the bottom of a ⅓ cup dry measuring cup, starting on the sides and corners, then evening out the center.
- Bake the crust at 350℉ for 10 minutes then cool on a wire rack.
Best tips
- Press the measuring cup into the side of the pan and use a thumb or finger from your other hand to press down on the top side and continue the whole way around. This helps you get really clean edges - it can take 2-3 times going around to get it compact.
- Use the bottom of the ⅓ measuring cup to apply light pressure and move it around the bottom of the crust to make it even and compact. Once you can smooth it around the bottom without pulling up or shifting any pieces, it's ready!
- After smoothing the bottom, go back and reinforce the edges lightly for one more time around.
How to make Chocolate Ganache
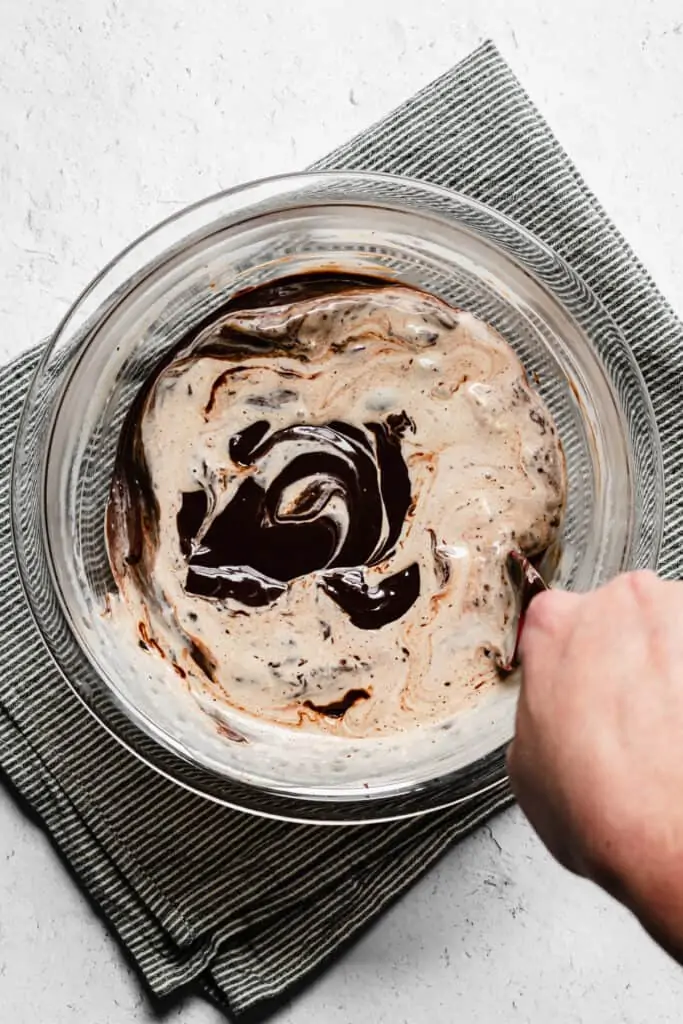
Chocolate ganache, in my humble opinion, is a literal gift to this earth. It is chocolate + heavy whipping cream, and that is all we need in life. To make this ganache, chop the chocolate and add it to either a glass or metal bowl. Sprinkle over the espresso/coffee powder (whichever you prefer to use).
💌 Save This Recipe
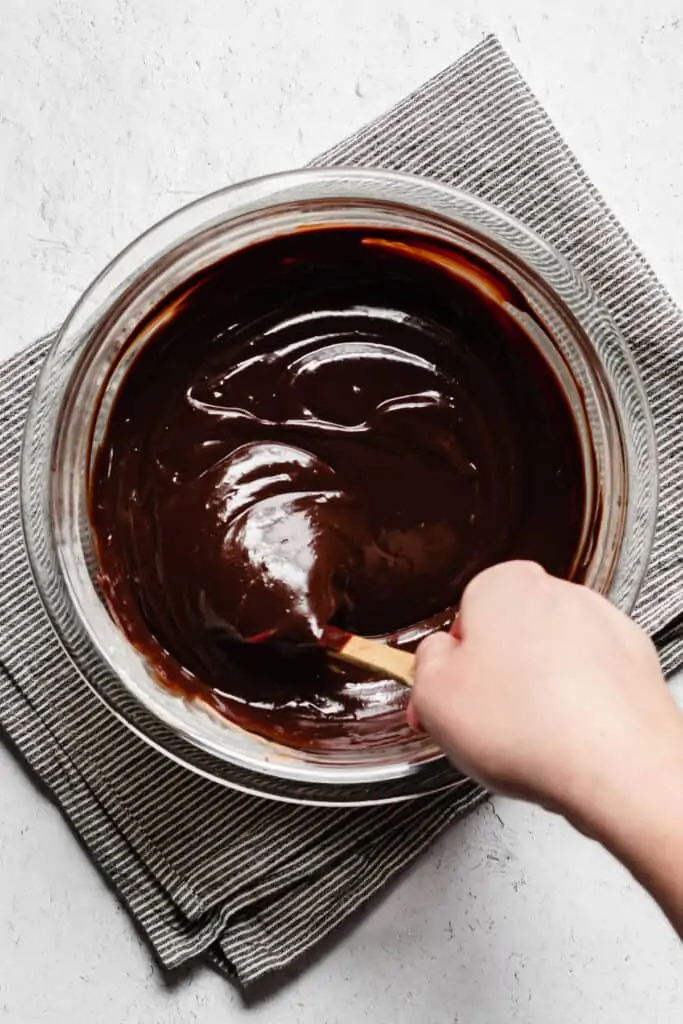
Then, heat the heavy cream in a small saucepan until it just starts to simmer, then pour it over top of the chocolate. Allow it to stand for one minute, then begin stirring. I like to use my small rubber spatula for this. Continue stirring from the center until the mixture starts to come together. Then, you can start scraping around the sides to bring some of the cream in, then continue stirring from the center.
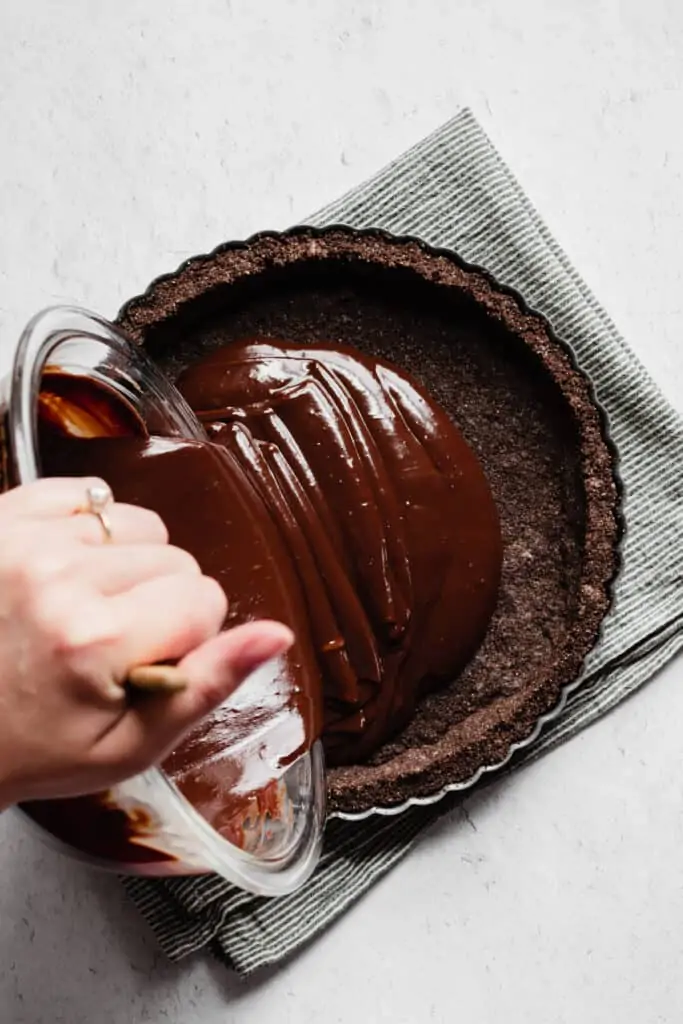
Pour the ganache into the cooled tart shell and smooth it evenly. Allow it to stand for about 30 minutes, then transfer to the fridge to finish setting for another hour to hour and a half.
Espresso whipped cream
To make the espresso whipped cream, start by putting the bowl of the stand mixer and whisk attachment in the freezer for about 15 minutes. This helps the whipped cream to whip up best.
Once the bowl has been in the freezer for 15 minutes, add the gelatin, espresso/coffee powder, and water to your smallest saucepan and give it a swirl. Then, place the pan on the lowest heat until the gelatin and powder dissolve, then turn off the heat.
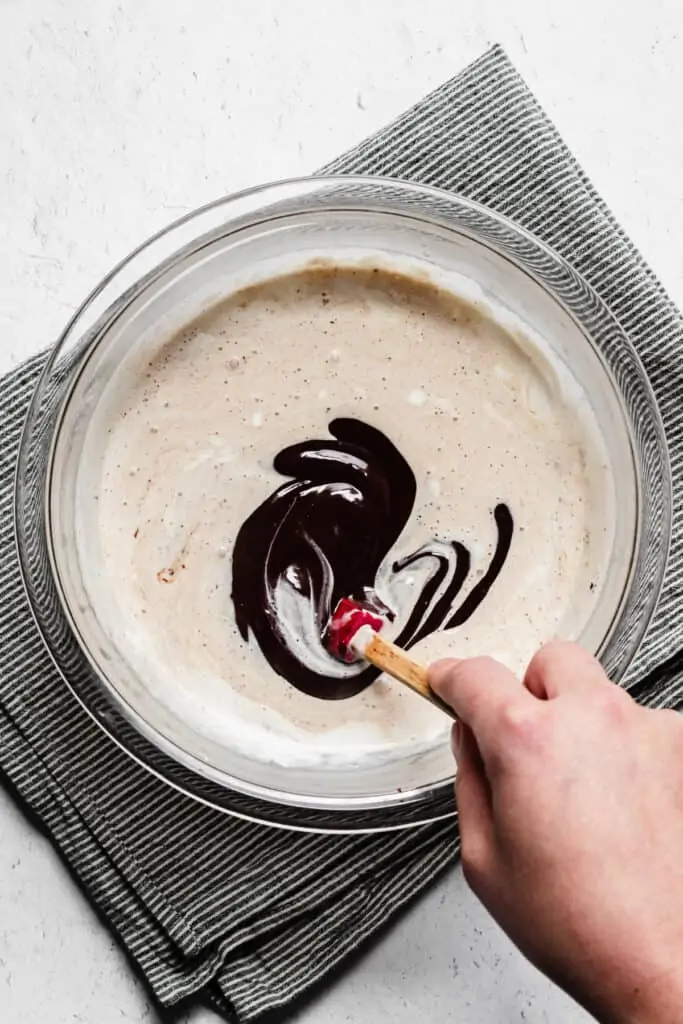
Add the heavy cream to the cold bowl and whip on high speed until it starts to thicken into soft peaks. Turn the mixer to low and sprinkle in the powdered sugar. Then, turn it back up to just under high speed and drizzle in the coffee and gelatin mixture. Whip until stiff peaks form.
The gelatin is used to keep the whipped cream stable for a few days (or else it would turn into an oozy mess). If you'd like to omit the gelatin (or know that the entire tart will get eaten in one go), simply heat ¼ cup of heavy cream with the espresso/coffee powder until dissolved, then add to the chilled bowl, followed by the remaining heavy cream, and whip as instructed.
FAQs
You can absolutely use either! The espresso powder is a bit stronger than instant coffee, so adjust slightly if you feel so inclined.
Nope! The gelatin is to help stabilize the whipped cream in case you don't plan on eating it all the day it's made. See the section on "Espresso Whipped Cream" for instructions on how to omit.
No, you don't. BUT, I feel that the flavor and texture is best when the chill has come off. The ganache softens and becomes really luscious. Eating it straight from the fridge has more of a fudgy texture. It comes down to preference, honestly!
P.s. If you are in love with the linen in these pictures as much as I am, head over to Loyale Studio to grab your Black Strip Linen!!
Give me more chocolate recipes!
- Chocolate Peanut Butter Tart
- Chocolate Layer Cake
- Dark Chocolate Pots de Creme
- Double Chocolate Banana Muffins
📖Recipe
Chocolate Espresso Tart
Equipment
Ingredients
Chocolate Crust
- 10 chocolate graham crackers finely ground (150g)
- 6 T unsalted butter melted (85g)
- ¼ cup granulated sugar 50g
- ¼ teaspoon kosher salt
Chocolate Filling
- 1 ¼ cup heavy whipping cream 275g
- 1 teaspoon instant espresso or coffee
- 12 oz dark chocolate around 65% cacao
Coffee Whipped Cream
- 4 teaspoon warm water
- 1 teaspoon unflavored gelatin
- 2 teaspoon instant espresso or coffee
- 1 cup heavy whipping cream 238g
- ⅓ cup powdered sugar 40g
- Chocolate covered espresso or coffee beans optional, for garnish
Instructions
- Preheat oven to 350℉. Pulse the graham crackers in a food processor until fine and sandy. Transfer to a bowl and mix in the salt, sugar, and melted butter with a fork until all crumbs are moistened.
- Press the crumbs into the tart pan and up the sides (I like to use a ⅓ measuring cup for this) as evenly and firmly as possible without it breaking. Bake the tart for 10 minutes, then remove to a wire rack to cool.
- While the shell is cooling, roughly chop the chocolate and add to a heat proof bowl. Sprinkle over the instant coffee or espresso.
- Bring the heavy cream to a simmer, then pour over the chocolate. Let it stand for about a minute, then stir until completely combined and smooth (be careful not to slosh the cream out at this part!) Pour the chocolate ganache into cooled crust and spread evenly.
- Allow the tart to cool for about 30 minutes, then transfer to the fridge for an hour to an hour and a half until the ganache is set.
- When ready to add the whipped cream, place the empty mixing bowl and whisk attachment (or beaters) in the freezer for about 10-15 minutes.
- Then, combine the gelatin, instant espresso/coffee, and warm water in your smallest saucepan. Give it a few swirls, then heat the mixture over low heat (lowest setting possible) until the gelatin and espresso/coffee granules are dissolved. Remove from the heat.
- Using the cold whisk and bowl, beat the heavy whipping cream on high until slightly thickened. Turn the mixer to low and add the powdered sugar. Return to medium high speed and slowly pour in gelatin/coffee mixture (make sure it's still liquid). Whip on high until stiff peaks form.
- Spread and swoop the whipped cream onto the tart, then sprinkle on chopped coffee or espresso beans (optional). Allow the tart (or slices of the tart) to stand at room temperature for about 30 minutes to an hour before enjoying (to soften the ganache).
Laura McKenzie says
Hi, can this work in an 11-inch tart pan?
Callan Wenner says
Hey Laura, I would suggest increasing the batch to 1.5x the original amount to be sure it all fits ok! If you have any excess, you can turn it into a little tart using a small tart pan or muffin tin.
Lisa says
Can you make these in mini tart pans?
Callan Wenner says
Totally! Just press the crumb crust into whatever size mini pans you have. You'll want to reduce the bake time by about 2 minutes if they're super mini. Then, just cool and fill with the ganache and top them off with the whipped cream once they're set!
Doris says
Can you leave out the coffee cuz I don't drink coffee
The Cozy Plum says
Hi Doris, Yes, you can omit the coffee and make it following all the same instructions. However, you will definitely lose the intended flavor!
Jordan says
SO SO GOOD! I have made this recipe twice now and it only gets better with practice. It is very rich so a little bit goes a long way. Great choice for chocolate and espresso lovers as well as group events!
The Cozy Plum says
Ahh, thanks so much, Jordan! And glad it's getting easier. Definitely perfect for to serve a crowd!