
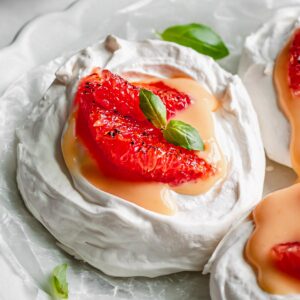
These easy mini pavlova nests create a crunchy and chewy meringue topped with sweet and tangy grapefruit curd. Made with a simple vanilla meringue, it's the perfect individual, make-ahead, gluten free dessert!
Why You'll Love This Recipe
Pavlova is an incredibly simple, naturally gluten free dessert with very few ingredients, but full of delicious textures and filling options.
In this winter pavlova recipe, a simple meringue is made into individual mini meringue nests and baked low and slow to dry out.
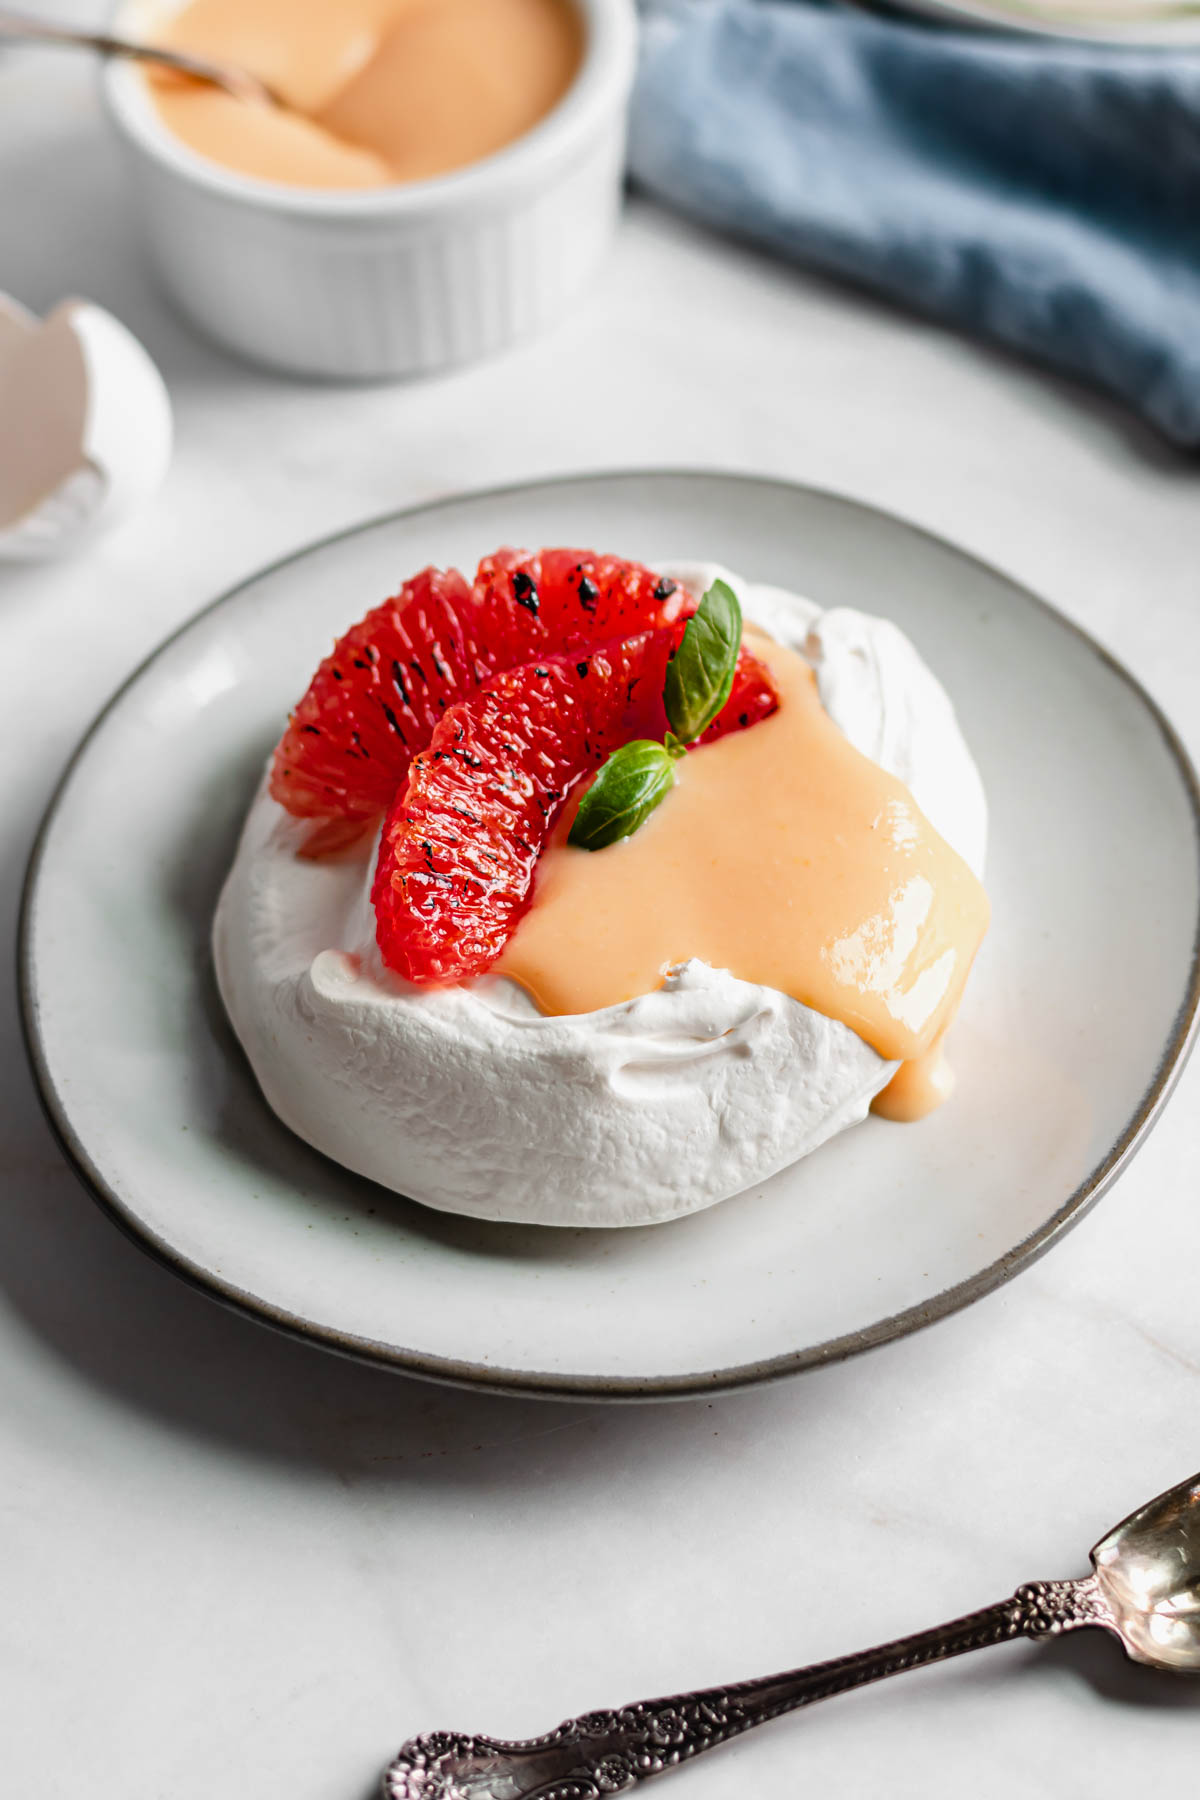
The meringue becomes light and crunchy on the outsides with a soft chew towards the center. In large pavlovas, the center stays even softer.
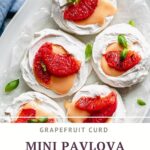
The pavlovas get filled with a tangy grapefruit curd and fresh, bruleéd grapefruit slices. If you like meringue cookies, you'll love this recipe!
Because this is an individual version rather than a large pavlova, you may even consider this an Eton Mess!

If you aren't a fan of grapefruit, you could also fill this winter pavlova with my lemon curd recipe and sliced oranges, or use cranberry curd from this tart recipe and top with sugared cranberries.
However you decide to dress or decorate the mini pavlova nests, it's the perfect light and sweet dessert!
Jump to:
Ingredients
- Eggs. Three full eggs for the grapefruit curd, four egg whites for the mini pavlova nests. Use the leftover yolks to make my Dark Chocolate Pots de Creme!
- Granulated sugar. Included in both portions of the recipe.
- Cream of tartar. Used to help stabilize the meringue.
- Vanilla. This provides extra flavor to the meringue and gives it a marshmallow flavor.
- Grapefruit. About two large ruby red grapefruits
- Unsalted butter. To whisk into the grapefruit curd.
Substitutions and Variations
While this recipe tops the small pavlovas with grapefruit curd and slices, there are a variety of fillings and ways to decorate a pavlova. Here are some of the most common:
- Lemon curd, passionfruit curd, lime curd, or cranberry curd.
- Mango, berries, or fresh fruit
- Whipped cream is typically paired with fruit or curd options!
- Nutella
It's also common to make the nests by using a large piping tip and piping the meringue on. If you choose this route, just be sure to leave a well in the center for the filling!
How to Make This Recipe
This recipe requires a bit of advanced prep. Make both the grapefruit curd and mini pavlova nests the day before you plan to serve them. I actually like to bake the small pavlovas in the evening and leave them in the cold oven to store overnight.
Then, the next day the individual pavlovas can be assembled on a dessert platter and served when ready!
Grapefruit Curd
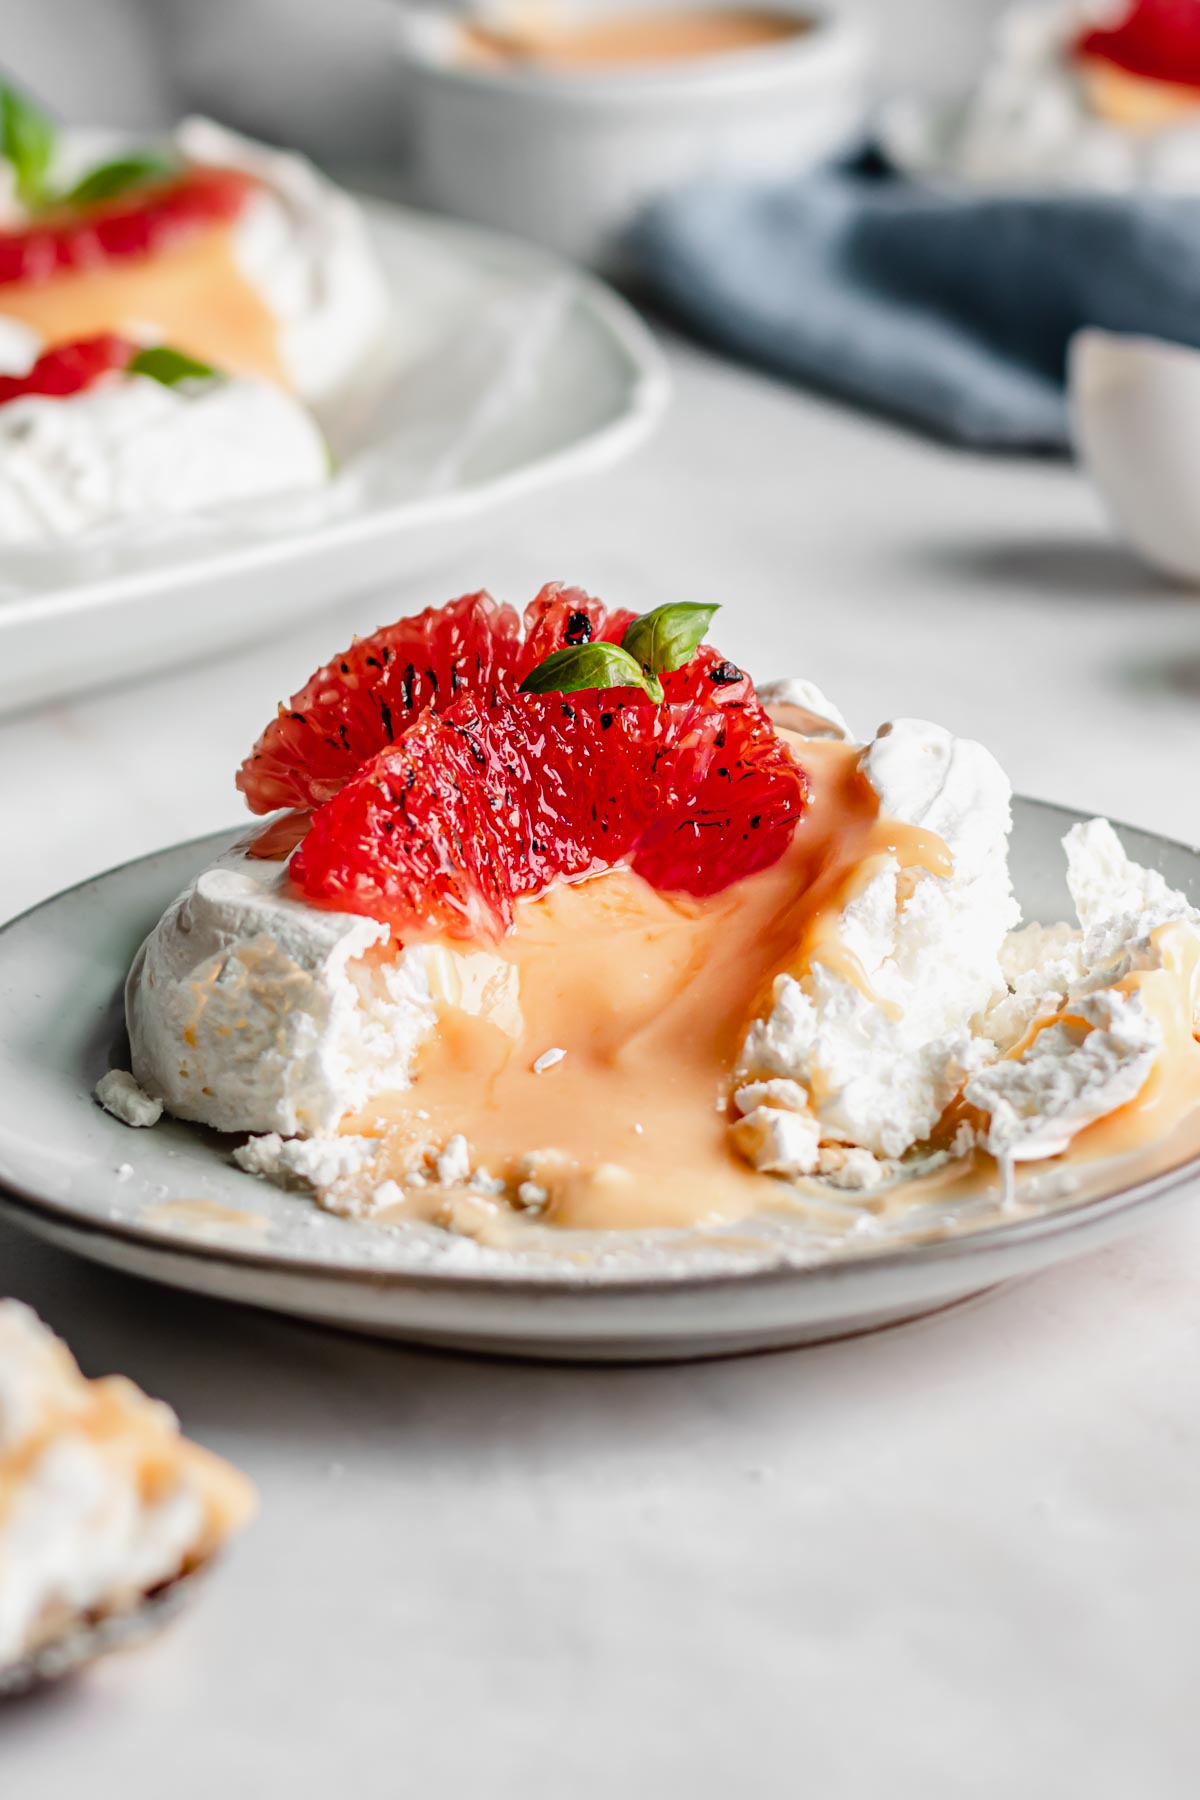
One: Whisk together the sugar, grapefruit zest, grapefruit juice and eggs and set over medium heat.
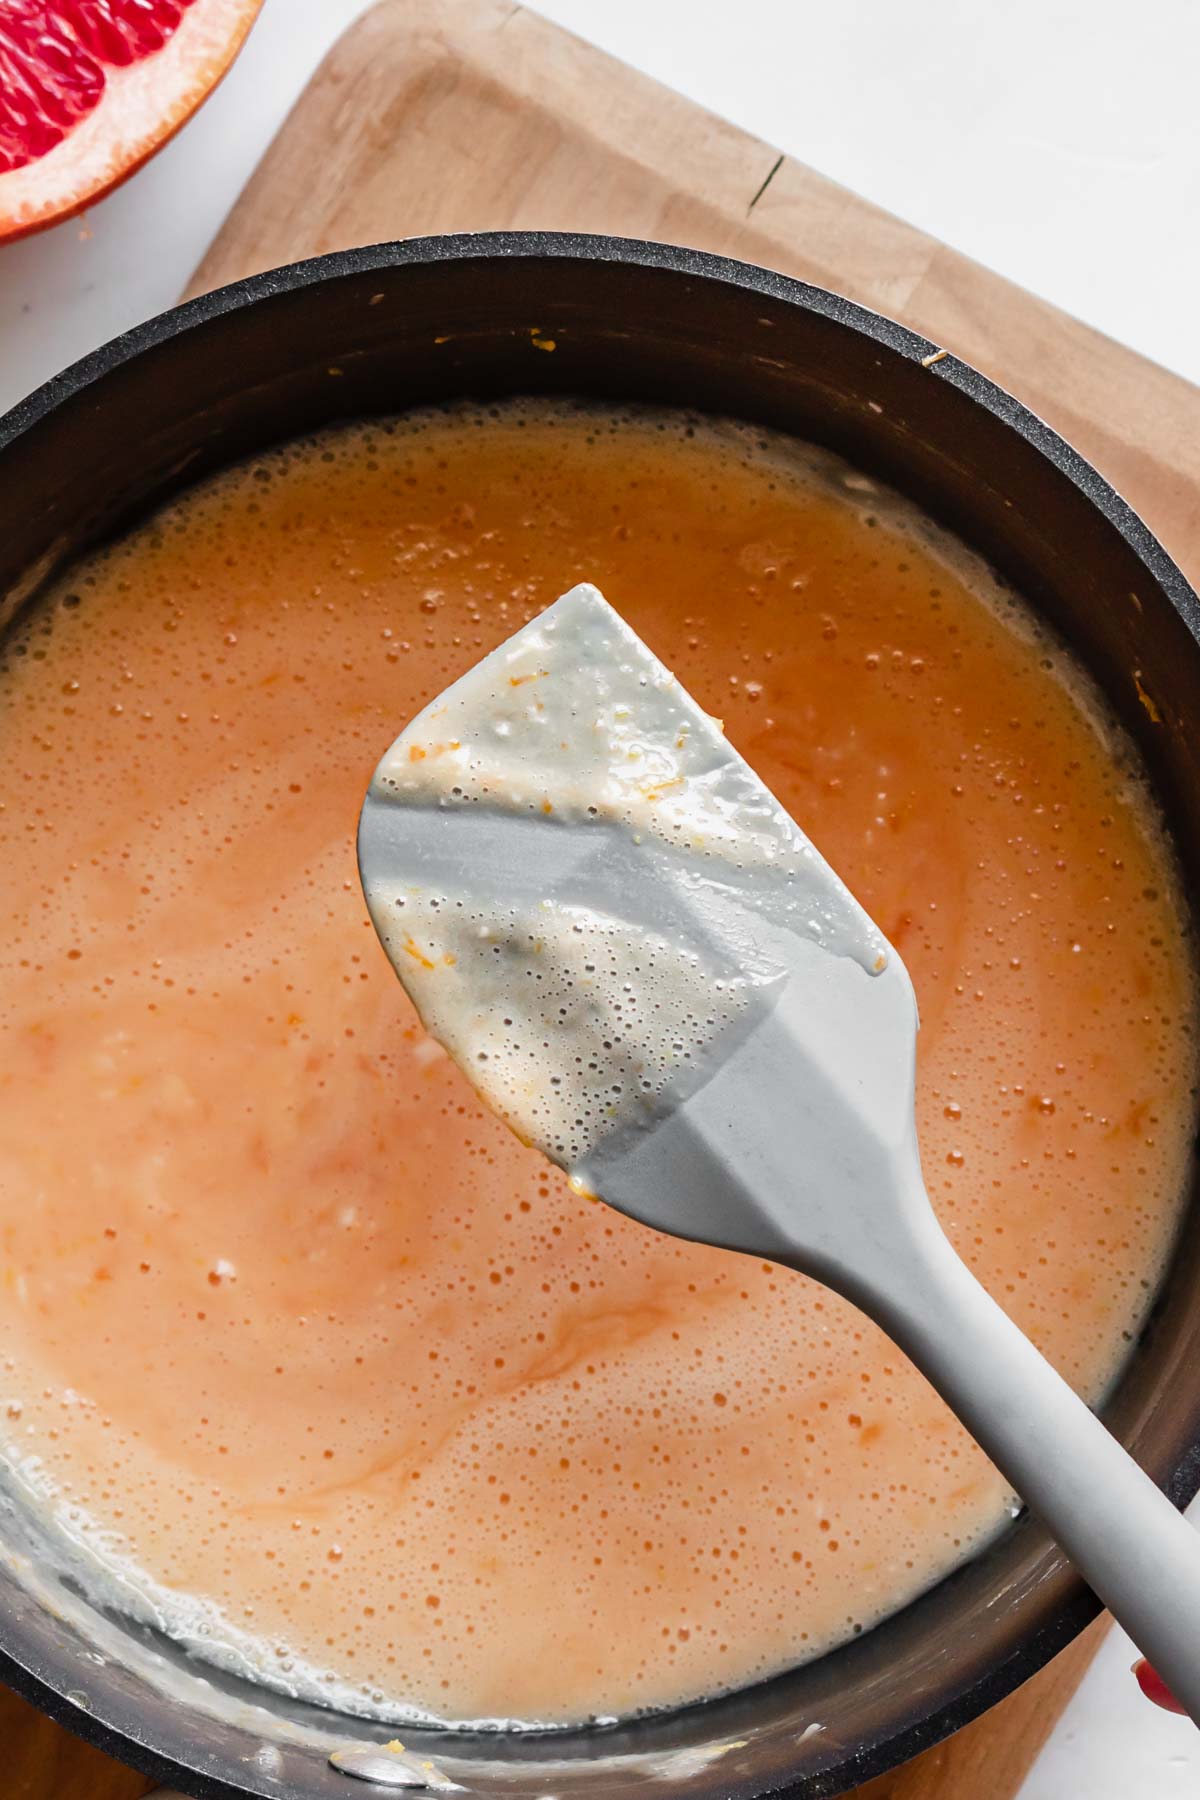
Two: Continue whisking and stirring until the curd thickens and coats a rubber spatula.
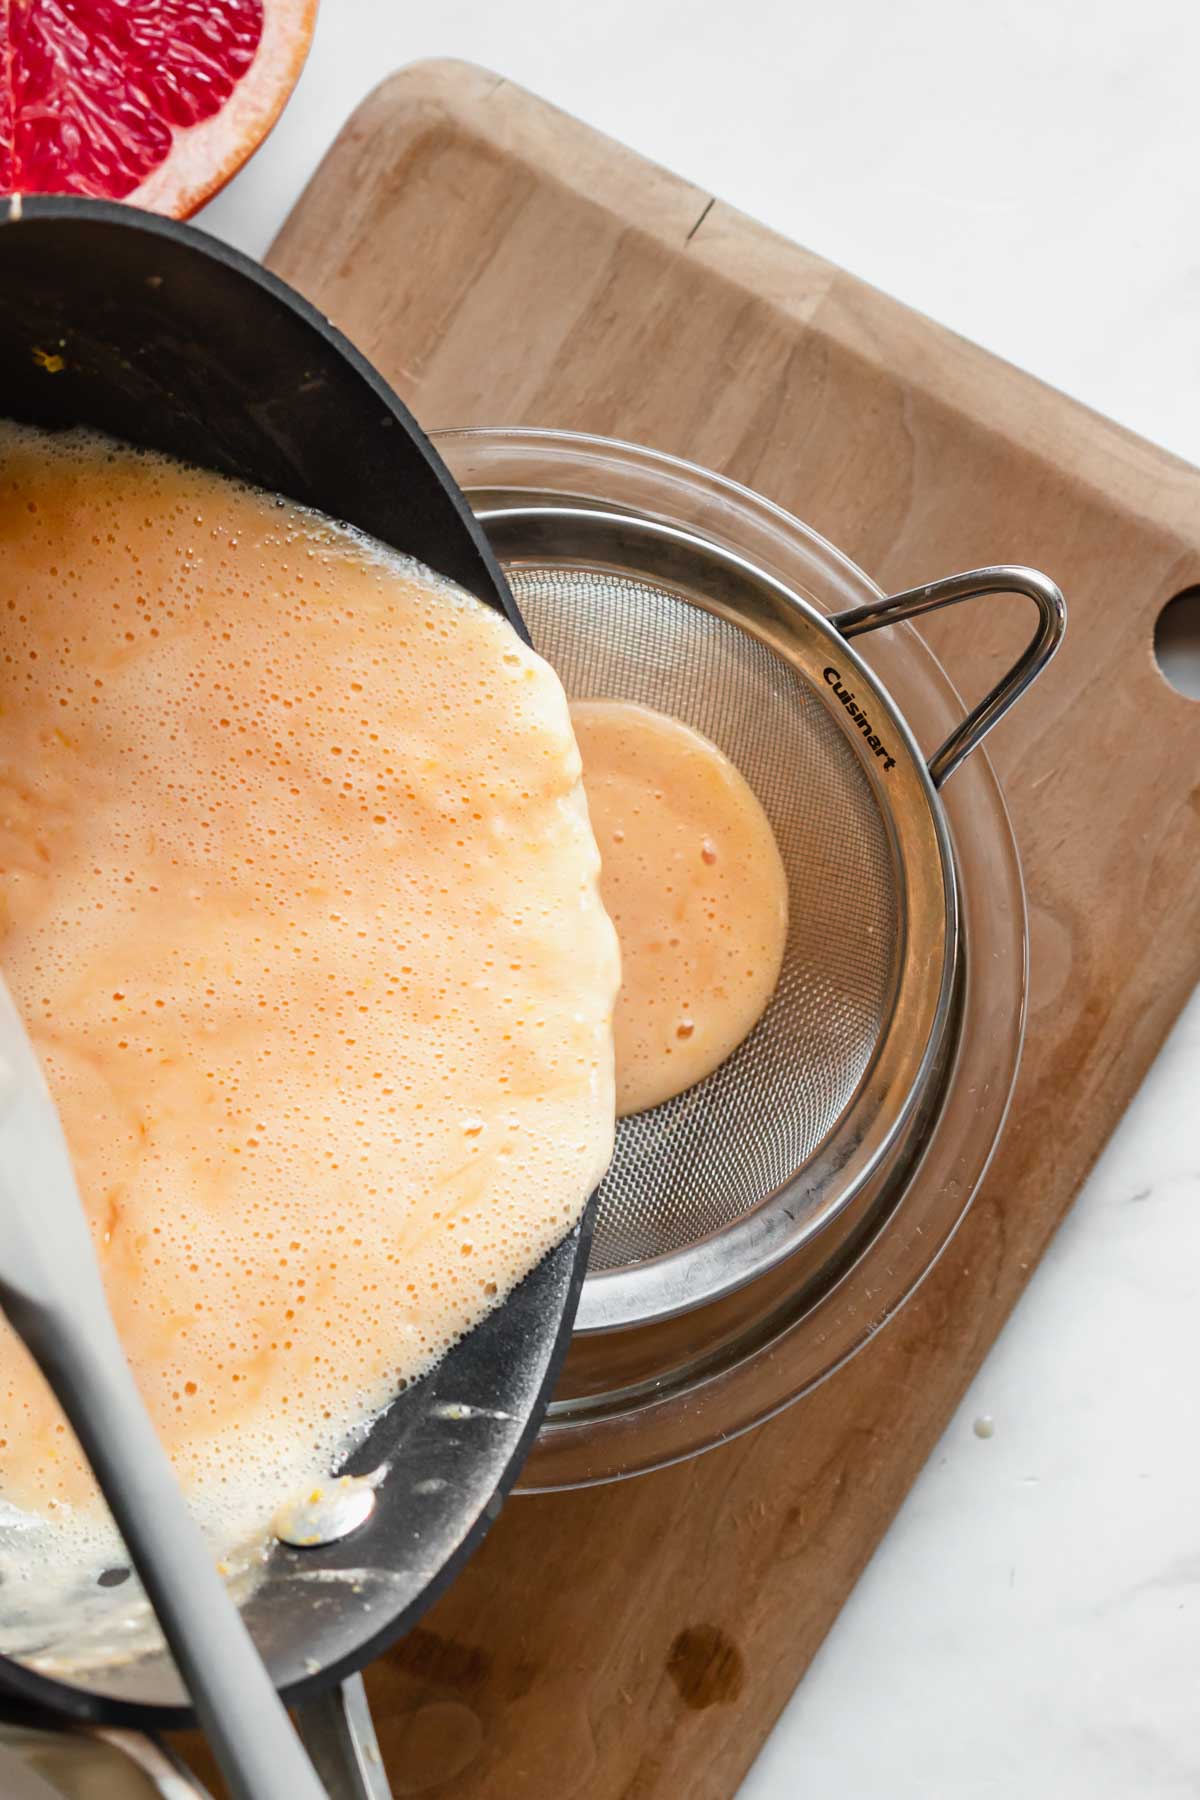
Three: Pass the curd through a fine mesh sieve into a bowl.
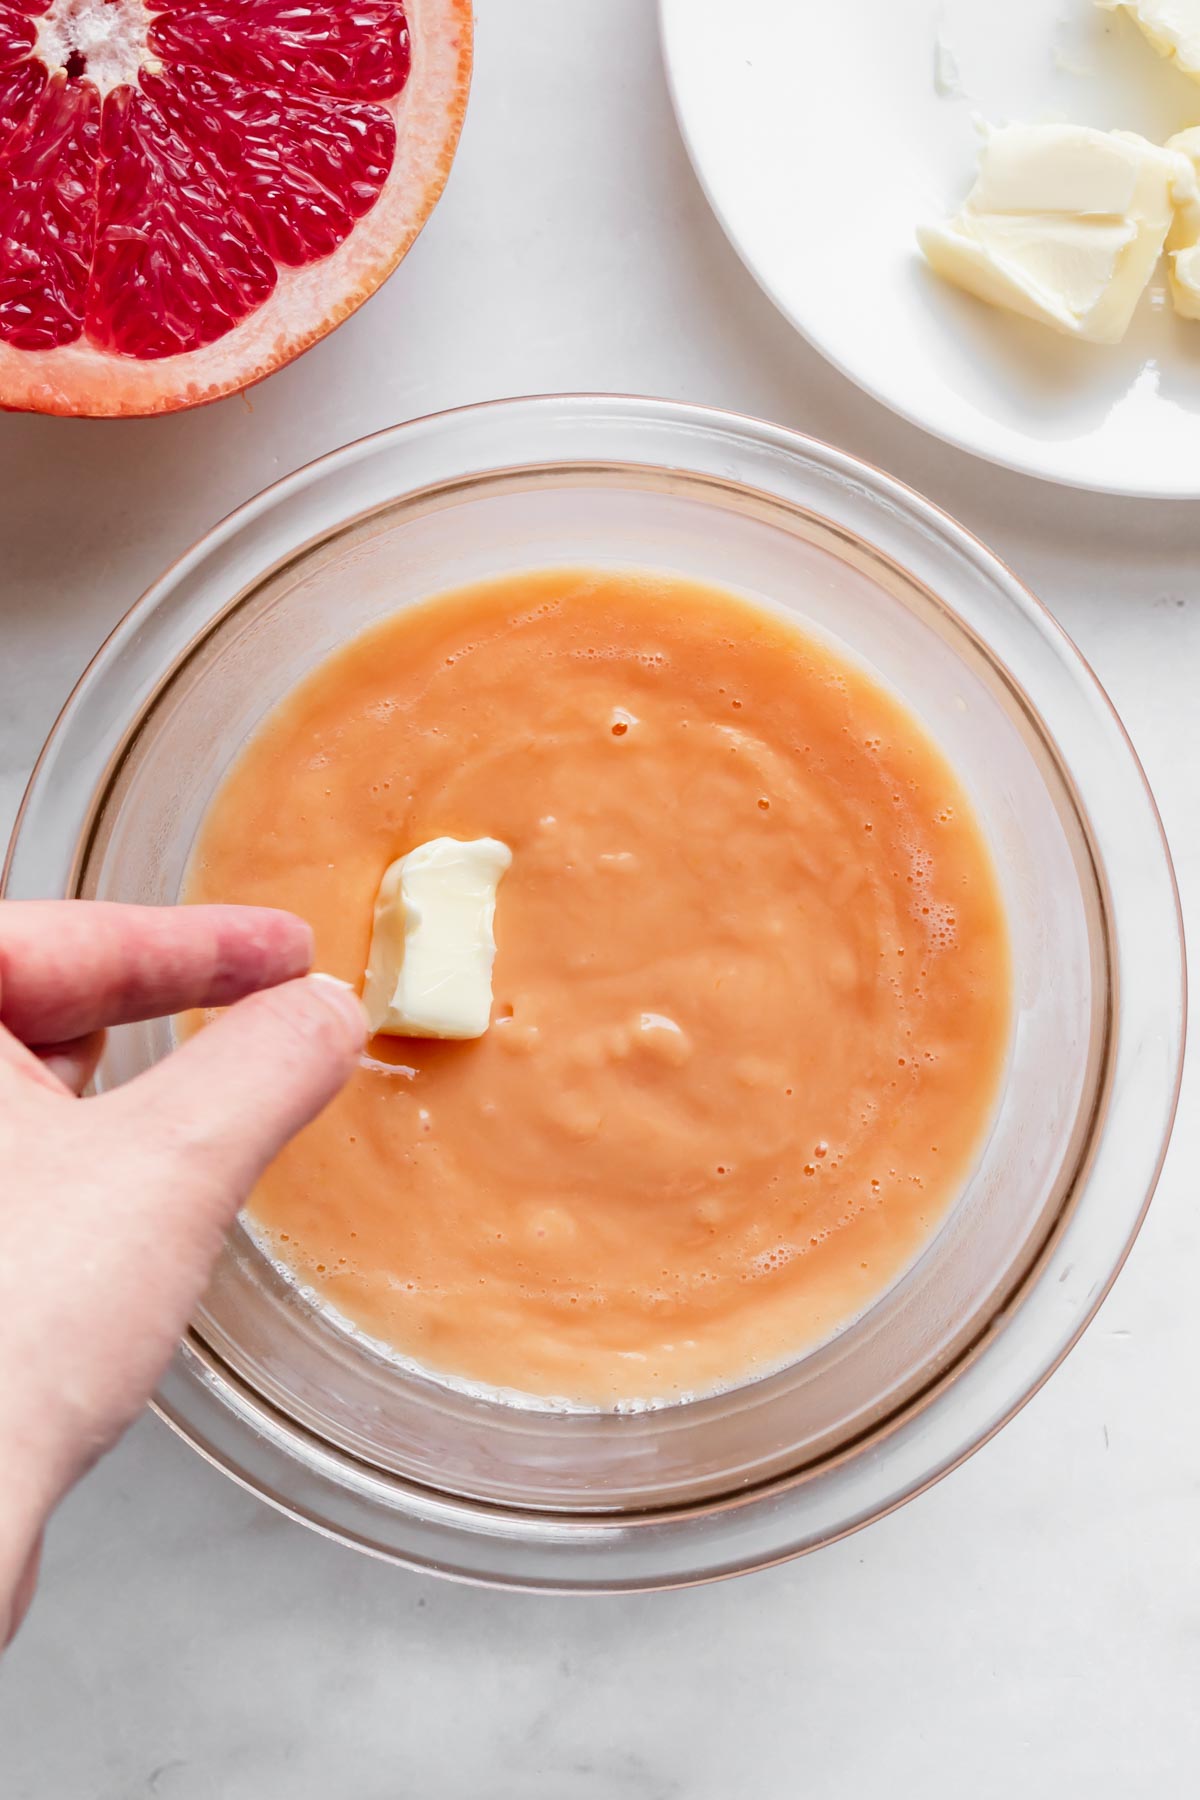
Four: Whisk in butter, then cover and chill in the fridge until set.
💌 Save This Recipe
Mini Pavlovas
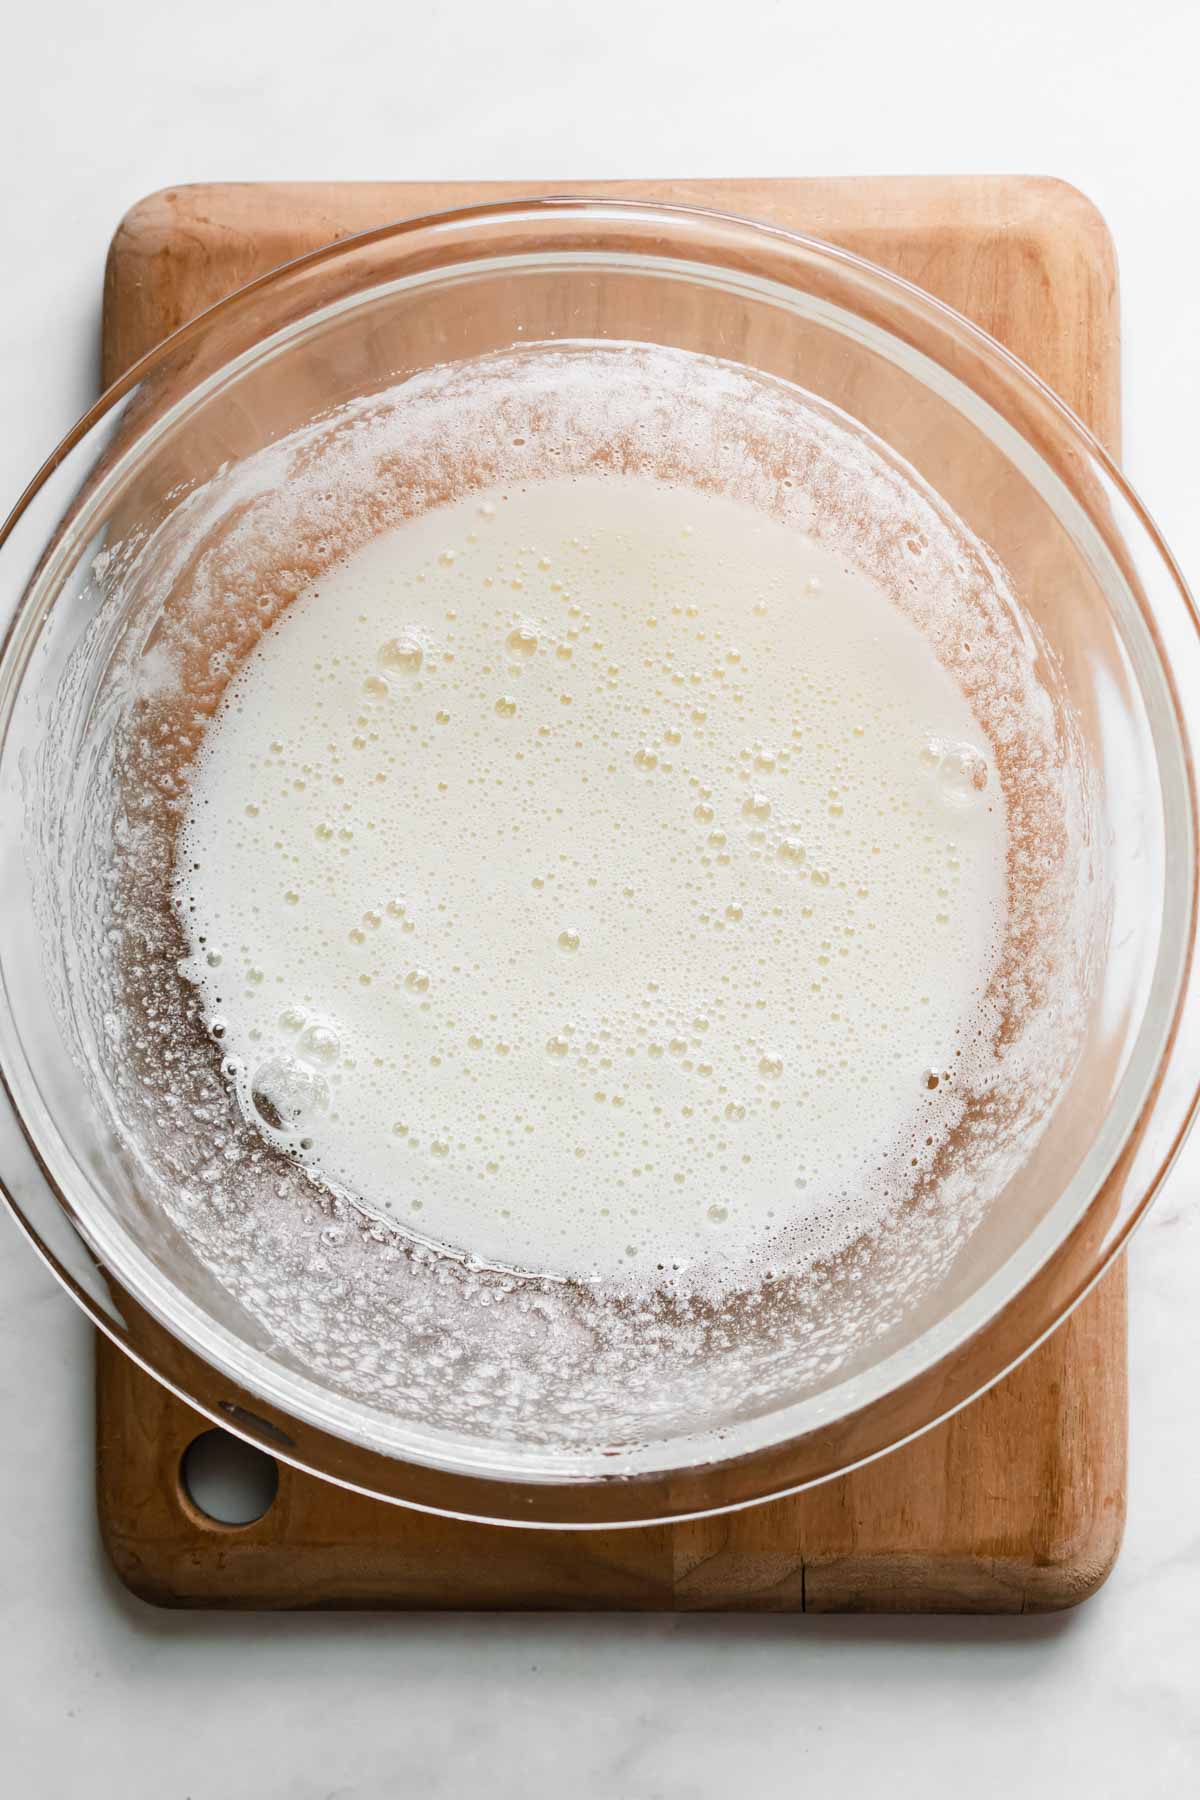
Five: Whisk the egg whites until frothy, then slowly add in the sugar as the mixer runs on medium speed.
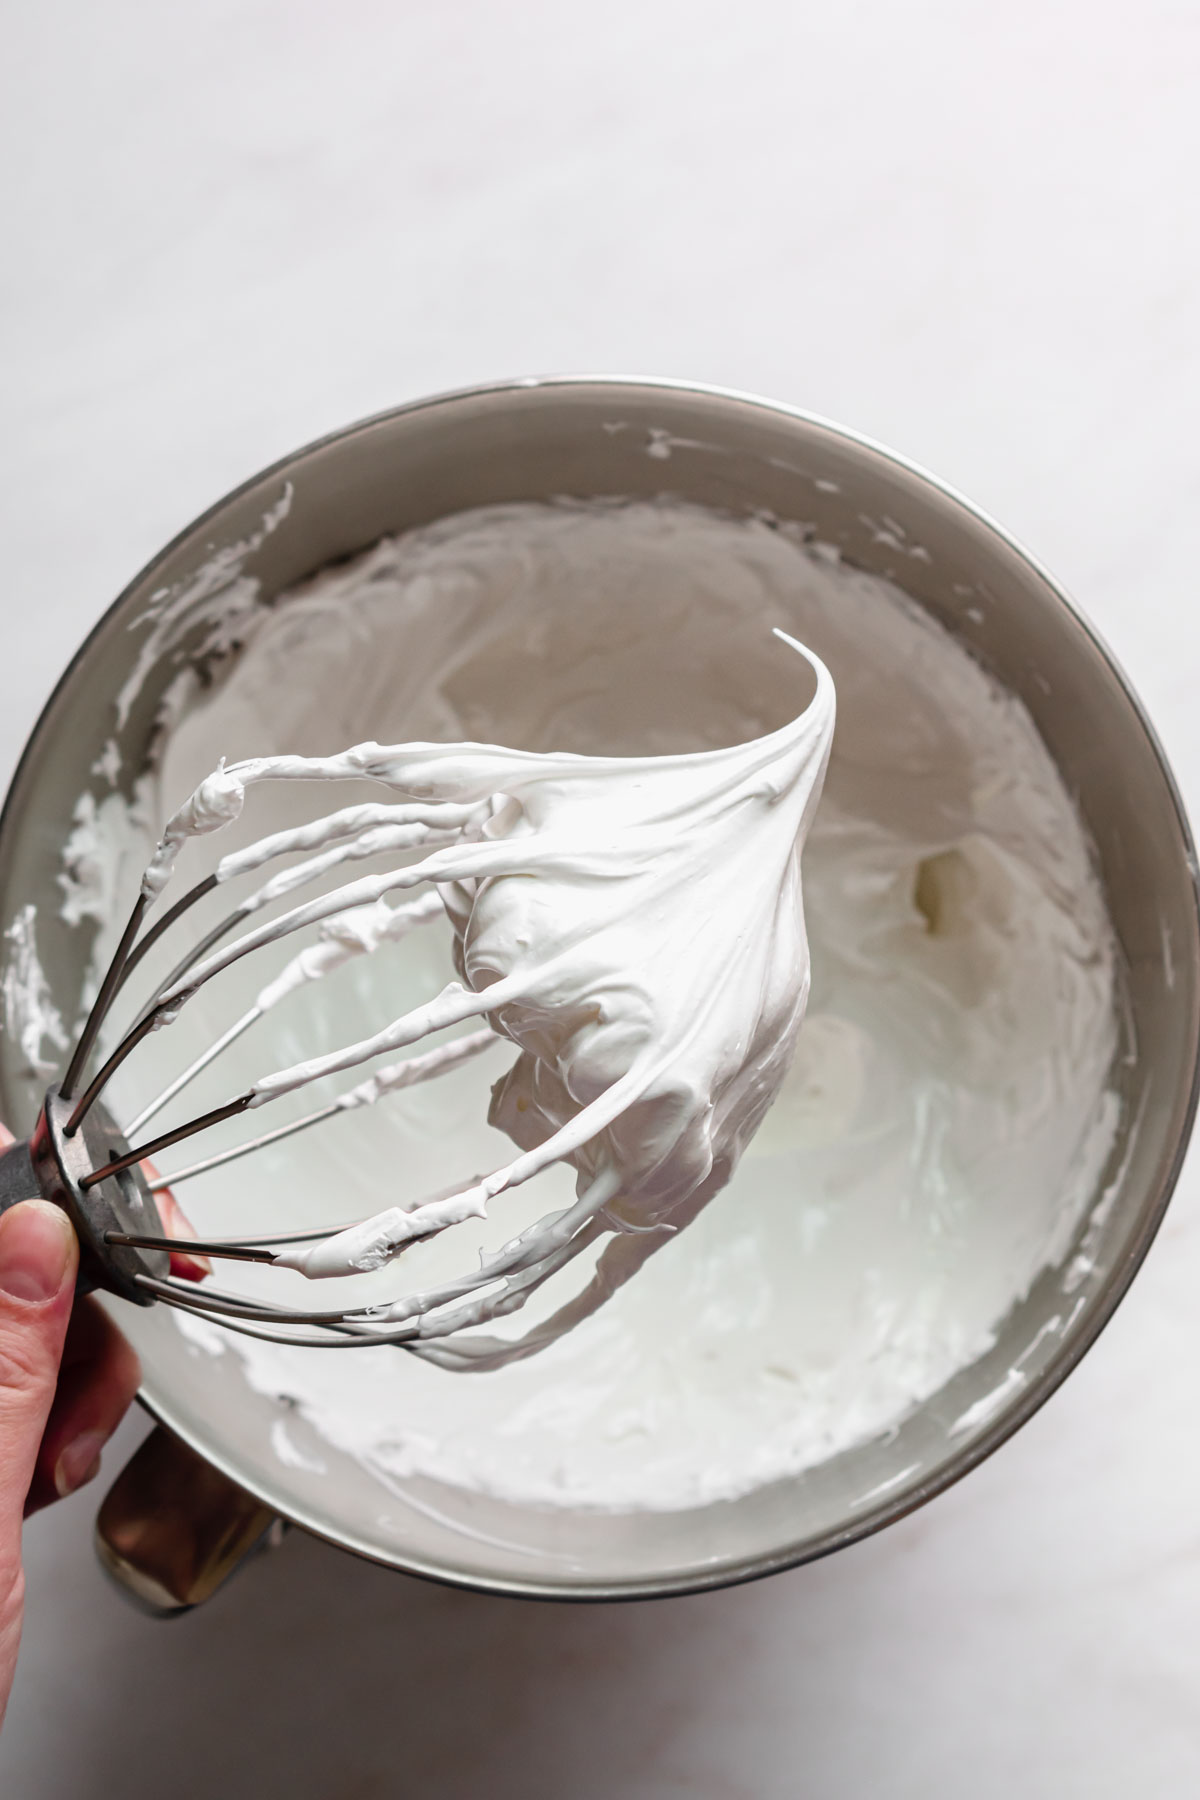
Six: Increase the speed once the sugar has been added, then whip until stiff peaks form on the whisk.
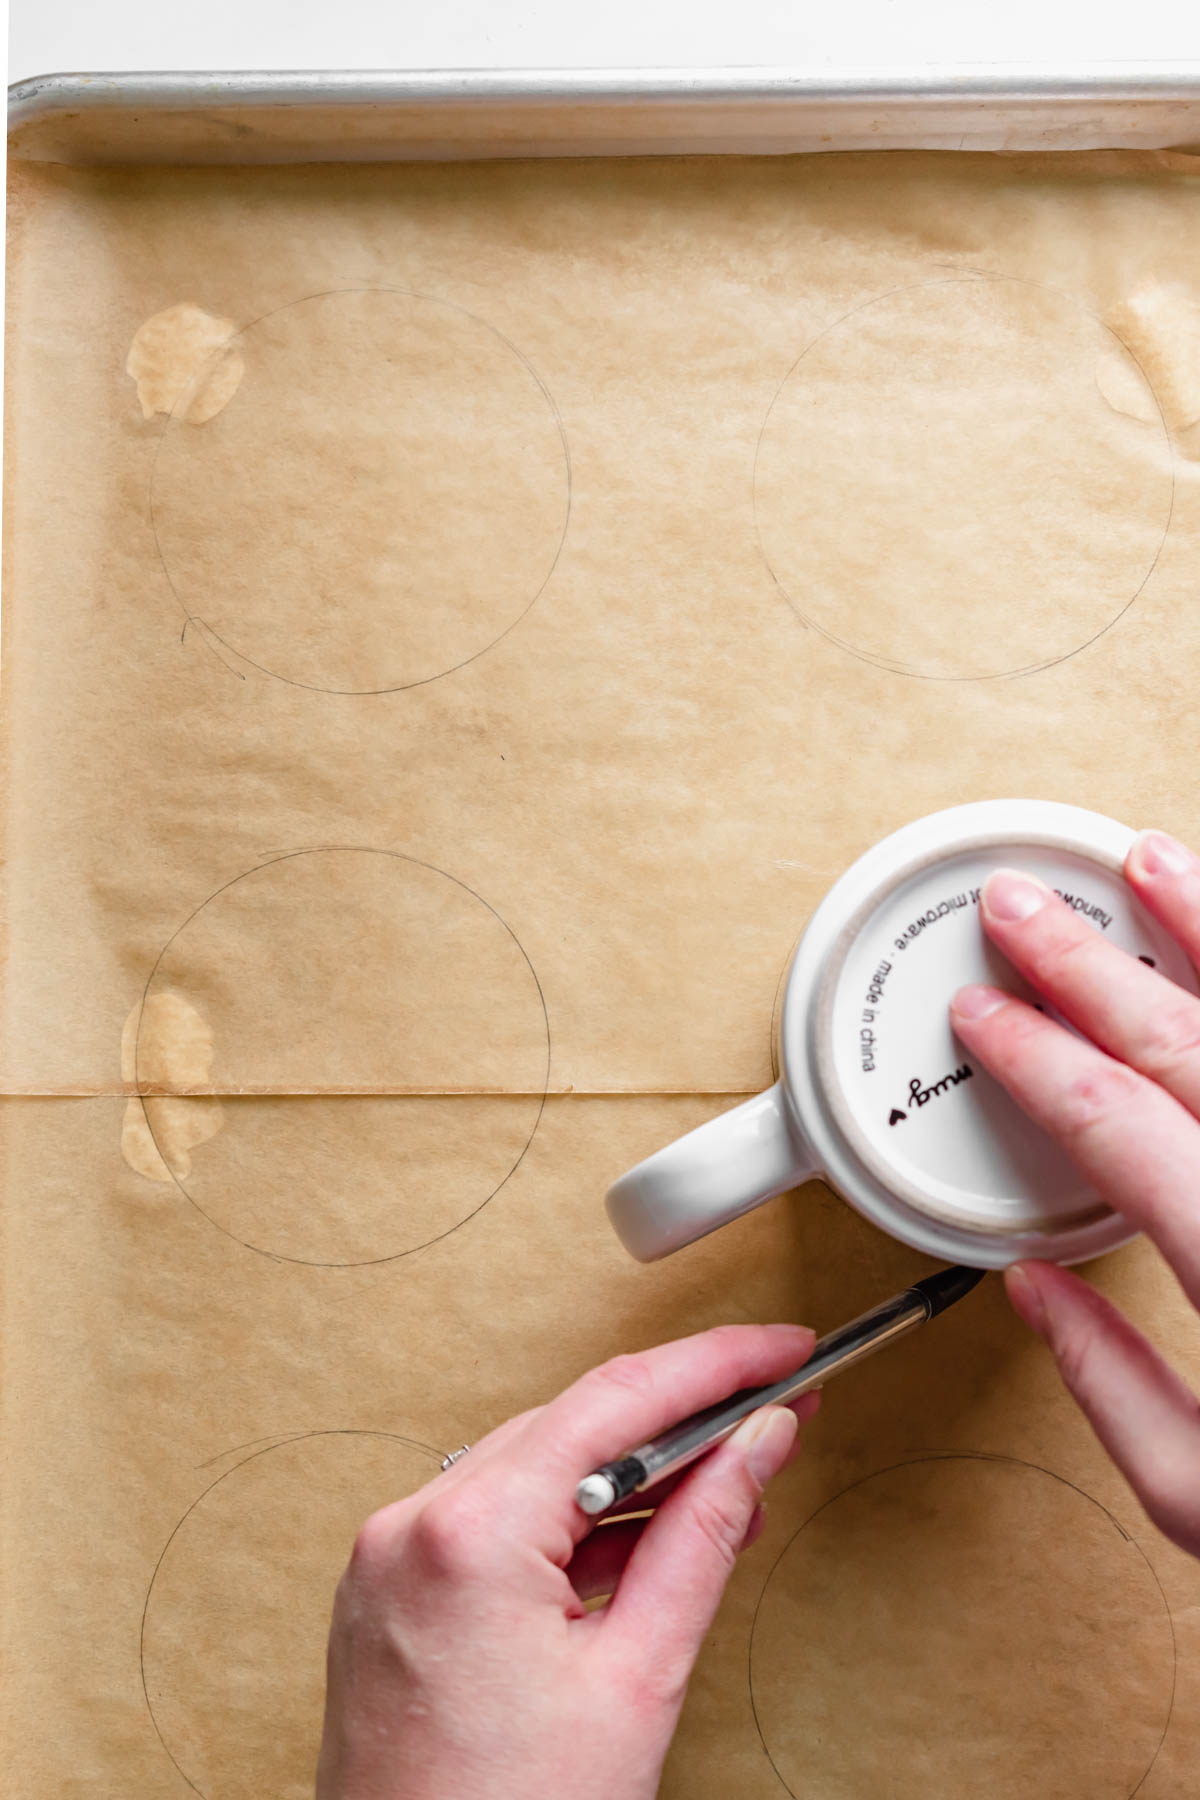
Seven: Trace four-inch rounds on a pan lined with parchment paper. Add small dollops of meringue underneath to help the paper stick to the pan.
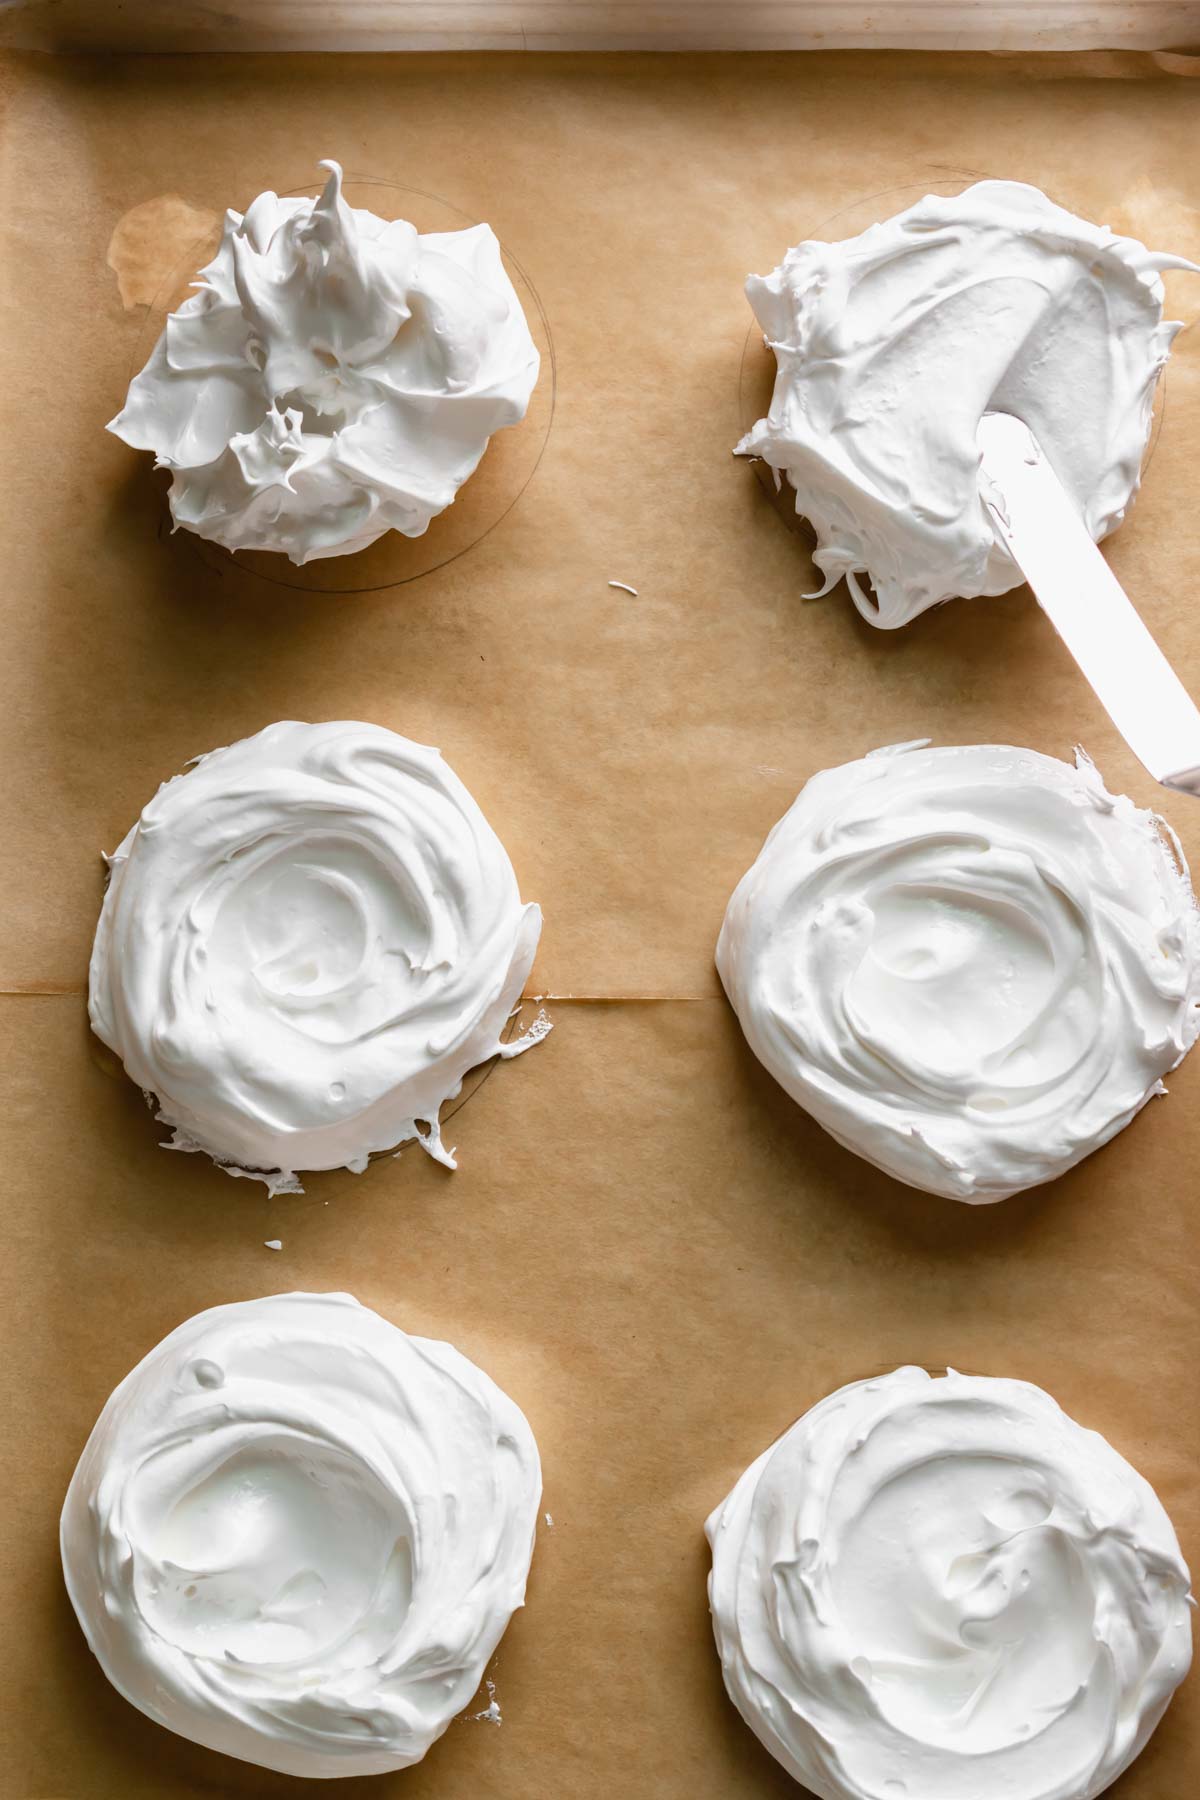
Eight: Add the meringue and swoop it into nests.
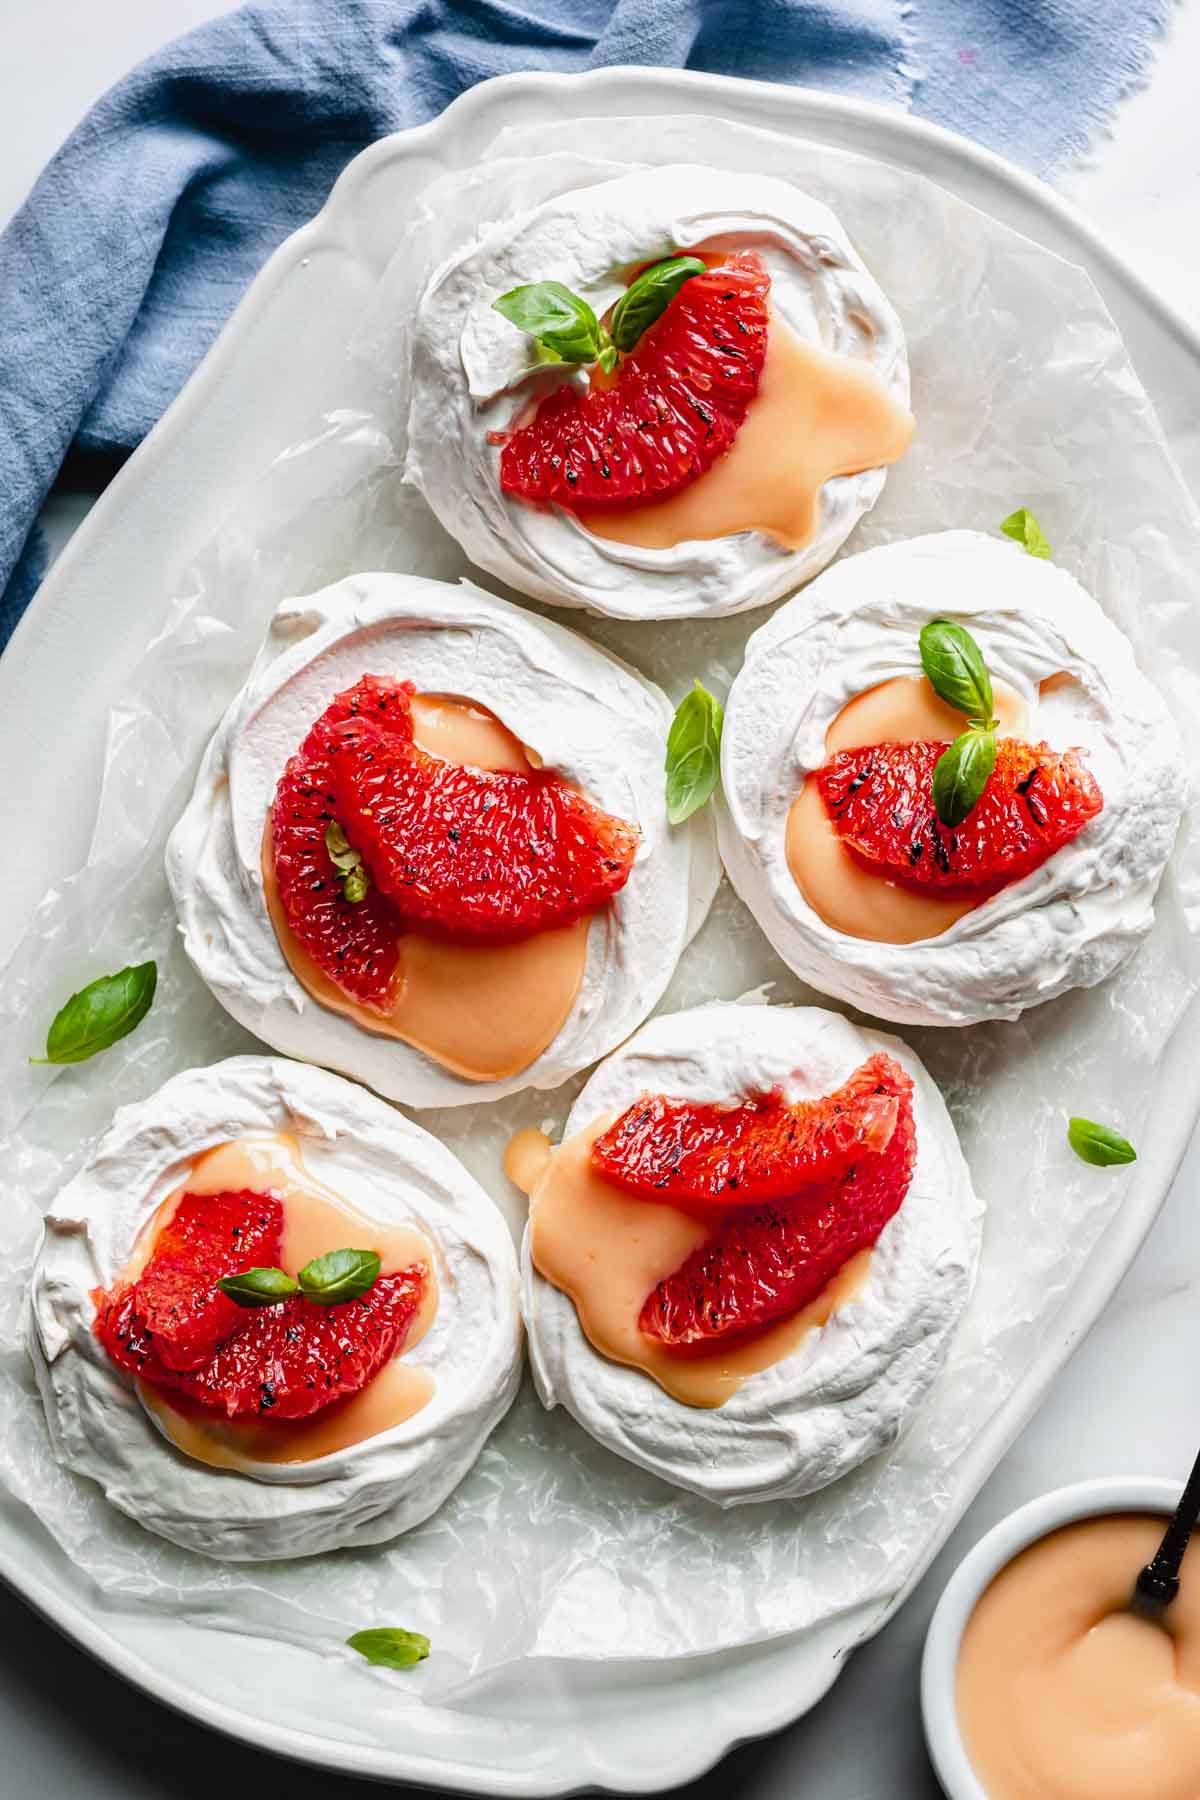
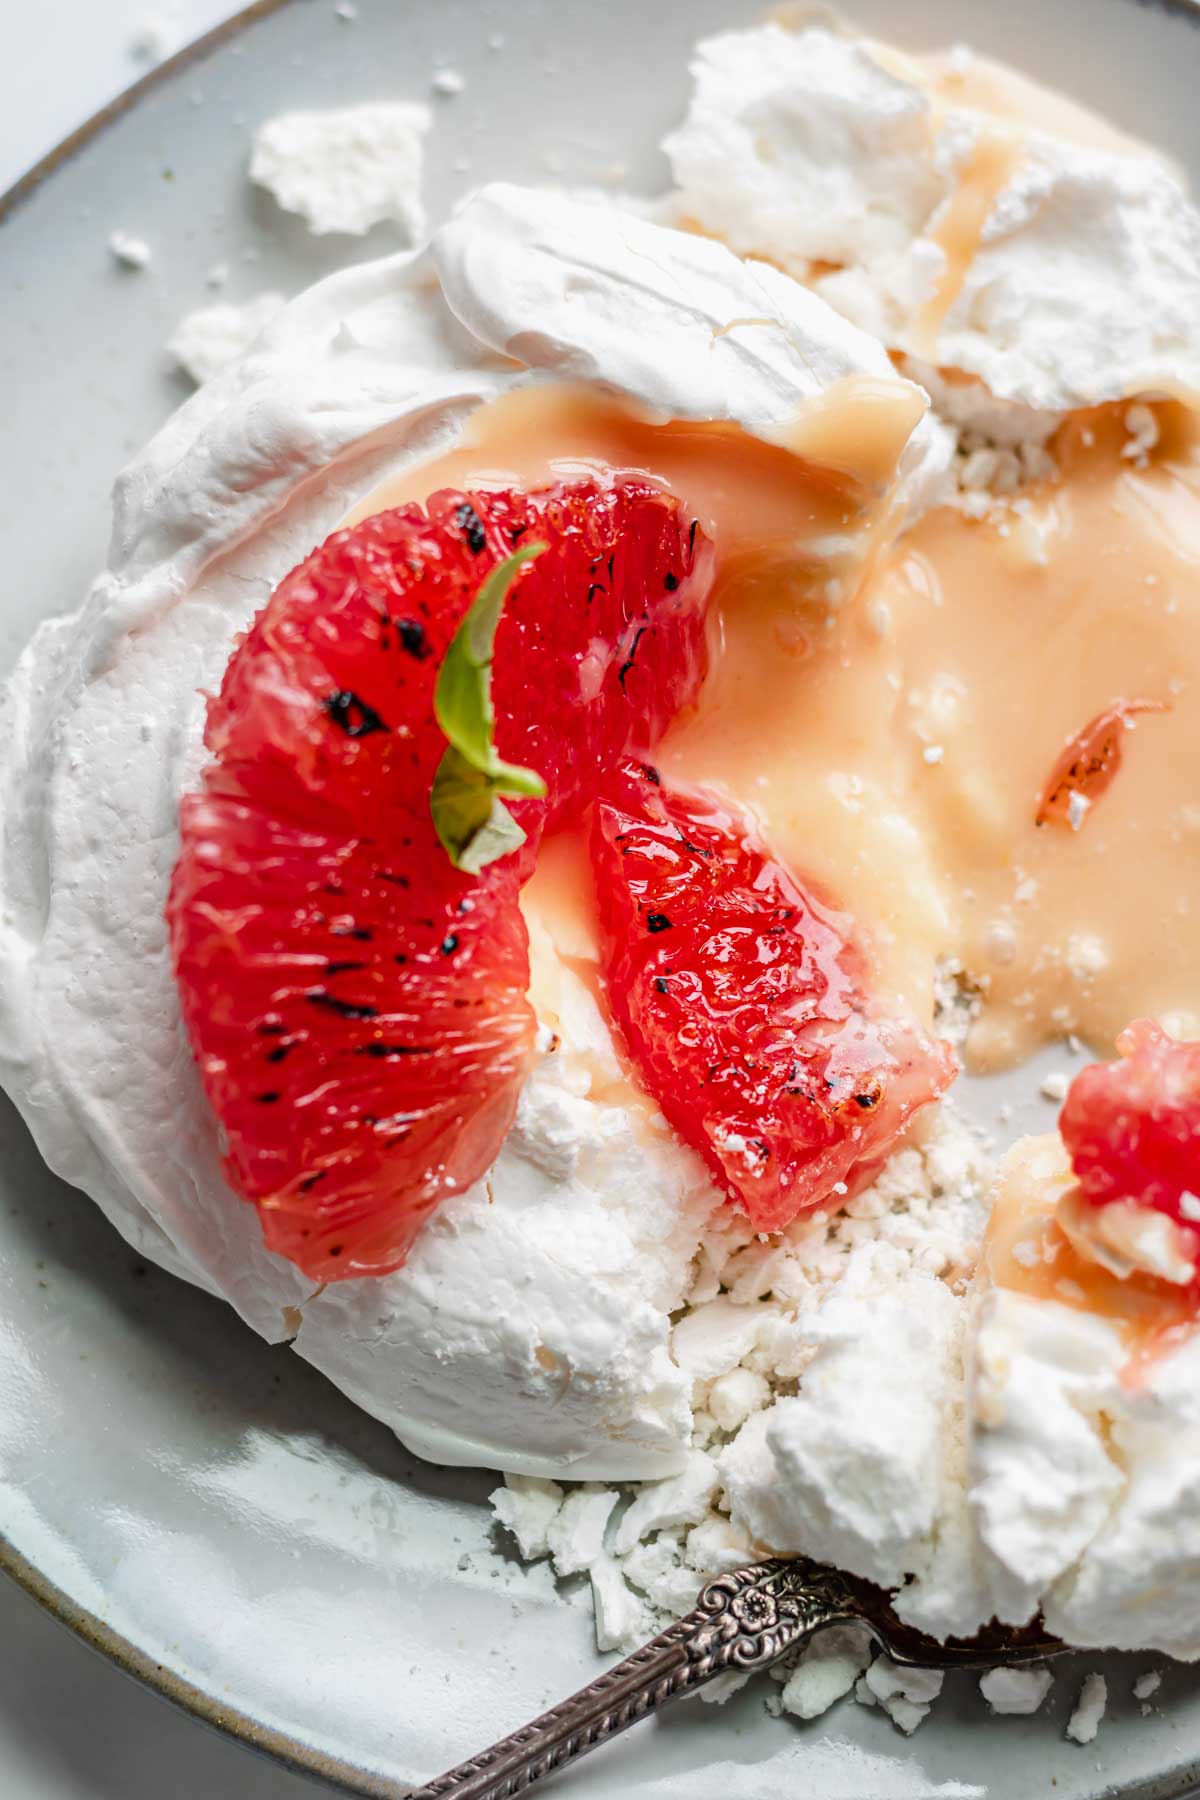
Citrus Pavlova Assembly
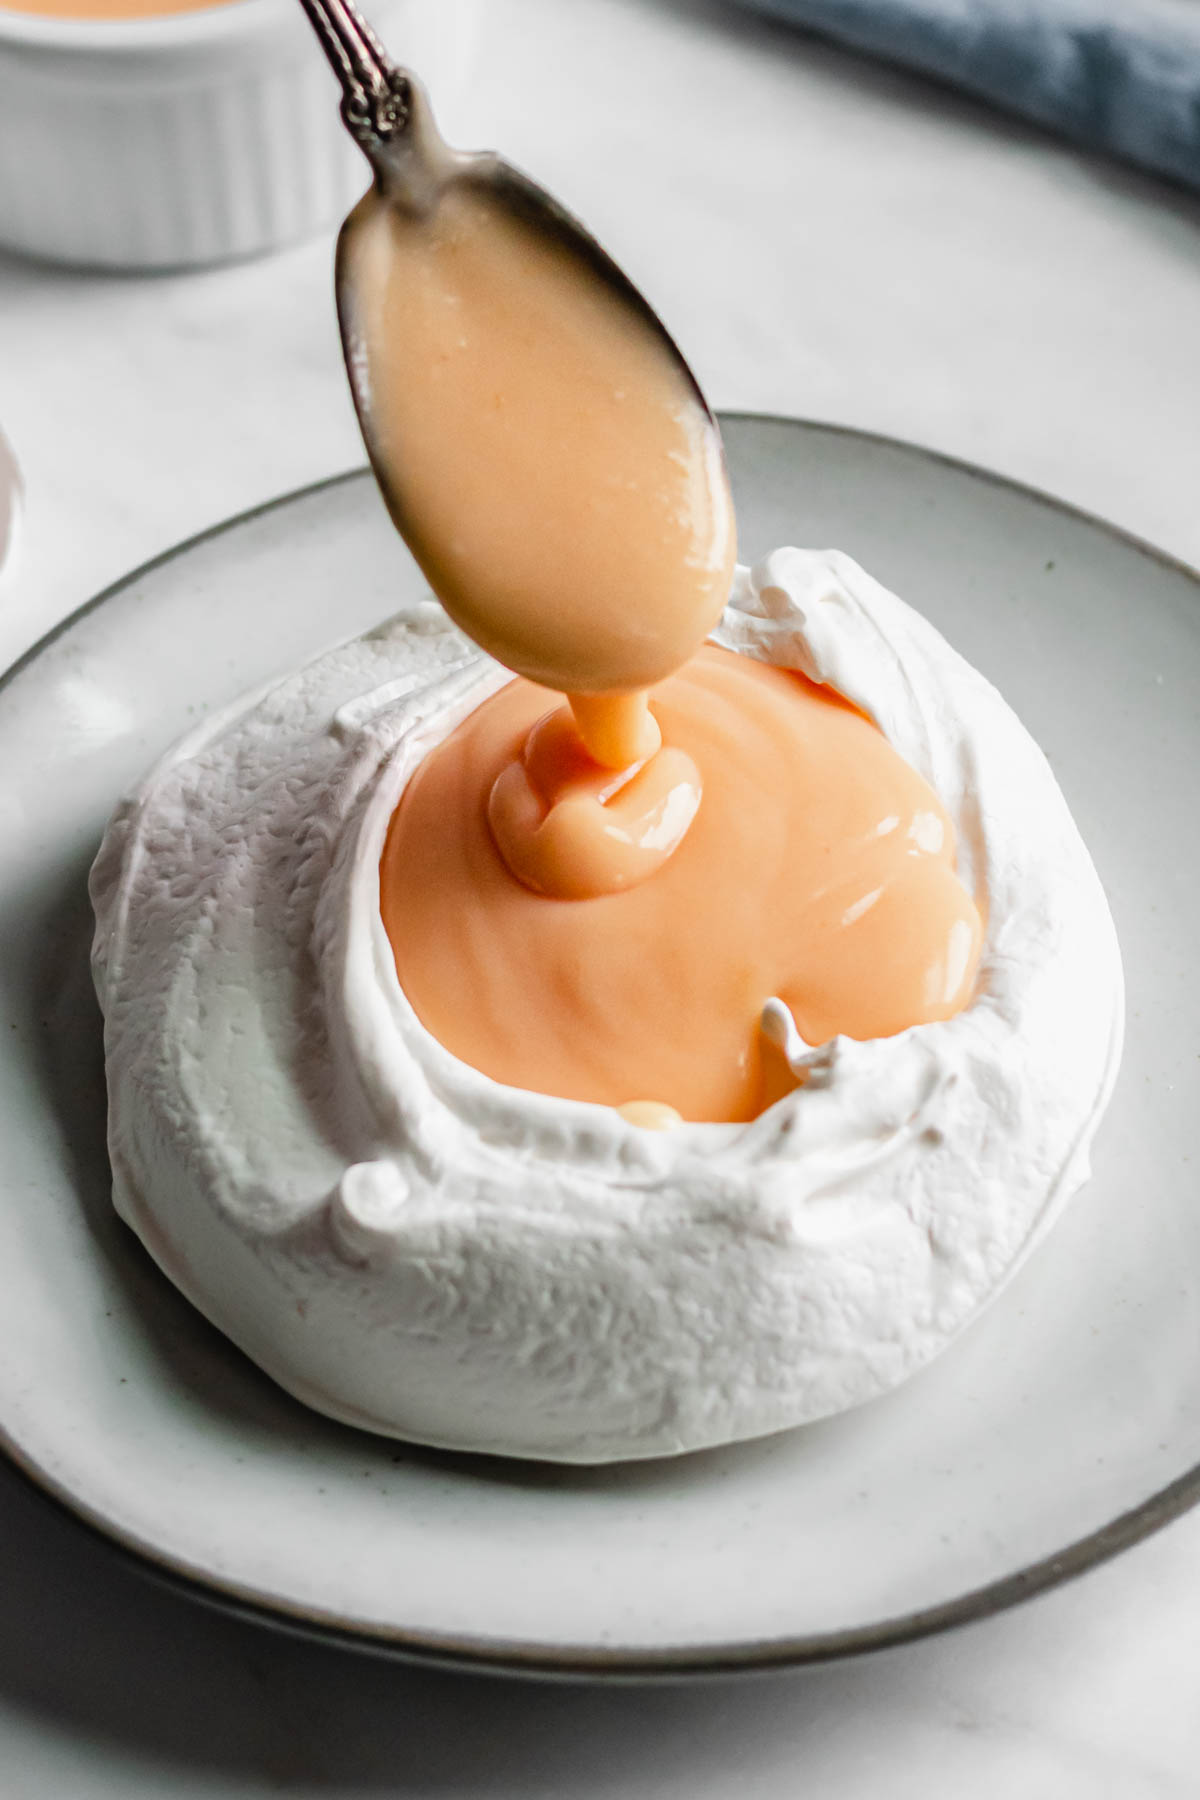
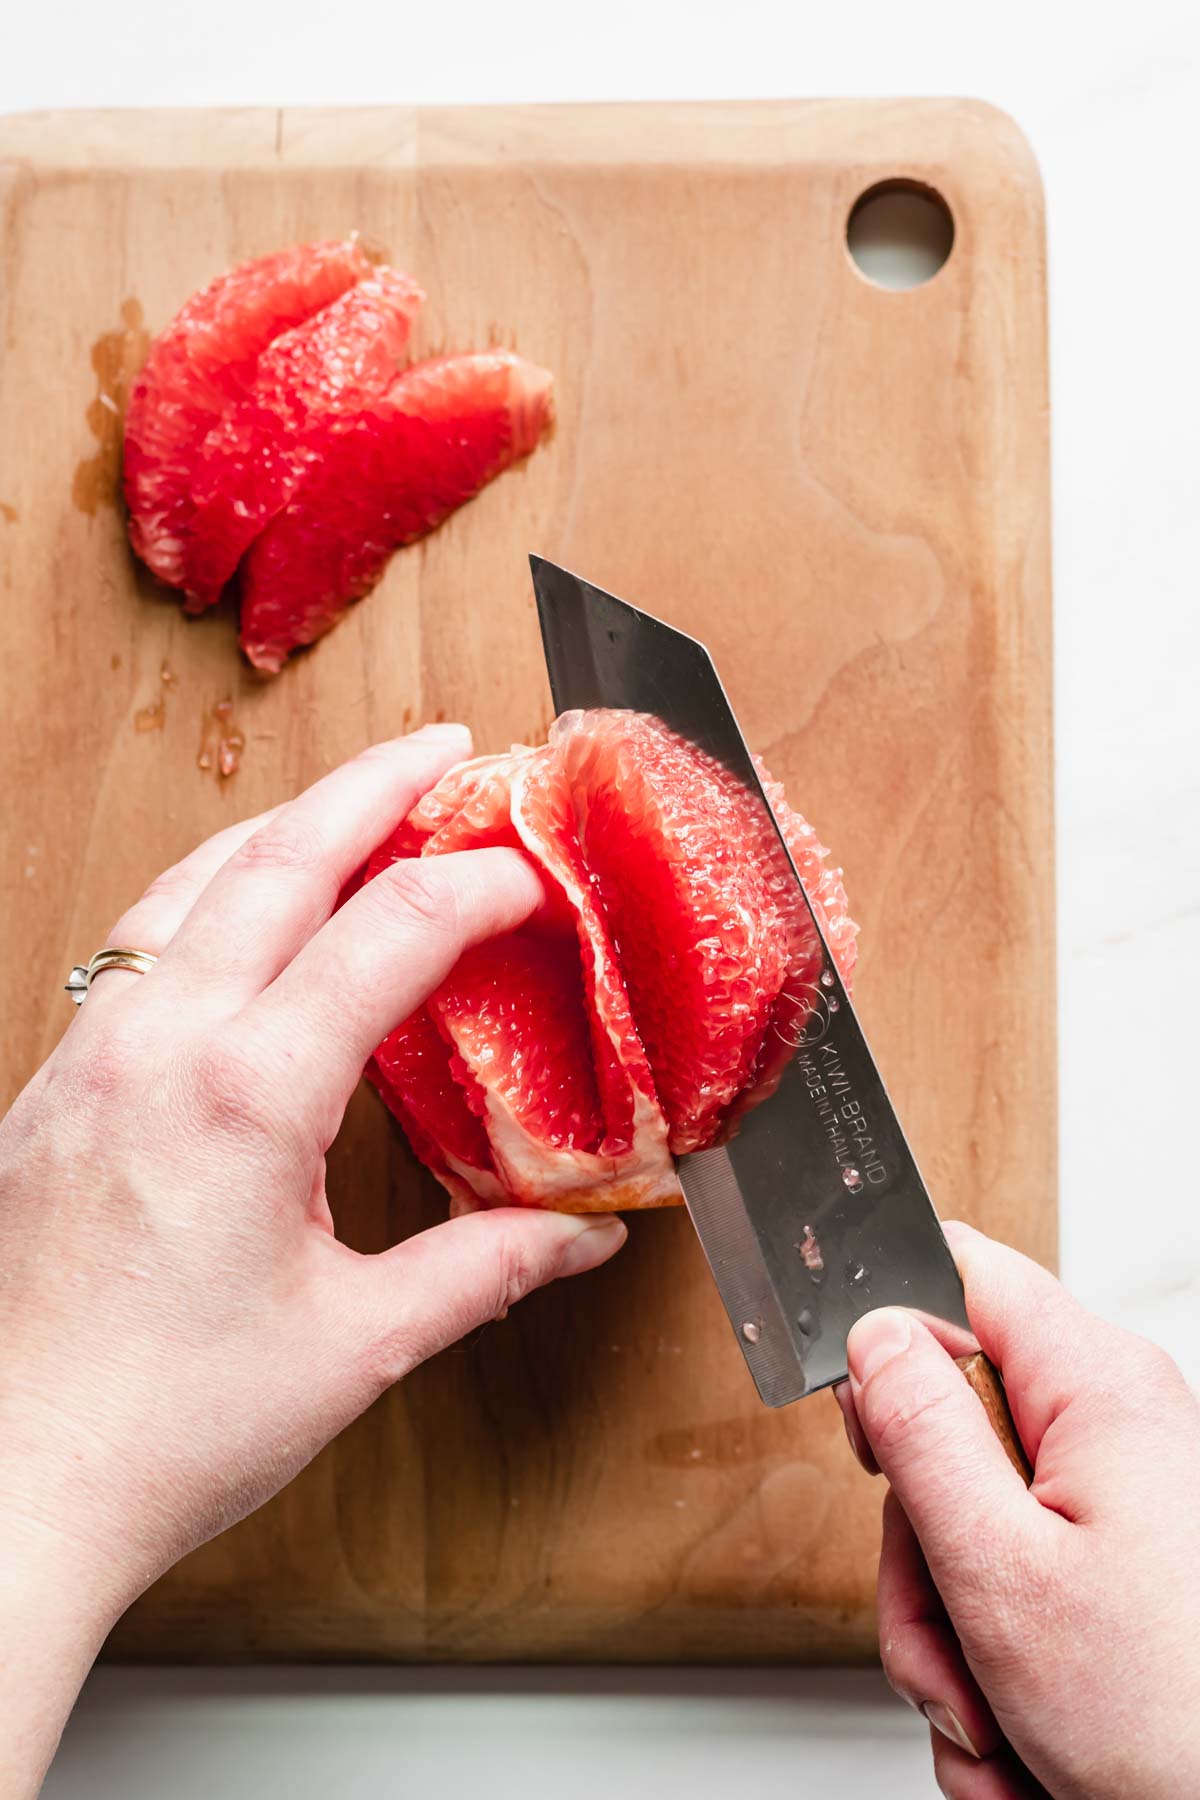
When ready to serve, place the mini pavlova nests on plates or a platter and spoon in the grapefruit curd to fill the meringue. Cut off the rind of a grapefruit (down to the flesh) and segment out the slices with a sharp knife to place on top of the curd.
If desired, pat the segments dry, push one side into granulated sugar, then torch the sugared side using a kitchen torch. This is optional for a bit of extra flavor and color.
Garnish the individual pavlovas with fresh mint or basil.
Expert Tips
- Make both the curd and nests a day ahead of time. They both need ample rest time and are great to assemble a day or two in advance.
- Use a totally clean bowl and whisk to whip the meringue. Any grease can cause the meringue not to whip up.
- When creating the nests, be sure to get a good swoop in towards the bottom. If it's too thick in the center, it won't bake up as nicely, and there should also be space to hold the grapefruit curd.
- Having a correct oven temperature is crucial for this bake. I suggest relying on an oven thermometer.
- Only assemble the meringue nests when ready to serve. Otherwise, the curd will "melt" the meringue.
Storage
While the pavlovas are best within 24 hour hours of making, store the unassembled mini pavlova nests uncovered at room temperature for three days. Only assemble the meringues and add the curd and fruit right before serving.
The pavlova nests should not be frozen.
Recipe FAQs
A pavlova is a large mass of whipped meringue (egg whites and sugar) baked at a low and slow temperature. The meringue dries out to create a light crunchy edge and a lightly chewy middle.
They are made of the same ingredients (eggs and sugar) and are both whipped to peaks. A meringue is referred to in the pre-baked state, and a pavlova is the baked state of meringue.
Meringue comes in a few different techniques: French, Swiss, and Italian. All of these methods can be used to make a pavlova.
A pavlova is ready when it can easily be removed from the parchment paper. If it is still sticking to the bottom, the meringue has not quite dried out enough.
If you notice any pavlovas that are under baked, remove the u0022doneu0022 nests and add the under baked pavlovas back to a 225℉/107℃ oven for 20-30 minutes, then turn off the oven and allow them to sit for 2 hours with the door closed.
This is likely because the oven temperature was too high. It's crucial to have an oven thermometer to make a pavlova.
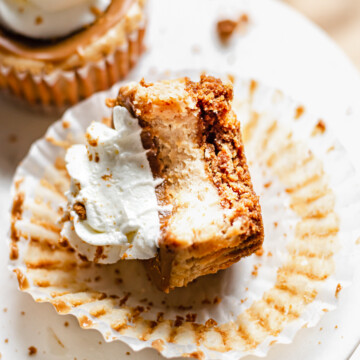
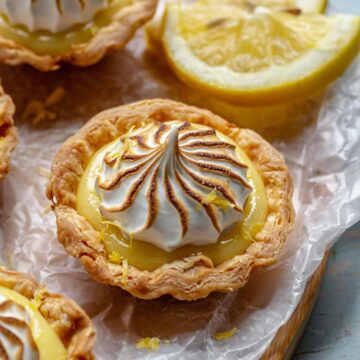
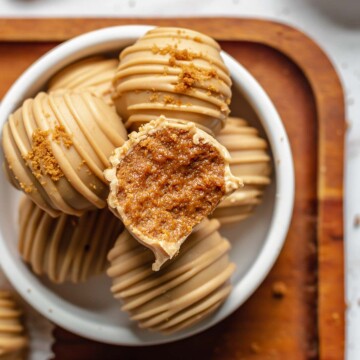
More Individual Desserts You'll Love
Did you make this recipe? Share it with us! Tag @thecozyplum on Instagram & Facebook and leave a star rating ⭐️ below!
📖Recipe
Mini Pavlova Nests with Grapefruit Curd
Equipment
- Microplane or zester
- Whisk
- Heat proof bowl
- Medium sized pot
- Offset spatula optional
Ingredients
Grapefruit Curd
- 3 large eggs
- ⅔ cup granulated sugar 133g
- 3 tablespoons grapefruit zest
- ⅔ cup grapefruit juice freshly squeezed (5oz)
- 6 tablespoons unsalted butter room temperature (85g)
- Red food coloring optional
Mini Pavlovas
- 4 large egg whites
- ⅛ teaspoon kosher salt
- ½ teaspoon cream of tartar
- 1 cup granulated sugar 200g
- ½ tablespoon vanilla paste or extract
Instructions
Grapefruit Curd
- Zest the grapefruit until there is 3 tablespoons of zest. Cut and juice the grapefruit until there is ⅔ cup of grapefruit juice - remove any seeds.
- Cut the butter into tablespoon pieces and place a fine mesh sieve on top of a bowl.
- Add the eggs, sugar, grapefruit juice and zest to a medium saucepan over medium low heat. Whisk constantly until the curd thickens considerably and it just starts to bubble, about 5 minutes. A track mark should remain on a rubber spatula when wiped.3 large eggs, ⅔ cup granulated sugar, 3 tablespoons grapefruit zest, ⅔ cup grapefruit juice
- Transfer the curd to the fine mesh sieve and pass it through into the bowl using a rubber spatula or wooden spoon. Scrape the underside of the sieve to remove all curd.
- Adding one tablespoon of butter at a time, whisk it in completely to combine before adding the next tablespoon of butter.6 tablespoons unsalted butter
- Add a drop or two of red food coloring if the curd is too light or dull. See "Notes" for more detils.Red food coloring
- Cover the curd with plastic wrap, placing the wrap directly onto the curd to prevent a skin from forming.
- Chill while the pavlovas are baking and store in the fridge until ready to use
Mini Pavlovas
- Add the egg whites to the bowl of a stand mixer fitted with the whisk attachment and whip on medium speed until frothy. Sprinkle in the salt and cream of tartar during this time.4 large egg whites, ½ teaspoon cream of tartar, ⅛ teaspoon kosher salt
- With the mixer running on medium speed, slowly pour in the sugar in a continuous stream until incorporated.1 cup granulated sugar
- Add the vanilla, increase the speed to medium high and whip until stiff peaks form and stand up on the tip of the whisk without falling. The mixture should be sheen and glossy. This can take anywhere from 3-10 minutes.½ tablespoon vanilla paste or extract
Assembling & Baking
- Preheat the oven to 225℉/107℃. Place a dime sized swipe of meringue on the corners of a large baking sheet, then line with parchment paper. This helps keep the parchment in place.
- Using a pencil, trace six, 4-inch circles evenly spaced on top of the parchment paper.
- Place a tall mound of meringue to each circle, adding to each until they're even and the meringue has all been used. Using two spoons is best here - one to hold the meringue and one to scrape off the meringue.
- Use an offset spatula or spoon and carefully work the meringue down to fill out the circle. Go around the edges to keep it smooth and formed, then make a few swoops and canals in the center of the meringue. This is best to hold the curd and helps it bake up nicely!
- Bake the mini pavlovas for one hour. Then, turn off the heat and allow them to fully cool in the oven with the door closed for 45 minutes.
- Add a spoonful or two of the curd to each pavlova, and top with segmented grapefruit. The segments can be dipped in sugar and bruleed with a torch for extra flavor and color, if desired.
Leave a Reply