
An upscale version of the classic holiday York Peppermint Patty, this Chocolate Peppermint Pie recipe has a chocolate crust, homemade peppermint candy layer, and are topped with a smooth chocolate ganache. Finish it off with some crushed candy canes for extra peppermint flavor (like in these chocolate peppermint brownies)! Looking for a more balanced mint flavor? Try this no-bake chocolate mint pie!
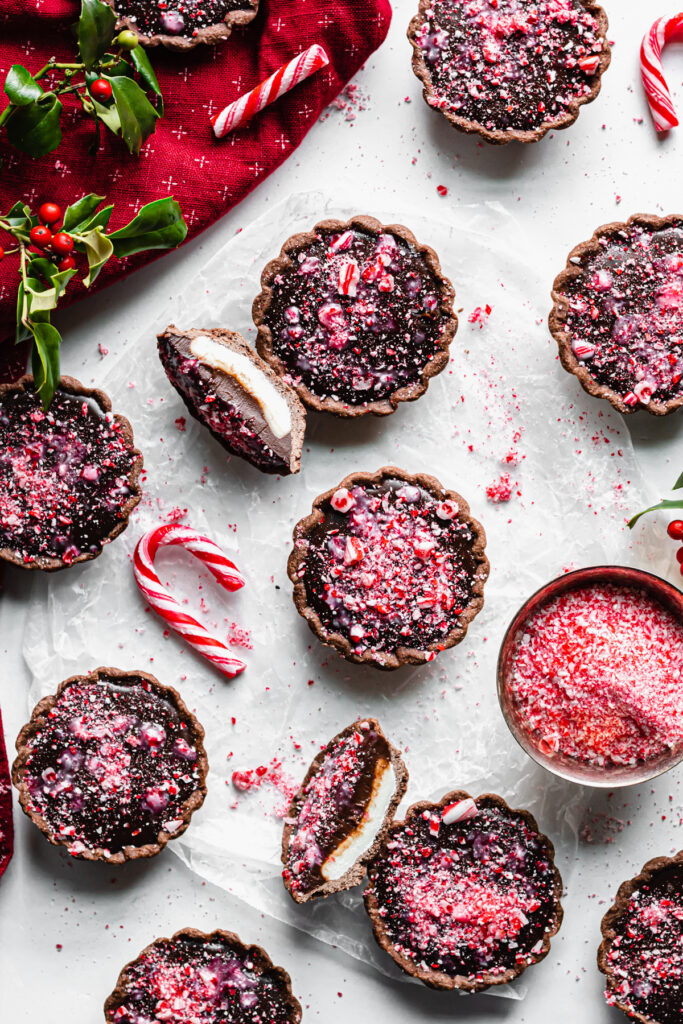
For these chocolate peppermint pies, a simple and forgiving chocolate tart dough bakes into a perfect cookie crust. Nestle in the easy homemade peppermint patty filling, add on a layer of silky chocolate ganache and you're hitting peak holiday joy! Wait - sprinkle on the crushed candy canes and then you've hit peak holiday joy.
But seriously, you have to try these. If you don't have any tartlet pans, here are the tartlet pans I use. However, you can 100% make them in a muffin tin, and I KNOW you have one of those. If you're looking for a fun and unique bake over the holiday season, this is it!

Jump to:
Ingredient Notes
- Unsalted butter. Softened - for the chocolate sweet tart crust.
- Dry ingredients. All-purpose flour and cocoa powder for the crust. I specifically use dutch-processed cocoa for the crust as it produces a darker color and depth of flavor. You can also use natural cocoa, but the shells will be lighter in color.
- Sweetened condensed milk. One of three ingredients needed for the peppermint patty filling.
- Sugars. Granulated sugar for the crust, powdered sugar for the peppermint filling.
- Heavy whipping cream. For the ganache! Heated to simmering.
- Chocolate. Semi-sweet (about 60-70% cacao), chopped. Chocolate chips can also be used in a pinch.
- Peppermint extract. To get all of that peppermint flavor, obviously!
- Candy canes. Crushed up and sprinkled on the tops of the Chocolate Peppermint Pies! Optional, but also necessary in my opinion.
How to make the Chocolate Peppermint Pies
This recipe is broken up into a few parts: Making the dough for the crust and 2 hours of chill time, baking the crust, peppermint filling, chocolate ganache.
Chocolate Sweet Tart Crust
You can read my full post write up for my Chocolate Sweet Tart Crust Recipe for additional details on this portion.
STEP 1: In a bowl, whisk together the flour and cocoa powder until combined and set aside. In the bowl of a stand mixer fitted with the paddle attachment (or with a hand mixer), cream together the butter, sugar and salt until smooth. Scrape down the sides.
Add in the egg and mix until incorporated, then scrape down the sides again. Add the flour and cocoa powder and mix on low until just incorporated. Wrap the dough in plastic wrap and flatten into a 1-inch thick disc. Place in the fridge for two hours.
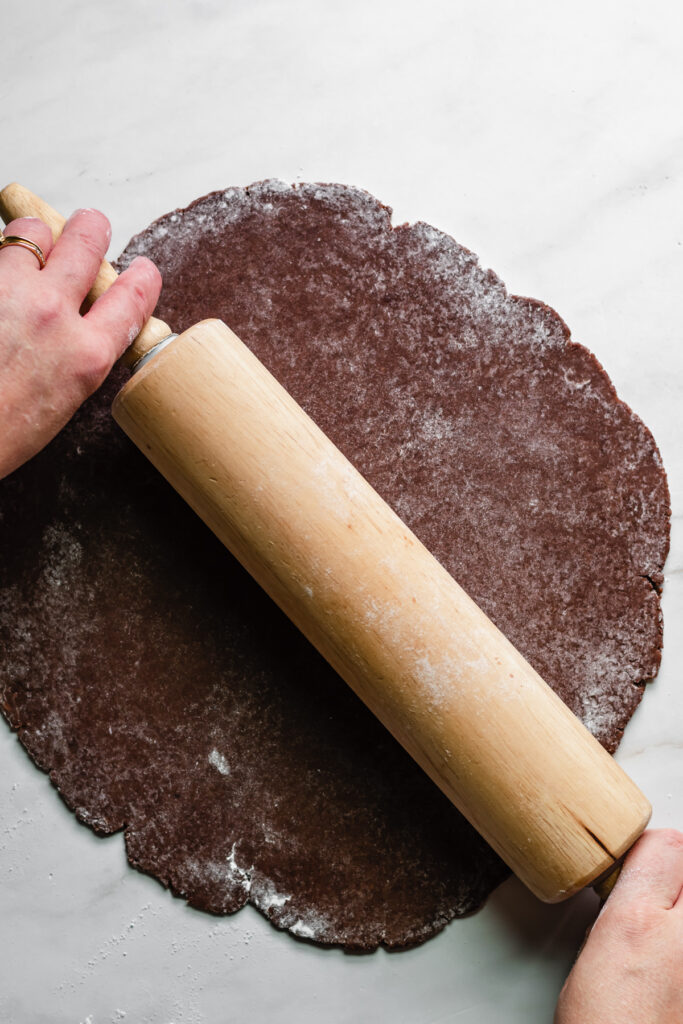
STEP 2: Remove the dough from the fridge and allow it to sit at room temperature for about 15 minutes. Flour your work surface and rolling pin and roll out the dough until it’s ⅛" thick, turning a quarter turn every few rolls. This dough is very forgiving, so if it cracks, you can patch it later.
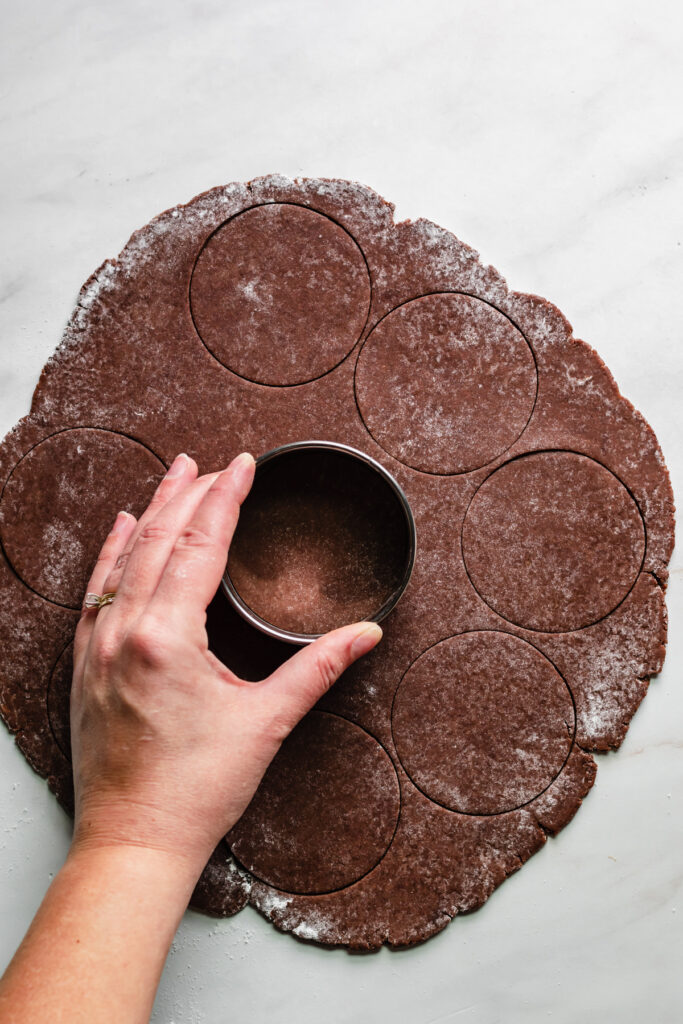
Cut 12 circles out of the dough using a 3 ¼” - 3 ½” cookie cutter (it should be slightly larger than your tartlet pan). After the first round of cuts, mash the dough scraps back together, roll out to ⅛” thick again, and cut rounds. Repeat again, if needed.
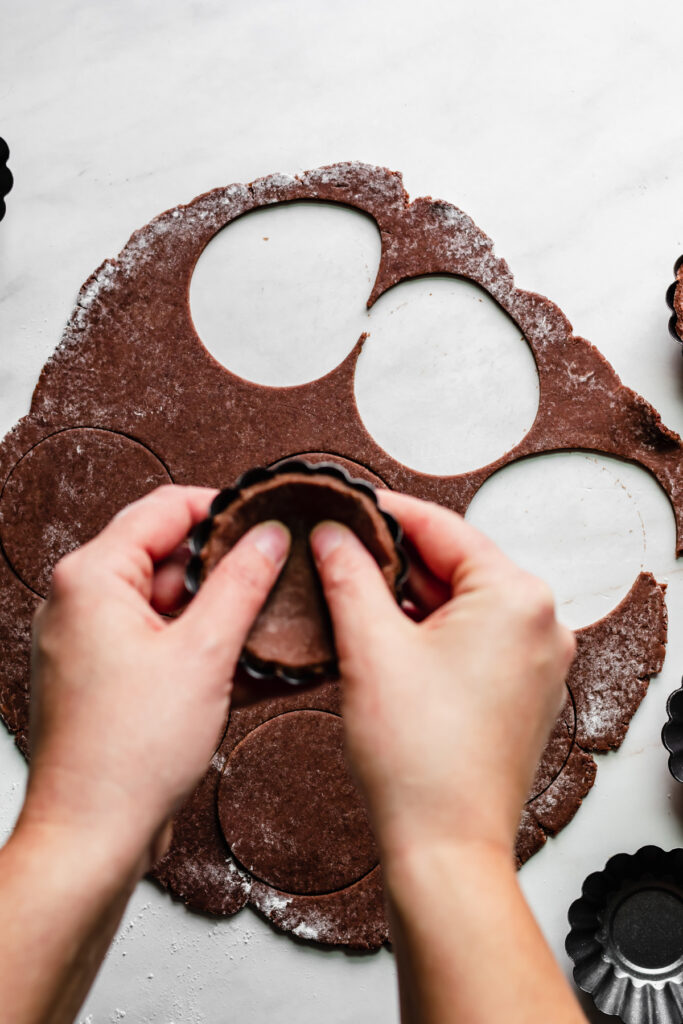
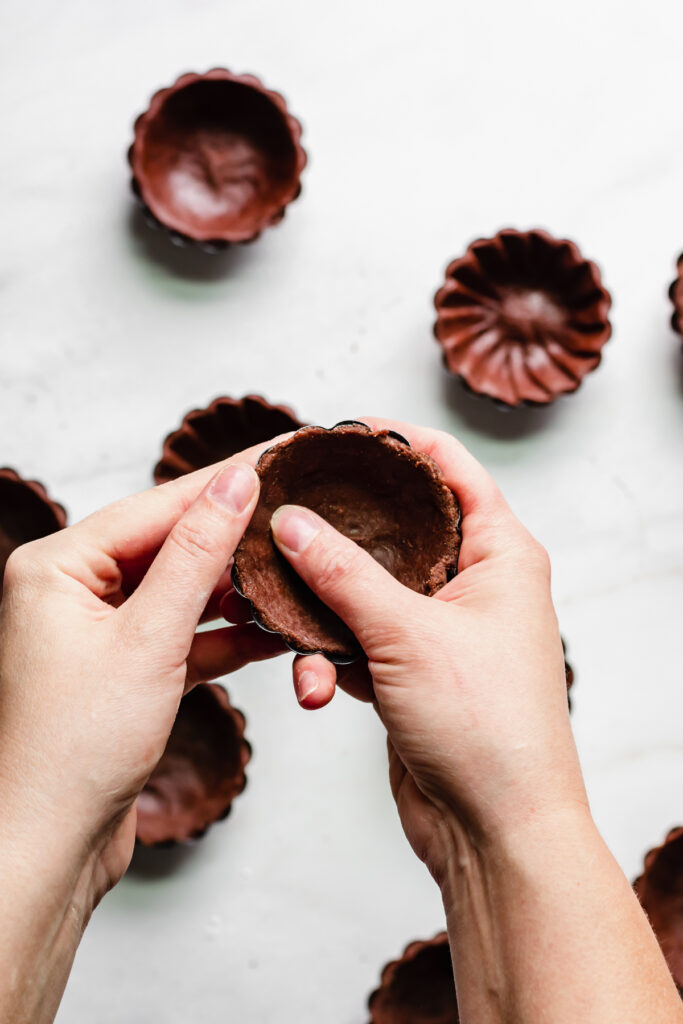
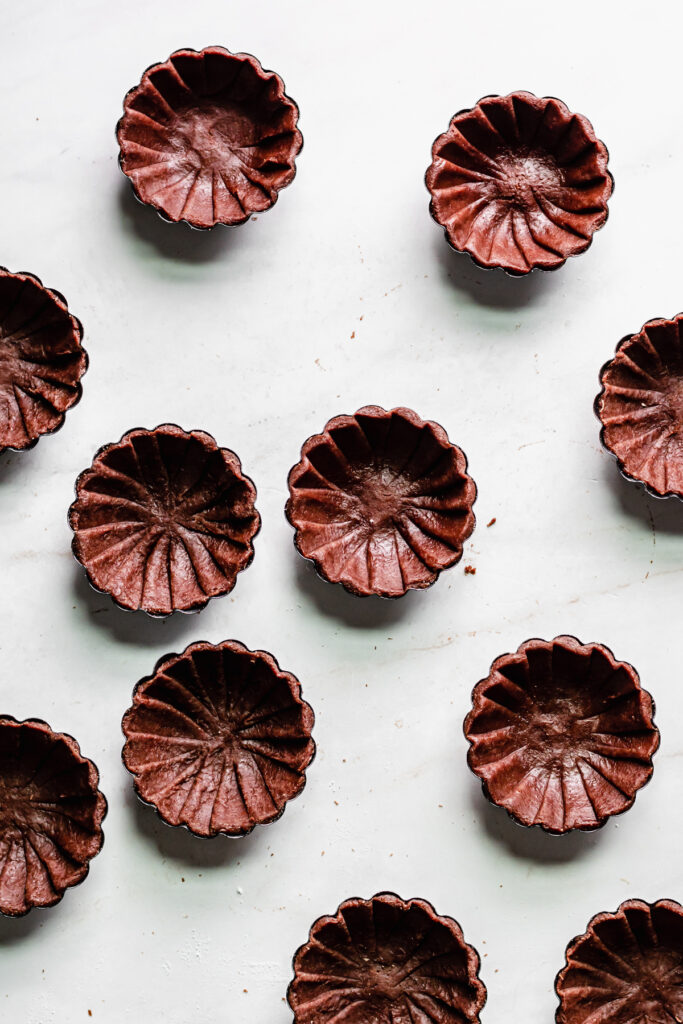
STEP 3: Transfer the pieces of dough to the tartlet pans and carefully press the dough into the bottom and sides of the pans. Push into the dough so it rises almost to the top of the pan opening and you work your way around the pan. This is the same process if using a muffin tin. If using individual tartlets, place them on a rimmed cookie sheet. Freeze the tartlets for 15 minutes.
Preheat the oven to 325℉/163℃ and cut twelve, 4” pieces of parchment paper.
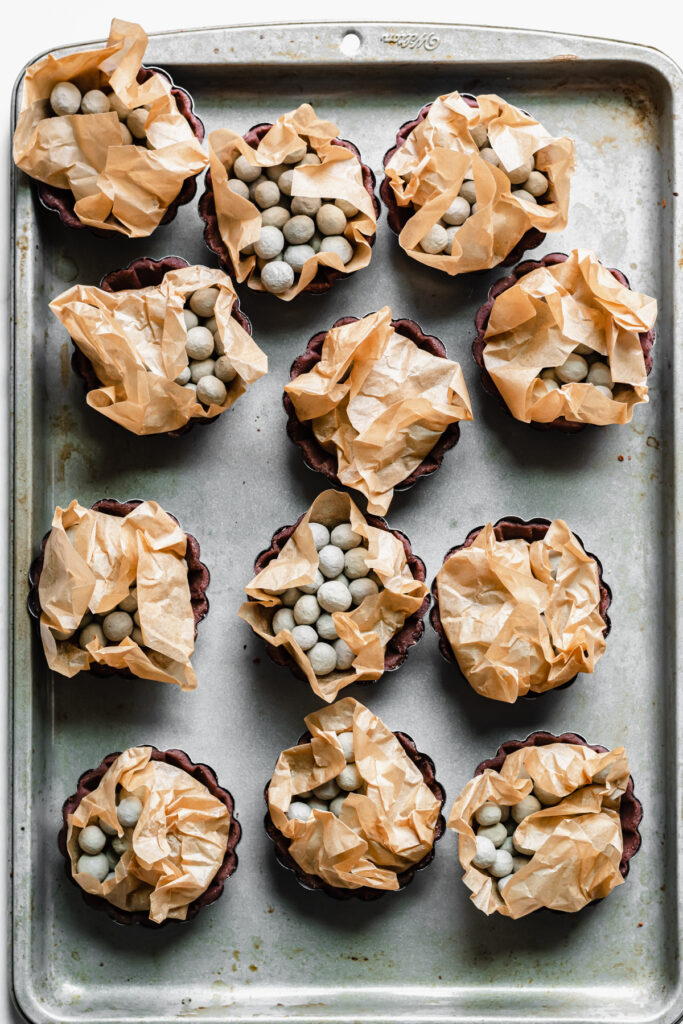
STEP 4: Remove from the freezer and dock all over the bottoms with a fork. Place a piece of parchment paper (it helps if you crumble it up first) into the shell, and fill completely with pie weights (or dried beans/rice, just don’t eat it afterwards), gently pressing the weights into the bottom and sides to evenly distribute the weight.
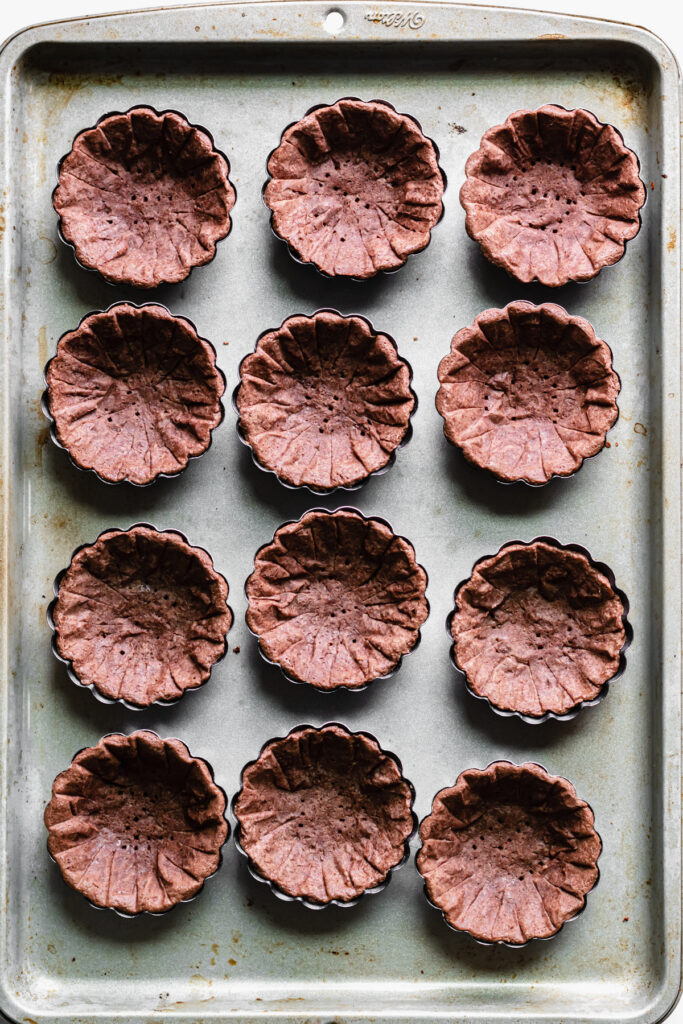
Bake for 10 minutes. Carefully remove the weights and parchment, and continue to bake for another 10-15 minutes until lightly golden. When done, the middle of the tart should not look moist or raw. Remove the pans to a wire rack to cool completely, then remove the crust from the shells before assembling. They should slip right out.
Peppermint Patty Layer
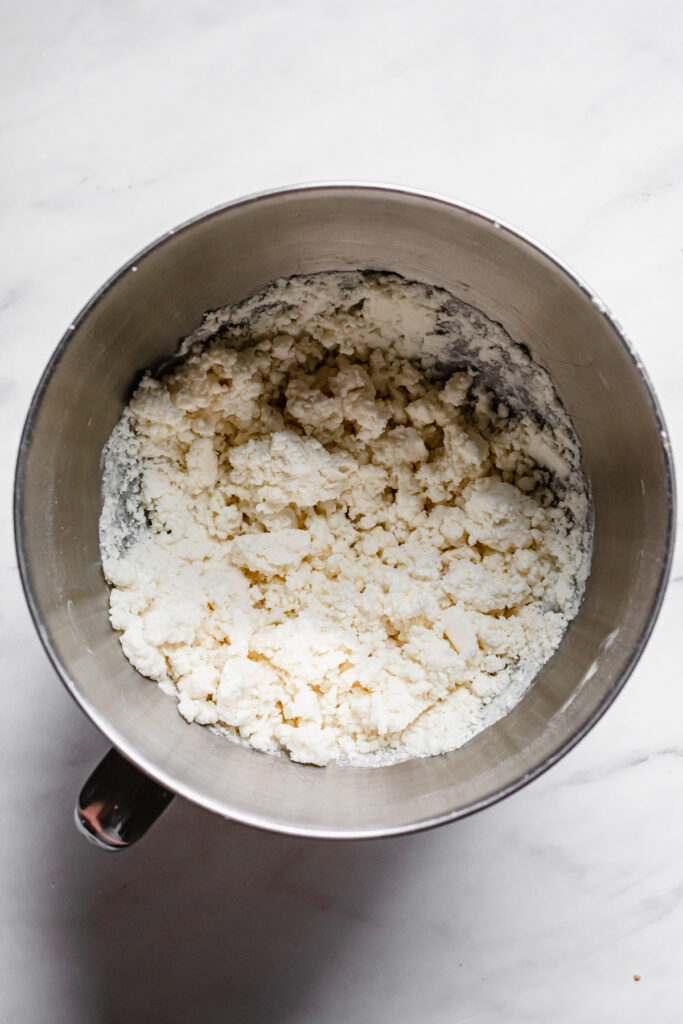
STEP 5: Add the sweetened condensed milk and peppermint extract to the bowl of a stand mixer (with paddle attachment) and sift 2 cups of the powdered sugar on top. Mix on low to combine and scrape down the sides.
Add the second two cups (also sifted) and mix again until a crumbly, soft paste forms. You may need to raise the speed slightly if it starts to slow the motor down.
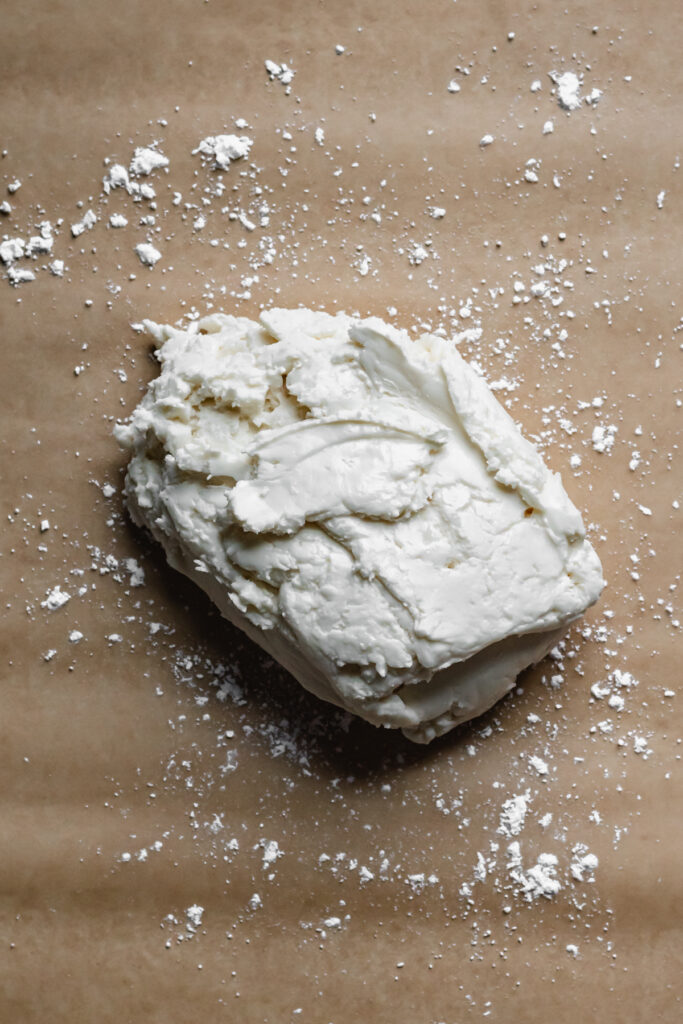
STEP 6: Transfer the dough to a sheet pan line with parchment paper or a silicon baking mat dusted with powdered sugar, and use clean hands to push it all together.
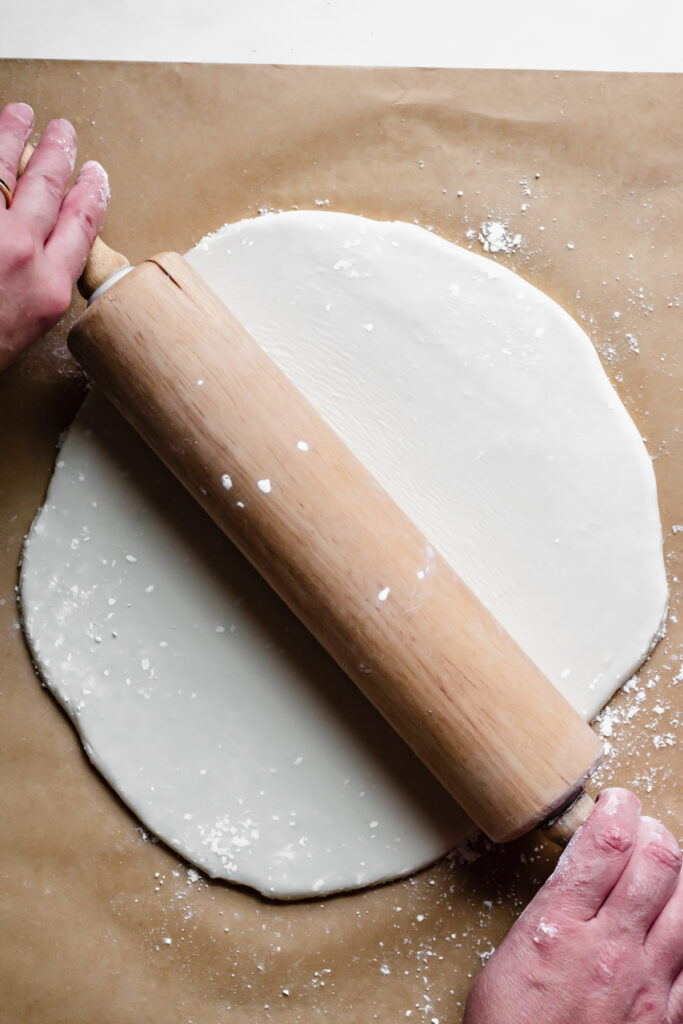
Use a rolling pin to roll the dough out to ¼" thickness and freeze for 10 minutes. Sprinkle with more powdered sugar if anything gets sticky.
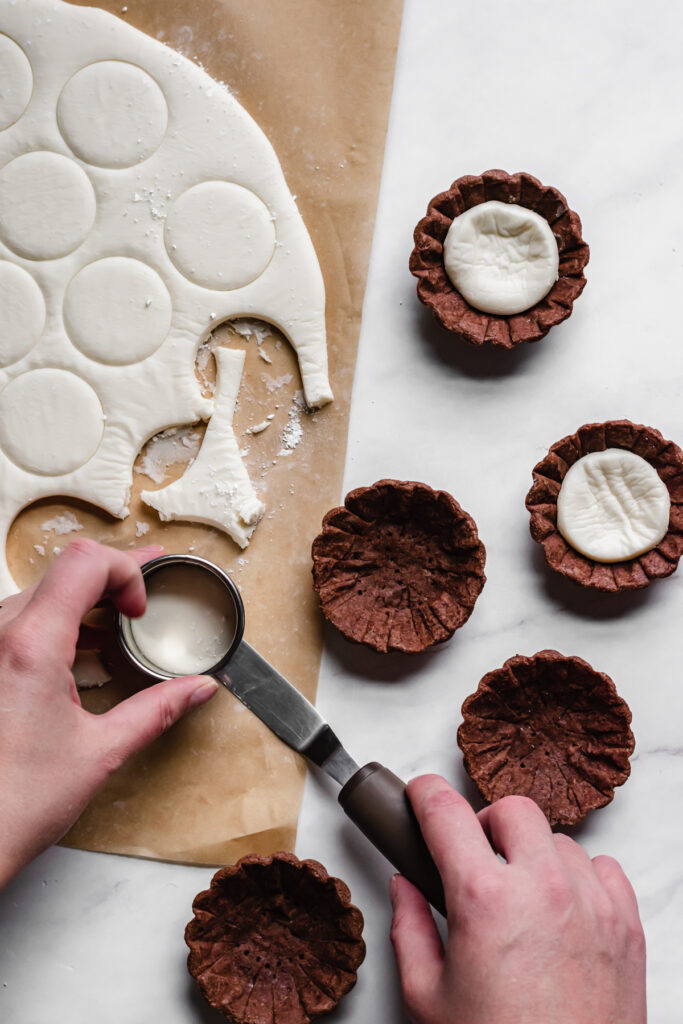
Remove the tartlets from the pans and place them on a small cookie sheet or serving platter.
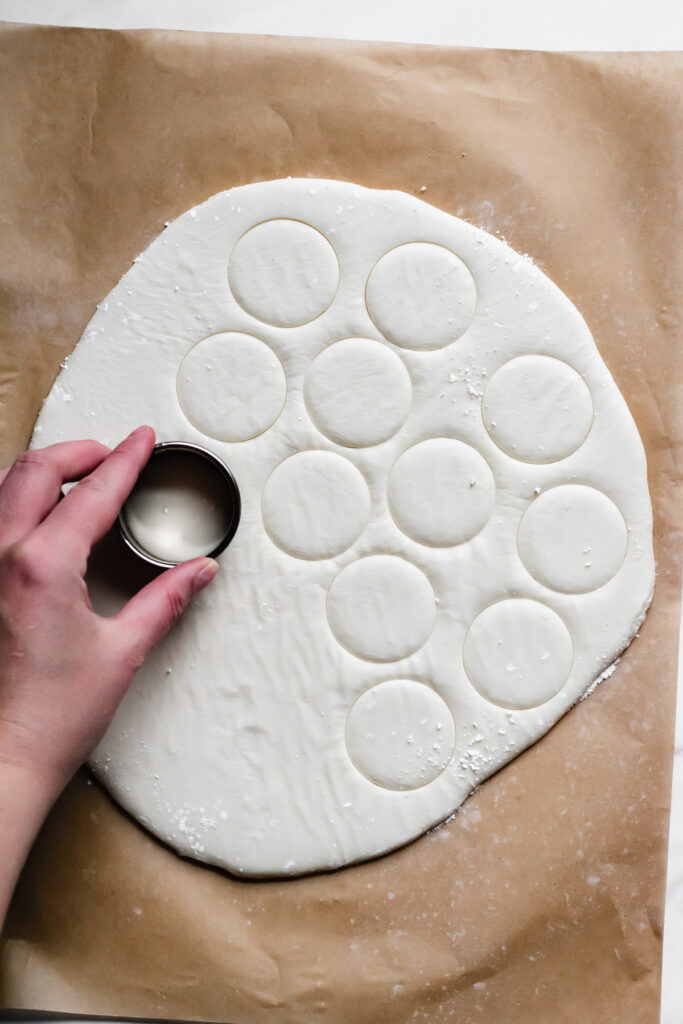
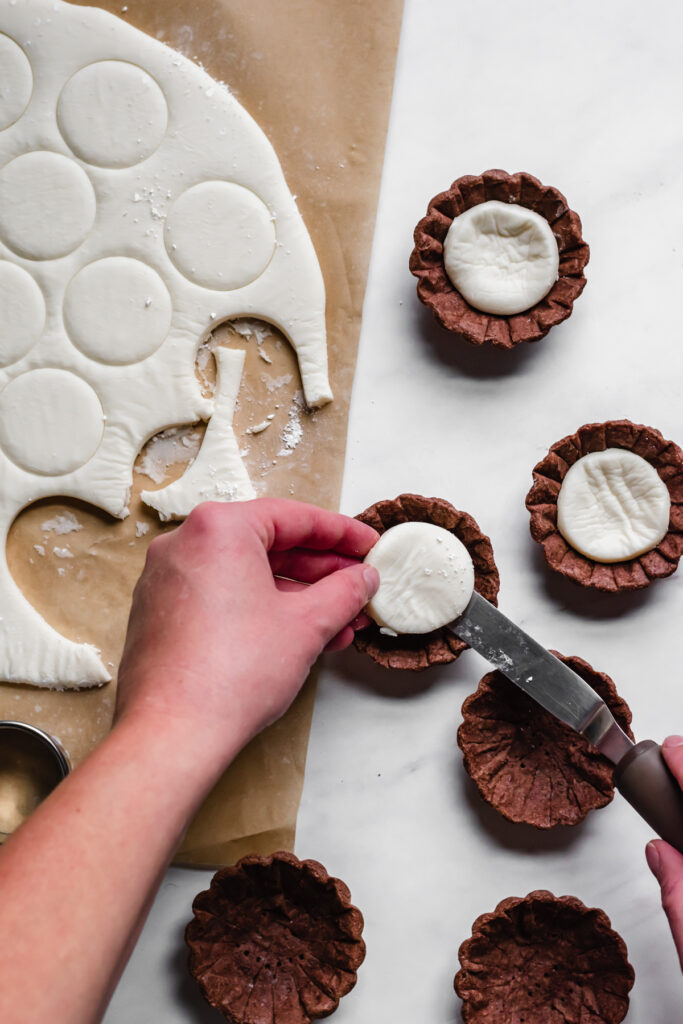
Use a 2” cookie cutter to cut out discs of the peppermint sugar. Place the circles of sugar into the cooled tartlets and gently press it into the bottom and sides. It helps to use an offset spatula to lift the sugar off of the mat, as the bottom may stick on some.
Chocolate Ganache
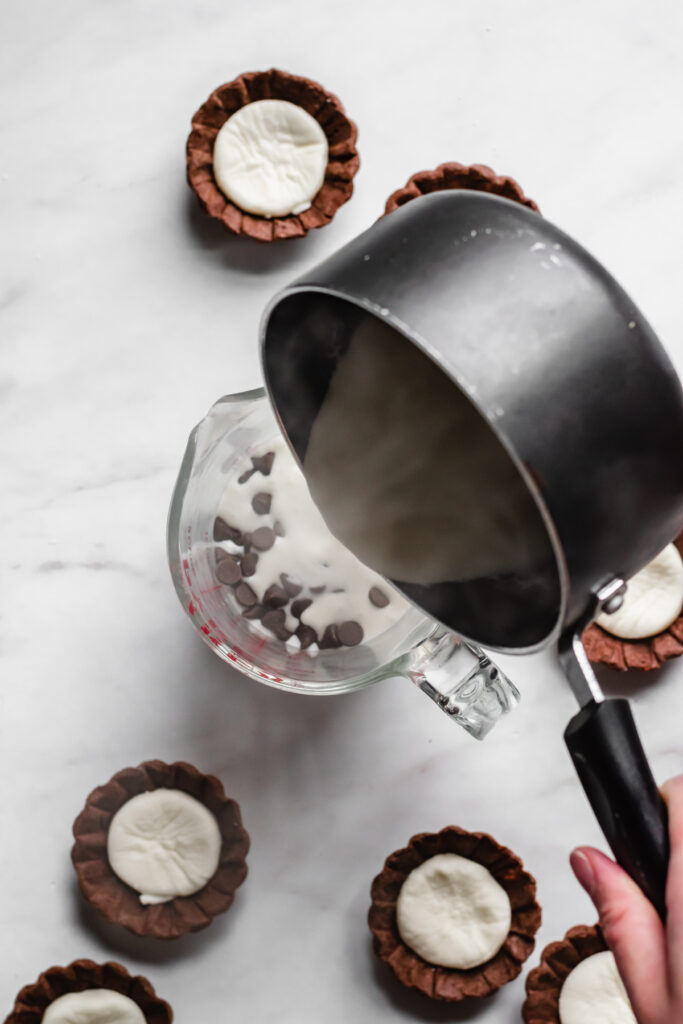
STEP 7: Place the chocolate in a heat proof bowl. Heat the heavy cream (on the stove or microwave) until it just starts to bubble, then pour overtop of the chocolate. Add in the 1 teaspoon of corn syrup or coconut oil, if using.
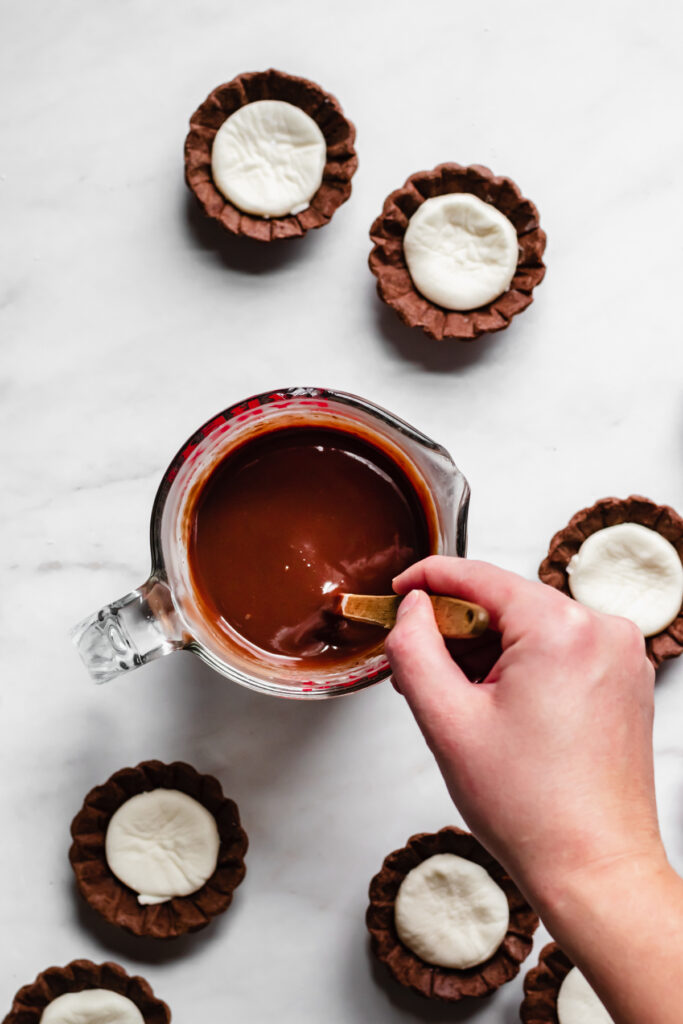
Allow it to sit for 1 minute, then mix the ganache constantly from the center and moving slightly outward until all of the cream becomes incorporated. A mini rubber spatula works best for this, a whisk can incorporate too much air.
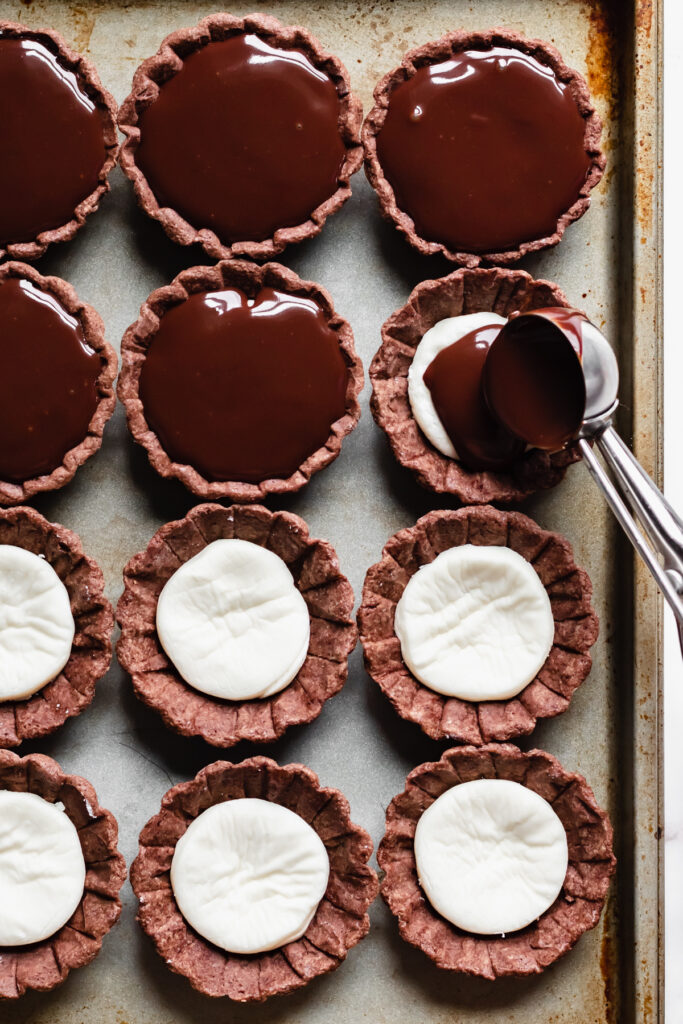
STEP 8: Allow the ganache to cool down for about 20 minutes (stir every few minutes), then spoon it on top of each of the tartlet shells until full. Gently shake the tarts so the ganache meets the crust.
Crush the candy canes, then sprinkle over top of the tarts.
Storing and Freezing
These packages of joy will last for up to 5 days in the fridge, sealed in an airtight container. Allow the chill to come off before enjoying. If you have to layer them, place a layer of wax or parchment paper in between.
They can also be frozen (but allow them to fully harden in the fridge, first) for 1 month in an airtight container or bag. Allow to thaw at room temperature for about an hour, then enjoy!
FAQs & Tips
💌 Save This Recipe
Just a few ingredients - sweetened condensed milk, powdered sugar, and peppermint extract! Some recipes also include corn syrup, though this one does not.
Yes! Use my Sweet Tart Crust recipe instructions to create and bake the full tart shell. Follow the same instructions for the peppermint patty filling, cutting one large round to fit in the shell, and the same amount of ganache can be used.
Other recipes to try

Be sure to tag me on Instagram @thecozyplum and use #TheCozy Plum! I can't wait to see your creations. For more ideas, follow me on Pinterest.
📖Recipe

Chocolate Peppermint Pie
Equipment
- 12, three-inch tartlet pans or a muffin tin
- Stand mixer with paddle attachment, or handheld mixer
- Pie weights or dried rice or beans
- Baking pan
- Round cookie cutters
Ingredients
Chocolate Tartlet Dough
- 6 tablespoons unsalted butter room temperature (85g)
- ⅓ cup granulated sugar 67g
- ⅛ teaspoon kosher salt
- 1 large egg room temperature
- 1 ¼ cup + 2 tablespoons all-purpose flour 165g
- 2 tablespoons dutch-processed cocoa powder 12g
Peppermint Patty Filling
- ¾ cup sweetened condensed milk 225g
- 1 ½ teaspoons pure peppermint extract
- 4 cups powdered sugar sifted (480g)
Chocolate Ganache
- 5 oz semi-sweet chocolate chopped
- ¾ cup heavy whipping cream 180ml
- 1 teaspoon light corn syrup or melted coconut oil optional, helps with shine
- Candy canes or peppermint candies crushed (optional, for garnish)
Instructions
Chocolate Tartlet Shells
- In a bowl, whisk together the flour and cocoa powder until combined.
- In the bowl of a stand mixer fitted with the paddle attachment (or with a hand mixer), cream together the butter, sugar and salt until smooth. Scrape down the sides.
- Add in the egg and mix until incorporated, then scrape down the sides again.
- Add the flour and cocoa powder and mix on low until just incorporated. Wrap the dough in plastic wrap and flatten into a 1-inch thick disc. Place in the fridge for two hours.
- Remove the dough from the fridge and allow it to sit at room temperature for about 15 minutes. Flour your work surface and rolling pin and roll out the dough until it’s ⅛" thick, turning a quarter turn every few rolls. This dough is very forgiving, so if it cracks, you can patch it later.
- Cut 12 circles out of the dough using a 3 ¼” - 3 ½” cookie cutter (it should be slightly larger than your tartlet pan). After the first round of cuts, mash the dough scraps back together, roll out to ⅛” thick again, and cut rounds. Repeat again, if needed.
- Transfer the pieces of dough to the tartlet pans and carefully press the dough into the bottom and sides of the tartlet pans. Push into the dough so it rises almost to the top of the pan opening and you work your way around the pan. This is the same process if using a muffin tin. If using individual tartlets, place them on a rimmed cookie sheet. Freeze the tartlets for 15 minutes.
- Preheat the oven to 325℉/163℃ and cut twelve, 4” pieces of parchment paper.
- Remove from the freezer and dock all over the bottoms with a fork. Place a piece of parchment paper (it helps if you crumble it up first) into the shell, and fill completely with pie weights (or dried beans/rice, just don’t eat it afterwards), gently pressing the weights into the bottom and sides to evenly distribute the weight.
- Bake for 10 minutes. Carefully remove the weights and parchment, and continue to bake for another 10-15 minutes until lightly golden. When done, the middle of the tart should not look moist or raw. Remove the pans to a wire rack to cool completely, then remove the crust from the shells before assembling. They should slip right out.
Peppermint Patty Filling
- Add the sweetened condensed milk and peppermint extract to the bowl of a standmixer and sift 2 cups of powdered sugar on top. Mix on low to combine and scrape down the sides.
- Add the second two cups (also sifted) and mix again until a crumbly paste forms. You may need to raise the speed slightly if it starts to slow the motor down.
- Transfer the dough to a sheet pan line with parchment paper or a silicon baking mat (dusted with powdered sugar), and use clean hands to push it all together.
- Use a rolling pin to roll the dough out to ¼" thickness and freeze for 10 minutes. Sprinkle on powdered sugar if anything gets sticky. Remove the tartlets from the pans and place on a small cookie sheet or serving platter.
- Use a 2” cookie cutter to cut out discs of the peppermint sugar. Place the circles of sugar into the cooled tartlets and gently press it into the bottom and sides. It helps to use an offset spatula to lift the sugar off of the mat, as it is a bit soft
Chocolate Ganache
- Place the chocolate in a heat proof bowl. Heat the heavy cream until it just starts to bubble, then pour overtop of the chocolate. Add in the 1 teaspoon of corn syrup or coconut oil, if using.
- Allow it to sit for 1 minute, then mix the ganache constantly from the center and moving slightly outward until all of the cream becomes incorporated. A mini rubber spatula works best for this, a whisk can incorporate too much air.
- Allow the ganache to cool down for about 20 minutes (stir every few minutes), then spoon it on top of each of the tartlet shells until full. Gently shake the tarts so the ganache meets the crust.
- Crush the candy canes, then sprinkle over top of the tarts.
Yzabeaux says
I'm hoping to try this in the coming holidays. Would this work if I sub the peppermint patty ingredients & just drop in a "York's Peppermint Patty" to cut down on time and work? Thanks for your feedback!
Callan Wenner says
Hey there - that should work! You may have to cut down/press down the patty so it fits into the shell but otherwise should be just fine! Will likely be a bit more chocolatey, too, with the chocolate around the candy...but I don't think that's a bad thing 😉