

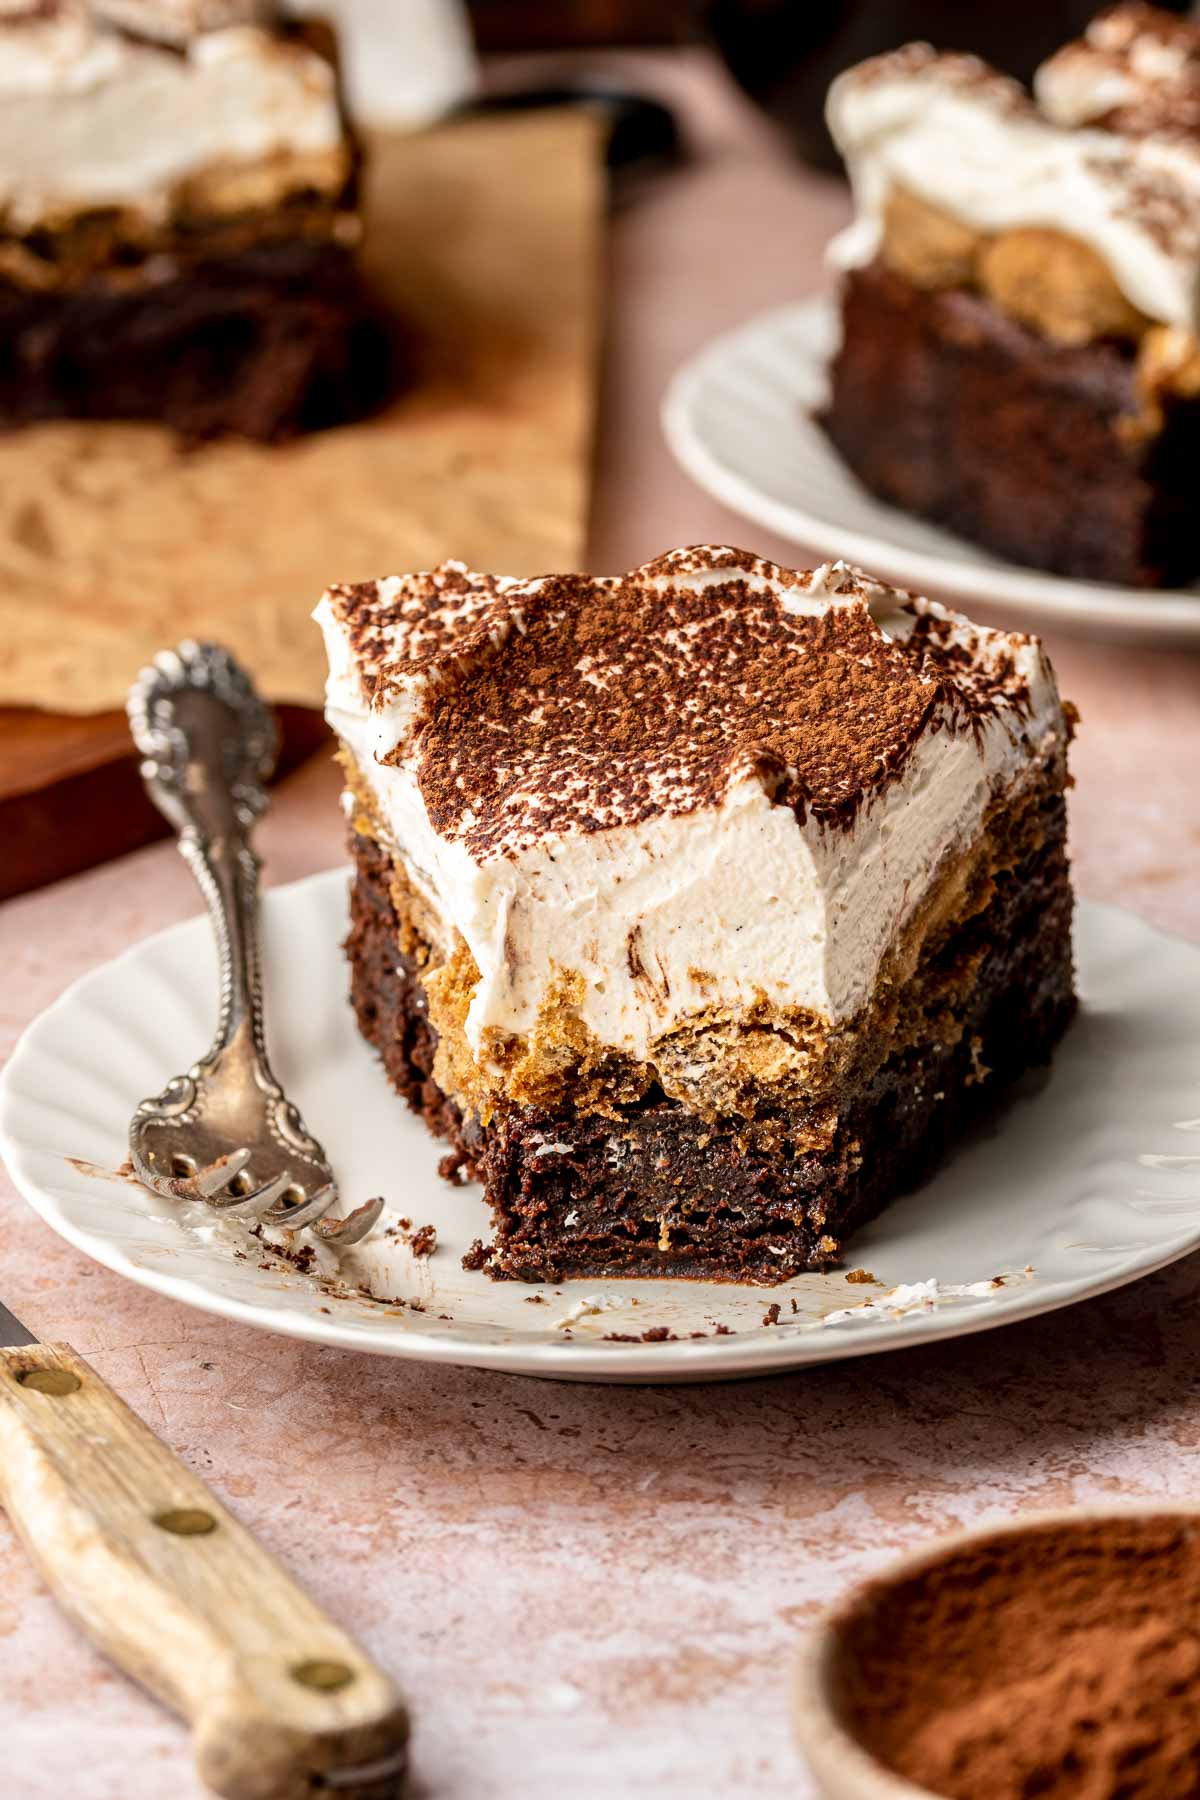
This chocolate tiramisu cake is a decadent twist on the classic Italian dessert, layering a dense brownie cake with espresso-soaked lady fingers and a fluffy mascarpone whipped cream. The combination of rich chocolate, bold espresso, and light cream gives all the nostalgic tiramisu vibes, in a sliceable, impressive cake form.
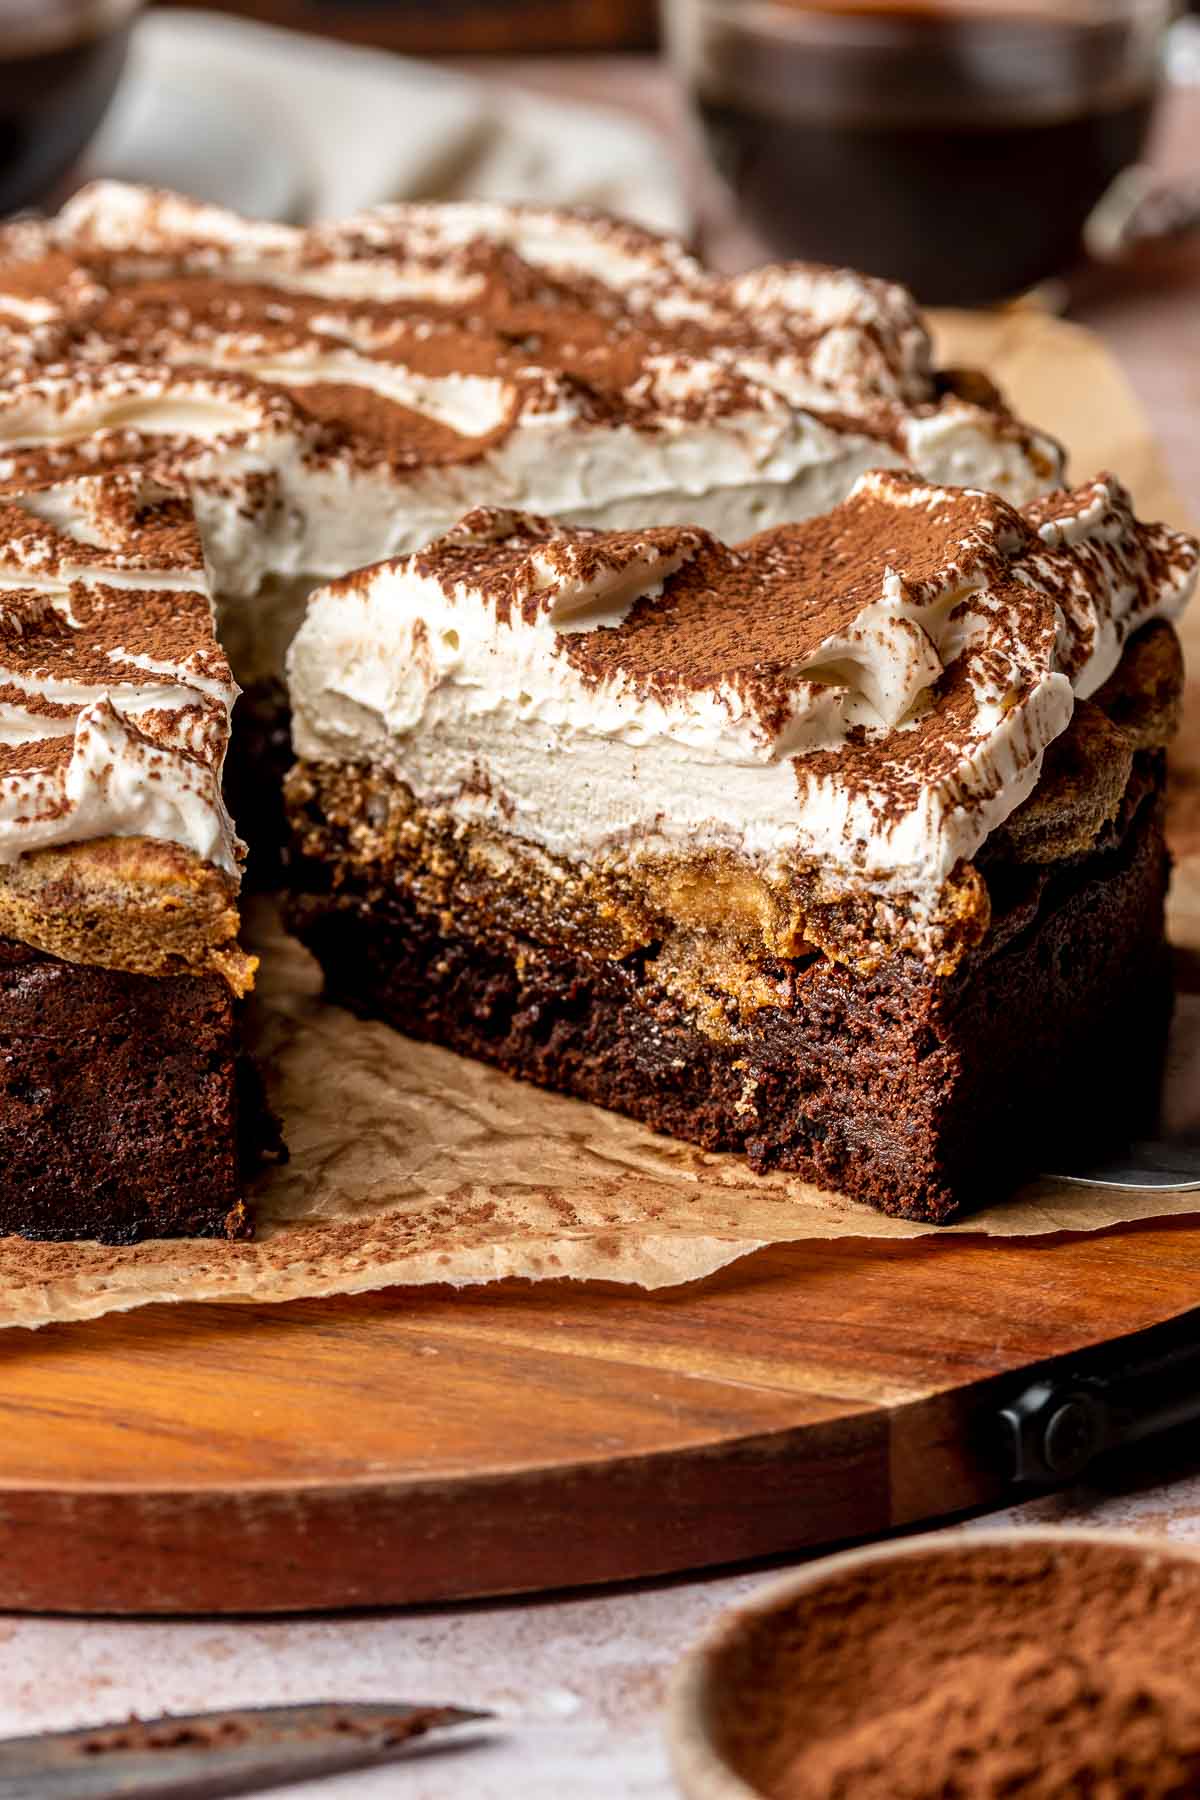
This tiramisu cake is elegant enough for holidays, Valentine's Day, or entertaining, yet simple enough for a weekend bake. Each layer brings something special. Deep cocoa from the brownie cake, soft espresso notes from the lady fingers, and barely sweet mascarpone to tie it all together.
We love unique takes on tiramisu, just like in this pumpkin chai tiramisu, cherry almond tiramisu, or lemon earl grey tiramisu. Or, skip the flavors and make a classic into individual tiramisu cups to make everyone feel super special!
Jump to:
Why You'll Love This Recipe
Three-layer perfection - fudgy brownie base, soft espresso lady fingers, creamy mascarpone, and a dusting of powdered sugar. Ok, that's technically four, but you get the point!
An easy showstopper - this cake looks super fancy, but is surpisingly easy to make and assemble. The hardest part is waiting for everything to meld together before serving it!
Make-ahead friendly - this cake actually tasted better after chilling, so the sponges can soak up all the liquid and all of the layers can fall into harmony.
Ingredients


- Semi-sweet chocolate. A few ounces gets mixed into the cake to help keep it super fudgy.
- Cocoa powder. We love to use dutch-processed cocoa powder for a deep chocolate flavor and color. Using natural cocoa is a fine substitute, but you will lose out on color and flavor.
- All-purpose flour. Only a small amount is used in the cake alongside the cocoa powder.
- Sugars. Granulated sugar, brown sugar, and powdered sugar all get used in this recipe!
- Espresso. This gives the deep, classic tiramisu flavor and is the best option for dipping!
- Lady fingers. Absorbs the sweetened espresso while perfectly holding their structure.
- Mascarpone. The main base of the whipped cream topping, which also stabilizes the topping. I've tried a lot of brands, and BelGioioso keeps the best structure!
- Heavy whipping cream. Lightens the mascarpone further to make for an ultra fluffy whipped cream.
See recipe card for full ingredients list and quantities.
Substitutions and Variations
- No espresso? Use very strongly brewed coffee (or even decaf). Or, pop over to your local coffee shop and ask for 4oz of brewed espresso!
- Add liqueur! Stir in 1-2 tablespoons of Kailua or Marsala into the espresso.
- Make chocolate whipped cream. Beat 2 tablespoons cocoa powder into the mascarpone before adding the whipped cream to go all in on the chocolate flavor.
How to Make This Recipe

One: Melt together the butter and chocolate.

Two: Beat the eggs and sugar until light and fluffy.

Three: Whisk in the butter and chocolate mixture.

Four: Add the dry ingredients and mix to fully combine.
Hot tip! Watch this quick video on how to fully line a springform pan with parchment paper!

Five: Spread into the prepared springform pan, bake, and cool.

Six: Mix hot espresso and sugar until the sugar dissolves.

Seven: Quickly roll each lady finger through the espresso.

Eight: Nestle them all on top of the cooled brownie cake.

Nine: Beat the mascarpone, powdered sugar and vanilla until combined.

Ten: Stream in the heavy whipping cream and whip until light and fluffy. Don't over-whip!

Eleven: Spread on top of the lady fingers, adding big swoops. Refrigerate for a couple of hours to let the lady fingers soak.

Twelve: Dust with cocoa powder before slicing and serving.
Expert Tips
- Fully line the springform pan with parchment paper or else the brownie cake will stick.
- Don't oversoak the lady fingers. A quick roll through the espresso is enough and will fully soak through with time. Too long in the pool makes them mushy.
- Use cold dairy in the topping. If the mascarpone and heavy cream are very cold, they'll whip up and set more easily.
- Chill before serving. This cake needs time in the fridge for the flavors to meld. It also slices better when cold.
- Wipe off your knife in between each slice. This ensures you don't pull of pieces of cake in between each slice.
- I like to let the cake sit out for about an hour before eating, as removing the chill improves texture and flavor.
💌 Save This Recipe
Testing Notes
- I used the same base brownie cake recipe as in my chocolate raspberry mousse cake and white chocolate mousse cake recipes. It's a tried and true, dense, creamy chocolate cake that I love to pair with soft fillings and toppings.
- I first cut into the assembled cake after 1 hour, but some of the lady fingers weren't fully saturated. The 3-hour (or more) mark seemed to be the key.
- A version of this mascarpone frosting is used in both my baklava cake and lemon pistachio cake, so I knew the key to this is keeping it at really soft peaks for the best texture.
Recipe FAQs
Of course! Store-bough are easiest, but if you have homemade, then go for it.
You can use a deep 9" can pan, but unmolding it is much trickier. A springform pan is best for the layering of this cake. If you have acetate, that will work in a cake pan.
This means it was overwhipped. Gently stir in a bit more cold heavy cream to help it come back together.
Storage
Store covered in the fridge for 3-4 days. I don't recommend freezing this cake.
I like to let the cake sit out for about an hour before eating, as removing the chill improves texture and flavor.
More Chocolate Cake Recipes You'll Love

What to Know When Cooking with The Cozy Plum
- All recipes are created with Diamond Crystal kosher salt, the least salty variety of kosher salt. If using Morton's, you'll need to cut the amount of salt in half as it's 2x as salty. This will be the same for sea salt. Please do not use table salt.
- Switch between Cups vs Metric using the toggle on the recipe card. Baking by weight using a digital scale will always produce the most accurate results.
- Scale the recipe using the '1X' '2X' '3X' buttons on the recipe card. Note that this does not make an adjustment for baking times, only quantities.
📖Recipe

Chocolate Tiramisu Cake
Equipment
- Stand mixer with paddle attachment, or handheld mixer
Ingredients
Brownie Cake
- ¾ cup unsalted butter room temperature
- 2 oz semi-sweet chocolate chopped
- ¾ cup granulated sugar
- ½ cup light brown sugar packed
- 3 large eggs room temperature
- ½ cup all-purpose flour
- ½ cup Dutch processed cocoa powder
- ½ teaspoon kosher salt
Lady Fingers
- ¾ cups espresso
- ¼ cup granulated sugar
- 12 lady fingers
Mascarpone Frosting
- 8 oz mascarpone cold
- ½ cup powdered sugar
- ¼ teaspoon kosher salt
- 2 teaspoons vanilla
- 1 cup heavy whipping cream cold
- Cocoa powder for dusting
Instructions
Brownie Cake
- Preheat the oven to 350℉ and grease and line one 9″ round springform pan. Coat the entire inside with a thin layer of nonstick spray, then cover the bottom with a round sheet of parchment paper and line the sides with additional strips of parchment paper.
- Note: The cake will stick to the sides of the pan otherwise, so make sure the entire inside is covered in parchment paper.
- In a microwave safe bowl, add the butter and chopped chocolate. Melt in 30 second intervals, stirring in between each, until smooth. Set aside.¾ cup unsalted butter room temperature, 2 oz semi-sweet chocolate chopped
- In a large mixing bowl, add the sugars and eggs. Whisk (using a hand mixer or by hand) vigorously for three minutes until frothy.¾ cup granulated sugar, ½ cup light brown sugar packed, 3 large eggs
- Pour in the cooled chocolate mixture and whisk until combined.
- Sift in the dry ingredients and use a rubber spatula to mix it in until just combined.½ cup all-purpose flour, ½ cup Dutch processed cocoa powder, ½ teaspoon kosher salt
- Scrape the batter into the prepared springform pan, spread evenly, then bake for 25-30 minutes. Cool completely.
Lady Fingers
- Mix together the espresso and sugar, then quickly dip and roll one lady finger at a time through the sweetened espresso.¾ cups espresso, ¼ cup granulated sugar, 12 lady fingers
- Lay the dipped lady fingers all over the top of the cake, ripping some apart so they fit in snugly.
Mascarpone Frosting
- In the bowl of a stand mixer fitted with the whisk attachment (or with a hand mixer), add the mascarpone, powdered sugar, salt, and vanilla and whip on medium speed for 1 minute.8 oz mascarpone, ½ cup powdered sugar, ¼ teaspoon kosher salt, 2 teaspoons vanilla
- With the mixer running, slowly drizzle in the heavy cream and whip until the frosting becomes light and fluffy, about 1-2 minutes.1 cup heavy whipping cream
- Note: Overmixing can cause the frosting to curdle.
- Swoop the frosting all over the top of the lady fingers, then refrigerate for at least 3 hours, but up to overnight.
- Let the cake come to room temperature about an hour before serving. Dust with cocoa powder before serving.Cocoa powder
Leave a Reply