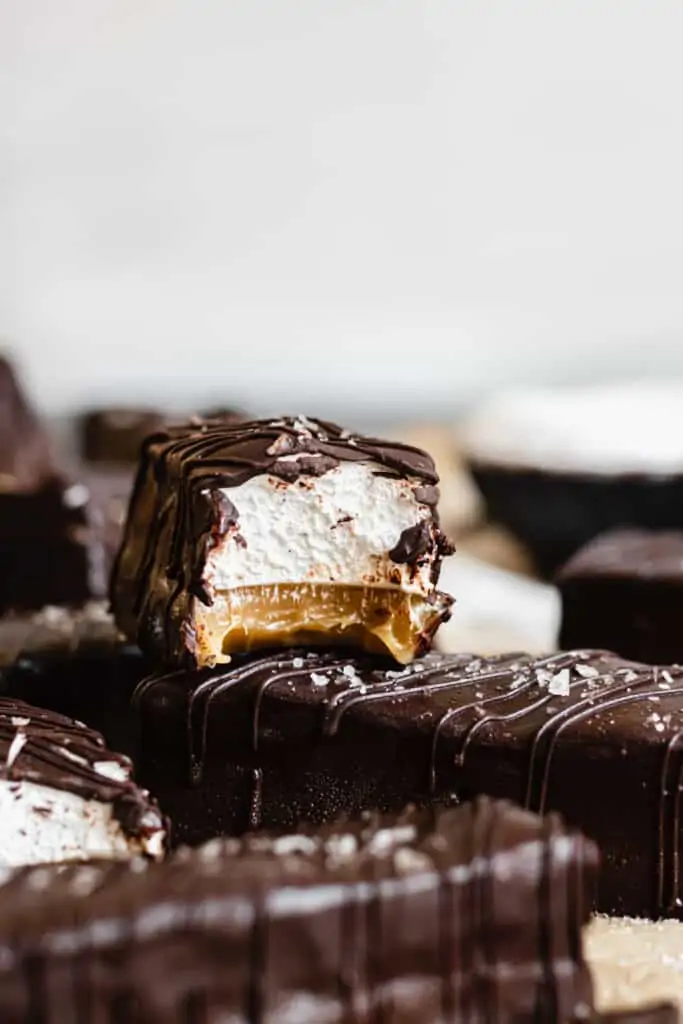
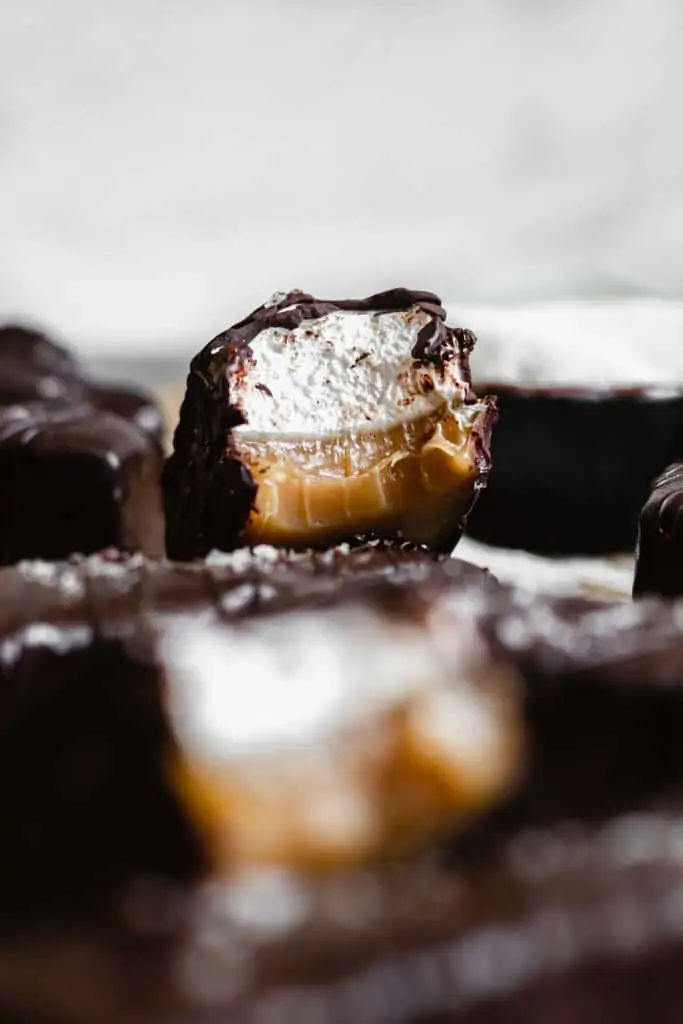
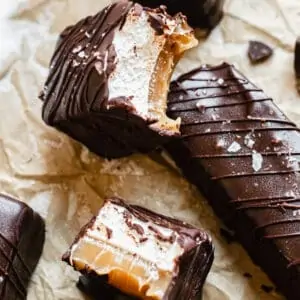
These decadant Chocolate Caramel Marshmallow Bars have a layer of chewy caramel, soft and fluffy marshmallow, and are coated in dark chocolate and topped with flaky sea salt. A homemade candy bar that you'll definitely want to make and share!
This post contains affiliate links. As an Amazon Associate, I earn from qualifying purchases.
Ever thought about making your own candy bar? I'm here to tell you that this is surprisingly easy! Yes, it does take a bit of time, especially because you have to let each layer rest before moving to the next section, but wow is it worth it. These Chocolate Caramel Marshmallow Bars are SO delicious.
What I love most about these are the layers of textures. You get a soft crack from the chocolate, move through the pillow of marshmallow, sink your teeth into the soft and chewy caramel, and end with small pieces of flaky sea salt that perfectly cut the sweetness.
Dark chocolate is definitely the play here, as milk chocolate would be too sweet. You need a slightly bitter chocolate to help cut the sweetness of the caramel and marshmallow, so aim for ~60-70% cacao. Also, don't skip the flaky sea salt! It really is crucial to the overall flavor of the bars.
These would be such a great holiday or housewarming gift (alongside my Biscoff truffles), and they freeze exceptionally well! Don't want to do full candy bars? No problem - cut them into smaller squares and have mini candy bars, instead.
Chocolate covered caramel marshmallow recipe
These marshmallow chocolate bars are no bake, so you don't even need to turn the oven on (though you will need to use your stove top). There are three key items of equipment that you absolutely need to make this recipe:
- Stand mixer + the whisk attachment. This is needed for the marshmallow - unfortunately, you cannot use a hand mixer for this. You will burn out that motor in two minutes!
- Candy thermometer. Needed for both the caramel and the sugar syrup for the marshmallow layer. Each of them must reach 240℉.
- 8x8" baking pan. I love the one linked because it has perfectly straight sides!
Ingredients
- Unsalted butter. Needed for the caramel; this will get melted.
- Dark brown sugar. For the caramel. You can also use light brown, but dark brown helps with better color.
- Granulated sugar. For the marshmallow. This gets turned into a sugar syrup and added to the gelatin.
- Light corn syrup. Used for both the caramel and marshmallow. This ingredient cannot be skipped or substituted.
- Sweetened condensed milk. A half can (7oz) will be needed. You could use the other half to just make a straight batch of chewy caramels using just the caramel portion of the recipe!
- Powdered gelatin. For the marshmallow. Also necessary.
- Vanilla paste or extract. I am a paste fan, especially when used in marshmallow because it provides an extra punch of flavor.
- Dark chocolate. Or bittersweet. Use something ~60-70% cacao for this. A milk chocolate makes the candy bars much too sweet.
- Flaky sea salt. Don't skip this! It really is a crucial part of the intended flavor of the bars.
Once you're ready to go, start by preparing the square pan with parchment paper. Spray the pan with cooking spray (including the sides), then cut two strips of parchment that will fit perfectly into the pan (it's best if they can slightly hang over the sides). Lay down one piece and fit it into the edges, spray the parchment with cooking spray, then lay the other piece the other way.
This recipe follows this order: caramel (and rest), marshmallow (and rest), cut, fridge/freeze, coat in chocolate.
Making the caramel
This recipe will have you making homemade chewy caramel in no time! This caramel is made without heavy cream, and instead uses sweetened condensed milk. I specifically chose to make the caramel this way because it is almost impossible to burn this version, which is always a plus!
Start by melting the unsalted butter in a medium saucepan over medium low heat. Once the butter has melted, add the dark brown sugar and light corn syrup and stir until the sugar granules dissolve. Finally, add the sweetened condensed milk, stir to combine, and increase the heat to medium.
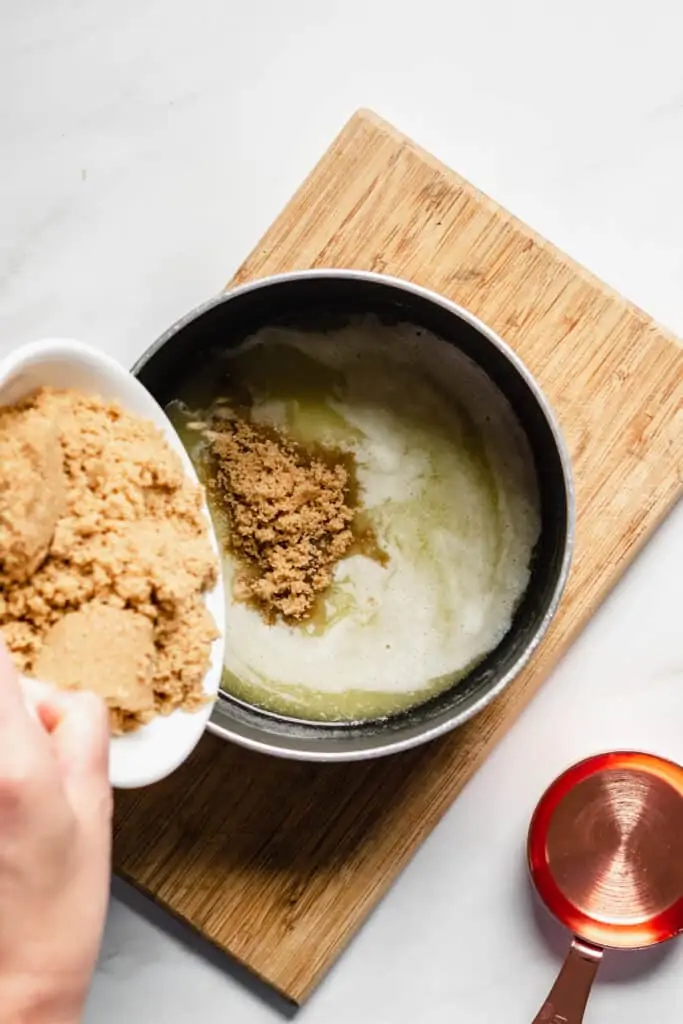
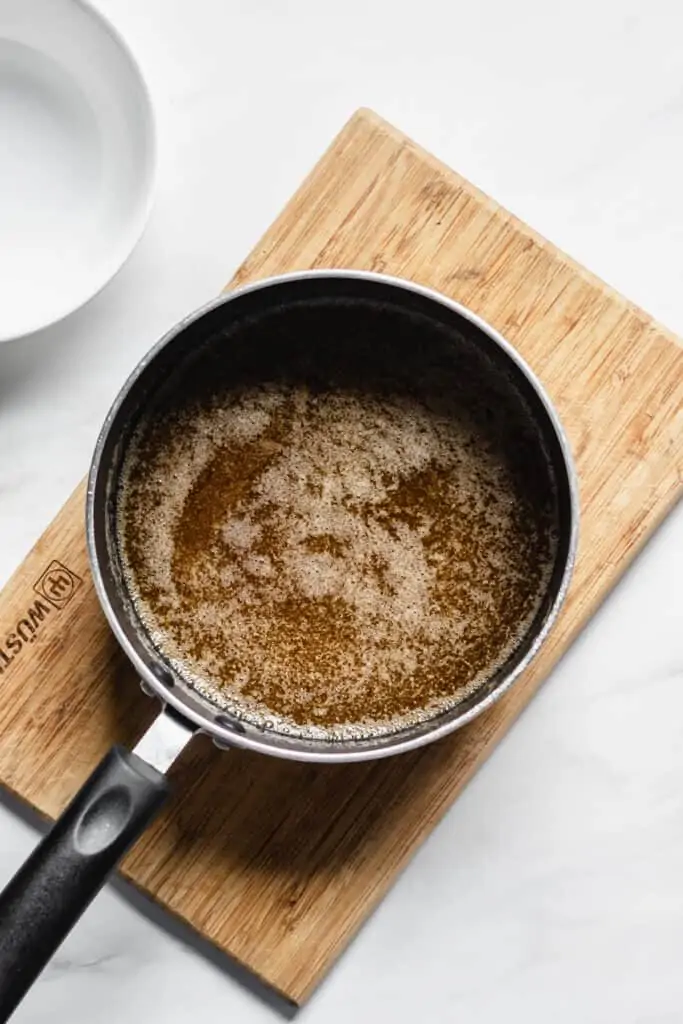
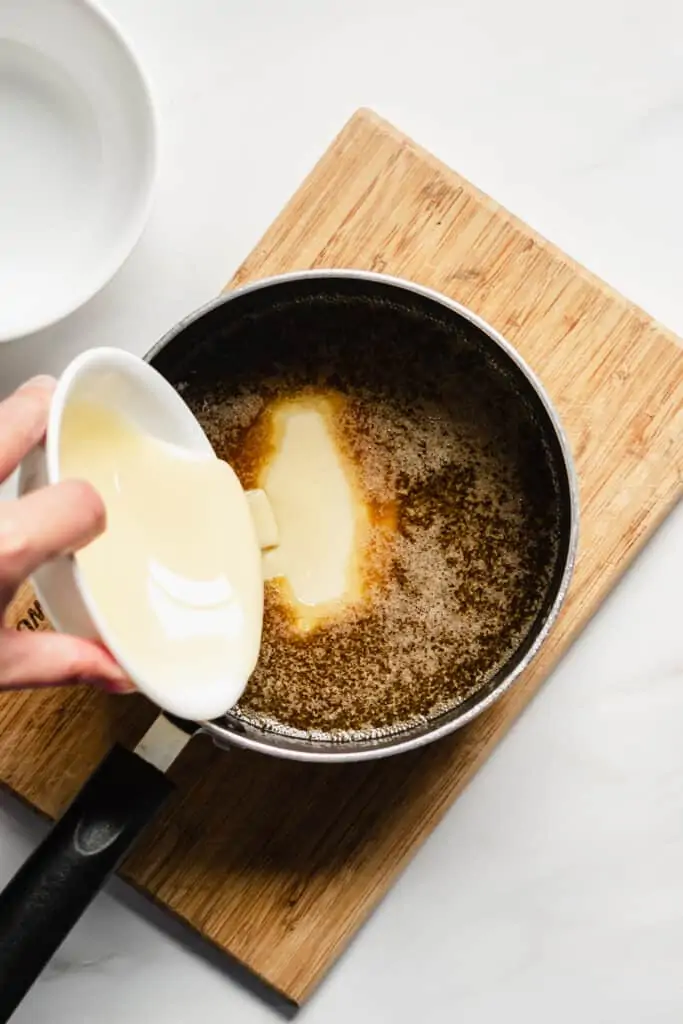
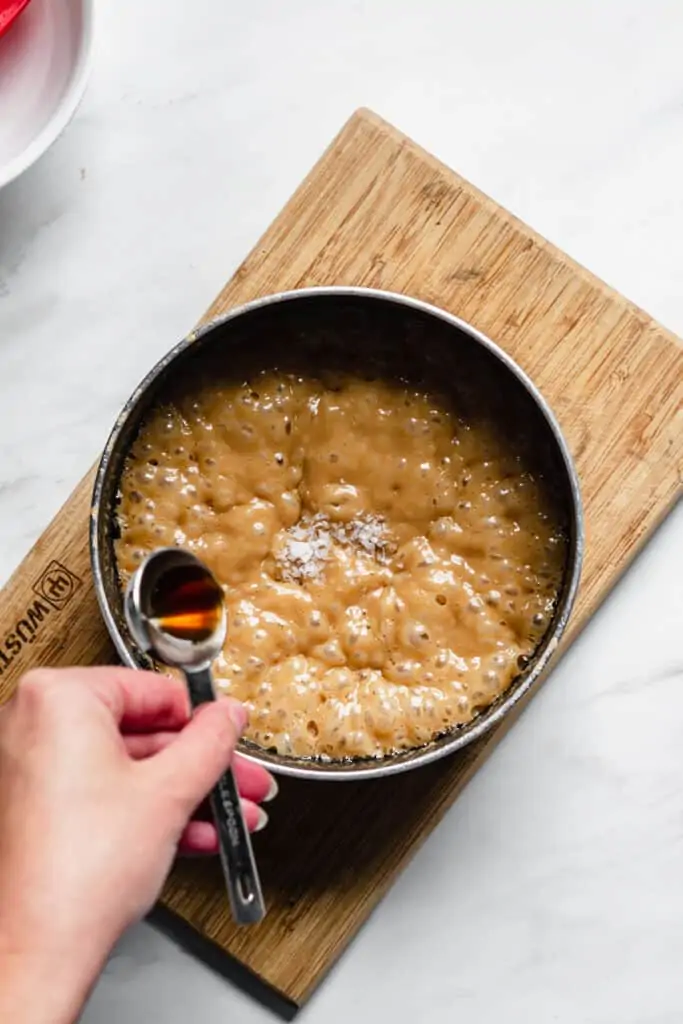
Stir the mixture constantly, scraping the bottom and sides with a rubber spatula, until the mixture reaches 240℉ on your candy thermometer. At this point, immediately remove the saucepan from the heat and stir in the vanilla and flaky sea salt. The mixture may bubble up slightly upon adding the vanilla, so don't startle!
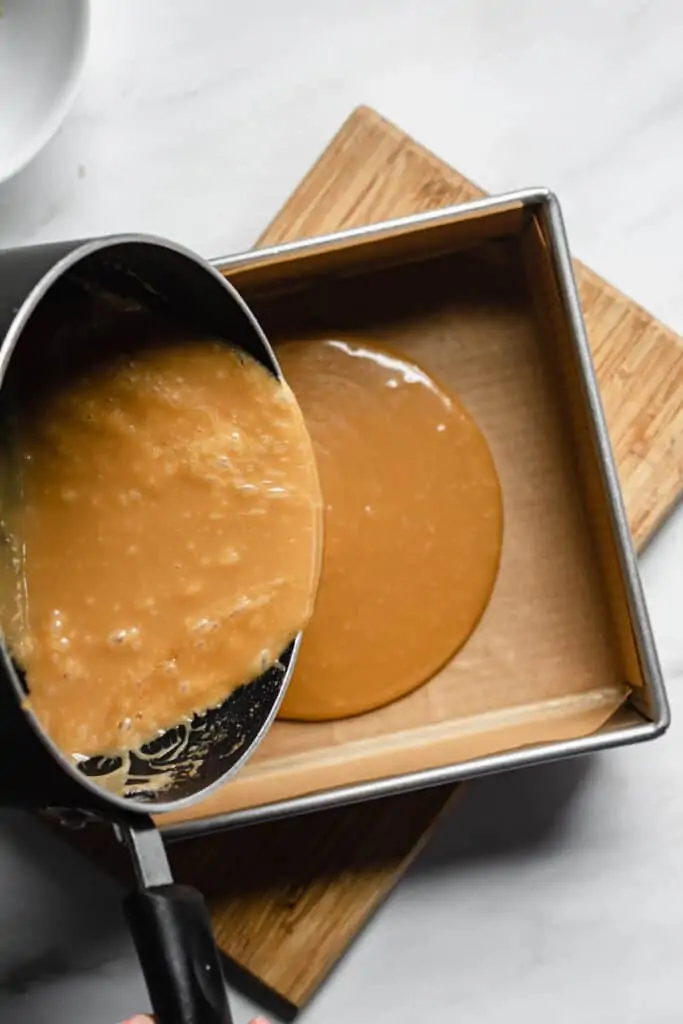
Pour the caramel into the prepared 8x8" baking pan then place it in the fridge for one hour to harden.
Making homemade marshmallow
Once the caramel has been in the fridge for an hour, begin making the marshmallow. Add half of the cold water and the gelatin to the bowl of your stand mixer. Then, add the rest of the water, sugar, corn syrup, and salt to a small saucepan, place onto medium heat and give it a stir.
Wait for the mixture to get to 240℉, you don't need to stir this. It comes to a boil rather quickly, but then takes another few minutes to get to the 240℉ mark. Once it hits temperature, carefully move the pot to the stand mixer.
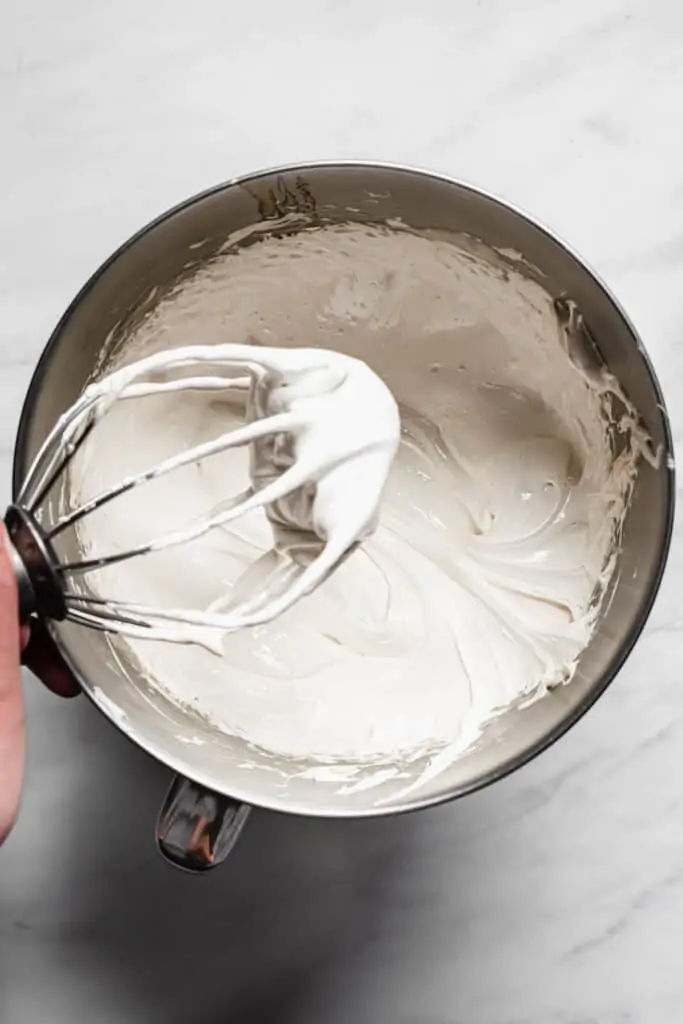
Turn the stand mixer on low (fitted with the whisk attachment) and very slowly pour in the hot sugar syrup in a steady stream. This should take a full two minutes. Once the syrup has been added, crank the mixer to high and set a timer for 10 minutes. Let that baby mix!
At the 10 minute mark, the marshmallow should be thick and glossy. Turn the mixer to medium low and add the vanilla. The mixer will speed up briefly, then go back to normal. Turn off the mixer.
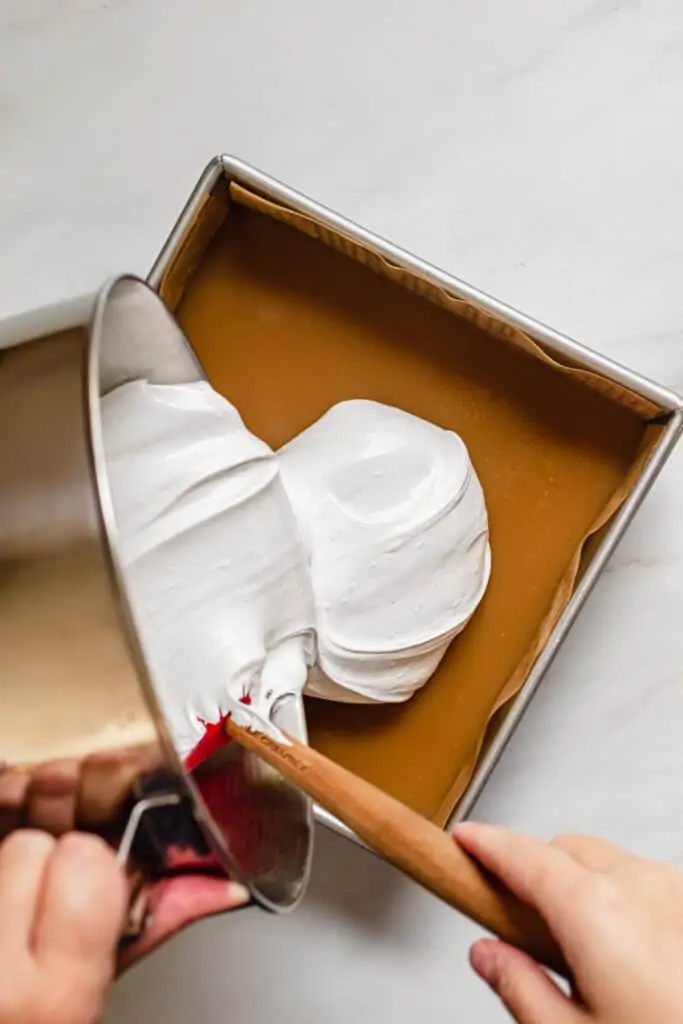
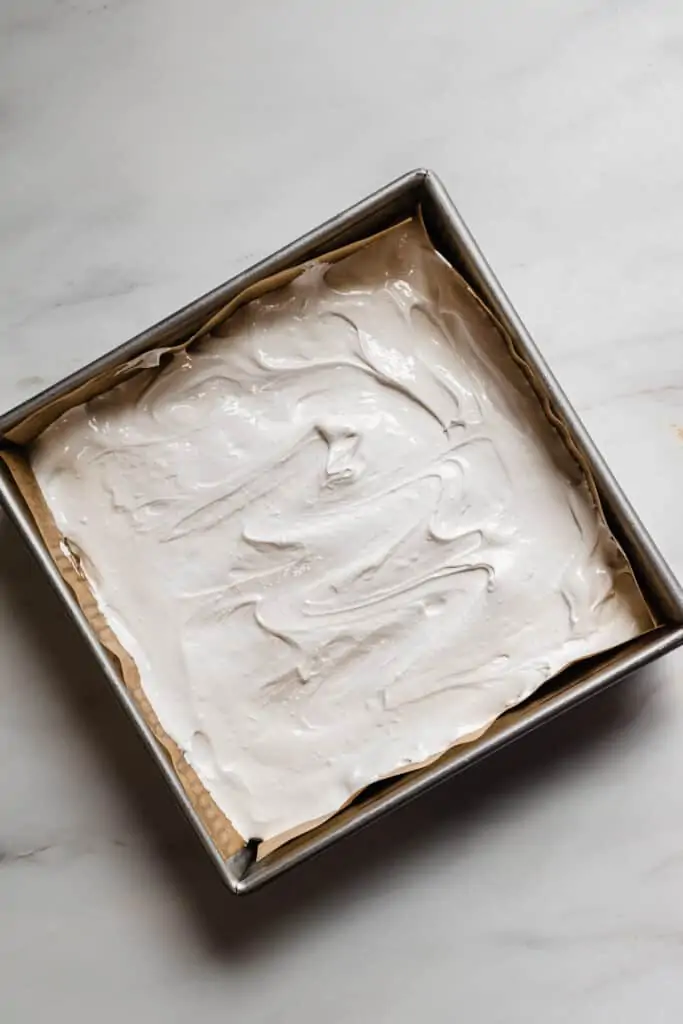
Use a sturdy spatula or spoon to pour and scrape the marshmallow out of the bowl and on top of the set caramel. Spread it out evenly, being sure to work the marshmallow the whole way to the sides and corners.
Allow the marshmallow to set for 3 hours at room temperature.
Cutting the bars
Remove the bars from the pan using the parchment paper slings and pull down the parchment paper from each side. It will stick slightly to the marshmallow, but will come off with some effort.
Coat the blade of a sharp chefs knife with neutral oil using a paper towel, and cut the bars in half. Add more oil to the knife and cut each half into 6 pieces. You will need to re-oil the knife after each cut. If the knife gets very sticky, wash and dry it, oil it, and continue cutting.
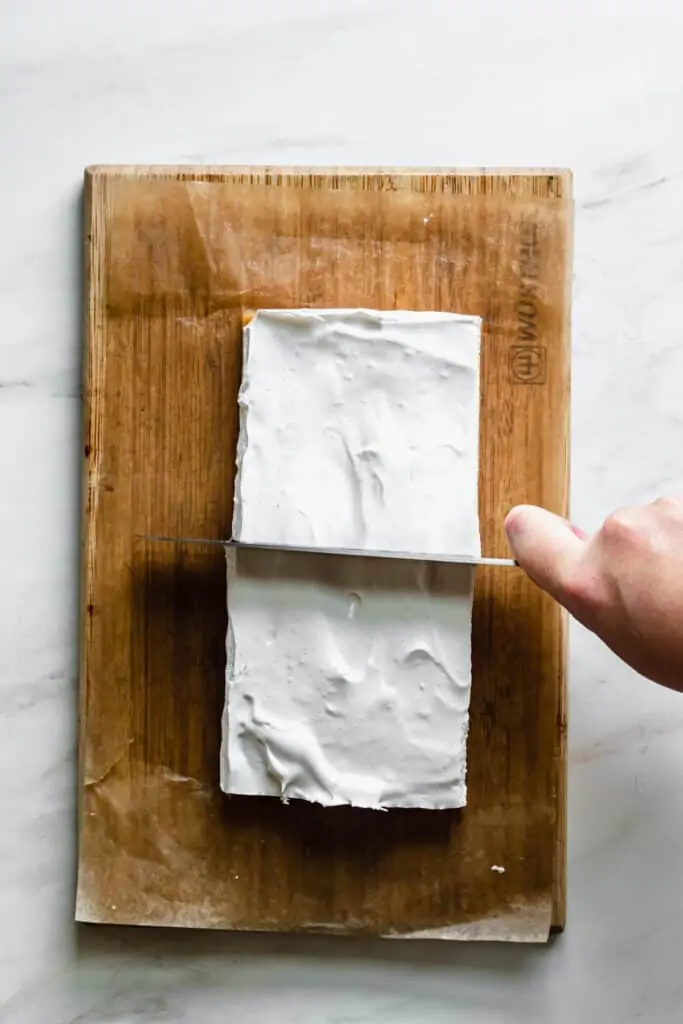
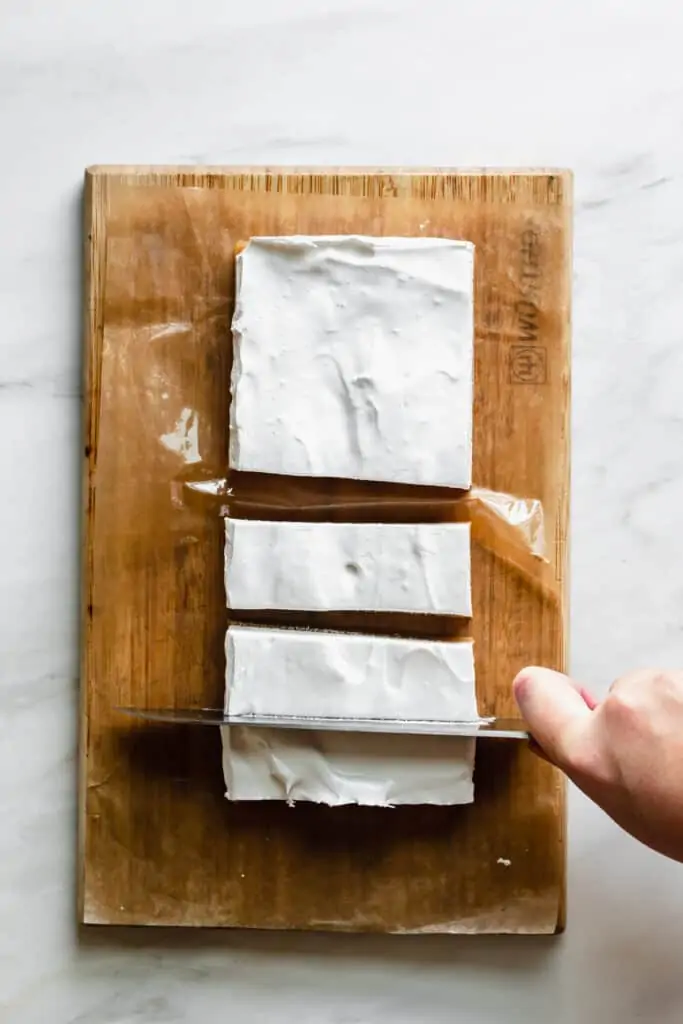
After each cut, separate the bars from each other or else they will stick back together! Place the bars on a parchment lined baking sheet and add the bars to the freezer while you prepare the chocolate.
Melted chocolate candy coating
Chop the chocolate bars into small pieces, and place into a heat proof bowl that can securely sit on top of a saucepan. To the saucepan, add one inch of water and add the bowl on top. The bottom of the bowl should not touch the water.
Turn the heat to medium and stir the chocolate every 30 seconds until it becomes completely melted. Remove the bowl and allow it to sit on the counter for about 5 minutes. If the chocolate is too hot, it can melt the caramel.
Assembling the candy bars
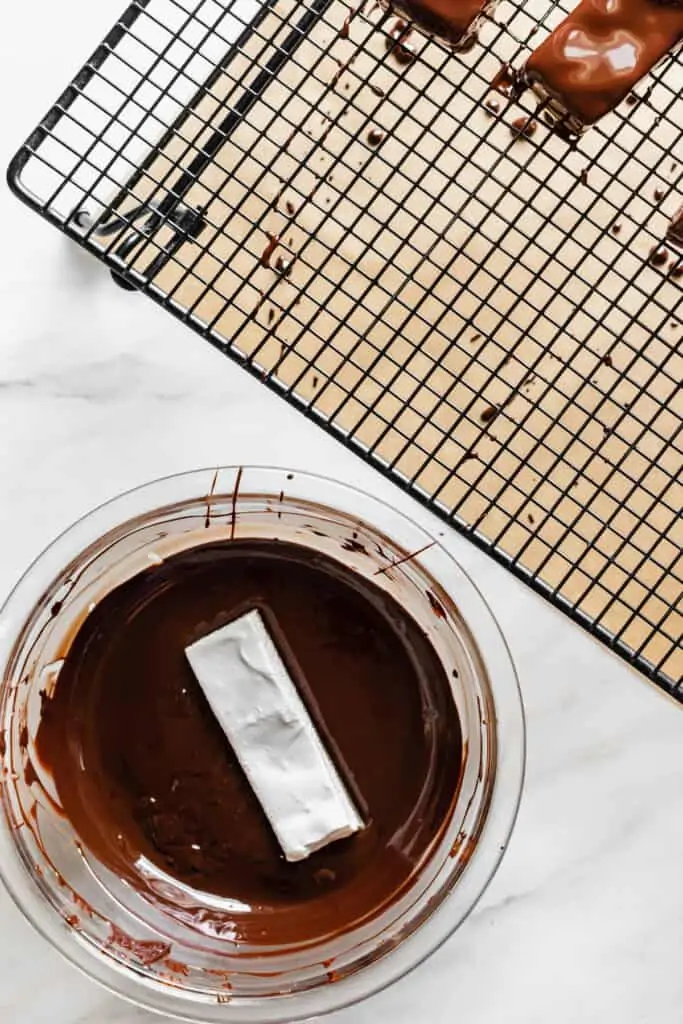
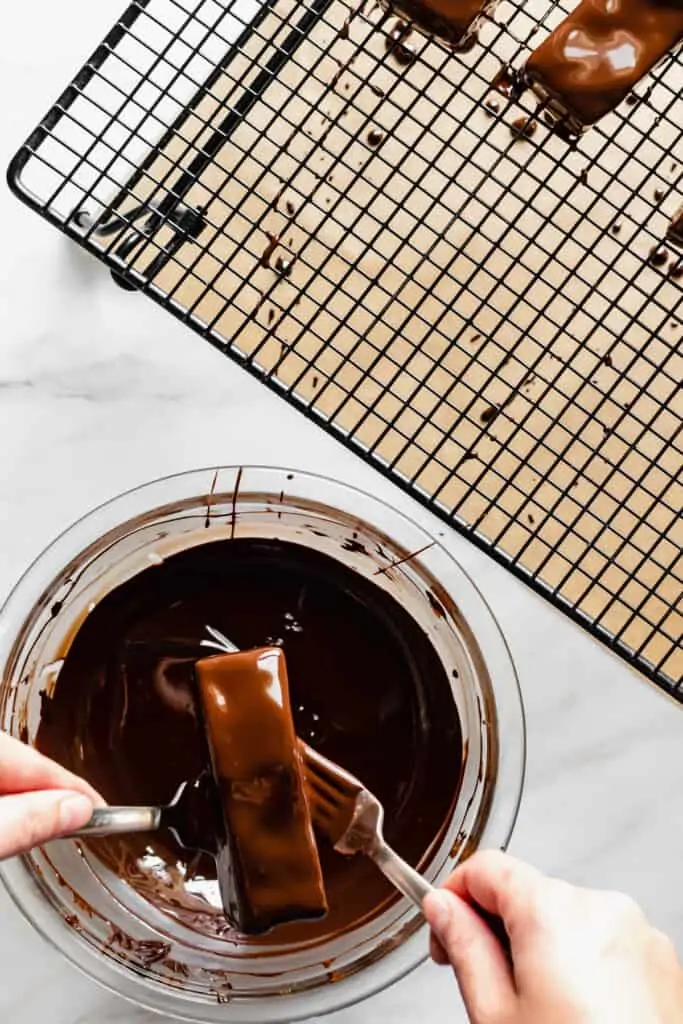
Remove the bars from the freezer and grab two forks. Use the forks to dip a candy bar into the chocolate, roll it to coat, and hold it over the bowl for a few seconds to let gravity remove some of the chocolate. Place the chocolate (caramel side down) back onto the parchment lined sheet pan. Repeat with the rest of the Chocolate Caramel Marshmallow Bars.
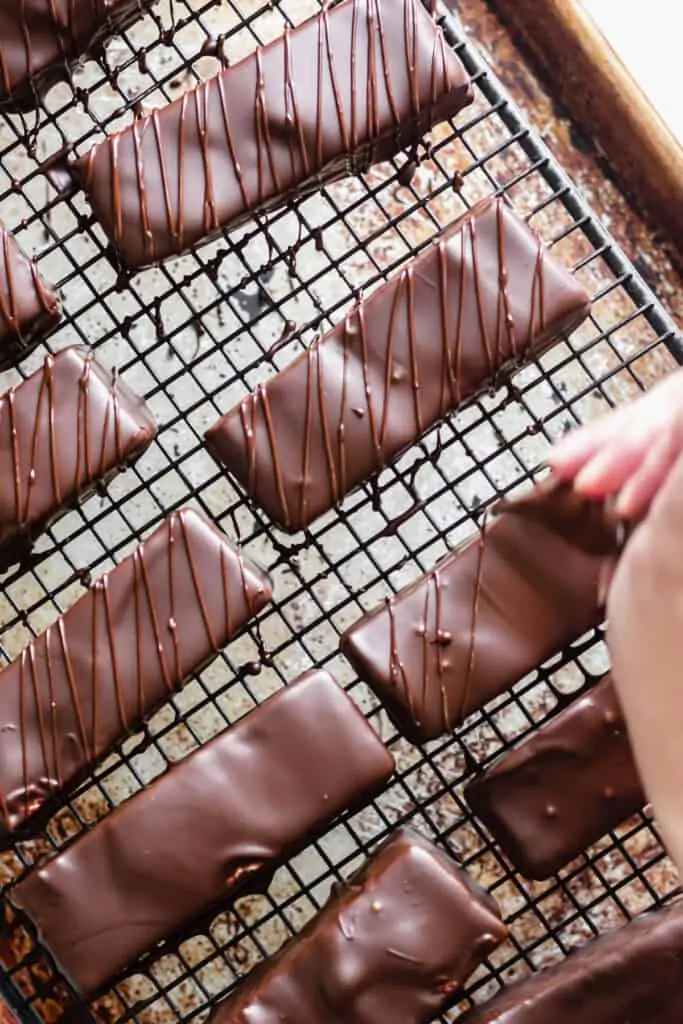
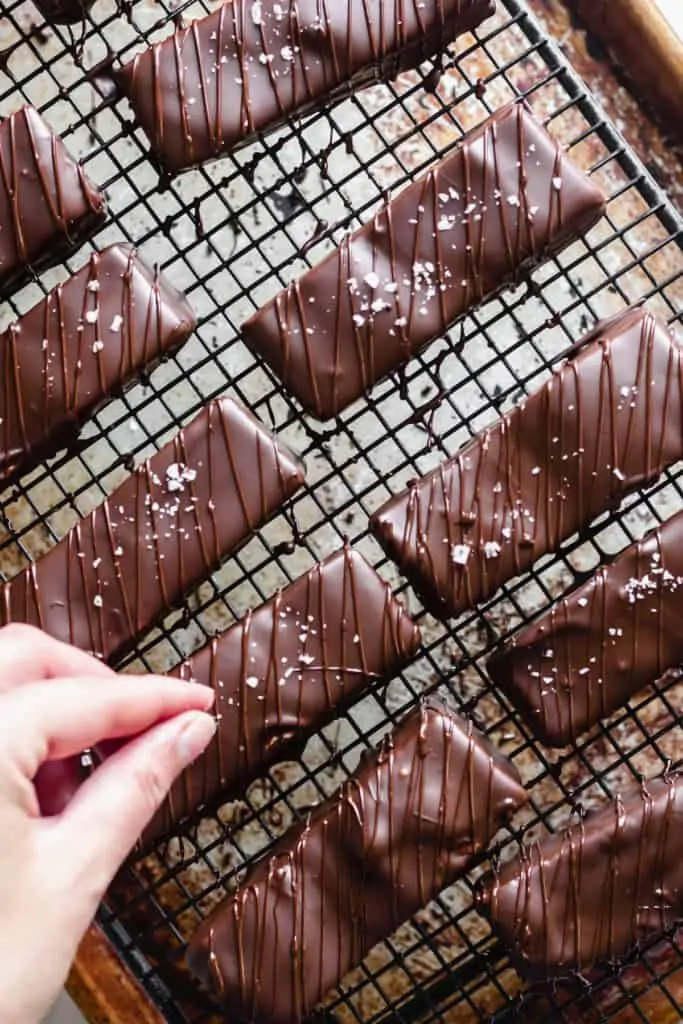
Scrape the remaining chocolate into a piping bag or ziptop bag and snip a tiny corner off. Drizzle the chocolate over the bars, then sprinkle flaky sea salt onto each.
Storing the bars
Store the bars in a ziptop bag or covered container in the fridge for one week. Let them stand at room temperature for 20 minutes before enjoying.
You can also wrap each bar in wax paper prior to placing in whatever container you plan to store them in. This is a nice touch if you want to gift the bars, as well!
How to freeze
To freeze the candy bars, simply place them into the freezer after coating in chocolate, and then transfer to a ziptop bag or covered container. Freeze for one month.
To thaw, place the bar(s) on a plate, uncovered, for about 20-30 minutes.
Searching for more bar recipes?
Did you make and enjoy this recipe? Be sure to leave a star review and share your creation with me on Instagram @thecozyplum!
📖Recipe
Chocolate Caramel Marshmallow Bars
Equipment
- 8x8 inch square pan
- Stand mixer with whisk attachment
- Large sheet pan
Ingredients
Caramel Layer
- ½ cup unsalted butter 113g
- 1 cup + 2 Tablespoons dark brown sugar 225g
- ½ cup light corn syrup 150g
- 7 oz sweetened condensed milk
- 2 teaspoon vanilla paste or extract
- 1 teaspoon flaky sea salt
Marshmallow Layer
- 1½ packets powdered gelatin 11g
- ½ cup cold water, divided 4oz
- ¾ cup granulated sugar 150g
- ½ cup light corn syrup 150g
- ⅛ teaspoon kosher salt
- 1 tablespoon vanilla paste or extract
Chocolate Coating
- 12 oz dark chocolate (~70% cacao)
- 2 teaspoons flaky sea salt for garnish
Instructions
Caramel Layer
- Prepare an 8x8" baking sheet with parchment paper slings.
- Melt the butter in a medium saucepan over medium low heat.
- Add the brown sugar and corn syrup and stir until the sugar granules are dissolved.
- Add the sweetened condensed milk and increase the heat to to medium. Stir the mixture constantly with a rubber spatula until it reaches 240℉ on a candy thermometer.
- Remove from the heat and stir in the vanilla and flaky salt, then pour into the prepared pan. Transfer to the fridge to cool and harden for one hour.
Marhsmallow Layer
- Add ¼ cup (2oz) cold water to the bowl of a stand mixer and sprinkle over the gelatin.
- Add the rest of the water, sugar, corn syrup, and salt to a medium saucepan over medium heat and stir. Heat the mixture to 240℉ on a candy thermometer.
- Turn the stand mixer (with whisk attachment) on low and very slowly stream in the hot sugar mixture. This should take a full two minutes.
- Once all of the sugar syrup has been added, turn to stand mixer to high speed and whisk for 10 minutes until the marhsmallow gets voluminous and shiny. Add the vanilla in the final minute.
- Pour the marshmallow over top of the set caramel and spread evenly to meet the edges. Allow the marshmallow to set for 3 hours at room temperature.
Preparing the Bars
- Coat the blade of a sharp chefs knife with neutral oil. Cut the block of bars in half, then cut each half into six bars. You will need to re-coat the blade with oil in between each cut.
- Transfer the cut bars to a parchment lined baking sheet and place in the freezer while you prepare the chocolate.
Chocolate Coating
- Chop the chocolate and place in a heatproof bowl.
- Fill a saucepan with about an inch of water and place the bowl of chocolate on top. Be sure the bottom of the bowl is not touching the water.
- Turn the heat to medium and stir the chocolate every 30 seconds until it's completely melted.
- Remove the bowl and allow it to cool off for about five minutes.
Assembly
- Remove the bars from the freezer and use two forks to place a bar into the chocolate, rolling it in the chocolate to cover completely.
- Lift the bar and allow the chocolate to fall off, then place back on the parchment lined baking sheet. Repeat with the rest of the bars.
- Transfer the remaining chocolate to a piping bag or a small ziptop bag and snip a small piece off of the corner.
- Drizzle the chocolate over each bar, then sprinkle on flaky sea salt.


Cristina
Hello. I'm going to be making these today for Christmas gifts. If I were to double the recipe, what size pan should I use?
Callan Wenner
Hey there - if you have something that is slightly smaller than a 9x13" pan, that would be the best bet! Otherwise, I'd make two batches in the 8x8" pan.
Alyssa Gerth
Is there egg white in the marshmallow layer ?
Callan Wenner
No egg whites - just sugar and gelatin as the base!
Erin
These candy bars are so, so good and everyone that has eaten them thinks I'm basically a confectionary goddess! The chocolate coating step is cumbersome, for sure, but the outcome is totally worth it. I added roasted cashews for a salty crunch, and this recipe replaced my quarterly order of scotchmallows from Sees. Thanks for the awesome recipe!
The Cozy Plum
This makes me so happy! Love the addition of the cashews. I do agree on the tedious step of the chocolate coating, but also agree that it's worth it. Thanks so much for making them!
Natalie K.
So tasty! The recipe was so clear and easy to follow, candy can be really difficult/intimidating but I had no problems with the caramel or marshmallow. I melted my chocolate in the microwave instead of a double boiler which worked fine. And the flaky sea salt on top is a must. Definitely a winner!
The Cozy Plum
Thanks so much for making these, and for this review, Natalie! Appreciate it, and so glad you enjoyed them!
Liz
These are absolutely incredible! I've always been intimidated by making caramel from scratch, but the process was so straightforward and came out perfectly! And the marshmallow layer is so soft without being too sticky, but the highlight for me is the chocolate coating with a pinch of salt - absolute heaven!!!
The Cozy Plum
Yay! So happy you went for it on the caramel. Thank you for making these, and glad you enjoyed them. Loved seeing them in your pictures!!
Julie
I got confused about the 7 oz of sweetened condensed milk. The can is 14 oz, so it would make sense that half is 7 oz, but when I measured 7 oz using my liquid measure, it was much more than half a can, maybe closer to 3/4 can. Must be by weight since sweetened condensed is very dense? Can you clarify? Thinking this is why the caramel took forever to reach 240. It also seems milkier than it looks in your picture. It still tastes good. I may have to try again to get it right.
Julie
I answered my own question. It's by weight, not by volume. So either use half a 14 oz can or a kitchen scale to get the 7 oz.
The Cozy Plum
Hi Julie - so sorry I wasn't able to get back to you on the first inquiry, but glad you answered your question. Correct on 7oz by weight!! This will produce the appropriate results. I hope the rest of the process goes well for you!